Managing SmartObjects in the K2 Management Site
In this tutorial, you will learn the basics for managing SmartObjects in the K2 Management site.
Context
Topics that will be covered in this tutorial include:
- Navigating the K2 Management site for SmartObjects
- How to register, edit and refresh a service instance
- How to generate a SmartObject from a service instance
- Testing SmartObjects in the K2 Management site
Duration
This tutorial should take around 20 minutes to complete.
Audience
Users working through this tutorial should already have a basic concept of K2 data components. For more information on service objects, service brokers and SmartObjects, review the learning materials that cover the basics of data providers and data consumers. One example is the Leave Request Extended tutorial.
In K2 blackpearl 4.7, users familiar with K2 Workspace will notice that many of the features are now available in the new K2 Management site. The K2 Management site contains the tools commonly used to administer the K2 environment. Other additions to the K2 Management site include the ability to register new service types and service instances, execute SmartObjects and view categories (both K2 Designer and system).
Step 1 Tasks
- Navigate the K2 Management site to become familiar with the location of the following:
- Integration > Service Types
- Integration > Service Instances
- Categories > Active Directory SmartObjects
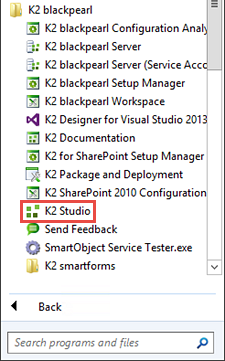
- Launch the K2 Management site. (Start > All Programs > K2 blackpearl > K2 Management)
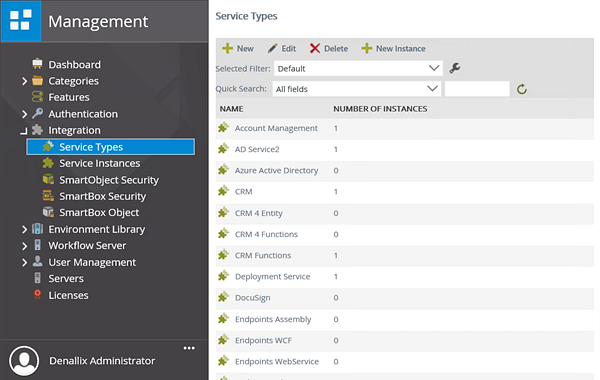
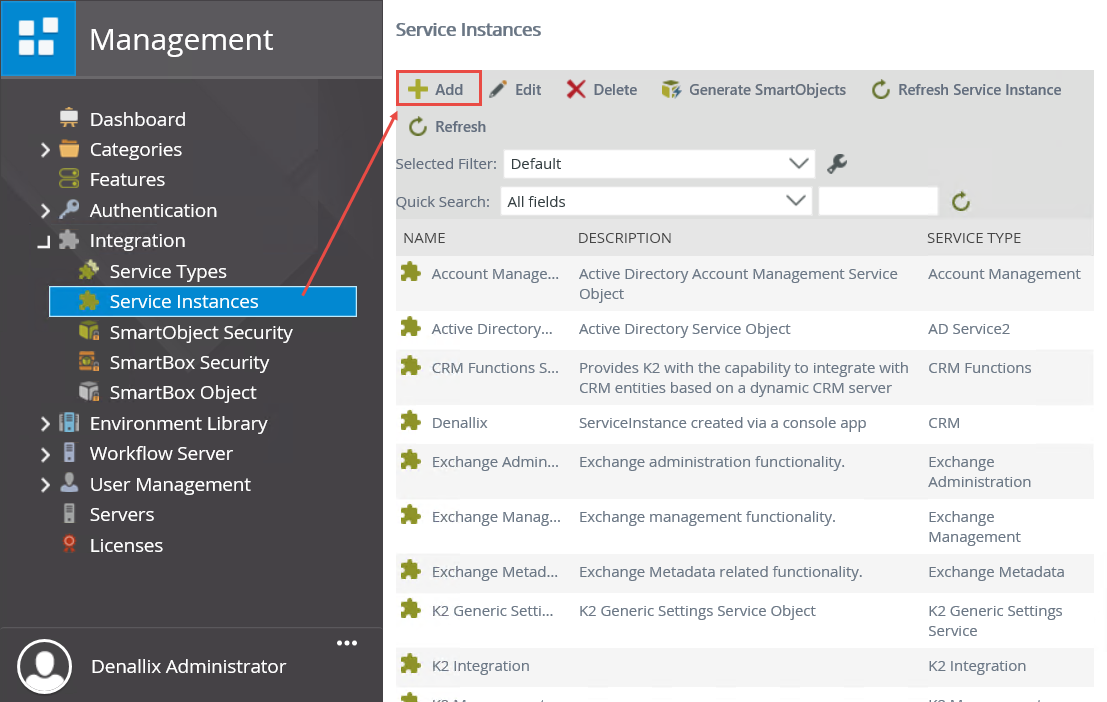
- Expand the Integration node, then click Service Types. The current service types are displayed in the central pane. Here, you can add new service types, edit existing service types, create new service instances from a service type and delete service types. Each service type that is displayed also contains the number of services instances associated. You can filter and search for service types from the central pane as well.
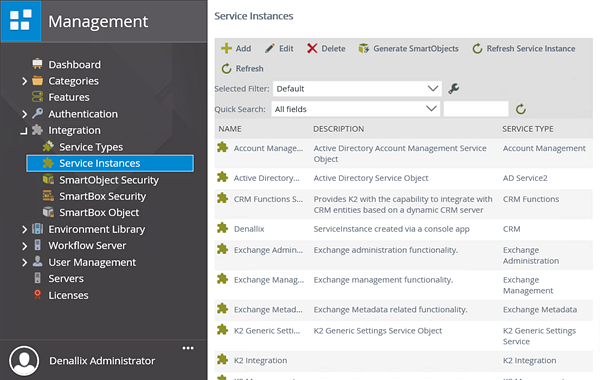
- Click Service Instances. The current service instances are displayed in the central pane. Here you can add new service instances, edit existing service instances, delete and refresh service instances. From this page, you can also generate new SmartObjects from a service instance. Notice that the service instances are displayed with their associated service type.
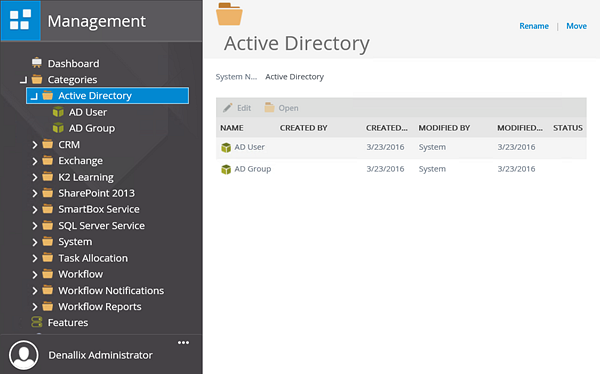
- Expand the Categories node. Similar to the K2 Designer category browser, the Categories node contains references to all of your views, forms, SmartObjects and workflows, as well as system elements. Expand the Active Directory node, then click on Active Directory to highlight it. Notice the two system SmartObjects that are included out-of-the-box for Active Directory. Take a minute to expand other categories to become familiar with the structure. If you have built any applications, expand those nodes to locate your views, forms, SmartObjects and workflows.
The Management menu is where you will access administrative features such assigning K2 server and process rights, roles, security, working hours, error logs, task lists, authentication protocols, service types, service instances, and more. Many features found in the SmartObject Services Tester utility are now accessible from within the K2 Management site.
Managing service types and service instances is accessible via the Integration node.
Step 1 Review
In this step, you briefly explored the K2 Management site menu, as it pertains to service types, service instances and SmartObjects. The K2 Management site contains a number of administrative features, as well as tools from the SmartObject Services Tester utility.
In this step, you will register a new SQL Server Service instance. You will then edit the service instance and finally, refresh it. The data you will connect to is located in an Azure SQL Database, which will demonstrate how you can connect to and interact with data found in external sources.
Step 2 Tasks
- Add a new SQL Server Service instance with the following configuration:
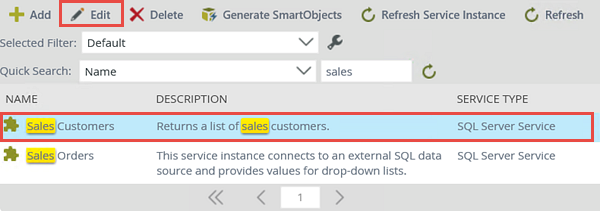
- If you have not edited a service instance before, click to highlight the Sales Customers service instance, then click the Edit button. Notice the edit configuration screen is the same screen that is used for creating the service instance.
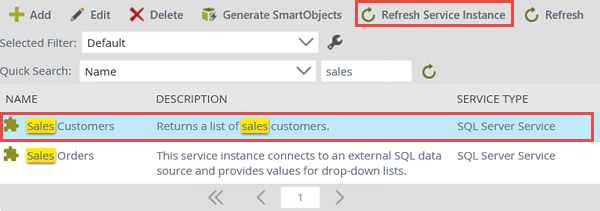
- Refresh the Sales Customers service instance in the same manner.
| Field Name | Setting | |
|---|---|---|
| A | Display Name | Sales Customers |
| B | Description | Returns a list of sales customers. |
| C | Service Type | SQL Server Service |
| D | Authentication Mode | Static |
| E | User Name |
K2LearningUser
|
| F | Password | K2LearningPass |
| G | On Different SQL Server | true |
| H | Command Timeout | 90 |
| I | Database | K2Learning
|
| J | Server | uh8ydarb4m.database.windows.net |
| K | Use Native SQL Execution | false |
| L | Generate SmartObjects for this Service Instance | UNCHECKED |
- Still in the K2 Management site, expand the Integration node, then click on Service Instances. From the central pane, click Add.
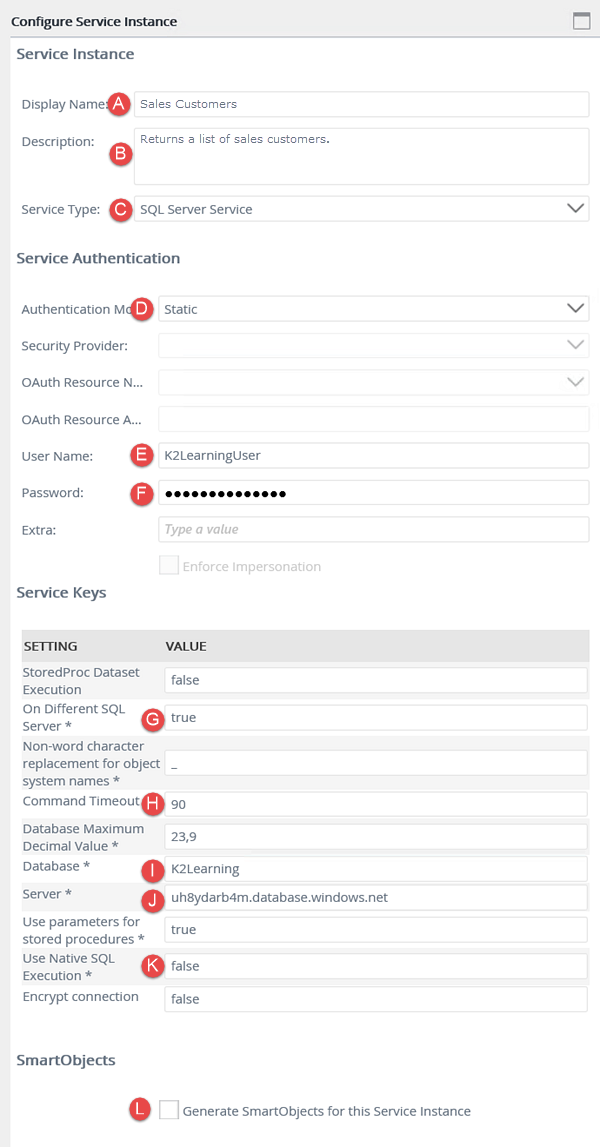
- On the Configure Service Instance page, configure the new service instance using the settings below. If a property is not shown in the table below, then assume the default value. Use the image below the table as a reference, if needed. When you have completed the settings, click OK to save the service instance, then click OK once again to close the confirmation message.
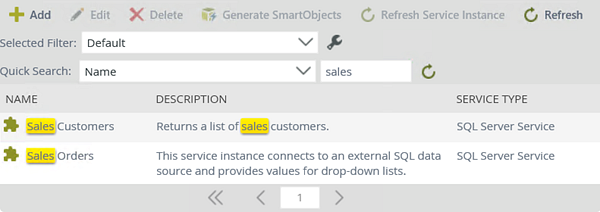
- Next, you will navigate to the new service instance. Scroll through the service instances or use the Quick Search option to locate the Sales Customers service instance.
- After locating the service instance, click the row to highlight the instance. Click the Edit button.
- Change the settings as necessary, then click OK to save the edits. Click OK once again to close the confirmation message.
- To refresh a service instance (and the associated SmartObjects of that service instance), click the service instance to highlight it, then click the Refresh Service Instance button.
| Field Name | Setting | |
|---|---|---|
| A | Display Name | Sales Customers |
| B | Description | Returns a list of sales customers. |
| C | Service Type | SQL Server Service |
| D | Authentication Mode | Static |
| E | User Name |
K2LearningUser
|
| F | Password | K2LearningPass |
| G | On Different SQL Server | true |
| H | Command Timeout | 90 |
| I | Database | K2Learning
|
| J | Server | uh8ydarb4m.database.windows.net |
| K | Use Native SQL Execution | false |
| L | Generate SmartObjects for this Service Instance | UNCHECKED |
sales
into the search text box, then click the resolve icon. You can also filter the list by the description and the service type.

Occasionally, you may have to edit the service instance. For example, perhaps the password has been changed and your connection is no longer working. Use the following steps if you need to edit a service instance.
Step 2 Review
In this step, you created a new SQL Server Service instance from the K2 Management site. You configured the connection string to point to an external SQL server, in this case, an Azure SQL Database. Once the service instance was in place, you explored the edit function and the refresh service instance function. Whenever the data source is changed (for example, a new column is added to the SQL table), the service instance must be refreshed so that any associated SmartObjects are refreshed. Service instances can also be edited as well, for example, to update a connection string password.
In this step, you will generate a SmartObject from the new Sales Customers service instance. Recall when you configured the connection string to the Azure SQL Database, you unchecked the option to (automatically) generate SmartObjects. When you select the generate SmartObjects option, K2 will generate SmartObjects for all of the objects it discovers. For example, this particular data source has five tables and three views, so K2 will generate eight SmartObjects. In Step 3, you will generate a SmartObject from the Sales Customers service instance and configure the SmartObject to include only one table from the data source.
Step 3 Tasks
- From the Service Instance screen, generate a SmartObject from the Sales Customers service instance. Select only the [Sales].[Customer] table.
- Navigate to the new SmartObject in the Management menu, Categories node.
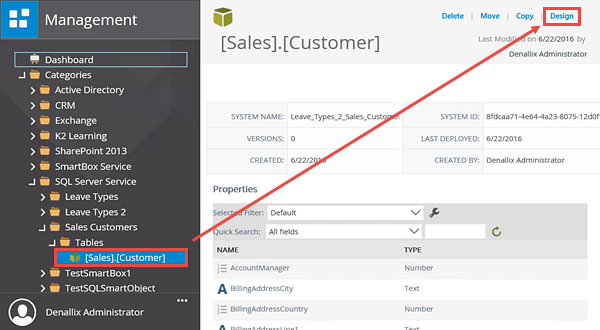
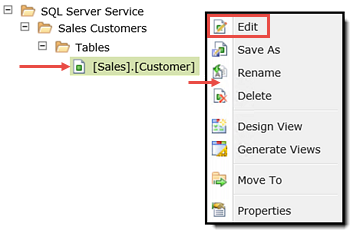
- Edit the SmartObject. (Select the SmartObject from the Categories node, then click the Design link in the central pane. You are now redirected to K2 Designer.)
- In the K2 Designer category browser, either create or confirm there is a category called K2 Learning under All Items. Create a new category under K2 Learning and name it
Advanced SmartObjects. - Highlight the [Sales].[Customer] SmartObject once again and edit it. Change the name to
Advanced Sales Customers
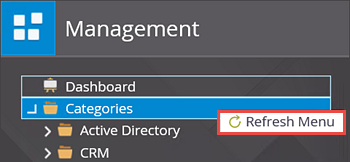
then move the SmartObject to the K2 Learning > Advanced SmartObjects category. - Navigate back to the K2 Management site and locate the Advanced Sales Customers SmartObject in the Categories > K2 Learning > Advanced SmartObjects node. (You will need to refresh the Categories by right-clicking the name and selecting Refresh Menu.)
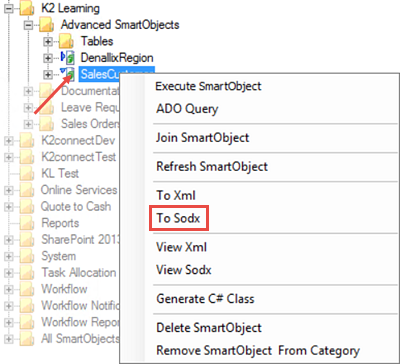
- Navigate to the Sales Customers service instance in the K2 Management site (if you are not there already). Click to highlight the Sales Customers service instance, then click the Generate SmartObjects button.
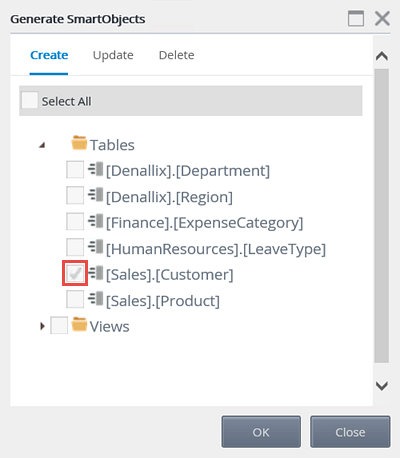
- The Generate SmartObjects screen opens with all of the objects that K2 has discovered displayed. In this case, there are six tables and three views. Expand the tables node, then CHECK the [Sales].[Customer] option. Click OK.
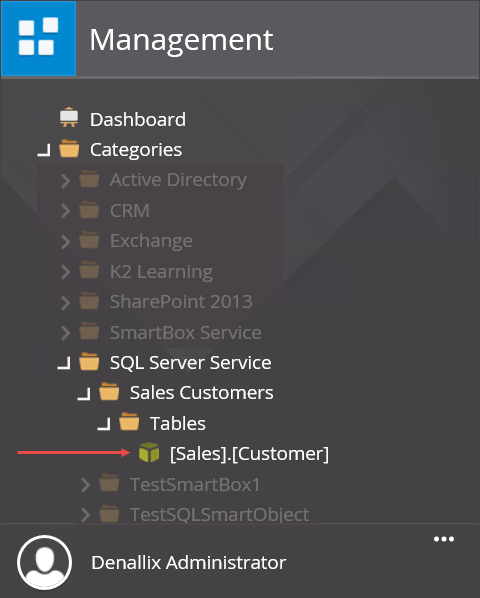
- Next, you will navigate to the new SmartObject. Begin by collapsing the Integration node, then expanding the Categories node. Expand SQL Server Service. (K2 puts the new SmartObject into a category with the service type name.) Notice the Sales Customers category. The Sales Customers category comes from the service instance title. Expand Sales Customers. Notice the Tables category, and the [Sales].[Customer] SmartObject is the only one generated. This is because you manually selected the one table. You did not select the other tables or the views, so K2 did not generate SmartObjects for those objects.
- Click to highlight the [Sales].[Customer] SmartObject, then click the Design button in the central pane.
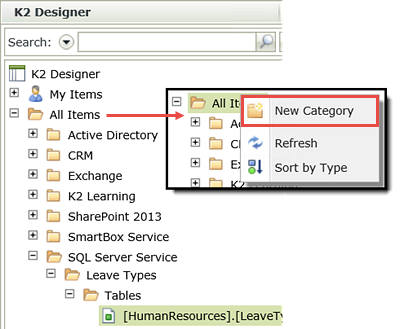
- Begin by looking through the existing All Items categories to determine if K2 Learning already exists. If you have worked through other tutorials, this category may have already been created. If it doesn't exist, then right-click All Items and select New Category.
- Name the new category
K2 Learning
then click OK. - Now, create another category under K2 Learning and name it
Advanced SmartObjects
then click OK. Your categories should look similar to the image below (you may or may not have other categories under K2 Learning). - Now, you will edit the [Sales].[Customer] SmartObject. Click to highlight the SmartObject, then right-click and select Edit.
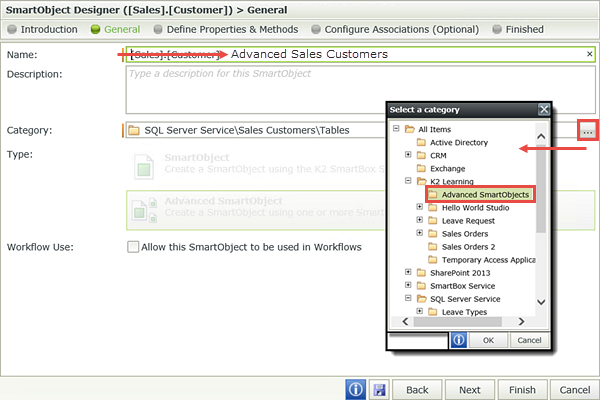
- Navigate to the General settings screen. Change the Name of the SmartObject to
Advanced Sales Customers
then use the Category ellipses to select the K2 Learning > Advanced SmartObjects category. Click OK. Click Finish to save the edits. - Switch back to the K2 Management site tab in your browser. Right-click Categories and select Refresh Menu.
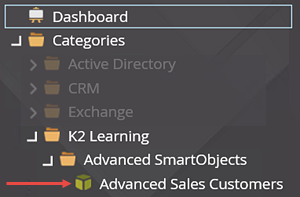
- Expand the Categories node, then expand the K2 Learning > Advanced SmartObjects node. Notice the Advanced Sales Customers SmartObject.

Next, you will rename the new SmartObject so that it is friendlier, then move it to a new category.
You are redirected to K2 Designer. First, you will create a new category, then you edit the SmartObject, rename it, and move it to the new category.

You will now navigate to the Advanced Sales Customers SmartObject located in the K2 Learning > Advanced SmartObjects category.
Step 3 Review
In this step, you generated a SmartObject from the Sales Customers service instance. By generating a SmartObject from a service instance, you gain the ability to select which objects you want as SmartObjects. In this case, you selected the [Sales].[Customer] table as the only object. You then selected the design option, which results in you being redirected to the K2 Designer. From there, you created new categories, renamed the SmartObject to a more friendly name, then moved it to the new category. What is also significant about this step is that it demonstrates how K2 operates across platforms. You were able to view the SmartObject in the K2 Designer and then again in the K2 Management site.
Now that you have successfully created a new SQL server-based SmartObject, you should test the SmartObject to confirm data is being returned. This will allow you edit and refresh the service instance if there are any connection string changes necessary. You will want to confirm the SmartObject prior to using it in other K2 elements.
Step 4 Tasks
- Execute the Advanced Sales Customers SmartObject from the K2 Management site. For the first test, execute the list method without any input properties defined.
- For the second test, execute the list method and filter the results by entering
2
into the DenallixRegion input property. - For the third test, execute the read method and enter
1
for the CustomerID parameter.
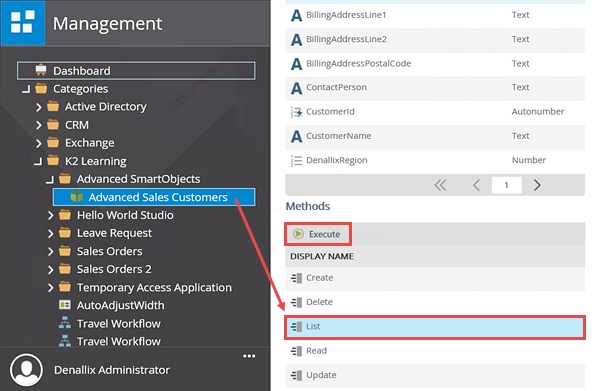
- In the K2 Management site, click to highlight the Advanced Sales Customers SmartObject located in the Categories > K2 Learning > Advanced SmartObjects node. The SmartObject properties and methods are displayed in the central pane.
- For the first test, select the List method. (You may have to scroll down a bit in the central pane to see the Methods section.) Click Execute.
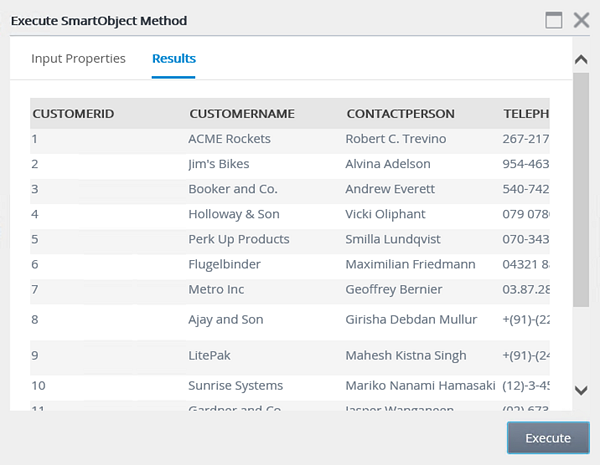
- On the Execute SmartObject Method screen, click Execute without entering any input properties. Review the results that are returned.
- Now you will enter an input property so that the list results are filtered. In this example, you are going to enter a value for the region. Switch back to the Input Properties screen, then locate the DenallixRegion property and enter
2
for the value. Click Execute. - The filtered results are returned. Scroll to the far right of the screen to confirm that each record returned has a DenallixRegion value of 2.
- Switch back to the Input Properties screen. Change the method to Read. For the CustomerId parameter (notice that it is required), enter
1
for the parameter value, then click the Execute button. Review the result that is returned for the record with the CustomerId of 1.
You will execute the SmartObject using two different methods, list and read. The list method returns a list of records found. The read method returns a single record and requires an input parameter of some kind so that K2 knows which record to return.

The two tests you just conducted used the list method, which returned a list of results. The first test had no input properties, so all of the records were returned. The second test used a value for the region to filter the records. In the next test, you will change the method to the read method, then enter an input parameter, which in this case, will be the customer ID. An input parameter of a defined (unique) property is required so that K2 knows which record to return. This will return the details from just one record, instead of a list.
Step 4 Review
In this step, you tested the Sales Customers SmartObject by executing two different method types. By entering a property for the list method, you observed how the results returned were filtered by the property (in this case, the region). The read method returned the results of one record, which you specified by entering the CustomerId parameter. This demonstrates how the list method returns a list of records and the read method returns the details of one record.
Continue on to the Building Advanced SmartObjects in the K2 Management Site tutorial to learn more about SmartObjects in the K2 Management site.