K2 Out of Office - Create Exception Rules in K2 Workspace
 |
How to Topics: Out of Office - Forward User and Out of Office - Exception User |
 |
Watch a short video on how to setting Out of Office rules in the K2 Worklist Web Part (Length 5 minutes). This video was created using the K2 Worklist Web Part in SharePonit but the principles remain the same when using Out of Office in Workspace. |
Exception rules are applied when the Out of Office user wishes to direct tasks of a particular event to specific destination user(s).
While the user is Out of Office, any items meeting the exception rule will be forwarded to those user(s) specified in the exception rule only, while all other tasks will be forwarded to the user(s) listed in the main Out of Office configuration.
Here is an example: the Out of Office user may want to redirect any Expense Claim Approval tasks to the Finance VP, but any other tasks should be directed to their peer. To do so, the user would configure an Out of Office rule to share all tasks to their peer, but then add an exception rule to share any Expense Claim Approval tasks with the Finance VP. While the user’s status is Out of Office, any Expense Claim Approval tasks for that user would be shared only with the Finance VP, while all other tasks will be shared with their peer.
See also: Forwarded Users as described in Add Destination Users in K2 Workspace
Create Exception Rule
 |
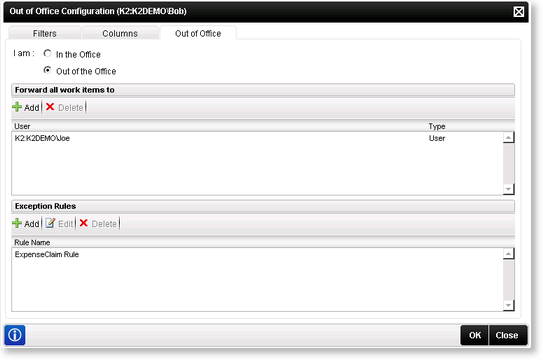
Click on the Add button in the Exception Rules section of the Out of Office Configuration screen. 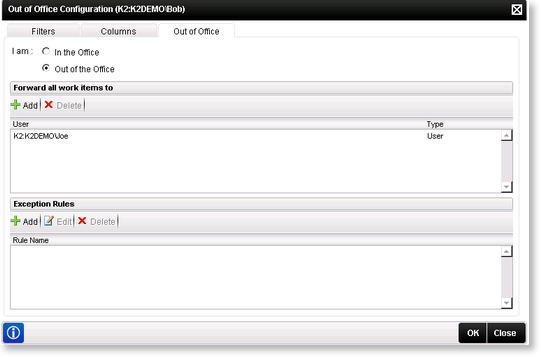
Fig. 1. Out of Office Configuration |
 |
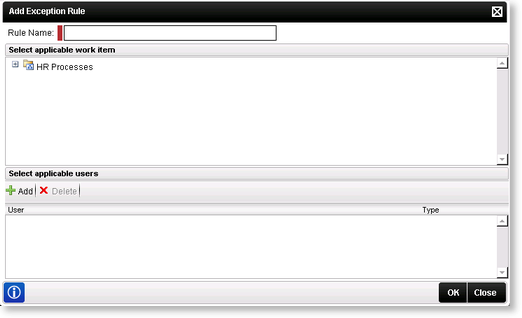
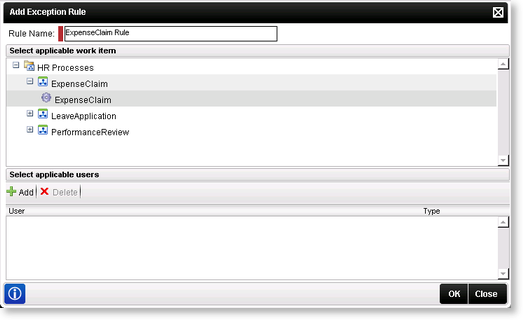
The Add Exception Rule screen will be displayed.
Fig. 2. Add Exception Rule |
 |
Give the new rule a name (When the exception rule is saved, this name will be used to identify the rule in the list). |
 |
Browse and select the work item you wish this Exception Rule to apply to.
Fig. 3. Create Exception Rule |
 |
Click on the Add button, search for a user(s), select the check box next to the user's name to assign rights to the user(s) for the specified work type.
Fig. 4. Add Exception Users |
 |
Click OK on the User search to return to the Add Exception Rule screen.
Fig. 5. Exception User |
 |
Click OK on the Add Exception Rule screen to return to the Out of Office Configuration screen.
Fig. 6. Exception Rule |
 |
Click OK on the Out of Office Configuration screen to save and activate the Out of Office settings. |


 |
|
| Feature | What it does |
|---|---|
| Rule Name | This is a required field. When the exception rule is saved, this name will be used to identify the rule in the list. |
| Select applicable work item | All the filters that can be applied will be displayed in this screen. The user will be able to drill-down to activity level. Browse and select the work item you wish this Exception Rule to apply to. |
| Select applicable users | This list will display the destination users this rule will apply to. Add - Clicking this button will display the Select users to add to the exception rule dialog. Here the user will be able to search for destinations that the rule will apply to. Delete - Clicking on a destination on the list and then clicking the delete button will remove the selected destination from the list. |
Edit or Delete Exception Rule
|
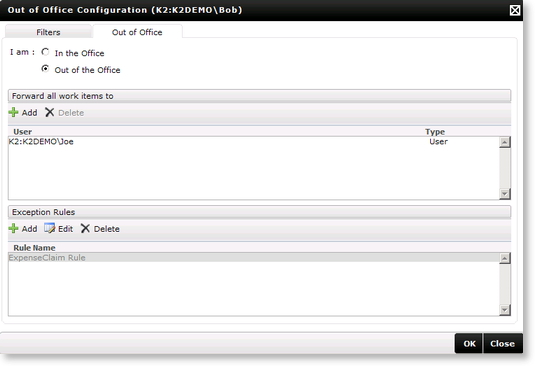
Should you wish to edit or delete the current Exception Rule(s), simply select the Rule and click Edit or Delete.
Fig. 7. Select Exception Rule |
|
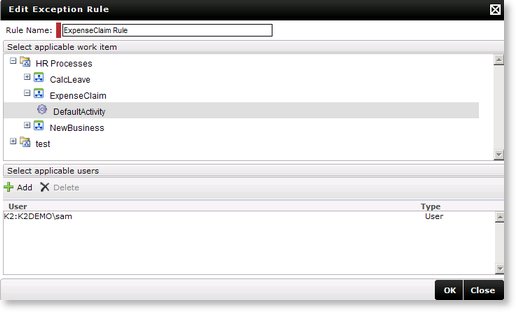
The Edit Exception Rule screen will open when selecting Edit, and settings for the selected Exception Rule can be modified.
Fig. 8. Edit Exception Rule |