Add the K2 for SharePoint App to a SharePoint Site
After updating the K2 components using the K2 for SharePoint Setup Manager and adding the App from the SharePoint Store, you need to add the K2 App to the SharePoint Site.
- Launch SharePoint (open a web browser to the Portal URL).
Opening the Portal for the first time may take a while.
-
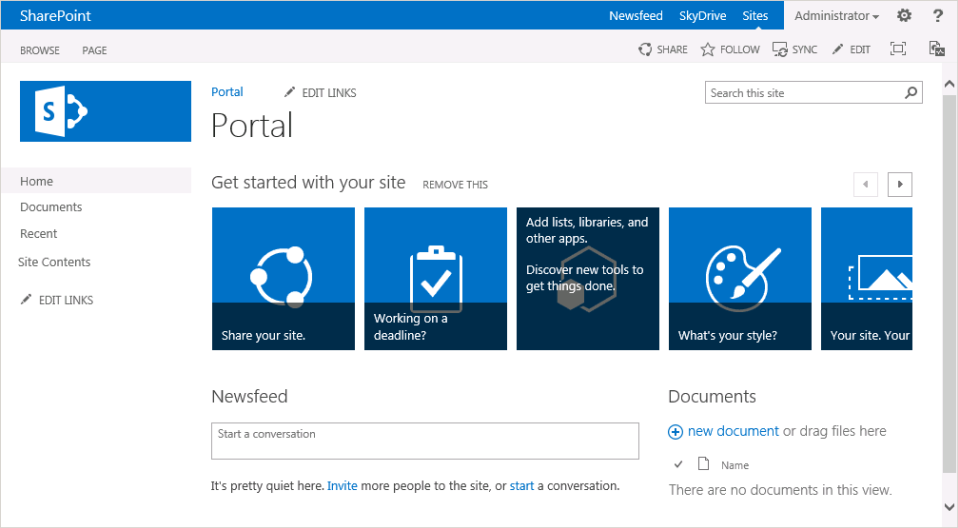
When the Portal opens, click Add lists, libraries, and other apps. The Site Contents page appears.
-
Click From Your Organization.
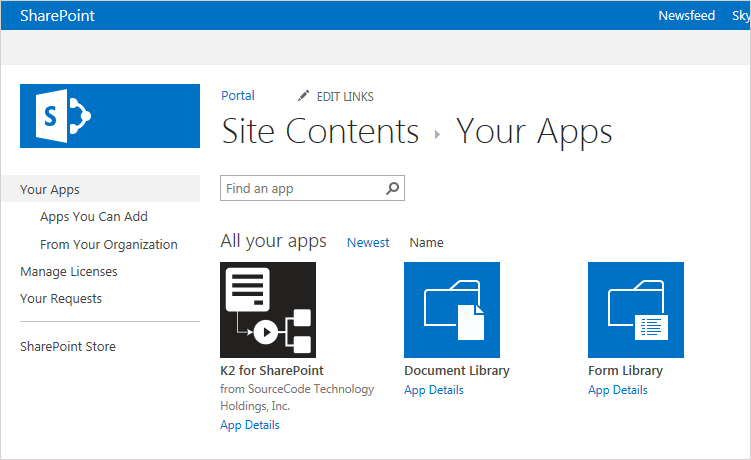
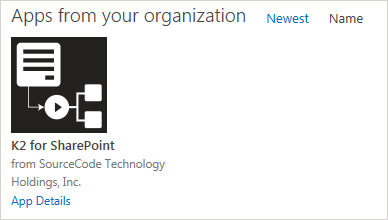
- Apps from your organization appear. Click K2 for SharePoint
- A window displays asking you to trust K2 for SharePoint. Click Trust It.
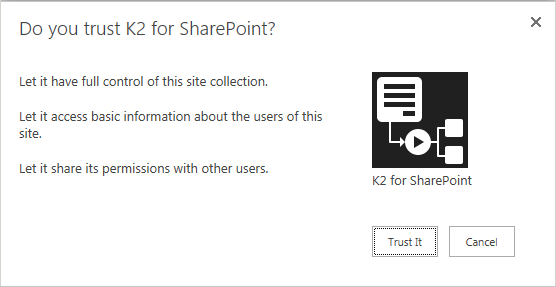
If an error occurs when the 'Trust It' button is clicked, see this Troubleshooting topic.
- When the K2 App finishes and installation completes on the SharePoint Site, the K2 for SharePoint App icon appears. Click the icon to configure the application.

Once you have the K2 for SharePoint app added to your site, you must register it with a K2 server. The K2 server must have the version of components that the K2 for SharePoint app requires.
The K2 AutoDiscover service allows you to supply any K2-related URL and it will return what the K2 for SharePoint app needs, namely the K2 smartforms Designer and Runtime URLs. You can copy the AutoDiscover IIS application from the K2 server to make it accessible to the internet if necessary. The K2 server, however, must be accessible from that IIS location in order for the AutoDiscover service to query the K2 server for the latest values.
Notes:
- More than one K2 for SharePoint app can be registered with a single K2 server. This means that you can have all of your SharePoint 2013 farms and / or SharePoint Online tenancies being served by a single K2 server.
- You must install and register the K2 for SharePoint app on every site you wish to use it on. The Registration Wizard will automatically navigate between pages if it discovers that the root site in the site collection has already been configured.
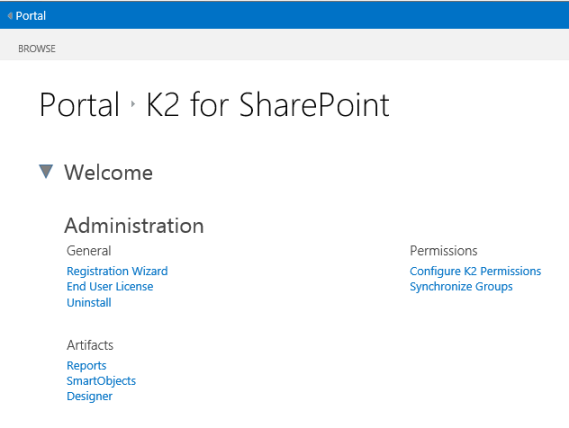
- You can start the Registration Wizard by selecting K2 blackpearl for SharePoint, which opens the K2 for SharePoint settings page, then selecting Registration Wizard under the Administration > General headings.
K2 for SharePoint Registration Wizard
-
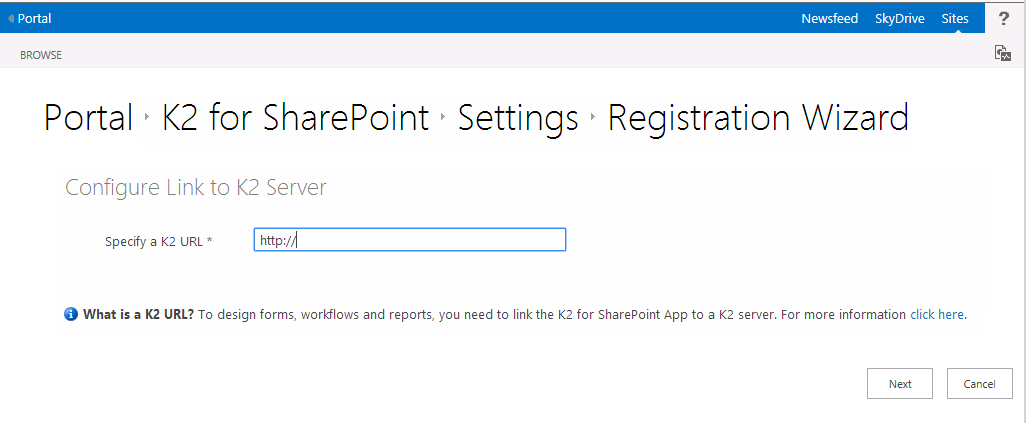
Specify the secure URL for the K2 smartforms site, and then click Next.
- When the K2 for SharePoint configuration completes, the Configure Server page displays the configuration status for OAuth, Claims, and the SharePoint Service Brokers (green check-marks appear), click Next.
These settings can be maintained from the management site, see the file: K2 for SharePoint Management settings.pdf (available as a download from the K2 for SharePoint article).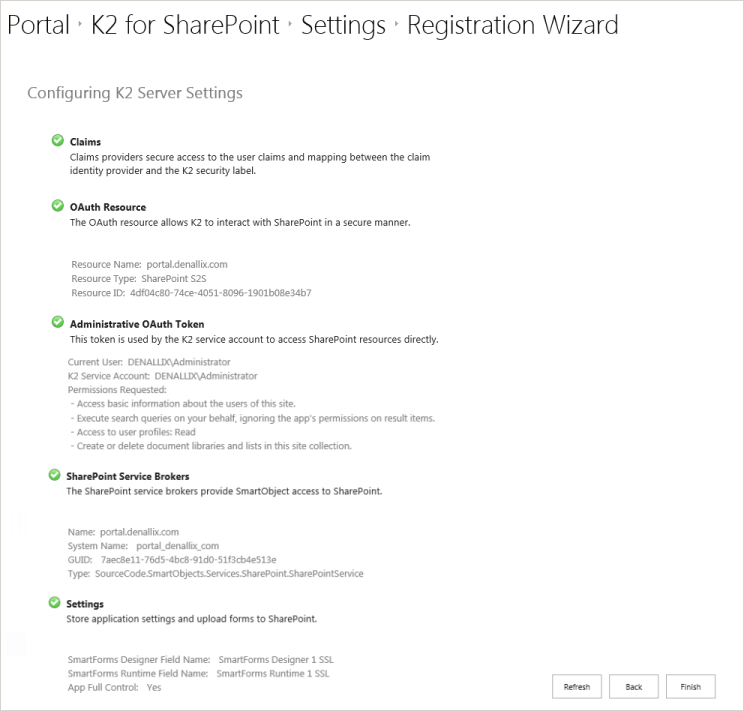
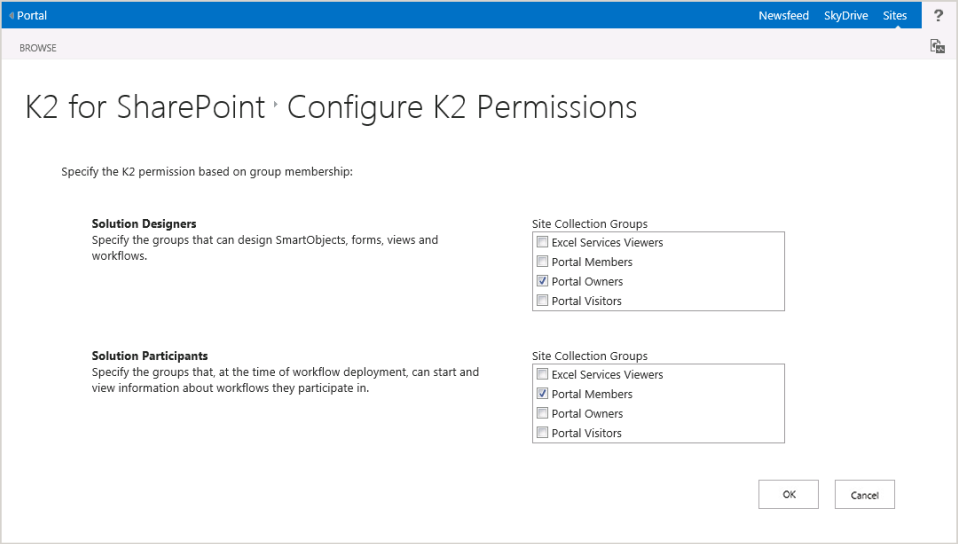
- By default the K2 Permissions are configured in the background for Solution Designers and Solution Participants to Portal Members and Portal Owners Site Collection Groups. This screen is not be shown by default, but these permissions can be changed from the K2 for SharePoint > Settings page.
From the Configure K2 Permissions screen, select the groups depending on their role in the workflow:- Solution Designers: create SmartObjects, Forms, and Workflows (default). In addition, they are granted rights to start, view, and action workflows (unless the default rights are altered).
- Solution Participants: participate in the workflow by starting, viewing, and actioning workflows.
- To complete adding the K2 Application to the SharePoint Site, click Finish.
-
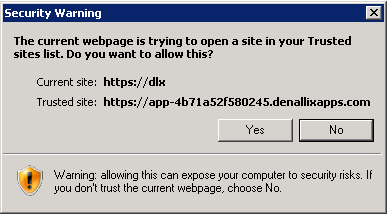
If prompted to allow the web page to open the site, click Yes.
- Optionally modify General Settings or Permissions, or return to the Portal page.
If the App Registration fails with a SAML error, see the troubleshooting topic SAML Token Error.
Also see the Troubleshooting topic if you encounter a Registration Wizard Failure when Self Service Site Creation Feature is enabled in SharePoint.
For more information on Adding the App, see the Add topic in the K2 for SharePoint User Guide.