Resolve Security Token Service Issuers page
This page will only appear when there has been more than one K2 site (for example Workspace, Designer or Runtime site) registered on the farm.
If you are using Claims or have an environment with multiple domains you would have more than one potential Security Token service Issuer and this page gives you the opportunity to choose which to use with K2.
Example: You may have an environment with a DMZ set up for certain users outside your company to access parts of your K2 environment but internal Issuers set up for your company users to access everything.
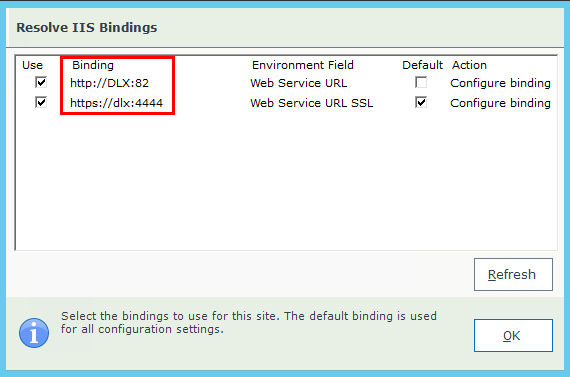
If the selected IIS binding in the Bindings page does not match the URI for the Security Token Service in the K2 database Identity.ClaimIssuer table, you will need to resolve which STS issuer to use. You do this by making a choice on the Resolve Security Token Service Issuers page. For more information on the IIS Bindings see either of the topics: K2 Designer Web Site or SmartForms Runtime Web Site.
The STS URI may be different for these reasons:
- The Security Token Service Issuer URI in the Identity.ClaimIssuer table of the K2 database has been manually changed (doing this is not recommended).
- A custom issuer has been added through the K2 Management pages.
This page will only be displayed during an Upgrade or Reconfigure of the K2 environment.
Resolving the STS Issuer
- In the images below, note that the Uri column in the K2.Identity.ClaimIssuer table in the SQL K2 database does not match any of the selected
bindings in the IIS Bindings page:

 If you want to change the bindings for your sites, it is strongly recommended to run the K2 blackpearl Setup Manager. This will ensure that the environment library fields and the bindings / STS configuration remain in sync. The recommended way to reconfigure is to run Setup Manager. Using the K2 Management page is the only other supported option.
 - When you click OK on the bindings page and the Bindings URL does not match the current K2 Forms STS Uri, the Resolve Security Token
Issuers page will open.
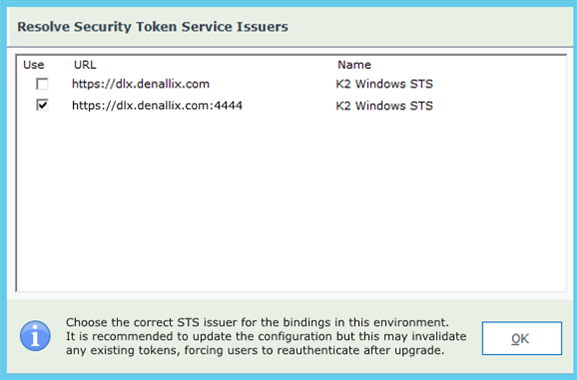
- As there is no current match between bindings in IIS and the Issuers in the database, you need to select which Issuer to use by checking the
Use checkbox.
- Only one Issuer can be selected (at least one must always be selected).
- All unique STS Issuers in the database will be listed here. If your WindowsSTS and FormsSTS Issuers have the same URL you will only see the first one listed.
- Clicking OK will continue the installation.