Installing a distributed K2 blackpearl system
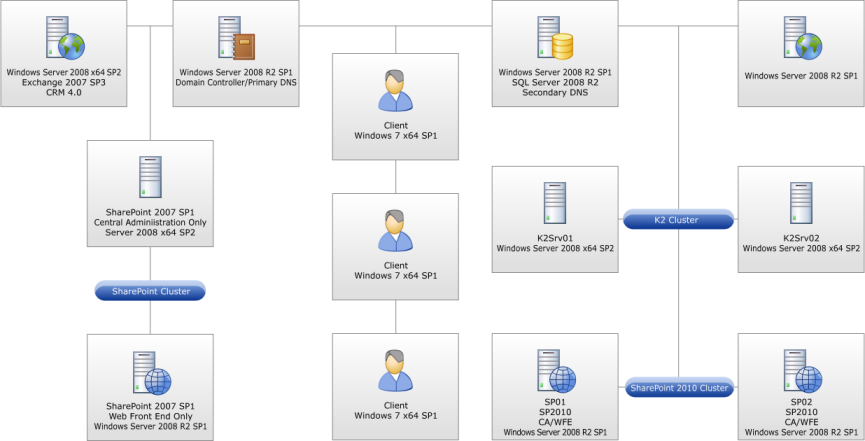
Due to the scalability of the K2 blackpearl system, an install in a distributed environment can become quite complex, especially when network load bearing clusters come into the picture. Below is an example of a distributed installation.
 |
Download: You can download an Excel Workbook to help you organize your K2 blackpearl installation by clicking here. Use this checklist to ensure that all topics have been read, understood and implemented successfully before, during and after K2 blackpearl installation. The checklist includes all possible items for both Standalone and Distributed installations. Please read the Reference Topic to determine if the item applies to your environment. There is also a worksheet where users can record their configured settings as reference. |
Before the installation is started, the user must decide if the trace logging feature should be enabled. See the topic Optional installation logging for troubleshooting for more information.
The order of the components listed below should be followed in a distributed installation.
See these topics for details concerning the installation of a distributed K2 system:
- Install and configure the K2 Host Server
- Install and configure the K2 Reports
- Install and configure the K2 Workspace
- Install and configure the K2 for SharePoint components
- Install the Client components: K2 for Visual Studio
- Install the Client components: K2 Studio
- Distributed install of the K2 View Flow via Group Policy
 |
The same version of K2 blackpearl must be installed on all K2 servers in the distributed environment. |
 |
Be sure to see the section on Post installation common tasks once done with the install. |
