Now that the Web Part solution has been deployed, you can add the Web Part to the SharePoint pages. The steps below will add the web part to the SharePoint portal home page, but it could just as easily be added to any page in your SharePoint environment:
- Open the SharePoint Site where the K2 Worklist Web Part needs to be added
- Click on the Page tab at the top of the SharePoint page
- Click on the Edit Page icon
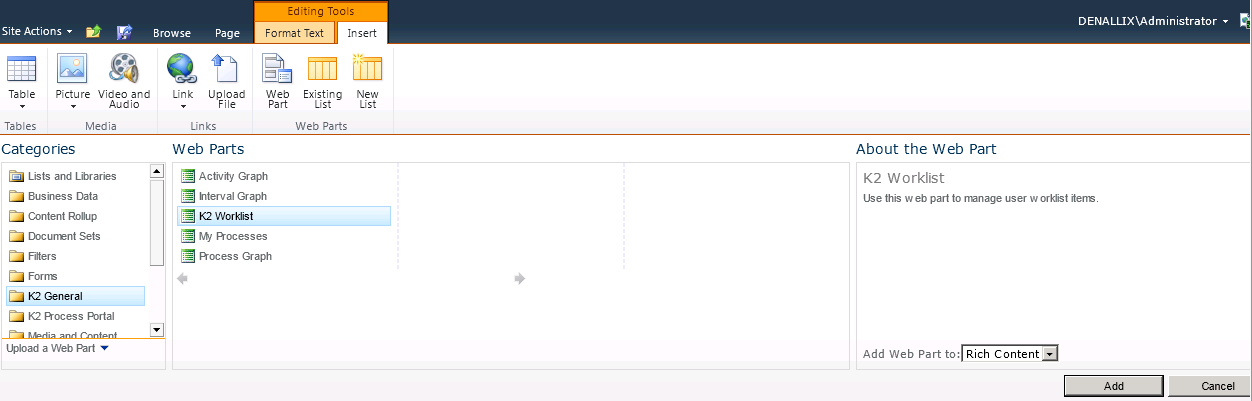
- Click on the Insert tab at the top of the SharePoint page
- Click on the Web Part icon
- Select K2 General from the Categories section
- Select K2 Worklist from the Web Parts section and click on Add. See image below:
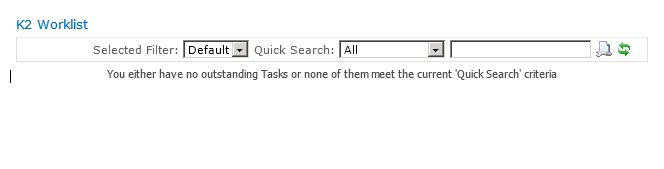
- The K2 Worklist web part will load as per the image below:
- Click on the Page tab again and click on Save and Close
- The K2 Worklist web part is now ready for use
It is also important to test the K2 Worklist Web Part from a remote server, meaning a server or client machine other than the SharePoint server. This will test that Kerberos has been set up properly for the SharePoint Service Account. First, be sure to set the Internet Options on your browser correctly. Then, access the SharePoint page with the K2 Worklist Web Part, and make sure it renders properly. If no items are displayed and yet items should be, check the K2 Server in console mode for authentication errors. If you see authentication errors, be sure to double check the SPNs for the SharePoint Service Account.
