SharePoint 2010 Documents Event Wizard
K2 provides integration with SharePoint 2010 document libraries through the SharePoint Documents event wizard.
What does the SharePoint Documents Event Do?
The SharePoint Documents event wizard is used to configure SharePoint Document Library items, allowing you to upload, download, copy, move, update metadata, load metadata, check in, check out and delete documents.
Why use the SharePoint Documents Event?
This event allows users access to the full set of options within a SharePoint library. You can create K2 processes that include support for documents in document libraries. There are many events that can be performed by the SharePoint Documents event wizard, including:
- Upload Documents
- Download Documents
- Copy Documents
- Move Documents
- Update Documents’ Metadata
- Get Documents’ Metadata
- Check In Documents
- Check Out Documents
- Undo Document Check Out
- Delete Documents
Documents created by the SharePoint Documents event wizard can be converted into publishing pages by using the SharePoint 2010 Publishing Wizard.
Using the SharePoint Documents Event Wizard
To start the SharePoint Documents event wizard, select the SharePoint Documents event wizard from the SharePoint 2010 Events section of the Event Wizards toolbar tin K2 Studio, and drag the event onto the design canvas or onto an existing activity.
Once the wizard has configured the SharePoint Documents event, it can be modified by clicking on the click to run default wizard icon within the workflow activity window
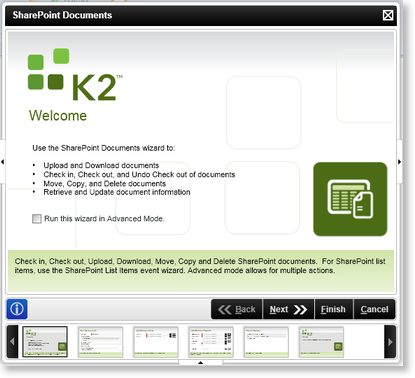
The Welcome page starts the process of the SharePoint Documents event configuration.
| Icon | Feature | What it is |
|---|---|---|
| Run this wizard in Advanced Mode | Run this wizard in Advanced Mode | Select this option to run this wizard in Advanced Mode |
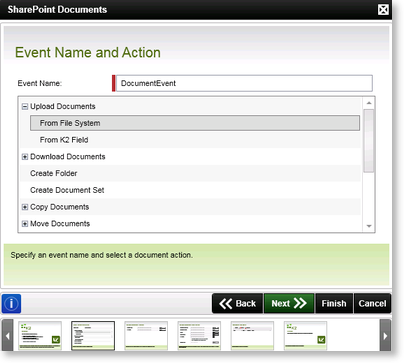
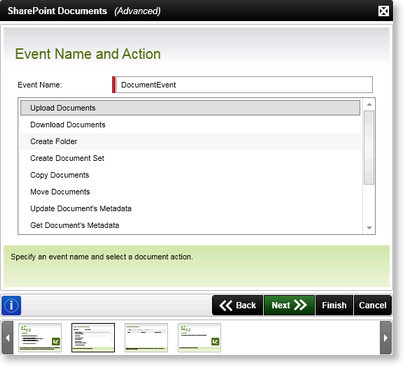
The Event Name and Action page displays different options depending on whether the wizard is run in Advanced or Standard mode. In Advanced mode only the headings are displayed which then progress to a more detailed page where you provide additional information. Advanced mode allows you to configure multiple document actions within the wizard, while Standard mode allows for a quicker configuration of a single action .
The actios selection fully integrates with the SharePoint Document Library events, allowing documents to be uploaded, downloaded, copied, moved, checked in, checked out, deleted, or document metadata loaded or changed.
A SharePoint Documents event needs to be associated with a SharePoint Document Library and the SharePoint library must exist before the workflow is created.
| Feature | What it is |
|---|---|
| Upload Documents |
Select this option to upload a document
|
| Download Documents |
Select this option to download a Document
|
| Create Folder | Select this option to create a folder or nested folders within other folders |
| Create Document Set | Select this option to create a document set in SharePoint the library (must configure the library to support document sets) |
| Copy Documents |
Select this option to copy a Document from one Document Library to another on the SharePoint Site, or to another Document Library on a different SharePoint Site
|
| Move Documents |
Select this option to move a Document from one Document Library to another on the SharePoint Site, or to another Document Library on a different SharePoint Site
|
| Update Document Metadata |
Select this option to change the Metadata of a Document
|
| Get Document Metadata |
Select this option to Get Metadata from a Document
|
| Check In Documents |
Select this option to Check In a Document
|
| Check Out Documents |
Select this option to Check Out a Document
|
| Undo Document Checkout |
Select this option to undo a document checkout; this retains the original version of the document with no changes
|
| Delete Documents |
Select this option to delete a Document
|
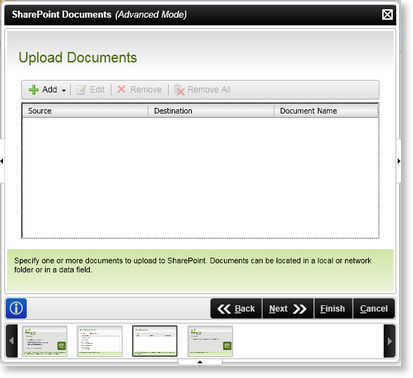
The Upload Documents function in the SharePoint Documents event wizard is used to upload documents from a specified location to a library in SharePoint .
Information required to Upload Documents
- An existing SharePoint Site URL
- An existing Document, DataField or XML Node
Upload Documents
The Upload Documents wizard page is only viewed when the wizard is run in advanced mode. The page provides an interface to upload multiple documents within SharePoint.
| Feature | What it is | How to use it |
|---|---|---|
| Add |
To upload documents, select the drop down arrow and select the relevant location:
|
Select an option |
| Edit | Modifies the listing | Click on the configured setting and select this option, to edit a configured document setting |
| Remove | Removes configured document | Click on the configured setting and select this option, to remove a configured document setting |
| Remove All | Removes all the configured documents | To remove all the configured document settings, select this option |
| Source | Displays the source of the document | |
| Destination | Displays the destination of the document | |
| Document Name | Displays the document's name |
Upload Document Source
The Upload Document Source wizard page is displayed if the Local or Network location option was selected from the Upload Documents wizard page in advanced mode or the From File System option from the Event Name and Action wizard page in standard mode.
The Upload Document Source wizard page allows you to specify the location of the document to be uploaded.

| Feature | What it is | How to use it |
|---|---|---|
| Location Path | Where the document is nlocated | Specify the Location Path in the text box, or click on the ellipse button to locate a Data or XML field from the Context Browser. The Browse button can also be used to browse to the relevant location folder. |
| File Name | The name of the file to be uploaded | Specify the File Name in the text box, or click on the ellipse button to locate a Data or XML field from the Context Browser. The Browse button can also be used to browse to the relevant file. |
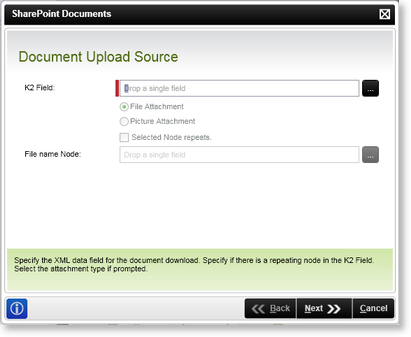
Document Upload Source
The Document Upload Source wizard page is displayed if the K2 Field option was selected from either the Upload Documents wizard page in advanced mode or from the Event Name and Action wizard page in standard mode.
The Document Upload Source wizard page allows you to specify the location of the document to be uploaded.
| Feature | What it is | How to use it |
|---|---|---|
| K2 Field | The K2 Field specifies the XML data field for the document download. Specify whether there is a repeating node in the K2 Field and select the attachment type when prompted. | Click on the ellipse button to browse to the relevant K2 Field and select the relevant boxes |
| File Name Node | Specify the node containing the name of the file to be uploaded | Specify the File Name Node OR Click on the ellipse button and click on the File Name Node |
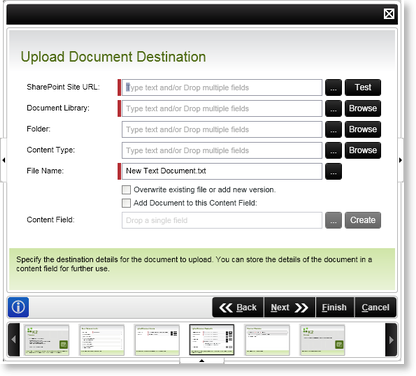
Upload Document Destination
The Upload Document Destination wizard page specifies the location of the uploaded document is .
| Feature | What it is | How to use it |
|---|---|---|
| SharePoint Site URL | Specifies the SharePoint Site URL where the document should be uploaded to | Specify the SharePoint Server URL e.g. http://SPSServer:121 OR use the ellipse button to open Context Browser and select the SharePoint URL |
| Document Library | The name of the SharePoint Document Library | Specify the Name of the Document Library where the document should be uploaded to in the text box, or use the ellipse button to select a DataField or XML Node. Alternatively use the Browse button to select the Document Library from the SharePoint Site |
| Folder | A folder within the document library where the uploaded documents are stored. | Provide a folder name as a destination for the document in the text box, or use the ellipse button to select a DataField or XML Node. Alternatively use the Browse button to select the required Folder |
| Content Type | If specifying a Content Type, the document is associated with that content type. | Specify the name of the Content Type, OR use the Context Browser to select a Data or XML Field. Alternatively use the Browse button to select the required Content Type |
| File Name | The name of the file | Specify the nameof the file to be uploaded |
| Overwrite Existing File/Add as new | Check this option if the uploaded file is to overwrite an existing file | Check this option if applicable |
| Add Document to this Process Field | Check this option to add a Document to this Process Field, as part of the workflow process | Check this option if applicable |
| Content Field | Locate the K2 Process Field in the Context Browser and drag it into the field box | Specify the name of the process field by typing or drag-and-dropping it into the text box |
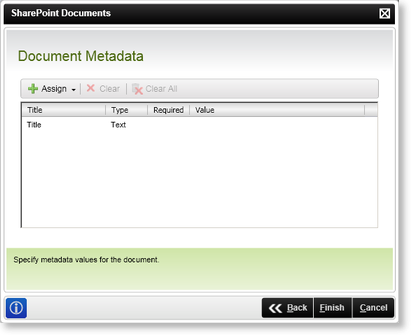
Document Metadata
The Document Metadata wizard page provides an interface to retrieve or change metadata on a document.
| Feature | What it is | How to use it |
|---|---|---|
| Assign |
To assign metadata, select the drop down arrow and select the relevant option:
|
Select an option |
| Clear | Removes the selected Document Metadata configuration | Click on the configured setting and select this option, to remove a configured document setting |
| Clear All | Removes all the configured Document Metadata | To remove all the configured document settings, select this option |
| Title | Displays the title of the metadata | |
| Type | Displays the type of metadata | |
| Required | Displays whether the value is required | |
| Value | Displays the value |
The Download Documents function in the SharePoint Documents event wizard is used to download documents from a specified location to a local or network location, or to a K2 field.
Information Required to Download Documents:
- An existing SharePoint Site URL
- An existing Document, Data or XML field
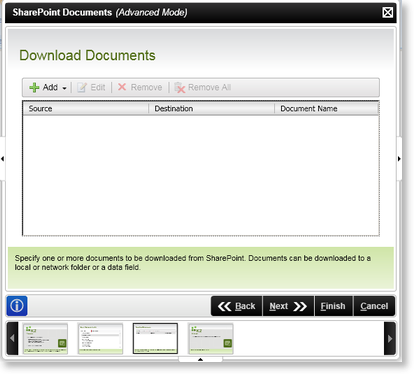
Download Documents
The Download Documents wizard page is only viewed when the wizard is run in advanced mode. The page provides an interface to download documents from SharePoint.
| Feature | What it is | How to use it |
|---|---|---|
| Add |
To download documents, select the drop down arrow and select the relevant location:
|
Select an option |
| Edit | Modifies the document settings | Click on the configured setting and select this option, to edit a configured document setting |
| Remove | Removes document settings | Click on the configured setting and select this option, to remove a configured document setting |
| Remove All | Removes all the configured document settings | To remove all the configured document settings, select this option |
| Source | Displays the source of the document | |
| Destination | Displays the destination of the document | |
| Document Name | Displays the document's name |
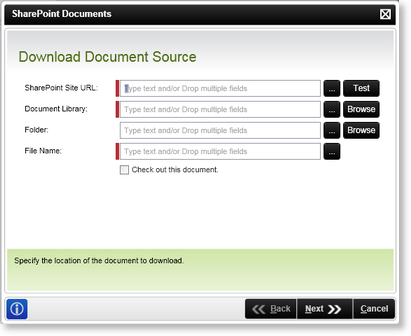
Download Document Source
The Download Document Source wizard page allows you to specify the location of the document to be downloaded.
| Feature | What it is | How to use it |
|---|---|---|
| SharePoint Site URL | The SharePoint Site URL text box specifies the location of the document to be downloaded | Specify the SharePoint Server URL e.g. http://SPSServer:121 OR use the ellipse button to open Context Browser and select the SharePoint URL |
| Document Library | The name of the Document Library | Specify the Name of the Document Library by typing or drag-and-dropping it into the text box |
| Folder | A folder within the document library where the documents will be downloaded from | Provide a folder name as a destination for the document |
| File Name | The name of ht efile | Specify the Name of the File to be downloaded |
| Check out this document | Check this option if the downloaded document should be checked out | Check this option if applicable |
Download Document Destination
The Download Document Destination wizard pag edisplays information related to selections made in previous wizard pages. Two examples are shown here. The Download Document Destination wizard page allows you to specify the location to which the document is downloaded.
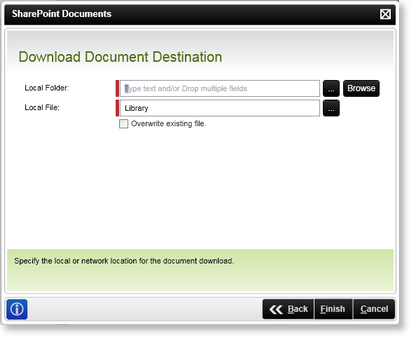
Download Document Source - Screen 1
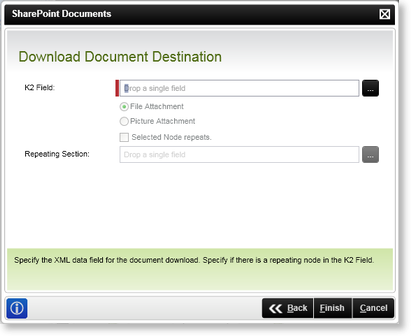
Download Document Source - Screen 2
| Feature | What it is | How to use it |
|---|---|---|
| Local Folder | The Local Folder specifies where the document should be downloaded to | Specify the Folder name, locating the File to be downloaded within the File System OR Click Browse and browse to the Folder where the document should be downloaded to |
| Local File | The name of the file to be downloaded | Specify the File Name OR Click Browse and click on the File Name |
| Overwrite existing file | Overwrites the existing file | Check this option if applicable |
| K2 Field | The K2 Field specifies the XML data field for the document download. Specify whether there is a repeating node in the K2 Field and select the attachment type when prompted. | Click on the ellipse button to browse to the relevant K2 Field and select the relevant boxes |
| Repeating Section | Specifies a repeating section | Click on the ellipse button to browse to the relevant Data or XML field |
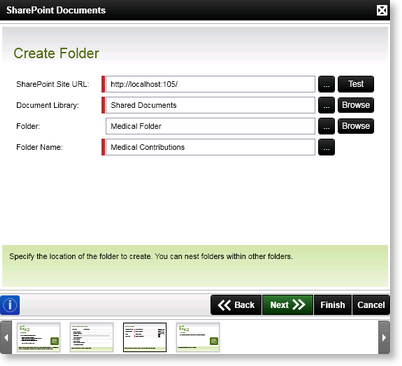
The Create Folder function in the Documents Event Wizard is used to create a folder or nested folders within other folders in SharePoint.
The Create Folder page allows you to create a folder or nested folders in a SharePoint library.
Note that you must have an existing SharePoint Site URL to create a folder.
| Feature | What it is | How to use it |
|---|---|---|
| SharePoint Site URL | Specifies the SharePoint Site URL where the folder is to be created | Specify the SharePoint Server URL e.g. http://SPSServer:121 OR use the ellipse button to open Context Browser and select the SharePoint URL. |
| Document Library | The document library where the folder is to be created | Specify the Name of the Document Library where the folder is tobe created in the text box, or use the ellipse button to select a Dataor XML field. Alternatively use the Browse button to select the Document Library from the SharePoint Site. |
| Folder | A folder within the document library where the new folder will be created. | Provide a folder name as a destination where the folder will be created, or use the ellipse button to select a DataField or XML Node. Alternatively use the Browse button to select the required Folder. |
| Folder Name | The new folder name to be created | Specify the name or |
The Create Document Set function in the SharePoint Documents event wizard is used to create a document set in SharePoint. This document set can be used to group multiple documents together.
Prerequisites
It is important to perform the following in SharePoint in order to use the Create Document Set feature:
- Activate the Document Sets Site Collection Feature on the specific SharePoint Site Collection
- Allow management of Content Types on the specific SharePoint Library
- Add Document Set to Content Types in Document Library Settings
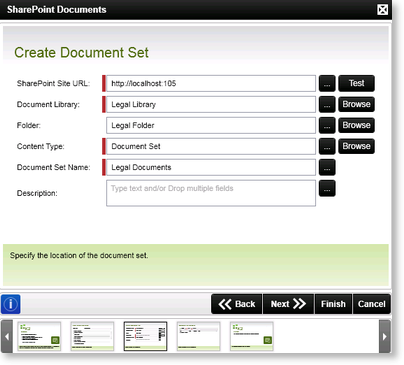
The Create Document Set page allows you to create a document set in a SharePoint library.
Note that you must have an existing SharePoint Site URL to create a document set.
| Feature | What it is | How to use it |
|---|---|---|
| SharePoint Site URL | Specifies the SharePoint Site URL where the document set is to be created | Specify the SharePoint Server URL e.g. http://SPSServer:121 OR use the ellipse button to open Context Browser and select the SharePoint URL |
| Document Library | The document library where the Document Set is to be created | Specify the Name of the Document Library where the document set should be created in the text box, or use the ellipse button to select a DataField or XML Node. Alternatively use the Browse button to select the Document Library from the SharePoint Site |
| Folder | A folder within the document library where the document set is to be created | Provide a folder name as a destination for the document set in the text box, or use the ellipse button to select a DataField or XML Node. Alternatively use the Browse button to select the required Folder |
| Content Type | The content type for the document set. Only those document set content types that have been added to the selected library will be listed | Specify the name of the Content Type, OR use the Context Browser to select a DataField or XML Node. Alternatively use the Browse button to select the required Content Type. Select Document Set. Only those document set content types that have been added to the selected library will be listed |
| Document Set Name | The Document Set name | Specify the name of the Document Set to be created |
| Description | The Document Set description | Specify the description of the Document Set |
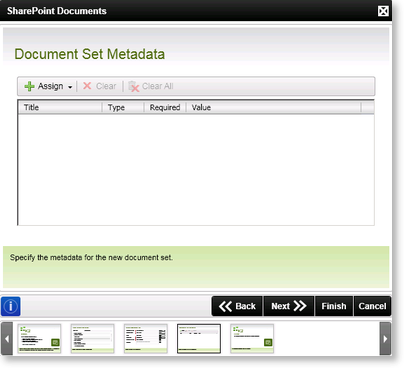
Document Set Metadata
The Document Set Metadata wizard page allows you to assign metadata to the specified document set.
| Feature | What it is | How to use it |
|---|---|---|
| Assign |
To assign metadata, select the drop down arrow and select the relevant option:
|
Select an option |
| Clear | Removes the selected Document Set metadata configuration | Click on the configured setting and select this option, to remove a configured document setting |
| Clear All | Removes all the configured Document Set metadata configuration | To remove all the configured document settings, select this option |
| Title | Displays the title of the metadata | |
| Type | Displays the type of metadata | |
| Required | Displays whether the value is required | |
| Value | Displays the value |
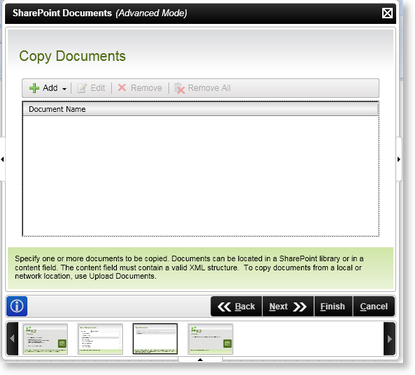
The Copy Documents function in the SharePoint Documents event wizard allows you to copy documents from a specified location to another SharePoint library.
Copy Documents
The Copy Documents wizard page is only viewed when the wizard is run in advanced mode. The page allows you to copy documents in SharePoint.
Note that you must have an existing SharePoint Site URL and an existing document (or data field containing a document) to copy a document.
| Feature | What it is | How to use it |
|---|---|---|
| Add |
To add documents, select the drop down arrow and select the relevant location:
|
Select an option |
| Edit | Modifies the document settings | Click on the configured setting and select this option, to edit a configured document setting |
| Remove | Removes document settings | Click on the configured setting and select this option, to remove a configured document setting |
| Remove All | Removes all configured document settings | To remove all the configured document settings, select this option |
| Document Name | Displays the document's name |
Copy Document Source
The Copy Document Source wizard pageis displayed if the SharePoint Document option was selected from the Copy Documents wizard page in advanced mode or the Document option from the Event Name and Action wizard page in standard mode.
The Copy Document Source wizard page allows you to specify the location of the document to be copied.

| Feature | What it is | How to use it |
|---|---|---|
| SharePoint Site URL | The SharePoint Site URL text box specifies the location of the document to be copied | Specify the SharePoint Server URL e.g. http://SPSServer:121 OR use the ellipse button to open Context Browser and select the SharePoint URL |
| Document Library | The Document Library where the source document resides. | Specify the Name of the Document Library by typing or drag-and-dropping it into the text box |
| Folder | A folder within the document library where the document resides | Provide a folder name as a destination for the document |
| File Name | The name of the file | Specify the Name of the File to be copied |
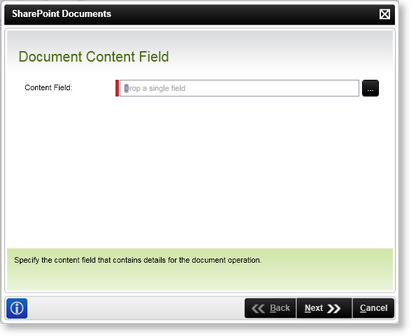
Document Content Field
The Document Content Field wizard screen specifies the content field that contains details for the document operation.

| Feature | What it is | How to use it |
|---|---|---|
| Content Field | Specifies the Content Field that should be used | Click on the ellipse button and browse to the relevant Content Field |
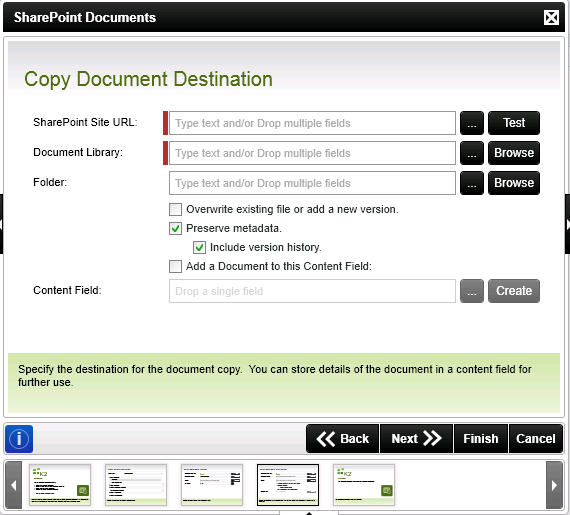
Copy Document Destination
The Copy Document Destination wizard page allows you to specify the location where the document is to be copied.
| Feature | What it is | How to use it |
|---|---|---|
| SharePoint Site URL | Specifies the SharePoint Site URL where the document is to be copied | Specify the SharePoint Server URL e.g. http://SPSServer:121 OR use the ellipse button to open Context Browser and select the SharePoint URL |
| Document Library | A Document Library that will contain the copied document | Specify the Name of the Document Library where the document should be copied to in the text box, or use the ellipse button to select a DataField or XML Node. Alternatively use the Browse button to select the Document Library from the SharePoint Site |
| Folder | A folder within the document library where the copied document will be stored. | Provide a folder name as a destination for the document in the text box, or use the ellipse button to select a DataField or XML Node. Alternatively use the Browse button to select the required Folder |
| Overwrite Existing File/Add as new | Check this option if the copied file is to overwrite an existing file | Check this option |
| Preserve metadata | Specifies whether metadata should be preserved for the document being copied. | Select this option to preserve metadata for the document being copied. By default this option is selected. Deselect the option if metadata should not be preserved. |
| Include Version History | This option will include the documents version history when the document is copied. | This option will only be available to select if the Preserve metadata option is selected. This option will only function if versioning is enabled for the SharePoint Document Library. Check this option if applicable |
| Add Document to this Process Field | Check this option to add the Document to this Process Field as part of the workflow process | Check this option if applicable. |
| Content Field | Locate the K2 Process Field in the Context Browser and drag it into the field box | Specify the Name of the Process Field by typing or drag-and-dropping it into the text box |
How to use the Preserve metadata option
The Preserve metadata option can be used to preserve metadata for the document being copied. This would typically be the columns:
- Created By
- Created Date
- Modified By
- Modified Date
It is however possible to preserve metadata from custom columns. The metadata is only be preserved for custom columns if the destination SharePoint Document Library has the same columns with the exact same name as the source SharePoint Document Library.
How to use the Include Version History option
The Include Version History option is only enabled when the Preserve metadata option is selected. The version history only functions when the specified SharePoint Library has versioning enabled. When the Include Version History option is checked, the current version of the document is kept. Un-checking this option results in adocument version of 1.0.
Ensure that the following updates are installed to make use of this functionality:
- The latest SharePoint Cumulative Updates.
- The latest SharePoint Service Pack.
- For all new processes, this functionality will be available.
- To make use of this new functionality on existing workflows, update the design templates, open the wizard and make the necessary configuration and redeploy the process.
- If the Run As functionality is used on this event, with the Preserve metadata option enabled, the Run As user must have the following rights:
- SharePoint 2010 - SharePoint Site Collection Administrator
- MOSS 2007 - Full Control on the SharePoint Site
Examples on how the metadata is displayed
Example 1
Preserve metadata and Include Version History - Enabled:
In this example a SharePoint Document Library is used with the following columns and metadata:

Using the SharePoint Document Wizard to copy a document to a different SharePoint Document Library in a K2 process, the metadata is preserved and the version history of the SharePoint item is included after running an instance of the process. See the image below for results after running an instance of the process:

Note that the Created By and Modified By columns were preserved as the Preserve metadata option was enabled in the SharePoint Documents event wizard. The SharePoint item version history was also included.
Example 2
Preserve metadata and Include Version History - Disabled:
The same SharePoint Document Library example is used in example 1.
Using the SharePoint Document Wizard to copy a document to a different SharePoint Document Library in a K2 process, the metadata will NOT be preserved and the version history of the SharePoint item will NOT be included after running an instance of the process. See the image below for results after running an instance of the process:

Note that the Created By and Modified By columns were not preserved as the Preserve metadata option was disabled in the SharePoint Documents Wizard. The SharePoint item's version history was not included. The Created By and Modified By columns will revert back to the Service Account user. Note that the version history reverts back to 1.0.
Example 3
Preserve metadata - Enabled; Include Version History - Disabled:
The same SharePoint Document Library example is used as per example 1.
Using the SharePoint Document Wizard to copy a document to a different SharePoint Document Library in a K2 process, the metadata is preserved, however the version history of the SharePoint item is NOT included after running an instance of the process. See the image below for results after running an instance of the process:

Note that the Created By and Modified By columns are preserved as the Preserve metadata option was enabled in the SharePoint Documents wizard. The SharePoint item's version history is not included as this option was disabled. Note that the version is set to 1.0 as if it were a new document.
Example 4
Overwrite a document with Preserve metadata and Include Version History options Disabled:
The same SharePoint Document Library example is used as per example 1.
Using the SharePoint Documents wizard to copy a document to a different SharePoint Document Library and overwrite the document in a K2 process, the metadata is NOT preserved and the version history of the SharePoint item is NOT included after running an instance of the process. See the image below for results after running an instance of the process:

Note that the Created By column are still preserved since the Overwrite an existing file option was selected. The Modified By column is not preserved as the Preserve metadata option was disabled in the SharePoint Documents wizard. The SharePoint Document version history is not included as this option was disabled. The Modified By column is set to the Service Account user. Note that the version is set to 1.0 as if it were a new document.
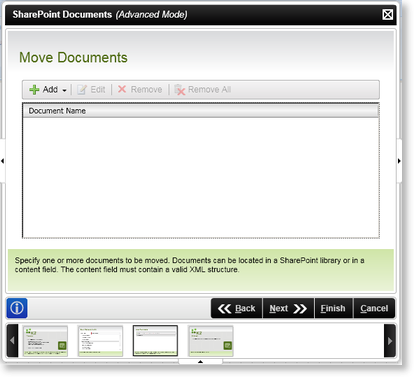
The Move Documents function in the SharePoint Documents event wizard is used to move documents from a specified location to a destination library in SharePoint.
Move Documents
The Move Documents wizard screen is only viewed when the wizard is run in advanced mode. The screen provides an easy to use interface to move documents within SharePoint.
Note that you must have an existing SharePoint Site URL and an existing document (or data field containing a document) to move a document.
| Feature | What it is | How to use it |
|---|---|---|
| Add |
To add documents, select the Add drop down arrow and select the relevant location:
|
Select an option |
| Edit | Modifies the document settings | Click on the configured setting and select this option, to edit a configured document setting |
| Remove | Removes document settings | Click on the configured setting and select this option, to remove a configured document setting |
| Remove All | Removes all the configured document settings | To remove all the configured document settings, select this option |
| Document Name | Displays the document's name |
Move Document Source
The Move Document Source wizard page is displayed if the SharePoint Document option was selected from the Move Documents wizard page in advanced mode or the Document option from the Event Name and Action wizard page in standard mode.
The Move Document Source wizard page allows you to specify the location of the document to be moved.

| Feature | What it is | How to use it |
|---|---|---|
| SharePoint Site URL | The SharePoint Site URL text box specifies the location of the document to be moved | Specify the SharePoint Server URL e.g. http://SPSServer:121 OR use the ellipse button to open Context Browser and select the SharePoint URL |
| Document Library | The library containing the document to be moved. | Specify the Name of the Document Library by typing or drag-and-dropping it into the text box |
| Folder | A folder within the document library where the documents will be moved from | Provide a folder name as a destination for the document |
| File Name | The name of the file | Specify the Name of the File to be downloaded |
Document Content Field
The Document Content Field wizard screen specifies the content field that contains details for the document operation.
| Feature | What it is | How to use it |
|---|---|---|
| Content Field | Specifies the Content Field that should be used | Click on the ellipse button and browse to the relevant Content Field |
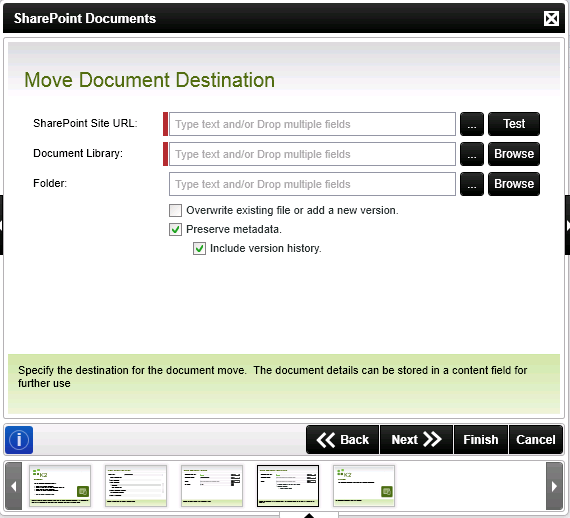
Move Document Destination
The Move Document Destination wizard screen specifies the location where the document should be moved to.
| Feature | What it is | How to use it |
|---|---|---|
| SharePoint Site URL | Specifies the SharePoint Site URL where the document should be moved to | Specify the SharePoint Server URL e.g. http://SPSServer:121 OR use the ellipse button to open Context Browser and select the SharePoint URL |
| Document Library | A SharePoint Document Library provides a central repository for team documents. This is an alternative to storing files in shared folders | Specify the Name of the Document Library by typing or drag-and-dropping it into the text box |
| Folder | A folder within the document library where the moved documents will be stored. | Provide a folder name as a destination for the document |
| Overwrite Existing File or add new version | Check this option if the moved file is to overwrite an existing file or alternatively add a new version depending on the preconfigured settings. If versioning is set up a new version will be created, alternatively the existing file will be overwritten. | Check this option |
| Preserve metadata | Specifies whether metadata should be preserved for the document being copied. | Select this option to preserve metadata for the document being copied. By default this option is selected. Deselect the option if metadata should not be preserved. |
| Include Version History | This option will include the documents version history when the document is copied. | This option will only be available to select if the Preserve metadata option is selected. This option will only function if versioning is enabled for the SharePoint Document Library. Check this option. |
How to use the Preserve metadata option
The Preserve metadata option can be used to preserve metadata for the document being moved. This would typically be the columns:
- Created By
- Created Date
- Modified By
- Modified Date
It is however possible to preserve metadata from custom columns. The metadata will only be preserved for custom columns if the destination SharePoint Document Library has the same columns with the exact same name as the source SharePoint Document Library.
How to use the Include Version History option
The Include Version History option will only be enabled for use when the Preserve metadata option was selected. The version history will only function when the specified SharePoint Library has versioning enabled. When the Include Version History option is checked, the current version of the Document will be kept. Unchecking this option will result in the Documents version to reflect as 1.0.
We recommend that the following updates are installed to make use of this functionality:
- The latest SharePoint Cumulative Updates.
- The latest SharePoint Service Pack.
- For all new processes, this functionality will be available.
- To make use of this new functionality on existing workflows, update the design templates, open the wizard and make the necessary configuration and redeploy the process.
- If the Run As functionality is used on this event, with the Preserve metadata option enabled, the Run As user must have the following rights:
- SharePoint 2010 - SharePoint Site Collection Administrator
- MOSS2007 - Full Control on the SharePoint Site
Examples on how the metadata will display
Example 1
Preserve metadata and Include Version History - Enabled:
In this example a SharePoint Document Library is used with the following columns and metadata:
Using the SharePoint Document Wizard to move a document to a different SharePoint Document Library in a K2 process, the metadata will be preserved and the version history of the SharePoint item will be included after running an instance of the process. See the image below for results after running an instance of the process:
Note that the Created By and Modified By columns were preserved as the Preserve metadata option was enabled in the SharePoint Document Wizard. The SharePoint item version history was also included.
Example 2
Preserve metadata and Include Version History - Disabled:
The same SharePoint Document Library example is used as per example 1.
Using the SharePoint Document Wizard to move a document to a different SharePoint Document Library in a K2 process, the metadata will NOT be preserved and the version history of the SharePoint item will NOT be included after running an instance of the process. See the image below for results after running an instance of the process:
Note that the Created By and Modified By columns were not preserved as the Preserve metadata option was disabled in the SharePoint Documents Wizard. The SharePoint item's version history was not included. The Created By and Modified By columns will revert back to the Service Account user. Note that the version history will revert back to the original version for example 1.0.
Example 3
Preserve metadata - Enabled; Include Version History - Disabled:
The same SharePoint Document Library example is used as per example 1.
Using the SharePoint Document Wizard to move a document to a different SharePoint Document Library in a K2 process, the metadata will be preserved, however the version history of the SharePoint item will NOT be included after running an instance of the process. See the image below for results after running an instance of the process:
Note that the Created By and Modified By columns were preserved as the Preserve metadata option was enabled in the SharePoint Document Wizard. The SharePoint item's version history was not included as this option was disabled. Note that the version history will revert back to the original version for example 1.0.
Example 4
Overwrite a document with Preserve metadata and Include Version History options Disabled:
The same SharePoint Document Library example is used as per example 1.
Using the SharePoint Document Wizard to move a document to a different SharePoint Document Library and overwrite the document in a K2 process, the metadata will NOT be preserved and the version history of the SharePoint item will NOT be included after running an instance of the process. See the image below for results after running an instance of the process:
Note that the Created By column will still be preserved since the Overwrite an existing file option was selected. The Modified By column was not preserved as the Preserve metadata option was disabled in the SharePoint Document Wizard. The SharePoint Document version history was not included as this option was disabled. The Modified By column will revert back to the Service Account user. Note that the version history will revert back to the original version for example 1.0.
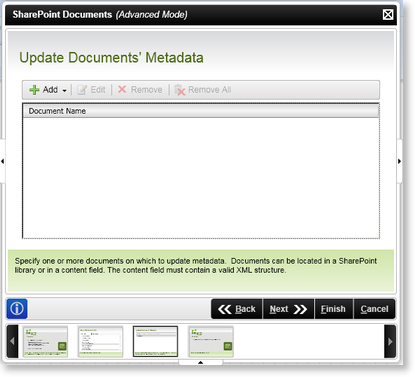
The Update Documents' Metadata function in the Documents Event Wizard is used to update a document's Metadata in SharePoint automatically as part of the workflow.
Information Required to Update a Document's Metadata:
- An existing SharePoint Site URL
- An existing Document, DataField or XML Node containing Metadata
Update Documents' Metadata
The Update Documents' Metadata wizard screen is only viewed when the wizard is run in advanced mode. The screen provides an easy to use interface to update a document's Metadata within SharePoint automatically.
| Feature | What it is | How to use it |
|---|---|---|
| Add |
To add documents, select the drop down Arrow and select the relevant location:
|
Select an option |
| Edit | Modifies the listing | Click on the configured setting and select this option, to edit a configured document setting |
| Remove | Removes document settings | Click on the configured setting and select this option, to remove a configured document setting |
| Remove All | Removes All the configured document settings | To remove all the configured document settings, select this option |
| Document Name | Displays the document's name | User Reference |
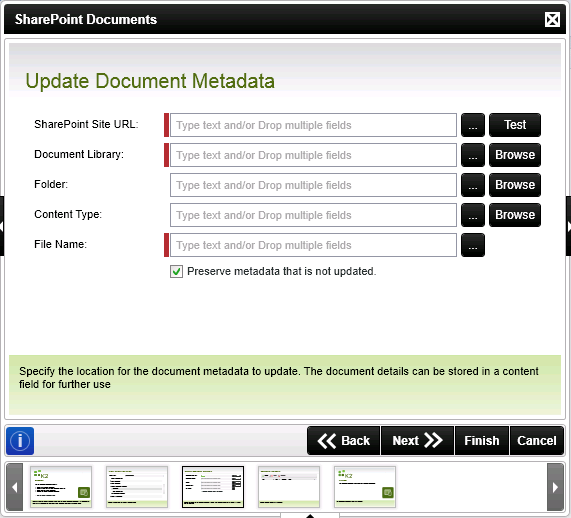
Update Document Metadata
The Update Document Metadata wizard screen is displayed if the SharePoint Document option was selected from the Get Documents' Metadata wizard screen in advanced mode or the Document option from the Event Name and Action wizard screen in standard mode.
The Update Document Metadata wizard screen specifies the location of the document that should be copied.
| Feature | What it is | How to use it |
|---|---|---|
| SharePoint Site URL | The SharePoint Site URL, refers to the Uniform Resource Locator (URL). It is the address for the server running Windows SharePoint Services | Specify the SharePoint Server URL e.g. http://SPSServer:121 OR use the ellipse button to open Context Browser and select the SharePoint URL |
| Document Library | A SharePoint Document Library provides a central repository for team documents. This is an alternative to storing files in shared folders | Specify the Name of the Document Library by typing or drag-and-dropping it into the text box |
| Folder | A folder within the document library where the Metadata will be retrieved from | Provide a folder name as a destination for the document |
| Content Type | Content Type is a customizable meta description of content that can include custom properties, a retention policy, and an associated set of workflows/business processes | Specify the Name of the Content Type by typing or drag-and-dropping it into the text box |
| File Name | Adds the File Name | Specify the Name of the File to be updated |
| Preserve metadata that is not updated | Specifies whether metadata should be preserved if not selected to be updated. | Select this option to preserve metadata that is not selected in this event to be updated, for example the Created By column in the SharePoint List. By default this option is selected. Deselect the option if metadata should not be preserved. |
How to use the Preserve metadata that is not updated option
The Preserve metadata that is not updated option can be used to preserve metadata that is not selected to be updated. This would typically be the columns:
- Modified By
- Modified Date
It is however possible to preserve metadata from custom columns. The custom columns that are not selected to be updated via the wizard, will be preserved if this option is checked.
We recommend that the following updates are installed to make use of this functionality:
- The latest SharePoint Cumulative Updates.
- The latest SharePoint Service Pack.
- For all new processes, this functionality will be available.
- To make use of this new functionality on existing workflows, update the design templates, open the wizard and make the necessary configuration and redeploy the process.
- If the Run As functionality is used on this event, with the Preserve metadata that is not updated option enabled, the Run As user must have the following rights:
- SharePoint 2010 - SharePoint Site Collection Administrator
- MOSS2007 - Full Control on the SharePoint Site
Examples on how the metadata will display
Example 1
Preserve metadata that is not updated - Enabled:
In this example a SharePoint Document Library is used with the following columns and metadata:

Using the SharePoint Document Wizard to update a Document, the Title column and TestColumnTwo was selected to be updated in a K2 process. See the image below for results after running an instance of the process:

Note that the Modified By column was preserved as the Preserve metadata that is not updated option was enabled in the SharePoint Document Wizard.
Example 2
Preserve metadata that is not updated - Disabled:
In this example the same Document Library with columns and metadata is used as per example 1.
Using the SharePoint Document Wizard to update a document, the Title column and TestColumnTwo was selected to be updated in a K2 process. See the image below for results after running an instance of the process:

Note that the Modified By column was NOT preserved as the Preserve metadata that is not updated option was disabled in the SharePoint Document Wizard. The Modified By column will revert back to the Service Account user.
Example 3
Specific configuration required in the Document Libraries wizard in Advanced mode when updating multiple documents:
Take for example a scenario in which 2 documents are to be updated, Document A and Document B. A is to have the metadata preserved and the B metadata must not be preserved. To ensure that both documents are updated correctly it is necessary to configure the wizard in the following manner:
- Document B must be configured first and the Preserve metadata that is not updated option disabled and then secondly configure Document A with the Preserve metadata that is not updated option enabled, this will allow the metadata for Document A to be preserved while B is not. Note that if the configuration is swopped around that the metadata will be preserved on both documents.
Update Document Metadata from the Content Field
The Document Content Field wizard screen specifies the content field that contains details for the document operation.
| Feature | What it is | How to use it |
|---|---|---|
| Content Field | Specifies the Content Field that should be used. | Click on the ellipse button and browse to the relevant Content Field. |
| Preserve metadata that is not updated | Specifies whether metadata should be preserved if not selected to be updated. | Select this option to preserve metadata that is not selected in this event to be updated, for example the Created By column in the SharePoint Library. By default this option is selected. Deselect the option if metadata should not be preserved. |
How to use the Preserve metadata that is not updated option
The Preserve metadata that is not updated option can be used to preserve metadata that is not selected to be updated. This would typically be the columns:
- Modified By
- Modified Date
It is however possible to preserve metadata from custom columns. The custom columns that are not selected to be updated via the wizard will be preserved if this option is checked.
We recommend that the following updates are installed to make use of this functionality:
- The latest SharePoint Cumulative Updates.
- The latest SharePoint Service Pack.
- For all new processes, this functionality will be available.
- To make use of this new functionality on existing workflows, update the design templates, open the wizard and make the necessary configuration and redeploy the process.
- If the Run As functionality is used on this event, with the Preserve metadata that is not updated option enabled, the Run As user must have the following rights:
- SharePoint 2010 - SharePoint Site Collection Administrator
- MOSS2007 - Full Control on the SharePoint Site
Document Metadata
The Document Metadata wizard screen provides an easy to use interface to assign Metadata to the specified document.
| Feature | What it is | How to use it |
|---|---|---|
| Assign |
To assign Metadata, select the Drop Down Arrow and select the relevant option:
|
Select an option |
| Clear | Removes the selected Document Metadata | Click on the configured setting and select this option, to remove a configured document setting |
| Clear All | Removes All the configured Document Metadata | To remove all the configured document settings, select this option |
| Title | Displays the title of the Metadata | User Reference |
| Type | Displays the type of Metadata | User Reference |
| Required | Displays whether the value is required | User Reference |
| Value | Displays the value | User Reference |
The Get Documents' Metadata function in the Documents Event Wizard is used to load a document's Metadata in SharePoint automatically as part of the workflow.
Information Required to Get a Document's Metadata:
- An existing SharePoint Site URL
- An existing Document, DataField or XML Node containing Metadata
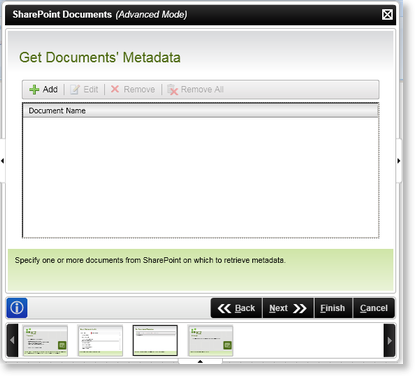
Get Documents' Metadata
The Get Documents' Metadata wizard screen is only viewed when the wizard is run in advanced mode. The screen provides an easy to use interface to retrieve an existing document's Metadata within SharePoint automatically.
| Feature | What it is | How to use it |
|---|---|---|
| Add | The Add button opens the Get Document Metadata wizards screen, which provide all the necessary inputs to retrieve the required Metadata | Click Add |
| Edit | Modifies the listing | Click on the configured setting and select this option, to edit a configured document setting |
| Remove | Removes document settings | Click on the configured setting and select this option, to remove a configured document setting |
| Remove All | Removes All the configured document settings | To remove all the configured document settings, select this option |
| Document Name | Displays the document's name | User Reference |
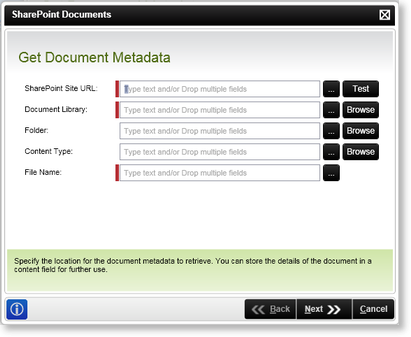
Get Document Metadata
The Update Document Metadata wizard screen specifies the location of the document that should be copied.
| Feature | What it is | How to use it |
|---|---|---|
| SharePoint Site URL | The SharePoint Site URL text box specifies the location of the document that should be used | Specify the SharePoint Server URL e.g. http://SPSServer:121 OR use the ellipse button to open Context Browser and select the SharePoint URL |
| Document Library | A SharePoint Document Library provides a central repository for team documents. This is an alternative to storing files in shared folders | Specify the Name of the Document Library by typing or drag-and-dropping it into the text box |
| Folder | A folder within the document library where the Metadata will be retrieved from | Provide a folder name as a destination for the document |
| Content Type | Content Type is a customizable meta description of content that can include custom properties, a retention policy, and an associated set of workflows/business processes | Specify the Name of the Content Type by typing or drag-and-dropping it into the text box |
| File Name | Adds the File Name | Specify the Name of the File to be updated |
Document Metadata
The Document Metadata wizard screen provides an easy to use interface to assign Metadata to the specified document.
| Feature | What it is | How to use it |
|---|---|---|
| Assign |
To assign Metadata, select the Drop Down Arrow and select the relevant option:
|
Select an option |
| Clear | Removes the selected Document Metadata | Click on the configured setting and select this option, to remove a configured document setting |
| Clear All | Removes All the configured Document Metadata | To remove all the configured document settings, select this option |
| Title | Displays the title of the Metadata | User Reference |
| Type | Displays the type of Metadata | User Reference |
| Required | Displays whether the value is required | User Reference |
| Value | Displays the value | User Reference |
The Check In Documents function in the Documents Event Wizard is used to check in a document in SharePoint automatically as part of the workflow.
Information Required to check in a document:
- An existing SharePoint Site URL
- An existing Document, DataField or XML Node
Check In Documents
The Check In Documents wizard screen is only viewed when the wizard is run in advanced mode. The screen provides an easy to use interface to automatically check in documents within SharePoint.

| Feature | What it is | How to use it |
|---|---|---|
| Add |
To add documents, select the Drop Down Arrow and select the relevant location:
|
Select an option |
| Edit | Modifies the listing | Click on the configured setting and select this option, to edit a configured document setting |
| Remove | Removes document settings | Click on the configured setting and select this option, to remove a configured document setting |
| Remove All | Removes All the configured document settings | To remove all the configured document settings, select this option |
| Document Name | Displays the document's name | User Reference |
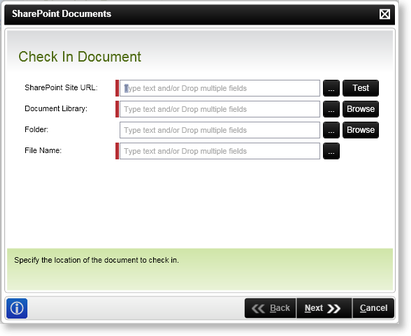
Check In Document
The Check In Document wizard screen is used to specify which document to check in.
| Feature | What it is | How to use it |
|---|---|---|
| SharePoint Site URL | Specifies the SharePoint Site URL where the required document should be checked in to | Specify the SharePoint Server URL e.g. http://SPSServer:121 OR use the ellipse button to open Context Browser and select the SharePoint URL |
| Document Library | A SharePoint Document Library provides a central repository for team documents. This is an alternative to storing files in shared folders | Specify the Name of the Document Library by typing or drag-and-dropping it into the text box |
| Folder | A folder within the document library where the documents will be checked in to | Provide a folder name as a destination for the document |
| File Name | Adds the File Name | Specify the Name of the File to be checked in |
Document Content Field
The Document Content Field wizard screen specifies the content field that contains details for the document operation.
| Feature | What it is | How to use it |
|---|---|---|
| Content Field | Specifies the Content Field that should be used | Click on the ellipse button and browse to the relevant Content Field |
Check In Document Detail
The Check In Documents Detail wizard screen specifies the different configuration settings that should be applied when checking in the document.
To make use of the versioning functionality, versioning must be enabled within SharePoint

| Feature | What it is |
|---|---|
| No versioning | No versioning will be applied when the document is checked into the SharePoint Document Library |
| Minor Version (draft) | Minor versioning will be applied when the document is checked into the SharePoint Document Library. The document will be checked in as an unpublished document in draft mode. |
| Major Version (publish) | Major versioning will be applied when the document is checked into the SharePoint Document Library. The document will be checked in as a published document. |
| Overwrite current minor version | The current minor version will be overwritten when the document is checked into the SharePoint Document Library |
| Keep file checked out | Will keep the document checked out after the document has been checked in |
The Check Out Documents function in the Documents Event Wizard is used to check out a document in SharePoint automatically as part of the workflow.
Information Required to Check Out Documents:
- An existing SharePoint Site URL
- An existing Document, DataField or XML Node
Check Out Documents
The Check Out Documents wizard screen is only viewed when the wizard is run in advanced mode. The screen provides an easy to use interface to automatically check out documents within SharePoint.

| Feature | What it is | How to use it |
|---|---|---|
| Add |
To add documents, select the Drop Down Arrow and select the relevant location:
|
Select an option |
| Edit | Modifies the listing | Click on the configured setting and select this option, to edit a configured document setting |
| Remove | Removes document settings | Click on the configured setting and select this option, to remove a configured document setting |
| Remove All | Removes All the configured document settings | To remove all the configured document settings, select this option |
| Document Name | Displays the document's name | User Reference |
Check Out Document
The Check Out Document wizard screen is used to specify which document to check out.
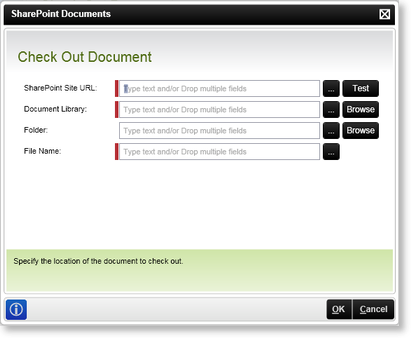
| Feature | What it is | How to use it |
|---|---|---|
| SharePoint Site URL | Specifies the SharePoint Site URL where the required document should be checked out of | Specify the SharePoint Server URL e.g. http://SPSServer:121 OR use the ellipse button to open Context Browser and select the SharePoint URL |
| Document Library | A SharePoint Document Library provides a central repository for team documents. This is an alternative to storing files in shared folders | Specify the Name of the Document Library by typing or drag-and-dropping it into the text box |
| Folder | A folder within the document library where the documents will be checked out of | Provide a folder name as a destination for the document |
| File Name | Adds the File Name | Specify the Name of the File to be checked out |
Document Content Field
The Document Content Field wizard screen specifies the content field that contains details for the document operation.
| Feature | What it is | How to use it |
|---|---|---|
| Content Field | Specifies the Content Field that should be used | Click on the ellipse button and browse to the relevant Content Field |
The Undo Documents' Check Out function in the Documents Event Wizard is used to undo the check out a document in SharePoint automatically as part of the workflow.
Information Required to undo a Documents' Check Out:
- An existing SharePoint Site URL
- An existing Document, DataField or XML Node
Undo Documents' Check Out
The Undo Documents' Check Out wizard screen is only viewed when the wizard is run in advanced mode. The screen provides an easy to use interface to automatically undo the check out of multiple documents within SharePoint.

| Feature | What it is | How to use it |
|---|---|---|
| Add |
To add documents, select the Drop Down Arrow and select the relevant location:
|
Select an option |
| Edit | Modifies the listing | Click on the configured setting and select this option, to edit a configured document setting |
| Remove | Removes document settings | Click on the configured setting and select this option, to remove a configured document setting |
| Remove All | Removes All the configured document settings | To remove all the configured document settings, select this option |
| Document Name | Displays the document's name | User Reference |
Undo Document Check Out
The Undo Check Out Document wizard screen is used for the undo of the document check out.

| Feature | What it is | How to use it |
|---|---|---|
| SharePoint Site URL | Specifies the SharePoint Site URL that should be used with the Undo Check Out function | Specify the SharePoint Server URL e.g. http://SPSServer:121 OR use the ellipse button to open Context Browser and select the SharePoint URL |
| Document Library | A SharePoint Document Library provides a central repository for team documents. This is an alternative to storing files in shared folders | Specify the Name of the Document Library by typing or drag-and-dropping it into the text box |
| Folder | A folder within the document library where the documents will be checked back in | Provide a folder name as a destination for the document |
| File Name | Adds the File Name | Specify the Name of the File to be checked in |
Document Content Field
The Document Content Field wizard screen specifies the content field that contains details for the document operation.
| Feature | What it is | How to use it |
|---|---|---|
| Content Field | Specifies the Content Field that should be used | Click on the ellipse button and browse to the relevant Content Field |
The Delete Documents function in the Documents Event Wizard is used to delete a document in SharePoint automatically as part of the workflow.
Information Required to undo a Documents' Check Out:
- An existing SharePoint Site URL
- An existing Document, DataField or XML Node
SharePoint Documents Wizard - Delete Documents
The Delete Document wizard screen is only viewed when the wizard is run in advanced mode. The screen provides an easy to use interface to automatically delete multiple documents within SharePoint.

| Feature | What it is | How to use it |
|---|---|---|
| Add |
To add documents, select the Drop Down Arrow and select the relevant location:
|
Select an option |
| Edit | Modifies the listing | Click on the configured setting and select this option, to edit a configured document setting |
| Remove | Removes document settings | Click on the configured setting and select this option, to remove a configured document setting |
| Remove All | Removes All the configured document settings | To remove all the configured document settings, select this option |
| Document Name | Displays the document's name | User Reference |
Delete Document
The Delete Document wizard screen is used to specify which document to delete.
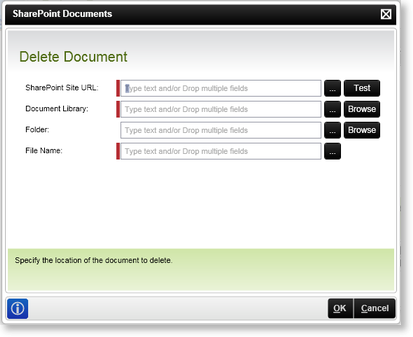
| Feature | What it is | How to use it |
|---|---|---|
| SharePoint Site URL | Specifies the SharePoint Site URL where the required document should be deleted from | Specify the SharePoint Server URL e.g. http://SPSServer:121 OR use the ellipse button to open Context Browser and select the SharePoint URL |
| Document Library | A SharePoint Document Library provides a central repository for team documents. This is an alternative to storing files in shared folders | Specify the Name of the Document Library by typing or drag-and-dropping it into the text box |
| Folder | A folder within the document library where the documents will be deleted from | Provide a folder name as a destination for the document |
| File Name | Adds the File Name | Specify the Name of the File to be deleted |
Document Content Field
The Document Content Field wizard screen specifies the content field that contains details for the document operation.
| Feature | What it is | How to use it |
|---|---|---|
| Content Field | Specifies the Content Field that should be used | Click on the ellipse button and browse to the relevant Content Field |
The Finished screen marks the end of the SharePoint Document Event Wizard. Click on Finish to close the wizard.
