Walkthrough: Create Secure Store Target Application
K2 SmartObject Services provides secure access to SmartObject data for each individual. SharePoint 2010 implements the use of Secure Store Target Applications to maintain the identity of the end user from the browser through to the line of business systems configured in BCS. This section explains how to create a new Secure Store Target Application can be used when configuring SmartObject Services WCF endpoints as external content types.
| Target Application Types | |
|---|---|
|
Individual |
Used for mapping each individual to a unique set of credentials on the external system. |
|
Group |
Used for mapping all the members of one or more groups to a single set of credentials on the external system |
 |
Although it is acceptable to configure a single account for a group of users in the secure store, to ensure security of the SmartObject data this is not recommended and therefore is not documented in this section. |
- Open a browser for SharePoint 2010 Central Administration.
- Navigate to Application Management > Manage Service Applications
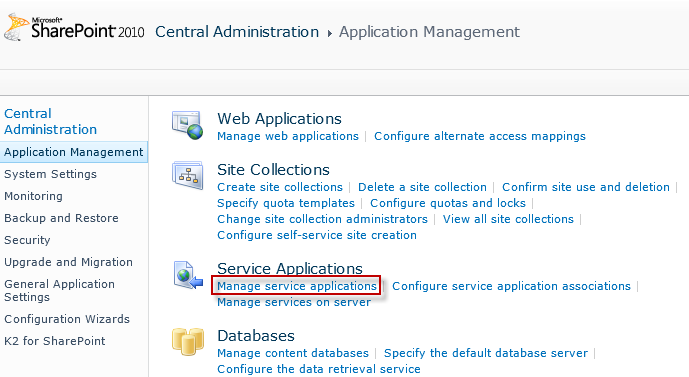
- Select the Secure Store Service and click on the Manage button on the ribbon

- If there are no Secure Store Target Applications, click on Generate a New Key and enter a Passphrase when prompted to create the new key. If an application or key already exists, skip to the next step.

- Click the New on the ribbon to create a new application.

- Enter an ID for the Application and Display name, for example K2 SmartObject Services Select Individual for the Target Application Type. Click Next.
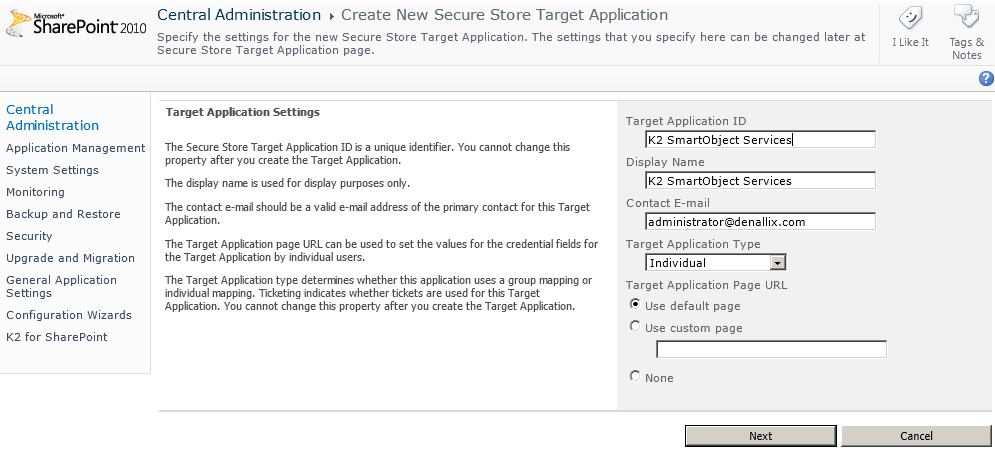
- Accept the default and click next on the following page.
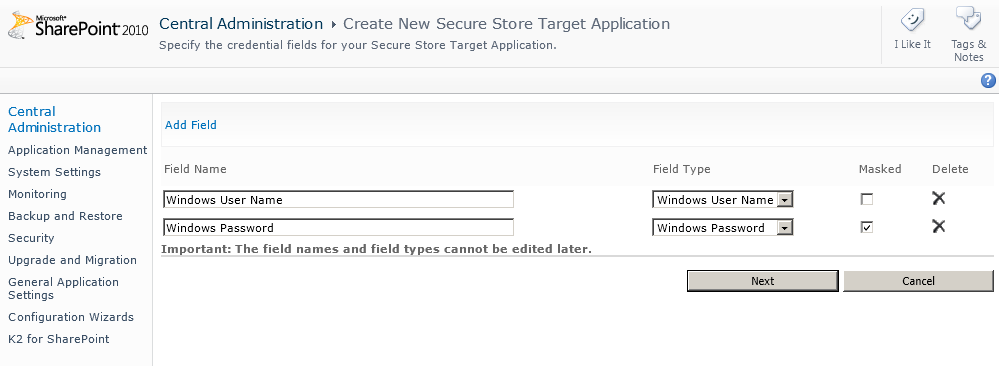
- Specify an administration account, for example Domain Admins. Click OK.
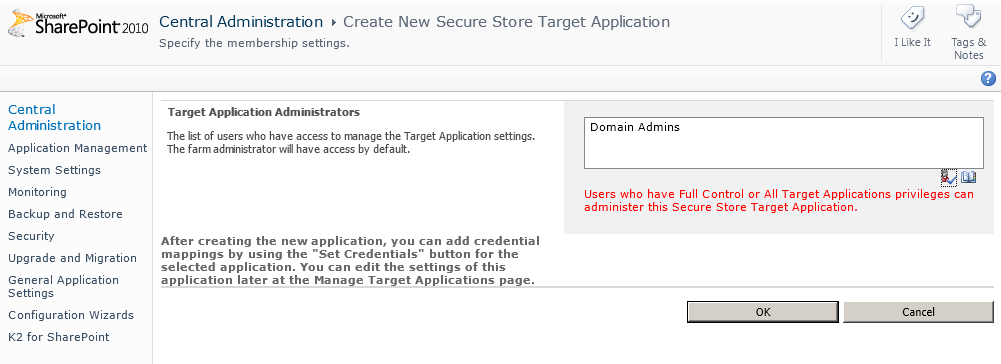
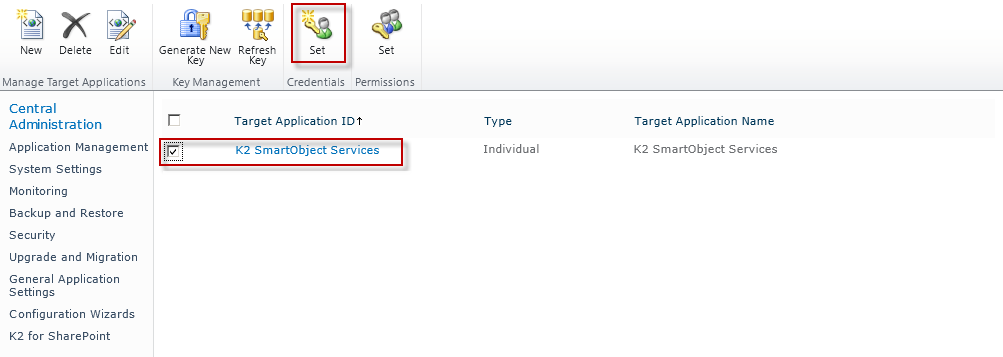
- Select the newly created Secure Store Target Application and click on the Set Credentials option in the ribbon.
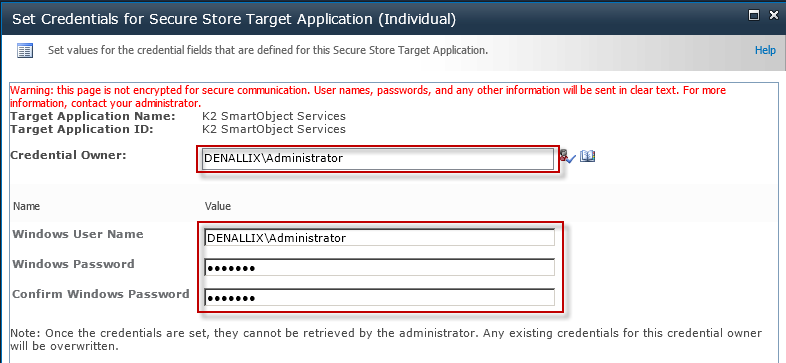
- Enter the Credential Owner (DOMAIN\USERNAME) for the person that will access the SmartObject data.
- Enter the Windows User Name and Windows Password (DOMAIN\USERNAME) for the person that will access the SmartObject data.
- Now that we have created an application in the Secure Store Service, we can use this information to configure SmartObject Services as an External Content Type. See Walkthrough: Create External Content Type.
