K2 Designer for SharePoint - Configuring the Outcome(s)
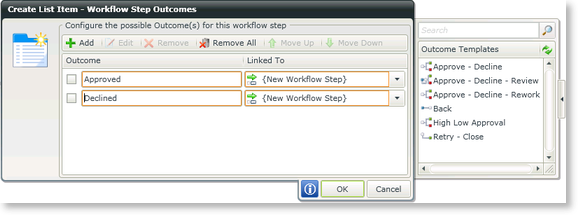
The outcome step determines the direction that the Workflow will follow. During the configuration of each wizard the outcomes can be configured by selecting the workflow steps icon on the relevant step on the design canvas.
 |
Watch a short video on how to use the Workflow Outcomes steps in K2 Designer for SharePoint. (Length 6 minutes). |

Fig. 1. Outcome Details
| Feature | What it is | How to use it |
|---|---|---|
| Add | Clicking on the Add button will open the Edit Outcome Rules screen | Select this option to add an Outcome Step |
| Edit | Edits a configured Outcome Step | Select this option to edit a configured Outcome Step |
| Remove | Removes the selected Outcome Step | Click on a configured Outcome Step and select this option to remove it |
| Remove All | Removes all the Outcome Steps | Select this option to remove all the Outcome Steps |
| Move Up | Moves the Outcome Step one position up | Select this option to move the Outcome Step one position up |
| Move Down | Moves the Outcome Step one position down | Select this option to move the Outcome Step one position down |
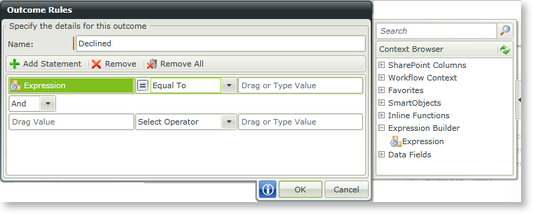
Edit Outcome Rule
The Edit Outcome Rules screen has the Add Statement option, allowing a user to add additional action outcome statement options to the step. Editing an outcome provides a way to add additional business logic, or rules, to the outcome client/server step.

Fig. 2. Outcome Rules
