SmartObject Services - WorkFlow Service
The Workflow service provides runtime services for K2 workflows, such as starting new processes or opening and completing worklist items for specific events in the workflow.
Note: the “Create Workflow SmartObjects” option must be checked and configured for each item in the workflow that you wish to create SmartObjects for.

| Setting | Value | Required |
|---|---|---|
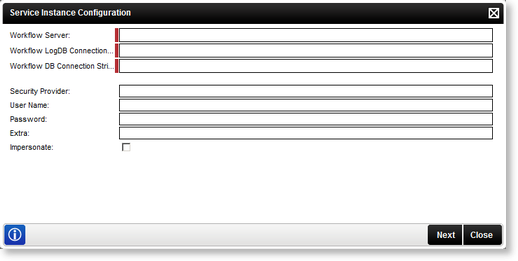
| Workflow Server | Enter the network location of the Workflow Server - e.g. localhost | This is a required field |
| Workflow LogDB Connection String | Enter the Workflow LogDB Connection String - e.g. server=localhost;database=k2log; uid=sa;pwd=k2pass; pooling=true;enlist=false;Min Pool Size=5 | This is a required field |
| Workflow DB Connection String | Enter the Workflow DB Connection String | This is a required field |
| Option | What to do | |
| Security Provider | Enter the Security Provider - e.g. SourceCode.Hosting.SecurityProviders.SmartBox | |
| User Name | Enter the user Name - e.g. Administrator | |
| Password | Enter the associated password - e.g. K2pass | |
| Extra | Provides additional information, for example dll paths needed. (Optional) | |
| Impersonate | Select this check box to enable impersonation rights. The impersonate option allows the K2HostServer service account to impersonate the user. | |
When configuring the rights the following applies:
- If the User Name and password is configured and the Impersonate checkbox is selected (set to True) the service will ignore the User Name and password and use Impersonate.
- If the User Name and password is configured and the Impersonate checkbox is not selected (set to False) the service will use SQL Authentication.
- If the User Name and password is not configured and the Impersonate checkbox is not selected (set to False) the service will use the K2 Service Account.
- If only the User Name and password is configured the service will use SQL Authentication.
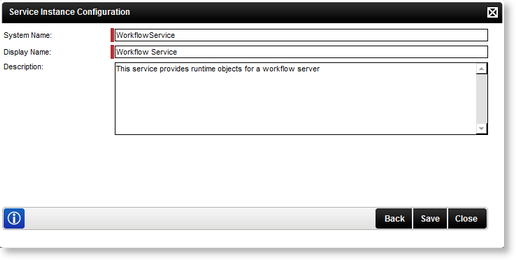
Clicking Next will load the Service Instance Configuration screen:

| Option | What it is | How to use it |
|---|---|---|
| System Name | The name of the SmartObject Service | Enter the name of the SmartObject Service |
| Display Name | A user friendly name for the SmartObject SmartBox Service | Enter a user friendly name for the SmartObject Service |
| Description | A description for the SmartObject Service | Enter a description for the SmartObject Service |
Edit Workflow Service
To edit a Service Instance, select the Service Instance, then click Edit. The Edit Service Instance screen will be loaded with the information as provided previously. Edit the information as required and click Save.
