Task Allocation SmartObject - AD Methods
 |
It is important to note that SmartObjects will only be available in the SmartObjects tool bar once it has been configured on the Configure SmartObject Access page |
The AD Methods comprise of the following:
-
- Get Manager - Will retrieve, and assign work to the current user's manager
- Get Direct Reports - Will retrieve, and assign work to the current user's direct reports
Single Method
The Get Manager Method of the Task Allocation - AD Methods SmartObject can be found by selecting the SmartObjects tab in the K2 Designer for SharePoint, then selecting the Task Allocation - AD Methods SmartObject from the list of SmartObjects available. Drag the method onto an activity.

Fig. 1. SmartObject Single Method
The SmartObject Wizard opens and the Input Properties screen is displayed. Tick the Update box next to the User Name and specify the User name in the Value field. The User Name represents the user who reports to the Manager, who will in turn be returned in the return property. The Manager of a User is specified in Active Directory. This is the Manager that will be returned. Click Next.
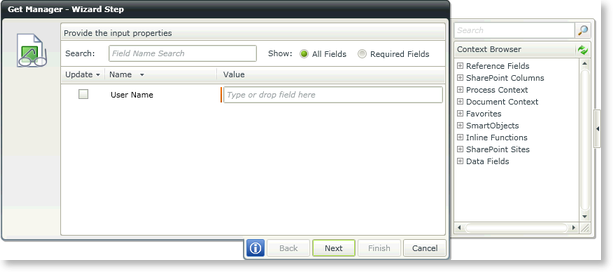
Fig. 2. Input Mapping screen
The Return Properties screen is displayed. Specify the property to be returned, which will be the Manager Name. This will be the Manager of the user specified on the Input Mapping screen. Click Finish.
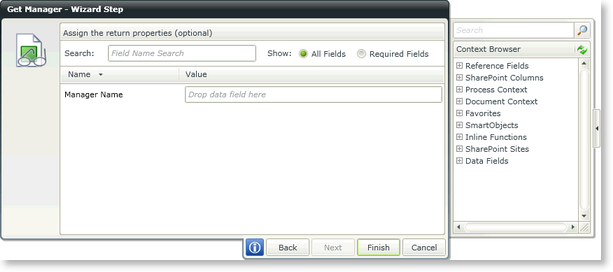
Fig. 3. Select a Return property
List Method
The Get Direct Reports Method of the TaskAllocationADMethods SmartObject can be found by expanding the SmartObjects node in the Context Browser, then navigating to Task Allocation - AD Methods.
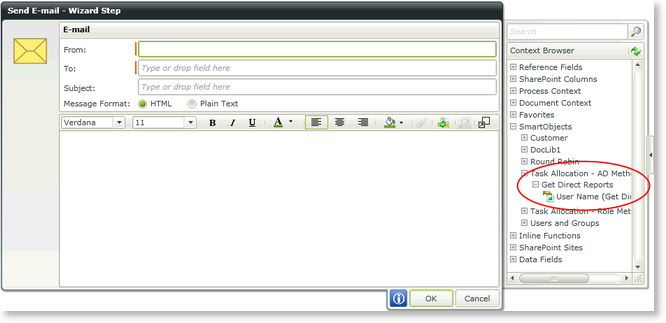
Fig. 4. SmartObject List Method
The SmartObject Wizard opens and the parameters screen is displayed. Specify the User Name. The User Name in this instance represents the Manager, and users returned will be users who reports directly to the Manager. A Filter can be applied to decrease the number of results to be returned. Click Next.
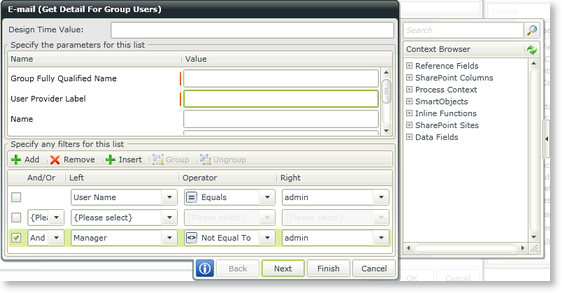
Fig. 5. Parameters and filter
| Filter Options | What it is | How to use it |
|---|---|---|
| Add | Adds a new instance of a filter | Click Add to add a new instance of a filter |
| Remove | Removes an existing instance of a filter | Select a filter, then click Remove |
| Insert | Inserts a new instance of a filter above the filter that is currently selected | Select a filter, then click Insert |
| Group | Groups two or more instances of a filter together | Select the instances and click Group |
| Ungroup | Undo the grouping of instances of a filter | Select the instances and click UnGroup |
The Return Property screen is displayed. Select the property to be returned, which will be the User Name, i.e user(s) who reports directly to the Manager as specified in the previous screen. Results can be ordered Ascending or Descending. Select the option most suitable from the List Options to return the list. Click Finish.
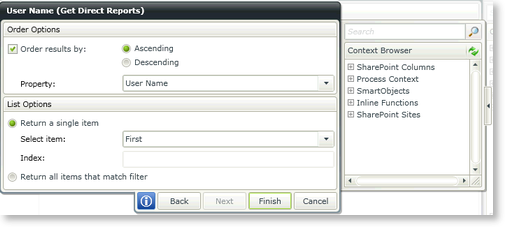
Fig. 6. SmartObject Return property screen
| Order Options | What it is | How to use it |
|---|---|---|
| Order results by | Results can be ordered Ascending or Descending | Select the option |
| Property | This is the property that will be returned | Select the property from the Context Browser |
| List Options | What it is | How to use it |
|---|---|---|
| Return a single item | Returns only a single item as specified in the Select item drop down or Index field | Choose First, Last or Index from the Select item drop down |
| Select item |
The following options are available from the drop down":
|
Select the required option from the list |
| Index | A specific item can be specified to be returned | Select Index from the Select item drop down and type the item number that should be returned, i.e. 5 |
| Return all items that match filter | Returns all the items that match the filter criteria | Select the option |
