1. Confirm the SharePoint App is Active; Add the K2 Worklist Web Part
In this step, you will confirm that the K2
- Create a subsite. Add a new subsite to build and store your K2 applications. This step is optional, but may be useful if you have multiple users working on tutorials from the same SharePoint location.
- If you do not know how to add a subsite, contact your SharePoint administrator for instructions specific your environment. Throughout this tutorial, there will be references to your SharePoint site. Keep in mind, this refers to your subsite if you create one, or to your root site, if you do not create a subsite.
- Confirm the K2 app deployment and activation. Begin by checking your site to see if the K2
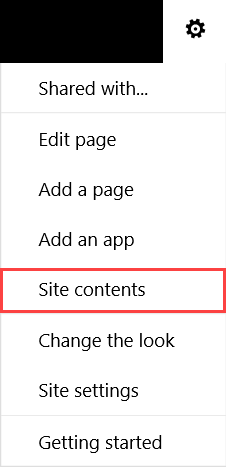
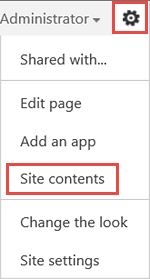
- From your site home page, navigate to the Site Contents page and confirm the K2 The images in this tutorial reflect SharePoint with Office 365. Your screen may not look exactly the same if you are on another version of SharePoint. Where necessary, additional notes will clarify version differences.If you do not see the app on the Site Contents page, it is likely the app is not deployed to the site collection.
The K2 app icon will vary depending on your environment
- From your site home page, navigate to the Site Contents page and confirm the K2
- Create a test list. From your site collection, create a new Custom List and name it K2 App Test. You don't need to add any other columns or make any other adjustments. You will use this list to confirm if the K2
- The easiest way to determine if the K2 app is active for your site collection is to create a new list or library, then look for the K2 icons in the ribbon toolbar. If the app is active, K2 adds the K2 group and icons to each new list and library. If the K2 group is not there, then the app is not active for this site collection and you will need to activate it. Begin by creating the test SharePoint list. Click the add an app icon, then click the Custom List app. Name the test list
K2 App Test
then click Create.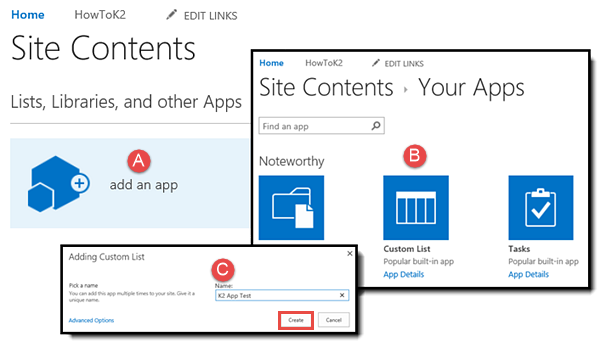
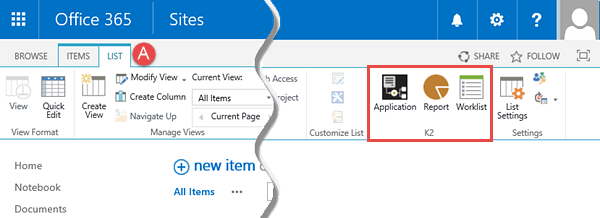
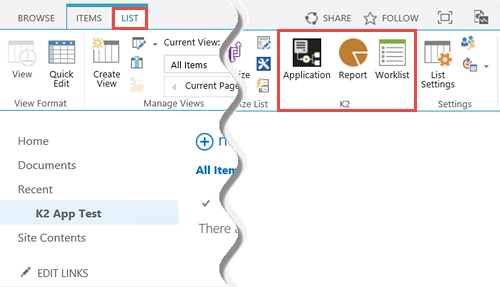
- After you create the test list, open the list. Click the LIST tab located in the ribbon toolbar and confirm you see the K2 group with the Application, Report and Worklist icons. If you see the K2 group and icons, the app is active at the site collection level you are working in. Continue to the next step to add the K2 Worklist web part. If you do not see the K2 group or icons, follow the steps in the Adding the K2
- The easiest way to determine if the K2 app is active for your site collection is to create a new list or library, then look for the K2 icons in the ribbon toolbar. If the app is active, K2 adds the K2 group and icons to each new list and library. If the K2 group is not there, then the app is not active for this site collection and you will need to activate it. Begin by creating the test SharePoint list. Click the add an app icon, then click the Custom List app. Name the test list
- Add the K2 Worklist web part to your site collection home page. Edit the home page of your site collection, then add the K2 Worklist web part to the page. There are no other configurations at this time. Save the page. If the K2 app is deployed and activated and you have added the K2 Worklist web part, you can continue now to the second topic. Scroll to the bottom of this page and use the link to continue.
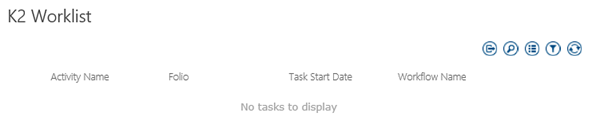
There are a number of ways you can action tasks assigned to you. One way is to work from the K2 Worklist web part. This web part features a list of all K2 tasks assigned to you. You can action the tasks directly from the worklist, or can open a task form (if configured) and action the task from the form. You will use the worklist throughout several K2 for SharePoint tutorials.
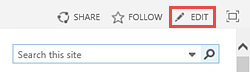
- Navigate to your site home page. From the home page, click the EDIT button in the upper right corner of the page.
Permissions required when adding the K2 Worklist web part. To add the Worklist web part successfully, you must be a member of a group that has permission to add and customize pages. Members of the site Owner's group have full control and therefore meet this requirement. Members of the site Member's group, by default, do not have the Add and Customize Pages permission level option. If you are working through this tutorial on a K2-provided VM, you are logged in as Administrator at the necessary permission level. If you are working in your own environment, confirm that you are either a member of the site Owner's group (with full control), or a member of the site Member's group with an edited permission level that includes the Add and Customize Pages option. If you are unsure of your permission level, contact your SharePoint administrator.
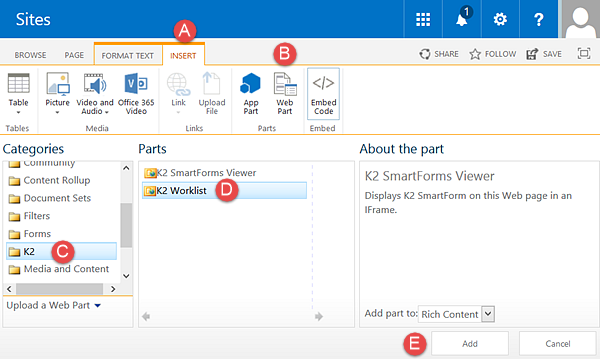
- Click the INSERT tab located in the ribbon toolbar. Click the Web Part option found in the Parts group. Click the K2 folder in the Categories pane. Click the K2 Worklist web part to highlight it. Click Add.
- After the web part has been added to the page, click the SAVE button in the upper right corner of the page to commit the change.

The K2 Worklist is one location you to find and action workflow tasks that have been assigned to you. You will use the K2 Worklist in future steps.
- Navigate to your site home page. From the home page, click the EDIT button in the upper right corner of the page.
If you have followed the steps above and find that the K2 app is either not deployed or not activated, use the following steps to configure the app. Depending on your environment, you may not have to perform all the steps below. If necessary, contact your
Configuring the K2
Install > Register > Deploy > Activate
First, you must install and deploy the app to the root site collection App Catalog. This step is generally part of the K2 product installation or upgrade process.
After the K2 product installation or upgrade process completes, you must register the app against the K2 server. The third step is to deploy the app to the site collection(s) where you will allow (or trust) the app (which establishes permissions and connection between K2 and the site collection). After deploying the app, you can activate it for use in site collections, which simply means enabling features such as service instances, management SmartObjects and list and library menu options. You can configure the deployment and activate steps to run automatically so that when you add new subsites, K2 discovers them, then deploys and activates the app for you. Once you have activated the app for a site collection, it is ready for use within the site and subsites.
- Confirm the app is installed by navigating to the root site collection's App Catalog. You can access this page via the SharePoint Central Administration > Apps. Generally speaking, you install the app during the SharePoint integration when installing or upgrading the K2 product. You should see the app listed under Apps for SharePoint. If it is not, contact your
- Navigate to the App Catalog associated with the root site collection you are working in.
- Confirm the K2
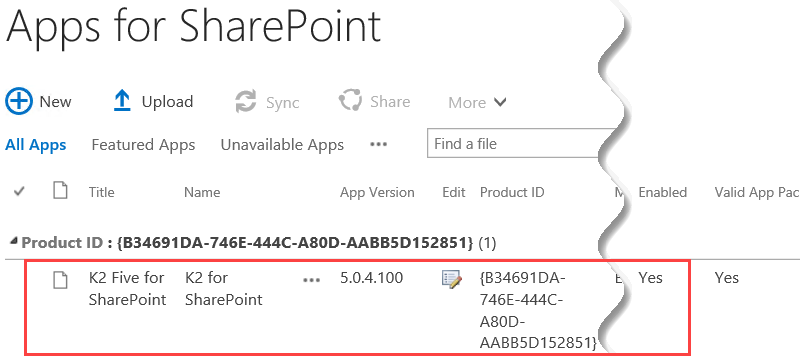
If you can see an entry for the app, then its installation is complete and you can continue with the Deploy steps. If the app is not displayed, then you must install it first to the App Catalog.
- Navigate to the App Catalog associated with the root site collection you are working in.
- Install the K2
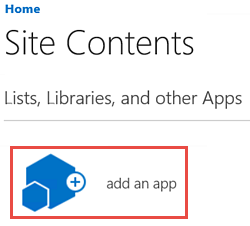
- From the App Catalog, navigate to the Site Contents.
- Click the add an app icon.
- Under the Apps you can add heading, click the K2 Five for SharePoint icon. (The app may have a different name, depending on the K2 product you are working with.)
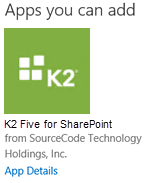
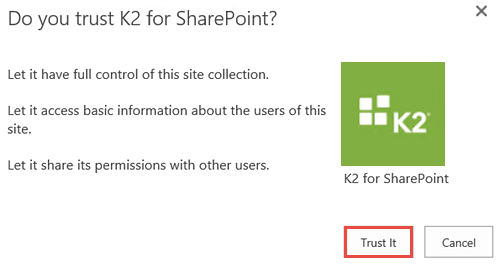
- On the Do you trust K2 for SharePoint screen, click Trust It.(The app may have a different name, depending on the K2 product you are working with.)
K2 will add the app. During this time, the app icon will be grayed out with a message that reads K2 is adding the app. When you see the full-color icon, K2 has added the app. (The app icon may have a different name, depending on the K2 product you are working with.)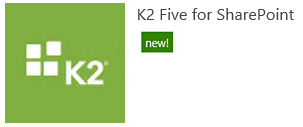
- Register the app against the K2 server. This step establishes the connection between the K2
- From the App Catalog > Site Contents page, click the K2
- On the Configure Link to K2 Server page, enter the URL to your K2 server. If you are on a K2-provided VM, the server URL is
https://k2.denallix.com
then click Next. If working in your own environment, enter the URL to your K2 server.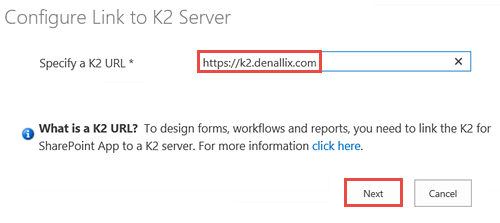
- From the App Catalog, open Site Contents.
- Locate the K2
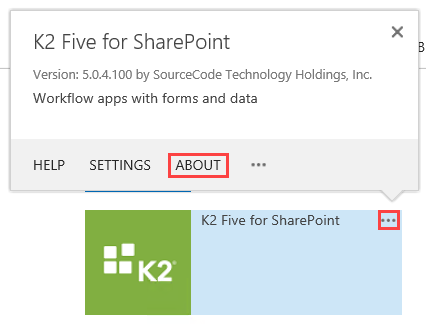
- On the K2 for SharePoint page, click GET IT.
- Click TRUST IT on the Do you trust K2 for SharePoint pop-up.
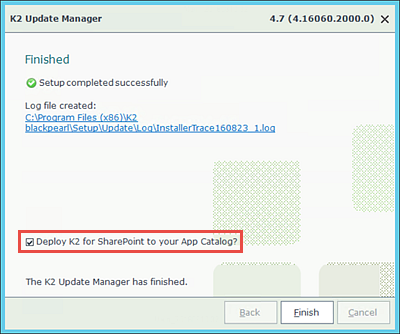
- The installer will update the app to the current version.
- Re-run the registration wizard.
- Click Finish after you see a green check next to each configuration. You should be on the App Catalog > K2
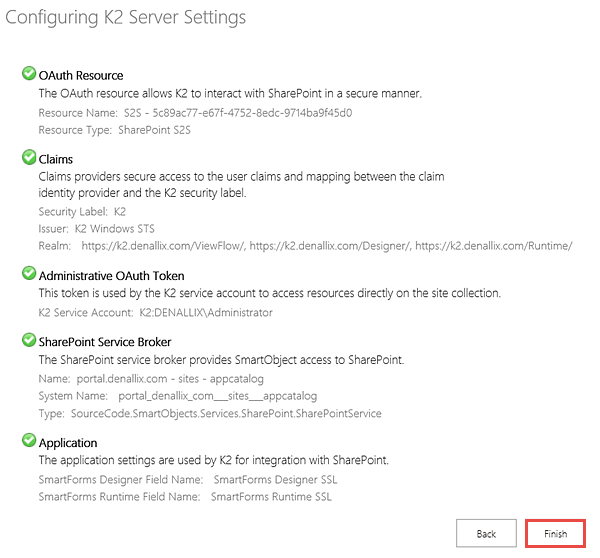
K2 will validate the URL. You will see the Configuring K2 Server Settings screen. This is where the configuration for authentication protocols, the SharePoint service broker and application settings take place.
If you see an error indicating a newer version of the app is available, you must update the current app before continuing. - From the App Catalog > Site Contents page, click the K2
- Deploy the app to your site collections to make it available for activation at the site collection level. You can deploy the app to the root site collection, then activate it later to only those sites and subsites where you want to use it.
Now that you have registered the app, you will deploy it to any site collections where you want to use it. Unless you have security policies in place that dictate otherwise, deploy the app to the root site collection where you will use it. You can choose which sites and subsites to activate the app for later. This gives more granular control over where you can use the app.
To deploy the K2- On the App Catalog > K2
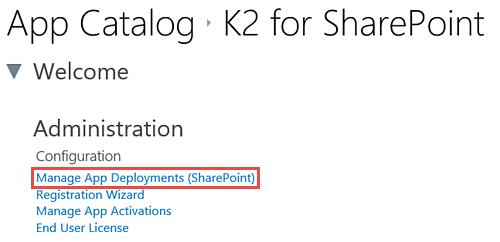
- You should be on the Manage App Deployments > K2 blackpearl for SharePoint page. Begin by entering the URL of the root site collection you are deploying the app to into the Enter a site collection to deploy to text box. If you are on a K2-provided VM, the site collection URL is
https://portal.denallix.com
then click Add (the button is just right of the text box). The site collection will be displayed in the Site collections to deploy to box.Even if you created a subsite earlier, the best practice is to deploy the app at the root level. From there, you can activate the app to specific site collections or subsites if desired. At the root level, the app is available across all sites.
- In the Managed Paths section, click to highlight All Paths, then click the Add button just right of the Available managed paths box. See the image above for reference, if needed.
- In the Site Templates section, leave the default settings in place. You will not filter the K2 app deployment by site template. At the bottom of the screen, click OK. When you see the Do you trust K2 for SharePoint screen, click Trust It. After the app deploys, you will redirect back to the App Catalog > Site Contents page.
If you have managed paths within your SharePoint environment, you can select which paths should have the K2 app deployed to automatically. K2 recommends using the All Paths option so that the app deploys to any site collections or subsites when created. You can use the activation settings to control which site collections or subsites have the app automatically activated. - On the App Catalog > K2
- Activate the app to the sites and subsites where you want to use it. This gives you more granular control over where you can use the K2 app. Activating the app enables the app features such as system SmartObjects, as well the K2 group options located in the ribbon toolbar for lists and libraries. You will need your SharePoint site URLs for this step. If you are on a K2-provided VM, use https://portal.denallix.com. At this point, you have deployed the app as a Global Admin, SharePoint Online or Tenant Admin. Activating the app requires site collection administrator permissions at a minimum. Confirm you have the necessary permissions before proceeding. Contact your SharePoint administrator if you have questions regarding your permission level. (If you are using a K2-provided VM, you are logged in as Administrator and can proceed)
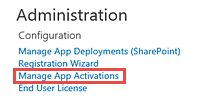
- On the App Catalog > Site Contents page, click the K2 app icon. The icon may look slightly different than the image below, depending on your environment.
- Under the Administration heading, click the Manage App Activations link.
- Begin by entering a site collection URL into the Activation text box, then click Activate. This may take a few minutes, depending on how many subsites you have within the site collection structure. If you are on a K2-provided VM, enter
https://portal.denallix.com
then click Activate.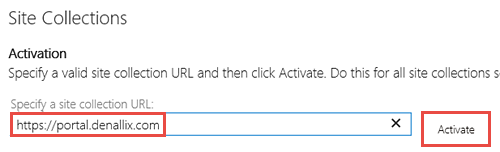
On the Configure Activation Settings page, there are three sections to note. Under the Deployment section, there is an option to Enable auto-activation on sites where the app is deployed for any new site collections or subsites. By default, this option is set to TRUE, but you can deselect if you need to have more granular control over where the app is active.
The Activation text box is where you will enter the URL for the site collection you want the app activated for. K2 recommends activating the app at the root site collection. The Uninstall box displays site collections where the app is currently activated. Here, you can select a site collection and remove the app, if desired.
When you remove a site collection from the App Activation Settings, you are resetting SharePoint back to its pre-K2 app configuration. Any K2 artifacts (such as SmartObjects, SmartForms and workflows) that existed will still exist on the K2 server, however they will no longer be visible from the site collection.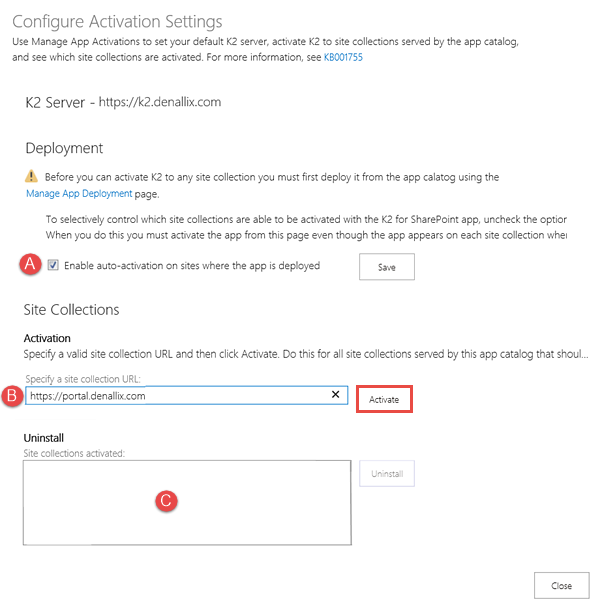
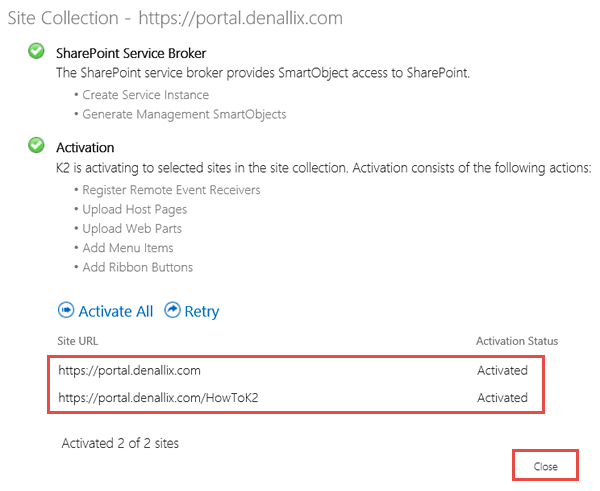
The activation process begins. During this time, you will see a green check appear next to the SharePoint Service Broker section and then the Activation section as those features active. After both checks appear, your site collections and subsites will display under the Activate All heading, if you activated at the root site collection level. You should see a status of Activated. Click Close. Click Close once again to exit the Configure Activation Settings page.
- On the App Catalog > Site Contents page, click the K2 app icon. The icon may look slightly different than the image below, depending on your environment.
- Confirm the app activation by returning to the test list you created in the first part of this topic. Click the LIST tab, then confirm the K2 group and icons are there.
If you can see the K2 group and icons, congratulations! You have successfully configured the K2
- Navigate back to your SharePoint site or subsite and open the K2 App Test list you created earlier. Click the LIST tab above the ribbon toolbar. Confirm there is now a K2 group that has Application, Report and Worklist icons displayed. The K2 app is now ready for use!
- Return to Step (4), Add the K2 Worklist web part and add the K2 Worklist web part to your site collection home page. After you add the K2 Worklist, you are ready to continue with this tutorial.
- Navigate back to your SharePoint site or subsite and open the K2 App Test list you created earlier. Click the LIST tab above the ribbon toolbar. Confirm there is now a K2 group that has Application, Report and Worklist icons displayed. The K2 app is now ready for use!
- How to update the app activation for new site collections. This step describes how to activate the K2 app for immediate use. During the K2 app deployment, you have the option for K2 to automatically apply the app to any new site collections. K2 schedules this "job" from a timer and depending on the settings, may not run for several minutes, or even hours. If you need to use the K2 app immediately in the new site collection, you can manually "push" the activation out to the site. From the Site Contents page, click the K2 app to launch the administration page. Under the Administration heading, click Activate Site Collection. The K2 app activates for the current site collection and is ready for use.
- After adding a new subsite or site collection, navigate to its Site Contents. Click the app to launch the K2
- Under the Administration heading, click Activate Site Collection.
You should see the activation processing screen. When complete, the app is ready for use. Remember, you must have site collection administrator permissions at a minimum to activate the app at the site collection level. You can also manually activate the app to a new subsite or site collection from the App Catalog. Follow the Activate steps for this scenario.
If you do not see the K2 - After adding a new subsite or site collection, navigate to its Site Contents. Click the app to launch the K2
Review
In this step, you confirmed the activation of the K2 for SharePoint app. You have registered, deployed and activated the app to your SharePoint site collection. K2 recommends deploying the app to the root site collection level with the All Paths option. Any site collections or subsites added will have the app available with out further intervention. You can also enable the auto-activation option, which enables the app to any new site collections or subsites. After confirming the app deployment and activation with your test list, you added the K2 Worklist web part to your site home page.