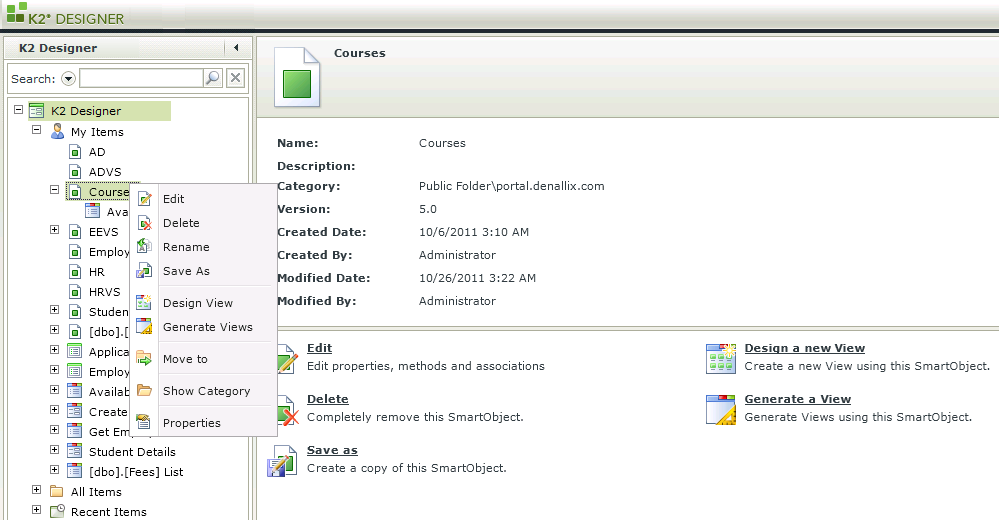
SmartObject Context Menu
Once a SmartObject has been created there are certain actions applicable to each SmartObject. To view the available actions select a SmartObject in the category tree and right-click. The context menu will open. Alternatively, the actions are available on the Properties screen which can be accessed by a single click on a SmartObject.

| Action | What it does | How to use it |
|---|---|---|
| Edit | Allows the SmartObject properties, methods and associations to be modified | Select the SmartObject and click Edit |
| Delete | Removes the SmartObject | Select the SmartObject and click Delete |
| Rename
|
Allows the name of the SmartObject to be changed | Select the SmartObject and click Rename |
| Save As | Creates a copy of the SmartObject | Select the SmartObject and click Save As, supply a name and category to save the SmartObject to |
| Design View
|
Allows a View to be manually created from the selected SmartObject | Select the SmartObject and click Design View |
| Generate Views | Allows a View and Form to be automatically created from the selected SmartObject |
Select the SmartObject and click Generate Views.
|
| Move To | SmartObjects can be moved to different Categories | Select the SmartObject and click Move To, browse to the category where the SmartObject must be moved to and select OK |
| Show Category | Will take the user to the location of the SmartObject in the Category Tree |
Select the SmartObject and click Show Category |
| Properties | Will open the Properties screen where the SmartObject details and Actions can be viewed | Select the SmartObject and click Properties |