Creating SmartObjects
Creating SmartObjects consist of creating properties, methods and associations. A wizard assists you with the creation of these properties and methods. The following wizard screens detail the specific steps involved. To start the wizard right -click on a category in the Category Tree and select New SmartObject from the available options. Once a SmartObject has been created the wizard can be reopened by selecting the Edit SmartObject option.
When editing a SmartObject any step in the wizard can be accessed immediately by clicking on it in the breadcrumb rather than stepping through the entire wizard.
This screen captures the SmartObject name, location and type of SmartObject to be created.
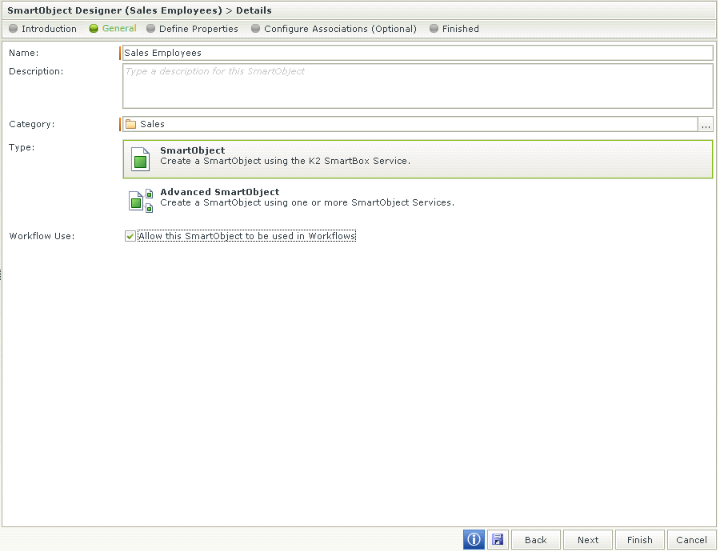
| Field | Description |
|---|---|
| Name | The Name of the SmartObject. Each SmartObject must have a unique name as duplicate SmartObjects are not allowed. The following special characters are not allowed: #%&*\\|:;"\/<>? |
| Description | The Description of the SmartObject |
| Category | The Category where the SmartObject should be saved |
| Type |
The type of SmartObject:
|
| Allow this SmartObject to be used in a Workflow |
All SmartObjects created will be reflected in the category tree on the left. In order for any SmartObject to be reflected in the K2 Workflow Designer's SmartObjects tab, it has to be selected on this SmartObject screen. For example, if a Task Allocation SmartObject such as Users and Groups is to be used, you will need to edit the specific SmartObject from the category tree and select the Allow this SmartObject to be used in a Workflow option on the SmartObject screen.If this is not done, the SmartObject will not surface in the SmartObjects tab in the K2 Workflow Designer for use in a Workflow. |
Changing the SmartObject Name will only change the display name and not the system name. The change will automatically be carried through to any Views , Forms or Workflows using the edited SmartObject.
This screen is used to add properties and methods for the SmartObject. The Define Properties screen will display differently depending on the type of SmartObject selected. The Define Properties and Methods screen has two tabs at the top:
- Properties - The K2 SmartObject Properties are the attributes that define the object. They are things like First Name, Last Name, Social Security Number, department and so on. Properties are created manually when a user creates the SmartObject or they are retrieved via a service and the SmartObject is created to expose / surface the properties from the back end system.
- Methods (Advanced SmartObject) - SmartObject methods are categorized into two types:
- The Data Create / Save & Delete category. These method's are used to populate the K2 SmartObject with record instances.
- The Load / Get List category which retrieves record instances from the K2 SmartObject .
Creating a simple SmartObject will create single SmartBox service SmartObjects. Here you can specify the required properties but not the methods. The methods are automatically created for the SmartObject and will consist of the default methods, namely, Create, Save, Load, GetList and Delete.
When creating Advanced SmartObjects the user has the option to create properties and methods, select from existing Service Objects and create mappings between properties and methods.
The Properties tab is displayed by default for simple and advanced SmartObjects.
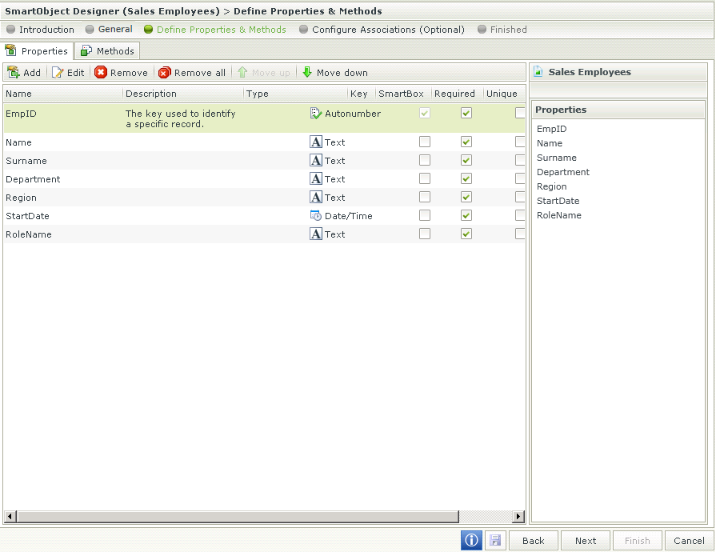
| Action | Description |
|---|---|
| Add | Opens the Add SmartObject Properties screen |
| Edit | Opens the property for editing |
| Remove | Removes the selected property |
| Remove All | Removes all the properties |
| Move Up | Changes the position of the property selected with the property above it |
| Move Down | Changes the position of the property selected with the property below it |
See the following topics on Adding and Editing properties and methods:
Simple SmartObject Properties and Methods
Advanced SmartObject Properties and Methods
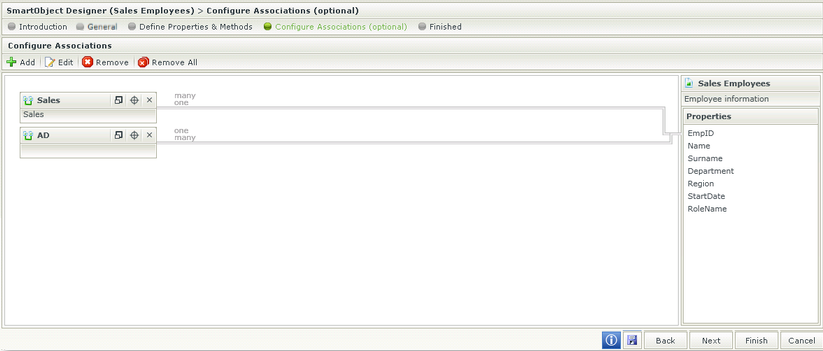
Associations allow for the defining and managing of relationships between SmartObjects. Associations can be configured between different SmartObjects and/or between Workflows and SmartObjects. The K2 SmartObject Association Wizard configures mappings between the current SmartObject's properties or Workflow and the properties of other SmartObjects and in so doing a relationship is built between various SmartObjects. When 2 SmartObjects are associated the SmartObject Association wizard will guide the user through the Workflow, editing the SmartObject to add a foreign key field. If required the wizard will create a SmartBox Service Object to hold a foreign key and the mapping of methods to make use of this data.
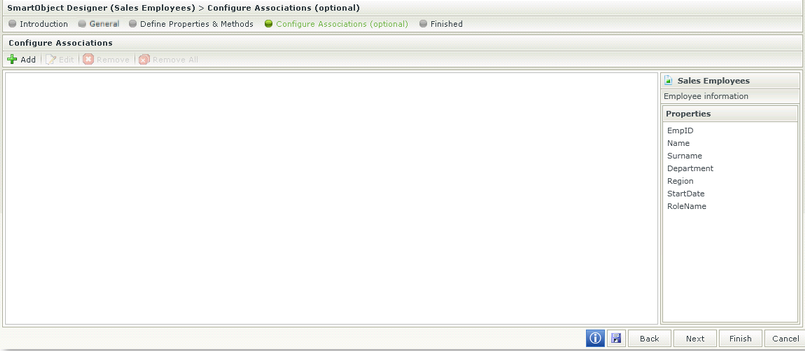
The associations between the SmartObjects can be viewed on the canvas after the associations have been made. To edit or remove an association, click on the associated SmartObject on the left to enable the functionality to edit or remove. The
 icon on the specific association window can also be selected to edit the association. Clicking the icon will open the Association wizard for editing.
To view the exact properties that have been mapped click on the first icon on the association window known as the expand icon as demonstrated below:
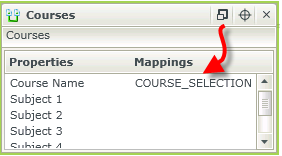
The association windows can be moved around on the canvas by hovering over the window until the mouse pointer changes to a hand. Then click on the window, hold and drag the window to the new position.
The Select a SmartObject screen requires the user to select the SmartObject that will be associated with the current SmartObject. This can be a SmartObject created in SmartForms, K2 Designer for Visual Studio, K2 Studio. SharePoint and SQL SmartObjects
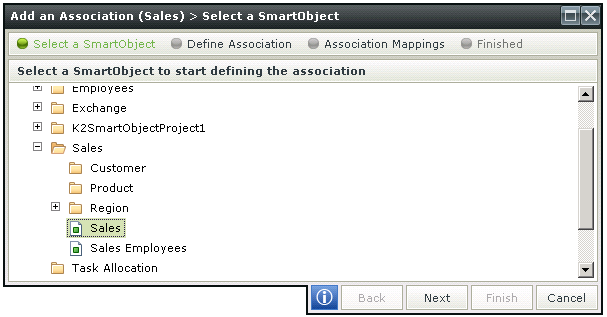
Select the SmartObject to be associated with the current SmartObject. Once the SmartObject has been selected click Next to proceed.
The DefineAssociation screen requires the user to specify the type of relationship between the SmartObjects. The type of relationship will determine the next wizard screens required for configuration.
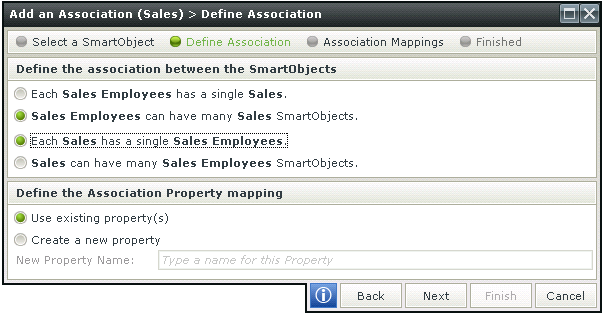
| Fields | What it is |
|---|---|
| Each Sales Employees has a single Sales | Defines the classification of the database relationship |
| Sales Employees can have many Sales SmartObjects | Defines the classification of the database relationship |
| Each Sales has a single Sales Employees | Defines the classification of the database relationship |
| Sales can have many Sales Employees SmartObjects | Defines the classification of the database relationship |
| Use existing property(s) | Specifies whether to use existing property(s) to map to |
| Create a new property | Specifies whether to create a new property to map to in the current SmartObject |
| Relationship | Combination |
|---|---|
| One to One |
|
| One to Many |
|
| Many to One |
|
| Many to Many |
|
The relationship selected will determine the wizard screens from this point on
Many to Many relationships will result in the creation of a composite SmartObject, this will require the following:
- The current SmartObject must have a Key
- A name is specified for the new composite SmartObject that is created. The following special characters are not allowed: #%&*\\|:;"\/<>?
The composite SmartObject is created in the SmartBox and is surfaced in the Category Tree.
The Association Mappings screen requires the user to capture the property mappings between the SmartObjects
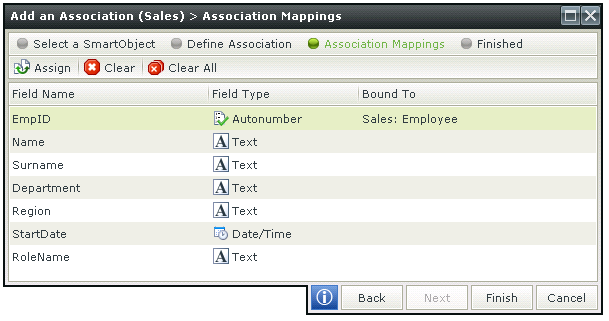
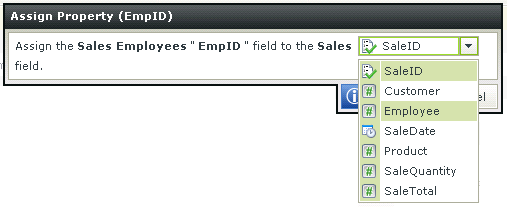
When selecting a property and clicking on Assign, the Assign Property screen opens. From the drop down list select the property to map from the available properties of the current SmartObject.
This screen indicates the end of the wizard and the successful creation of the SmartObject. A new View
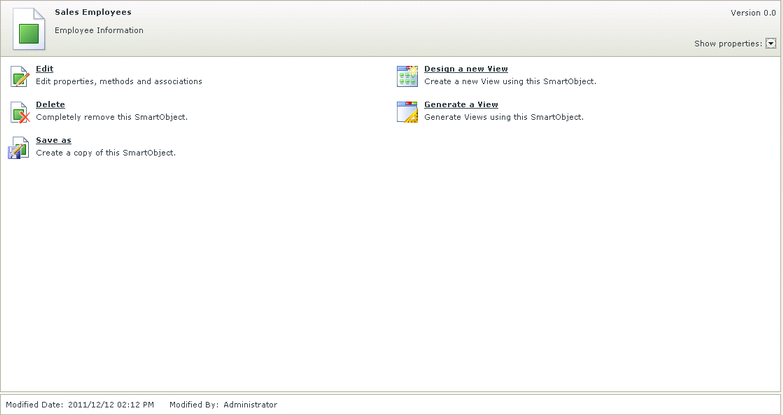
| Action | Description |
|---|---|
| Edit | Opens the SmartObject Designer wizard |
| Delete | Deletes the SmartObject |
| Save As | Creates a copy of the SmartObject |
| Design a new View | Opens the View Designer with the information of the SmartObject pre-populated |
| Generate a View | Opens the Generates View screen. On this screen, the type of View to be created can be selected as well as whether a Form should be generated |
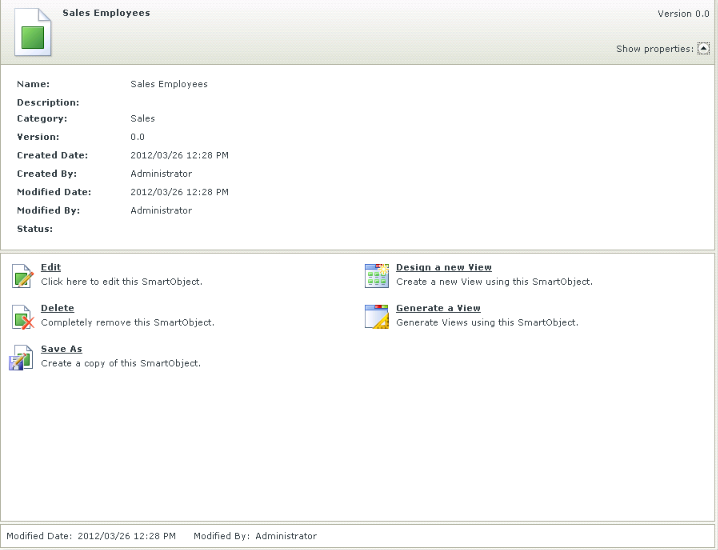
Clicking on the Show Properties arrow on the right of the canvas will open the specific properties of the SmartObject as shown below
When clicking on the Save As option, the Save As screen opens. On this screen, a new name can be entered for the new SmartObject, a description can be provided and a category can be selected where the new SmartObject should be saved. By selecting the Save As feature, the details of the current SmartObject is used to create a duplicate SmartObject, but saving it under another name. This provides the ability to create multiple SmartObjects that are more or less similar in design, but without duplicating the effort.
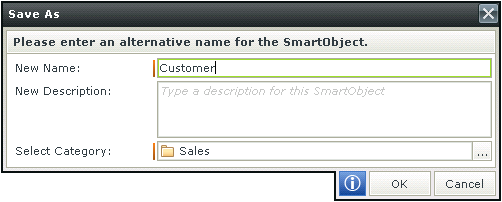
| Field | Description |
|---|---|
| New Name | Represents the new name given to the duplicate of the current SmartObject |
| New Description | Represents the new description given to the duplicate of the current SmartObject |
| Select Category | List of categories available where the new SmartObject can be saved |
When clicking on the Generate a View option, the Generate Views screen opens. On this screen, the type of View to be created from the SmartObject can be selected as well as if a Form should be created and the specifications for the Form. SmartForms will automatically create the selected View and Form if required for the user based on all the SmartObject properties and methods.
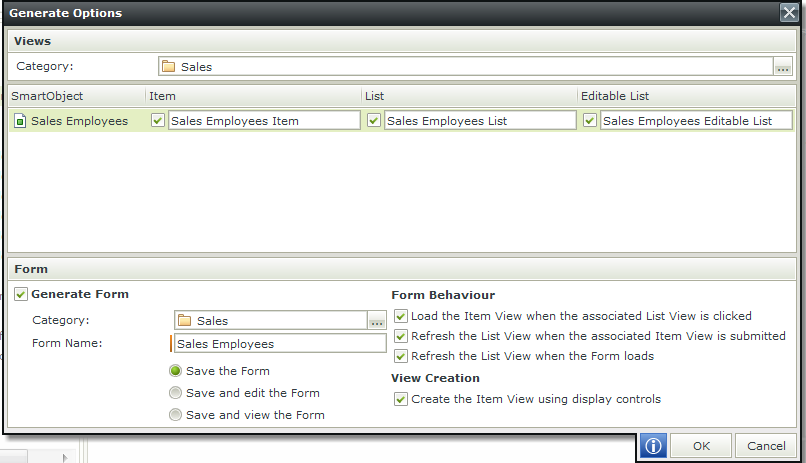
| Field | Description |
|---|---|
| Category | Represents the Category where the Views and/or Form will be created |
| Item/List/Editable List | Enables the View creation |
| Create a Form | Creates a Form using the current SmartObject and Views selected |
| Form Name | Specifies the name of the Form to be created |
| Save the Form | Saves the Form |
| Save and edit the Form | Saves the Form and opens the Form Designer to enable editing |
| Save and view the Form | Saves the Form and opens the Form to view |
| Form Behavior | Determines the behavior of the Form |
| View Creation | Uses display controls when the Item View is created |
Selecting this option will result in a read only SmartForms being created. This is typically useful when SmartForms are to be created where no input is required and only data should be displayed, such as an account statement.
When selecting the Create the Item View using display controls option, the following is applicable:
- The View is read only, in other words, no data can be captured in runtime
- The controls are displayed as Labels
- A label can be selected and the properties of the control can be edited
- The SmartForms will only contain display controls and no input controls
- No methods are added to the View
When this option is not selected, the following is applicable:
- The View is fully editable and data can be captured in runtime
- The type of control as configured in the SmartObject Designer is added to the View
- Controls can be edited
- The SmartForms can contain both input and display controls
- Methods are added to the View as configured in the SmartObject Designer