Creating the SmartObject Associations
Associations on the Student SmartObject
- Edit the Course SmartObject by double clicking on the Course SmartObject in the Category tree.
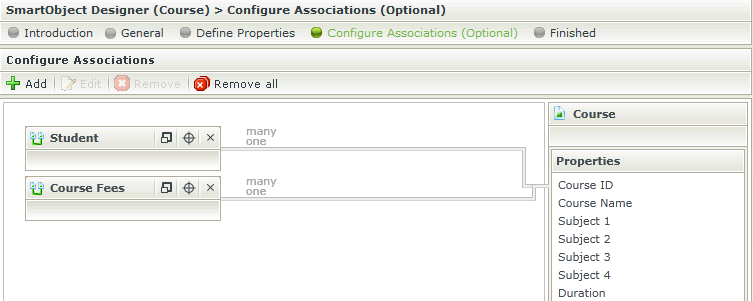
- In the SmartObject wizard navigation steps click on the Configure Associations (Optional) step.
- Click the Add button.
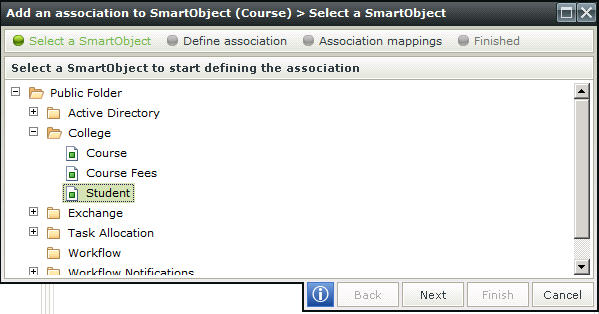
- Expand the College folder in the category tree.
- Select the Student SmartObject.
- Click Next.
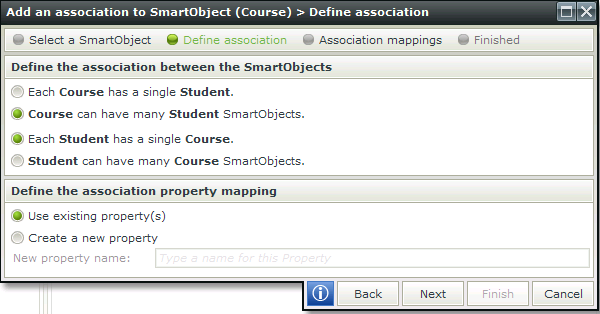
- Ensure that the following options are selected
- Course can have many Student SmartObjects
- Each Student has a single Course
- Use existing property(s)
- Click Next.
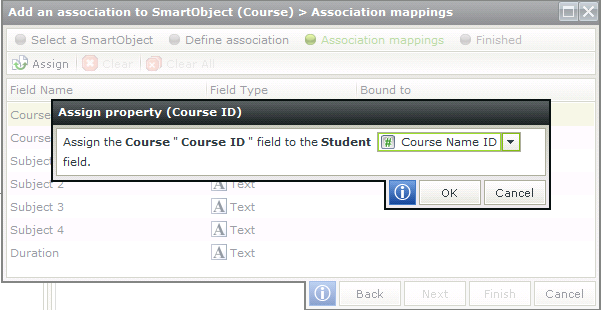
- Select Course ID and click on the Assign button.
- Click on the drop down box and select Course Name ID from the list. Click OK.
- Click Finish.
- Click the Add button.
- Expand the College folder in the category tree.
- Select the Course Fees SmartObject.
- Click Next.
- Ensure that the following options are selected
- Course can have many Course Fees SmartObjects
- Each Course Fees has a single Course
- Use existing property(s)
- Click Next.
- Select Course ID and click on the Assign button.
- Click on the dropdown box and select CourseID from the list. Click OK.
- Click Finish.
- Click Finish to save the SmartObject changes. The Course SmartObject will be saved and you will return to the SmartObject properties screen.

|
K2 smartforms Product Documentation: User Guide4.6.10