Creating the Course Fees SmartObject
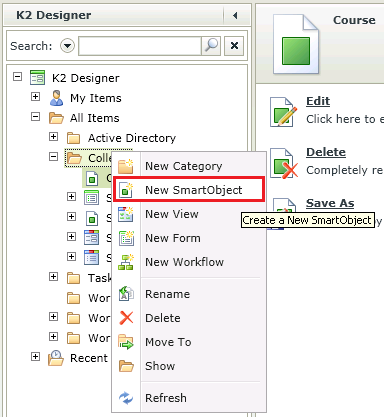
- Find the College folder in the category tree, right-click and select New SmartObject.
- Click Next on the Introduction screen.
- Type Course Fees in the Name Field for the SmartObject.
- Note that the College Category is pre-populated for you, or you can click the ellipsis button to change the category.
- We will be creating a SmartBox SmartObject therefore, the Type of SmartObject will be the first option called SmartObject. Ensure that the Type field has a green border around it to show that it has been selected.
- Click Next.
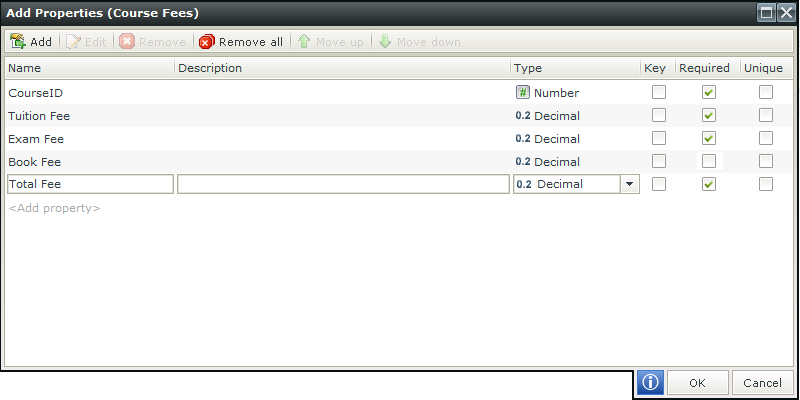
- On the Define properties screen click on the ID property and select the Edit button.
- Change the name from ID to Course Fees ID. Click OK.
- Click on the Add button. Add the following properties by clicking on <Add properties>.
| Property Name | Type | Required |
|---|
| CourseID | Number | Yes |
| Tuition Fee | Decimal | Yes |
| Exam Fee | Decimal | Yes |
| Book Fee | Decimal | No |
| Total Fee | Decimal | Yes |
- Click OK.
- Click Finish to save the SmartObject. The Course Fees SmartObject will be created. When it completes, you will see the properties screen.

|

|
K2 smartforms Product Documentation: User Guide4.6.10