Build Pane
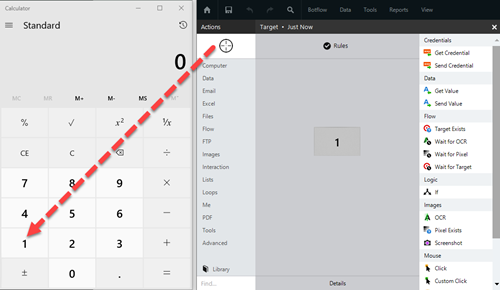
The Build Pane displays after you select a targeted element in a Windows application.
The Build Pane lets you:
- Preview an acquired target element from a Windows application.
- Define how selected target elements are used in actions.
- Manage the Rules Required to locate a target and vary based on the targeted application. used to locate the target element.
Selected target elements display in the Build Pane with a list of actions supported by the targeted item. The Build Pane also displays how long the item has been targeted.

Some actions have rules required to locate a target and vary based on the targeted application.
Rules of a targeted application element are configured and saved with the action. The rules are then used to locate the proper targeted element, such as an Microsoft Excel workbook.
To set the most common rules type:
- Click Rules from the Build Pane Area to add new actions and edit existing actions. or the Action Builder The Action Builder window provides access to the tools needed to create and modify Actions or instructions within a botflow. window.
- Adjust the available rules as required.
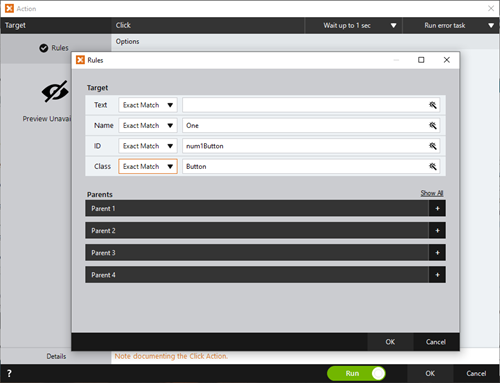
The Rules window displays the Rules available for the selected targeted application.
- Click OK to save the Rules.
- Some targets provide no rules.
- Most targets provide at least the text of the target, such as 'Log in' for a log in screen action.
- Some targets provide a name to identify the target (a unique developer-defined control name).
- Some targets provide an ID (a unique identifier that locates an item based on how it appears in the target).
- All targets use the following rules:
- Ignore: Ignores the value of the selected rule.
- Exact Match: Uses an exact match when considering the value of the rule.
- Best Match: Uses a best match when considering the value of the rule and uses a variety of information to locate the target.
- Left Match: Uses leading characters when considering the value of the rule based on a specified number of leading characters.
- Right Match: Uses trailing characters when considering the value of the rule based on a specified number of trailing characters.

Rules used when targeting tables in a web environment may interact with dynamic collections of data within the web tables.
Actions for web tables often require adjustments to the Rules to properly locate the target.
To adjust web table rules:
- Click Rules.
- Show Less/Show All: Toggles the table display.
- Bridge: No (default) select Yes: TBD
- Ignore Position (default): The default setting is set to ignore the position of dynamic positoned web tables. Click the drop-down to change to Exact Position if the target web table position is static, which could increase the Action speed. Click the X to close the drop-down and save the setting.
- <number> Columns: The number of columns of the targeted web table displays by default. Click the drop-down to change from Exact Count to Ignore Count if the number of web table columns could change.
- Left Match (default): Click the drop-down to Ignore (should table headers contain dynamic information) or Ignore (column). Otherwise, use Left Match to define the Column Header Length.
- Length: Enter the required Column Header length, or use the up and down arrows to adjust the required value.
- Click OK to save the settings.
The Rules window displays with additional Table rules.
Rules used when targeting a terminal emulator control the Connection Letter to the targeted emulator.
To change the Connection Letter:
- Click Rules
- Enter the required Connection Letter.
- Click OK to save the Rule with the Connection Letter.
The Emulator-specific Rules Window displays.
Rules used when targeting an FTP Action control the Connection Letter to the targeted FTP Action.
To change the Connection Letter:
- Click Rules
- Enter the required Connection Letter.
- Click OK to save the Rule with the Connection Letter.
The FTP-specific Rules Window displays.
Rules used when targeting an Adobe Form control the Connection Letter to the targeted Adobe Form.
To change the Connection Letter:
- Click Rules
- Enter the required Connection Letter.
- Click OK to save the Rule with the Connection Letter.
The Adobe-specific Rules Window displays.
When directed by Nintex Support, click Details from the Preview Panel of the Action Builder. If needed, Nintex Support will supply additional information.
| Field or button | Description |
|---|---|
| Selector Tool | Use the Selector tool to build actions in the Build Pane. |
| Actions | The list of actions supported by the targeted item display. |
| Preview | A preview of the target displays. |
| Rules | Manage the Rules used to locate the target. |
| Recent Target |
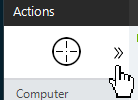
The most recent target may be accessed by clicking the Recent Target button to the right of the Selector.
This is useful when creating Excel, Emulator, and Web Table Targets allowing you to create new actions with existing targets. |


