Bots
The Bots page defaults to the Bots view where you can:
- Enable bots An autonomous program on a network that interacts with computer systems or users..
- Disable bots.
- Reset bots.
Note: Do not use the machine a bot is running on while the bot is running.
View bots
To view the Bots page:
- Select Settings from the top menu.
- Select Bots from the left menu.

Add a bot
You can add bots to the Bots page.
Note: You cannot add and enable bots in excess of your licensed bot entitlement.
To add a bot, complete these steps.
Adjust Windows 10 firewall settings to allow Bot machine access:
- Open the Control Panel. Right-click the Windows start menu, select Run, and type Control Panel to open.
- Navigate to System and Security -> Windows Defender Firewall and click Advanced settings.
- On the left pane, click Inbound Rules or Outbound Rules.
- On the right pane, click New Rule.
- Click Port and Next.
- Select TCP and based on the format of your Nintex RPA Central URL, enter the following in the Specific local ports field.
- Nintex RPA Central URL ends in a number, such as 8080, enter that number.
- Nintex RPA Central URL does not end in a number, enter 443.
- Click Next.
- Select Allow the connection and click Next.
- Select Domain.
- Ensure Private and Public are not selected.
- Click Next.
- Enter a rule Name, and optionally enter a rule description. Click Finish.
Complete the step 3 through step 12, first for Inbound Rules and then for Outbound Rules.
Note: The port number can be different depending on your machine and network environment. Consult with your Network Administrator.
Note: Be sure to complete step 3 through step 12 for both Inbound Rules and Outbound Rules.
Configure Nintex RPA to work with Nintex RPA Central:
- Launch Nintex RPA from Nintex in the Windows Start menu.
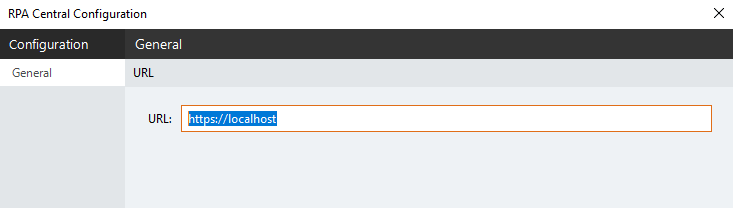
- Click OK if the Warning screen displays. The Configuration screen displays.
- Enter the Nintex RPA Central URL from the Nintex RPA Central License information screen and click OK to continue. Example: https://localhost/.
- Enter your Windows credentials at the Sign In screen.
- Select your comfort level in the Choose your comfort level screen.
- Click New Botflow on the Let's Begin screen. Nintex RPA displays.
Note: To return to the Configuration screen at any time, click the gear icon at the bottom right corner of the Nintex RPA Home screen.
To find the Nintex RPA Central License information screen, click Settings and then click License and SSL certificates.
Note: Enter the URL for the machine where the desired bot to add is located.
Manage bots
From the Bots page, you can enable, disable, or reset a bot.
To enable, disable, or reset a Bot:
- Select the ellipses for the required bot on the Bots page.
- Select Enable or Disable for the bot as required.

The sub-menu displays.
If the bot is enabled, you can disable that bot. If the bot is disabled, you can enable that bot.
Note: Select Reset if the bot status displays any error for Status.
The bot status displays OK for enabled Bots and Disabled for disabled Bots.
| Field or button | Description |
|---|---|
| Username | Lists the Bot user name. |
| Machine name | Lists the Bot machine name. |
| Connected | Lists whether the Bot is connected (checked) or not connected (unchecked). |
| Ellipses | Option to enable/disable/reset a Bot. |