Open Data
This article provides information on the following topics:
Note: The Actions Quick Reference provides a complete list of actions that you can print for easy reference.
What is the Open Data Action?
The Open Data Action opens a database. The following database files can be opened using the Open Data Action:
• Access 97-2003 Database (*.mdb)
• Access 2007-2010 Database (*.accdb)
• dBase III Table (*.dbf)
• Comma-Delimited Text File (*.csv, *.txt)
Creating an Open Data Action
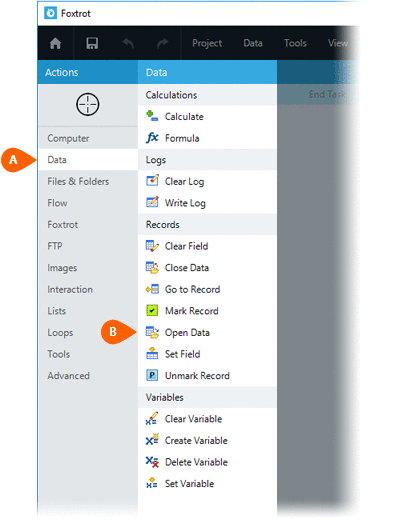
Select Data Actions
 to expand the Action list. Select the Open Data
 Action from the Actions list to display the Action Builder.

Select the Source
Database File  .
Depending on the type of database file chosen, different options
will be available. Below you will find the options available for
each type of database file.

DBase Table
When opening a dBase Table (*.dbf) file, you simply
need to click the OK button ( ) to save the Action.

Access Database
When opening an Access
Database (*.accdb, *.mdb) file, you must enter or select the Table
( ) to open. Click the
OK button (
 )
to save the Action.

Comma-Separated Value File
Note: Because Nintex RPA LE does not work directly with a Comma-Separated Value (*.csv, *.txt) file, the data must be imported into a dBase file (*.dbf).
If a Comma-Separated Value file (*.csv, *.txt) is selected, you will have the following options:
- Select the Destination
data file (
 )
which is the database that will house the data imported from the .csv
file. Select the Overwrite existing
destination file option (
 ) to
replace the destination file if it already exists.
The Start at
( ) and Stop
at (
 ) settings allow you
to choose the range of records to import. You can choose to start
importing from the beginning or from a specific row number. You
can also choose to stop importing at the end of the file or at a specific
row.
If the first imported row contains field names, check the Start Row contains Field Names. This tells Nintex RPA LE to use those field names rather than generating generic field name (Field1, Field2, etc). Generic field names will be generated if the field names are not included in the data being imported.
Choose the delimiter
( ) used in the .csv file. This
is how Nintex RPA LE
knows where to split the data. Click the Define
Fields button (
 ) to control which fields are
imported and to customize the name, data type, and length of each field.
Click the OK
button ( ) to save the Action.