OCR
The OCR action A feature that supplies the instructions in a botflow. in a botflow A file that stores the actions and variables designed to automate tasks. takes a picture of a target and extracts the text from the image using Optical Character Recognition (OCR) technology.
Note: Use OCR when the Get Value action can't extract text from a target.
Using the OCR action, you can:
- Get text from a PDF.
- Copy text from a text editor.
- Copy values from online forms.
Some examples of target applications for the OCR action using the Selector tool are:
- PDFs.
- Nintex Forms.
- Browser windows.
You can add an OCR action to a botflow using the:
Add an OCR action to a botflow using the Project Pane
This example provides the steps necessary to add an OCR action to a botflow using the Project Pane.
To add an OCR action to a botflow.
- On the Actions list, click Images and then click OCR from the Images list.
- Set the OCR settings.
- Preview: Provides a preview of the target.
- Color/B&W (Slide bar): The Color/B&W toggle switches the Preview between color and black-and-white. Use the slide bar to adjust black-and-white contrast.
- Left, Top, Width, Height: Enter a numeric value to adjust the OCR capture box area.
- Preview: Click Refresh to refresh the Preview and populate the Preview Field.
- Save to: Type the Save to destination.
The OCR Action Builder window displays.
- If needed, adjust the Rule settings.
- Image Editor: Select to use the OCR action with the Image Editor.
- Image File: Select to use the OCR action with an image file of your choosing.
- If needed, adjust the Run Error Task settings and Timing settings to fine tune how the action runs.
- View the action Detailssettings.
- If needed, adjust the Run Switch setting to create the action without running it.
- Optionally, add an action note.
- Click OK to add the OCR action to the botflow.
Add an OCR action to a botflow using the Selector Tool
This example provides the steps necessary to add an OCR action to a botflow using the Selector Tool.
To add an OCR action to a botflow.
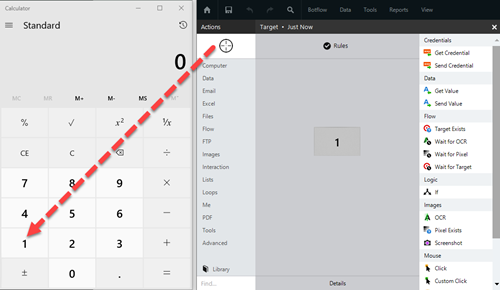
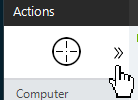
- Drag the Selector tool from the Build Pane Area to add new actions and edit existing actions. and drop it onto an application to display the Target Preview.
- Select OCR from the Images actions list.
- Set the OCR settings.
- Preview: Provides a preview of the target.
- Color/B&W (Slide bar): The Color/B&W toggle switches the Preview between color and black-and-white. Use the slide bar to adjust black-and-white contrast.
- Left, Top, Width, Height: Enter a numeric value to adjust the OCR capture box area.
- Preview: Click Refresh to refresh the Preview and populate the Preview Field.
- Save to: Type the Save to destination.
The OCR Action Builder window displays.
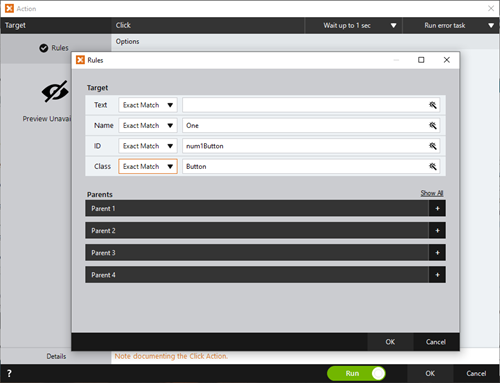
- If needed, adjust the Rule settings to modify how Nintex RPA finds the application target.
- If needed, adjust the Run Error Task settings and Timing settings to fine tune how the action runs.
- View the action Details settings.
- If needed, adjust the Run Switch setting to create the action without running it.
- Optionally, add an action note.
- Click OK to add the OCR action to the botflow.
Black & White Mode
Use Black & White Mode when detecting control values such as a check box check or a radio button. Different colored pixels make up each of these controls and can change with different versions of selected Windows themes.
Black & White example
Color Mode
Use Color Mode when an exact pixel color is needed to make a specific determination such as determining if a target is enabled or disabled.
Color example
Toolbar button enabled (color) versus disabled
![]()
![]()
OCR action field and button descriptions
| Field or button | Description |
|---|---|
| Selector Tool |
The Selector Tool allows you to choose the target element the botflow interacts with, such as a button, text field or check box. Ensure your machine's Windows Settings (Start Menu > Settings) are set as follows when using the Selector Tool:
You can use the Selector tool to do things such as:
Drag the Selector tool from the Task Pane Area to create and manage actions within a specific task. onto the desired application target An element within an application Nintex RPA interacts with, such as a button, text field, or checkbox. and choose the appropriate action from the Build Pane Area to add new actions and edit existing actions.. 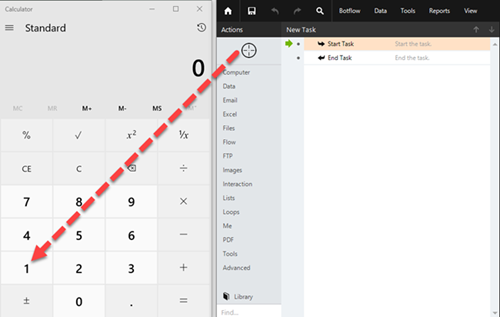
|
| Build Pane |
The Build Pane displays after you select a targeted element in a Windows application. The Build Pane lets you:
Selected target elements display in the Build Pane with a list of actions supported by the targeted item. The Build Pane also displays how long the item has been targeted.
|
| Recent Target |
The most recent target may be accessed by clicking the Recent Target button to the right of the Selector.
This is useful when creating Excel, Emulator, and Web Table Targets allowing you to create new actions with existing targets. |
| Field or button | Description |
|---|---|
| OCR Options/Settings | General
Tip: Click the capture box in Preview to manually move or reset the capture area.
Result
|
| Rules (Project Pane) |
Image Editor: Select to use the OCR action with the Image Editor. Be sure to have an image open in the Image Editor. Image File: Select to use the OCR action with an image file of your choosing. Type in the file path to the image, click the Folder icon to select the image, or use the Expression Builder to build your action rules using variables or other token values. |
| Rules (Selector Tool) |
Some actions have rules required to locate a target and vary based on the targeted application. Rules of a targeted application element are configured and saved with the action. The rules are then used to locate the proper targeted element, such as an Microsoft Excel workbook. To set the most common rules type:
The Rules window displays the Rules available for the selected targeted application.
|
| Preview | All actions created using the Selector Tool include a Preview of the targeted element. |
| Details |
When directed by Nintex Support, click Details from the Preview Panel of the Action Builder. If needed, Nintex Support will supply additional information. |
| Timing Settings |
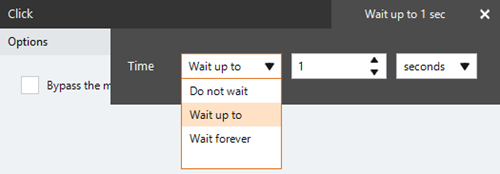
Some actions have timing settings and vary based on the targeted application. The timing settings of a targeted application element are configured and saved with the action. The timing settings are then used to control when the action starts.
|
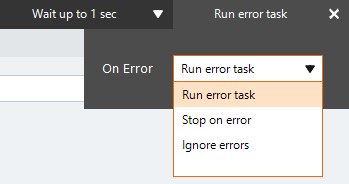
| Run error task |
|
| Note |
(Optional) Type a Note to document any special instructions or functionality.
|
| Run Switch |
The Run Switch toggle controls how Nintex RPA LE runs an action when adding or editing an action in a botflow.
|
| OK/Cancel | Click OK to save the action or click Cancel to discard the action or any changes. |
