Modifying the Start/End Point of Processes
You can modify the Start and Endpoint of discovered processes using the Snip tool.
-
Go to Discovery > Discover / Discovery Results
-
Select a process
-
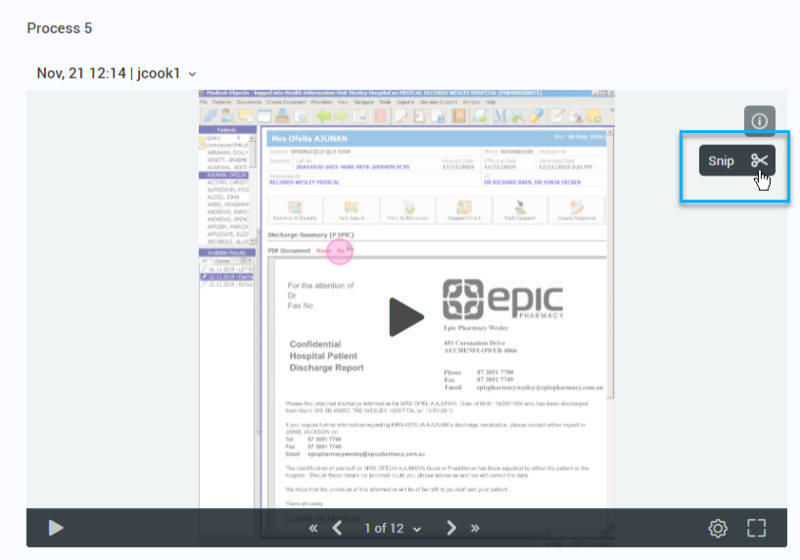
Click on the Video view to enable the toolbar
-
Select Snip:

-
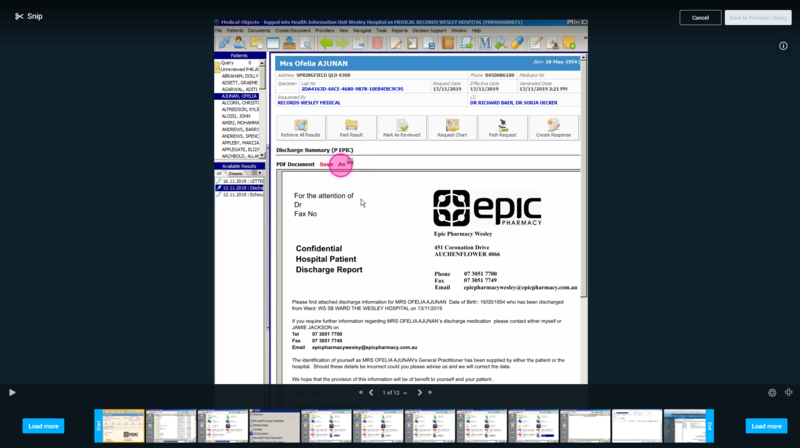
The Snip view will open in full-screen. Here you'll see the Start and Endpoint as determined by the Process Discovery solution mechanism. You'll also notice that you have a view of up to 20 screens (AKA actions) captured before the default Start point and after the default Endpoint. The additional screens are available to give you the option to set Start/Endpoint before/after the default points.

-
Click or place the cursor over any screen capture (AKA action) and select a different Start/Endpoint as you desire:

-
Save your selection and Add it to your Process Library, or Cancel your modification.

-
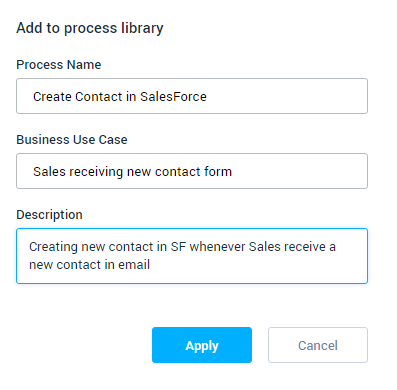
Fill in the process details and click Apply.

What happens after selecting different Start and/or Endpoints for a process?
Once you perform a snip on a discovered process:
-
The original process will remain on the list of discovered processes.
-
The snipped processes will appear in the process library
- The same original process can be snipped more than once
- You can also snip a process out of the entire user recording from the All users recordings page. See Snipping a Process Out of the Original User Recording.