The Association Columns feature is used to associate site columns with the workflow definition. Association columns are useful where you may need to reference columns for the 'current item' from within a reusable workflow. Association columns are automatically added to a list or library when a reusable workflow is associated to that list or library.
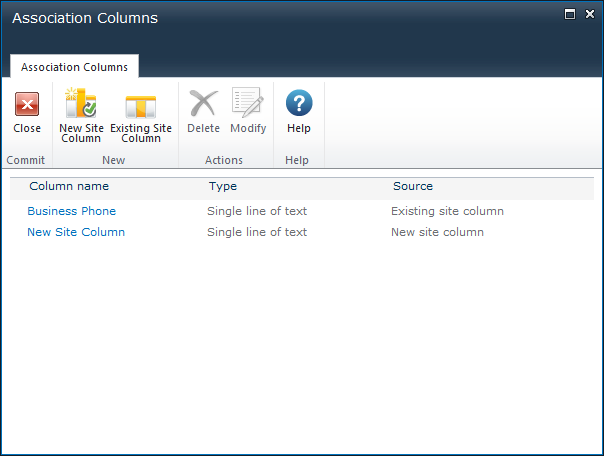
The Association Columns dialog allows associations to site columns to be created, added, deleted or modified.
Each Association Column is defined within the workflow definition. If these columns exist in the target library or list, they will be used. If they do not exist, they will be added to the target library or modified and deleted. Whilst Association Columns are predominantly used in reusable workflows associated with content types, they do not associate with the content type itself, instead any defined columns are added to the relevant list or library where the content type is deployed.
Please note: Association columns do not work on site workflows.
To access the Association Column dialog box:
- Navigate to the List Workflow you want to create Association Columns on.
- Click on Workflow Settings in the Ribbon.
- Select Association Columns.
Create New Site Column
To create a new site column and associate it with this workflow, click the New Site Column button in the Ribbon.
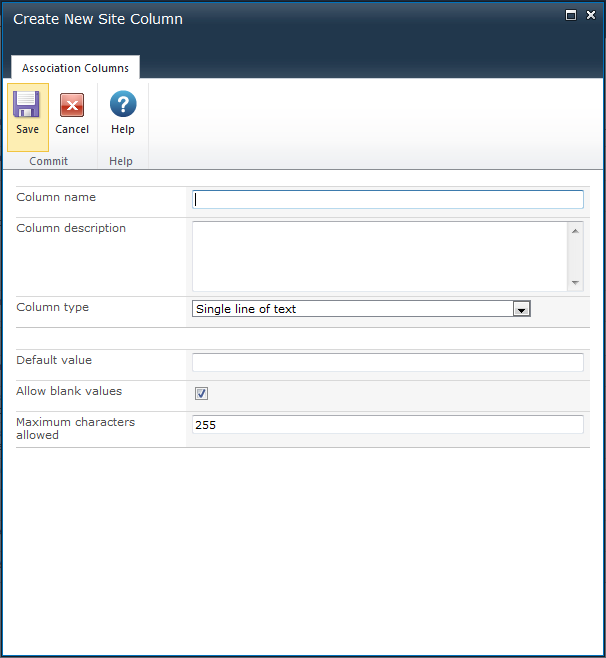
Set the column properties as described below:
- Column name: Enter the column title
- Column description: Enter a description for the column
- Column type: Select from one of the following column types
- Single line of text:
- Default value: Leave blank for no default value, or enter the text for the default
- Allow blank values: Check this option to allow the column to be left empty
- Maximum characters allowed: Set the maximum length of text up to 255 characters
- Multiple lines of text:
- Default value: Leave blank for no default value, or enter the text for the default.
- Allow blank values: Check this option to allow the column to be left empty
- Rich text: Use rich text editor for advanced style and format options
- Enhanced rich text: Add tables, pictures, and hyperlink abilities to the rich text editor
- Append changes to existing text: Set the column to preserve all previous entries and append new additions to the end
- Number of lines: Set the maximum number of lines of text
- Number:
- Default value: Leave blank for no default value, or enter the text for the default
- Allow blank values: Check this option to allow the column to be left empty
- Number of decimal places: Set the number of decimal places from 0 to 5, or Automatic
- Show as percentage: Format the display as percentage
- Minimum value allowed: Check this option and set the minimum value, or leave unchecked for no minimum
- Maximum value allowed: Check this option and set the maximum value, or leave unchecked for no maximum
- Currency:
- Default value: Leave blank for no default value, or enter the text for the default
- Allow blank values: Check this option to allow the column to be left empty
- Number of decimal places: Set the number of decimal places from 0 to 5, or Automatic
- Minimum value allowed: Check this option and set the minimum value, or leave unchecked for no minimum
- Maximum value allowed: Check this option and set the maximum value, or leave unchecked for no maximum
- Date and time:
- Default value: Choose between None or Today's date
- Allow blank values: Check this option to allow the column to be left empty
- Display format: Choose between date and time or date only
- Choice:
- Choices: Enter the selection choices to be displayed to the user. Place each choice on a new line using the Enter key
- Default value: Leave blank for no default value, or enter the text for the default
- Display format: Select from Radio buttons; Check boxes; or Drop down list
- Allow blank values: Check this option to allow the column to be left empty
- Allow 'fill in' choices: Check this option to provide a blank space for the user to enter their own text
- Lookup:
- List: Select the list to lookup values from
- Show field: Select the column from the list to lookup values from
- Allow blank values: Check this option to allow the column to be left empty
- Allow multiple values: Check this option to return a collection of values if more than one item meets the lookup criteria
- Yes/No:
- Default value: Select either Yes or No as the default
- Person or Group:
- Show field: Select the user account property to display
- Allow selection of: Select either People and Groups, or People only
- Choose from: Select either All users, or SharePoint Groups
- Group: If selection of Groups is set, this drop down list will be active, otherwise it will be disabled
- Allow blank values: Check this option to allow the column to be left empty
- Allow multiple values: Check this option to return a collection of values if more than one item meets the filter criteria
- Hyperlink or Picture:
- Display format: Select from Hyperlink, or Picture
- Allow blank values: Check this option to allow the column to be left empty
Once the workflow is published, the new site column will be created.
Associate the workflow with a site column that already exists
- Select Existing Site Column to associate the workflow with a site column that already exists in the SharePoint site.
- In the Add existing site column dialog, select the desired site column from the list.
- Click the OK button.
Other Options
Delete
To delete an association with a site column:
- Select the site column from the list
- Click the Delete button in the Ribbon.
- And then OK.
Please note: This does not delete the site column itself, only the association between the site column and this workflow. In the case of a New site column association that has not yet been published, the site column has not been created in the SharePoint site yet, and the site column definition will be lost when the association is deleted.
Modify
Only a New site column definition can be modified.
- Select the New site column from the list and click the Modify button.
- The Modify site column dialog will appear with the same configuration options as the Create New Site Column dialog, above.