Azure Configuration for Modern Authentication
Due to a recent upgrade in Microsoft, multi-factor authentication (MFA) was added as additional security to the username and password authentication.
To enable the cross-platform Exchange Web Services (EWS) and Nintex Kryon RPA to work with modern authentication without MFA, it is necessary to configure Azure AD.
Modern authentication methods currently supported:
-
Exchange Web Services (EWS) with modern authentication without MFA
-
Exchange Web Services (EWS) with modern authentication and client secrets (MFA alternative)
Modern authentication methods currently not supported:
- Regular MFA
Versions Supported: 21.10.7 and above.
The following sections detail the steps to enable and configure modern authentication in Azure AD to use with Nintex RPA:
Follow these steps to configure Azure AD for Nintex RPA OAuth Modern Authentication:
-
Sign in to your Microsoft Azure Active Directory portal.
-
Search for and select Azure Active Directory to enter the Home page.
-
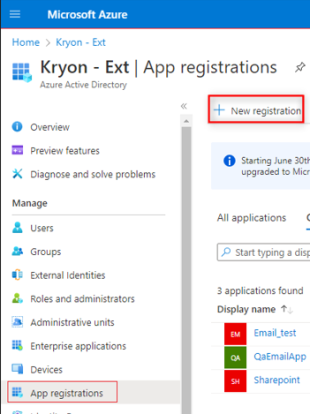
Select App registration from the left menu.
-
If a registration was not previously created for the Nintex application, select New registration.
-
Select Create new registration.
-
Give a name for the application such as Nintex Kryon RPA.
-
Select the option Accounts in this organizational directory only.

-
Click Register.
-
-
Once the app is created, the Application (client) ID and Directory (tenant) ID becomes visible. Take note of them as they will be required for configuring modern authentication in the Nintex RPA platform.
-
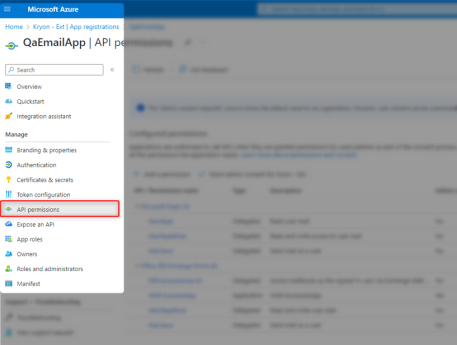
Navigate to the new App registration.
-
Select API permissions from the left menu.
-
Select Add a permission.
-
Select APIs my organization uses.
-
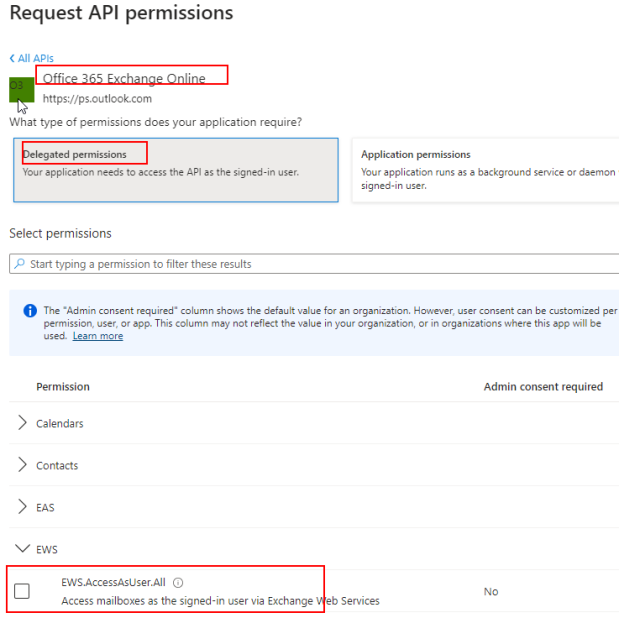
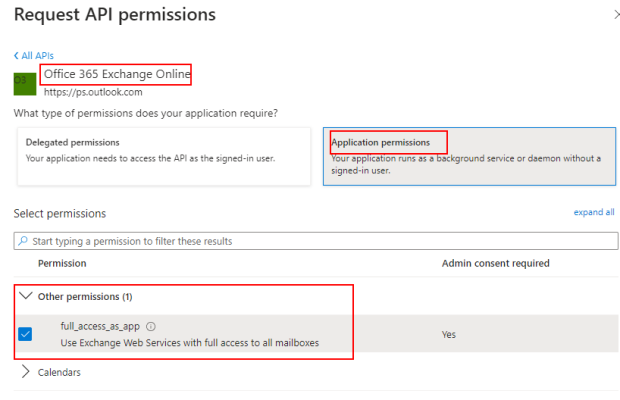
Search for and select Office 365 Exchange Online.
-
Select the type of permission that your application requires:
Scenario - If you are using: Permissions to select: Username and password with MFA disabled Delegated permissions Username and client secret Application permissions Username, password, and client secret Delegated and Application permissions
Client secret with MFA enabled or disabled Application permissions  Delegated permissions
Select Delegated permissions when your application requires specific user permissions to access the API online. When attempting to access the application, it impersonates the user to gain access. This process involves using credentials like the username and password associated with the user. If the necessary permissions are not granted, the application will deny access to the API.
-
Select Delegated permissions.
-
Search for EWS.
-
Select EWS.AccessAsUser.All.
-
Click Add permissions.
All added permissions should appear in the Configured permissions list.
-
Check the Grant admin consent checkbox to successfully grant these permissions.
 Application permission
Select Application permission to enable the application to operate as a background service independently, without relying on a specific user. This means the application can run and perform its tasks without requiring user authentication.
-
Select Application permissions.
-
Search for Other permissions.
-
Select full_access_as_app.
-
Click Add permissions.
All added permissions should appear in the Configured permissions list.
-
Check the Grant admin consent checkbox to successfully grant these permissions.
-
-
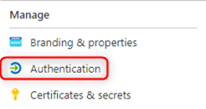
Select Authentication from the left menu.
-
Select Advanced settings.
-
Confirm that Enable the following mobile and desktop flows is enabled.

Click Save to commit any changes.
-
Search for and select Tenant properties.

-
Under Access managements for Azure resources, select Manage security defaults.

-
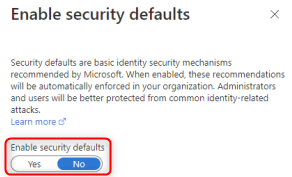
Confirm that Enable security defaults is set to No.
-
Click Save to commit any changes.
Follow these steps to add users or groups to your newly created Nintex application:
-
Sign in to your Microsoft Azure Active Directory portal.
-
Search for and select Azure Active Directory to enter the Home page.
-
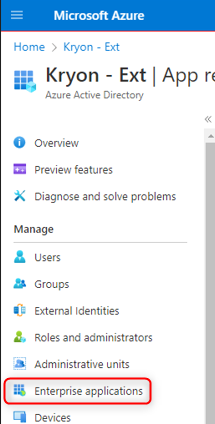
Select Enterprise applications from the left menu.
-
Select the Nintex application that was created in Configuration.
-
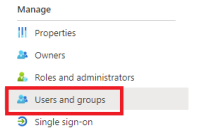
Select Users and groups from the left menu.
-
Add users or user groups to the application as needed.
Follow these steps to turn on modern authentication for email accounts:
-
Sign in to Microsoft 365 admin center.
-
Select Show All on the left menu.
-
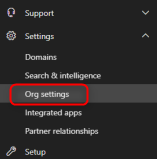
Select Settings.
-
Select Org settings.
-
Under the Services tab, select Modern Authentication.
-
Confirm that Turn on modern authentication for Outlook 2013 for Windows and later is selected.

Click Save to commit any changes.
Follow these steps to disable MFA for any email accounts used by Nintex RPA:
-
Sign in to Microsoft 365 admin center.
-
Select Users from the left menu.
-
Select Active users.

-
Select the Multi-factor authentication tab.

-
Click Disable on the right side under quick steps options.

-
Select yes in the confirmation popup.

The MFA status for this user should now show as Disabled.
-
Repeat steps 5,6, and 7 for each user that needs MFA disabled.
Follow these steps to set up email functions in the Nintex RPA platform to work with modern authentication:
-
Log in to the Studio.
-
Access the Credentials Vault.
For details, see Accessing the Credentials Vault.
-
From the Credentials Vault main window, select the OAuth Authentication tab.
-
Click the + Add button.
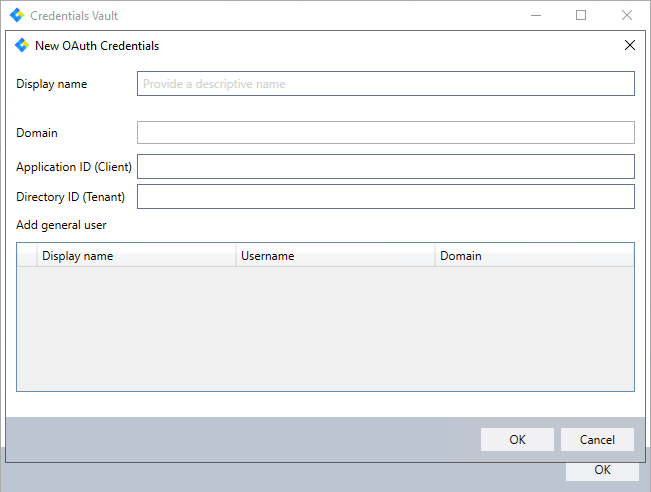
The following dialog opens:
-
Create your credentials by entering a Display name and the Domain, Application ID (Client), and Directory ID (Tenant) as given in Step 6 of Configuration.
-
Select the credential from the vault that you want to use modern authentication for.

-
Open any wizard that uses an email Advanced Command.
-
For the Get Email Advanced Command:
-
In the Email Account settings for the Advanced Command fill in these details:
-
Email Server Type:
Exchange (EWS: 2007 and above). -
Server:
https://outlook.office365.com/ews/exchange.asmx. -
Credentials: Choose the credential from the vault that is being linked to modern authentication.
OR
-
Enter manually: Enter the credential details.
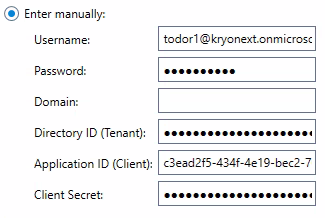
Details of the Application ID (Client), and Directory ID (Tenant) are seen in Step 6 of Configuration.
 To get the Client Secrets
You only have access to the client secret Value when you create it. If you did not copy the value when creating the client secret, you need to create a new one by selecting New client secret.
To get the Client Secrets
You only have access to the client secret Value when you create it. If you did not copy the value when creating the client secret, you need to create a new one by selecting New client secret.-
Sign in to your Microsoft Azure Active Directory portal.
-
Search for and select Azure Active Directory to enter the Home page.
-
Select App registration from the left menu.
-
Select the registration that was created in Configuration.
-
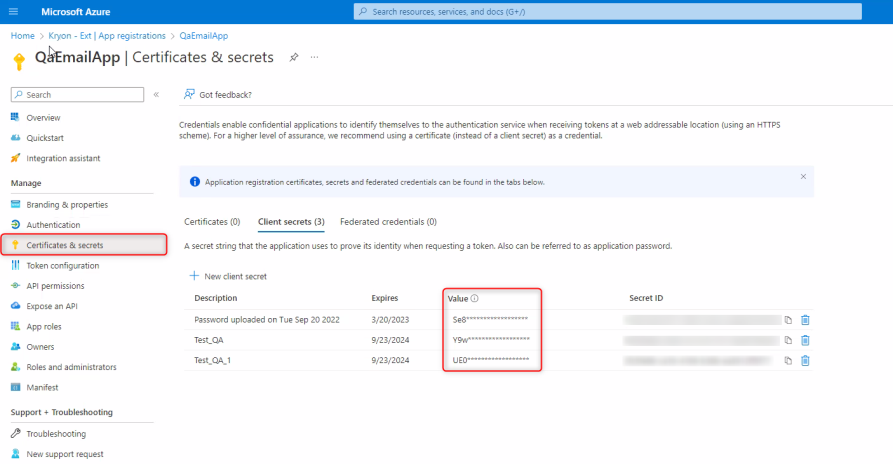
Select Certificates & secrets from the left menu.
-
The client secret is listed under Value.
-
-
Click Test.
If all configurations are performed correctly, you should get the Connection successful message.
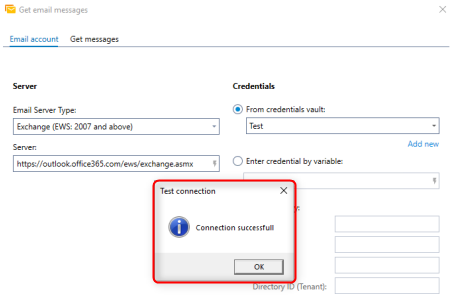 For more information about the Get email messages Advanced Command, see Get Email Messages.
-
-
For the Send Email Advanced Command:
-
In the Email Account settings for the Advanced Command, fill in these details:
-
Email Server Type:
Exchange (EWS: 2007 and above). -
Server:
https://outlook.office365.com/ews/exchange.asmx. -
Credential: Choose the credential from the vault that is being linked to modern authentication.
OR
-
Enter manually: Enter the credential details.

Details of the Application ID (Client), and Directory ID (Tenant) are seen in Step 6 of Configuration.
 To get the Client Secrets
You only have access to the client secret Value when you create it. If you did not copy the value when creating the client secret, you need to create a new one by selecting New client secret.
To get the Client Secrets
You only have access to the client secret Value when you create it. If you did not copy the value when creating the client secret, you need to create a new one by selecting New client secret.-
Sign in to your Microsoft Azure Active Directory portal.
-
Search for and select Azure Active Directory to enter the Home page.
-
Select App registration from the left menu.
-
Select the registration that was created in Configuration.
-
Select Certificates & secrets from the left menu.
-
The client secret is listed under Value.

-
-
Click Send a test email....
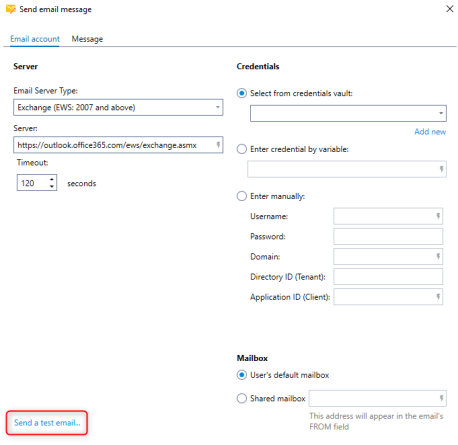 For more information about the Send email messages Advanced Command, see Send Email Messages.
-
Follow these steps to set the email triggers:
-
Log in to Console Plus, see Accessing Console Plus.
-
Select Triggers from the left navigation menu.
-
Choose an email trigger to edit.
-
In the Trigger Events section, fill in these details:
-
Email Server Type:
Exchange (EWS: 2007 and above). -
Server:
https://outlook.office365.com/ews/exchange.asmx.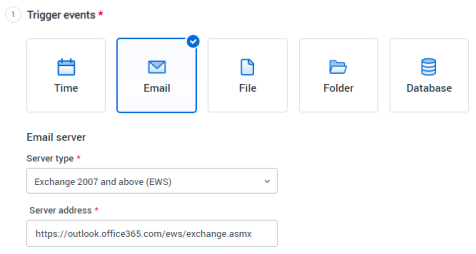
-
Credentials: Choose the credential from the vault that is being linked to modern authentication.

OR
-
Enter manually: Enter the credential details.
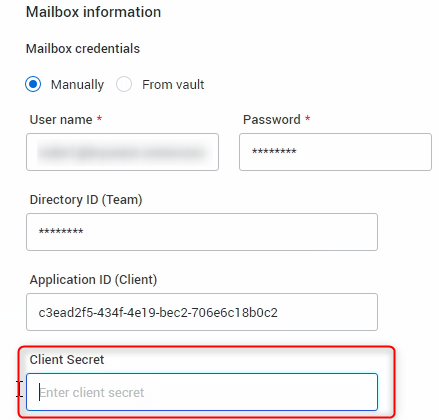
Details of the Application ID (Client), and Directory ID (Tenant) are seen in Step 6 of Configuration.
 To get the Client Secrets
You only have access to the client secret Value when you create it. If you did not copy the value when creating the client secret, you need to create a new one by selecting New client secret.
To get the Client Secrets
You only have access to the client secret Value when you create it. If you did not copy the value when creating the client secret, you need to create a new one by selecting New client secret.-
Sign in to your Microsoft Azure Active Directory portal.
-
Search for and select Azure Active Directory to enter the Home page.
-
Select App registration from the left menu.
-
Select the registration that was created in Configuration.
-
Select Certificates & secrets from the left menu.
-
The client secret is listed under Value.

-
-
Save and publish the trigger.
Check that the trigger has been published successfully in the Trigger section of the Console Plus.