3. Create the Hello World Form
In this step you will generate a new Form that will "host" the Hello World View. Users generally interact with SmartForm applications by launching a form in a browser, or using a Nintex K2 mobile app. Forms contain one or more views and are the user interfaces for entering, editing or interacting with data. Users usually only interact with forms, which is why we want to create a form that will contain the view.
- Generate a form from the Hello World view. Move it to the Forms category, then name the form Hello World Form.
- In this step, you will generate a new form from the Hello World view. When generating a form for a view, the view is automatically added to the form for you, and creates the view/form association. You can design forms manually as well, then manually add controls and views as needed. Generating a form from a view saves a few steps, but you still have the ability to edit the layout, add controls, rule, etc.
Right-click the Hello World view title from the explorer and select Generate Forms.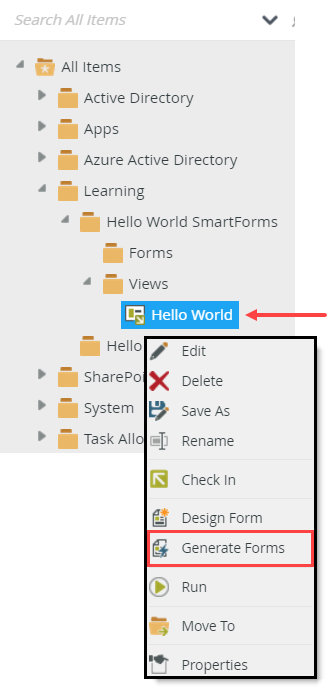
- Change the Form Name to
Hello World Form
then click the ellipses to the right of the Category field and select the Forms category from the explorer. Select the option to Save and edit the Form. Click OK and OK again.
(Because you generated the form from the view, the form is placed in the Views category by default. To keep your work organized, you can move artifacts into the categories that make the most sense. In this case, we want to store the form in the Forms category.)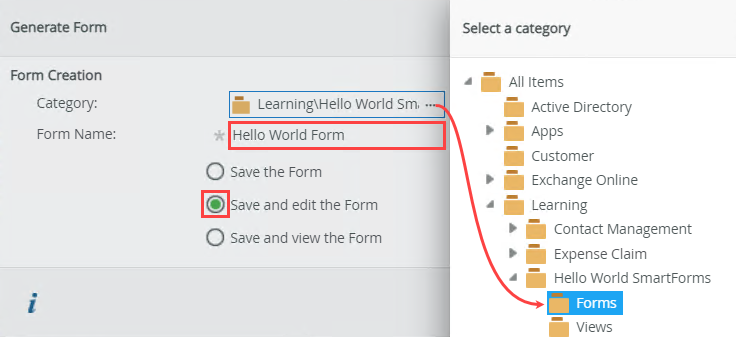
- In this step, you will generate a new form from the Hello World view. When generating a form for a view, the view is automatically added to the form for you, and creates the view/form association. You can design forms manually as well, then manually add controls and views as needed. Generating a form from a view saves a few steps, but you still have the ability to edit the layout, add controls, rule, etc.
-
Next, you will tweak the form's layout and give the view a title. Change the view title to Hello World View and the form’s width to 60%. Check
in the form and view after you complete the edits.
- SmartForms are browser-based forms. If you open this form in a browser, it will expand the entire width of the screen. Since this is a very small form, you can adjust the form's width so that it is easier to use. You can also give the view in the form a title, so that you know what the view does. In this particular application, you only have one view. In other applications, you may have several views, so changing the titles would easily separate one view from another, which helps to organize your form and its flow.
Click the (Enter View Title) title bar and change it to
Hello World View.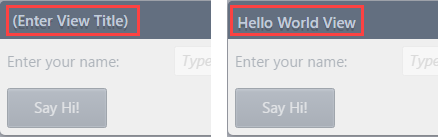
- Next, you will adjust the form's width. Click anywhere within the form canvas (just not in the view area). In the Properties pane, change the form’s Width to
60%
then click FINISH in the upper right corner to save your form and exit the form designer. (If your form does not look like the image below in terms of color and font, you may have a different Theme applied. The image below shows the form with the Lithium theme. It is OK to proceed with whatever theme you have applied.)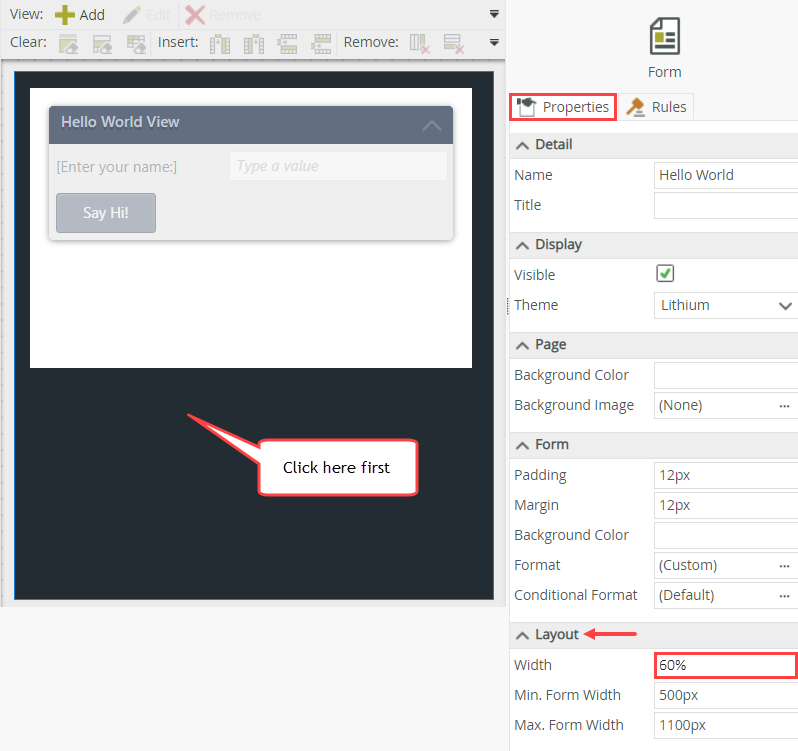
- Your final task in this step is to check in the form. Checking in views and forms "publishes" them to the server, making them available for use by your users. To make a change to a view or form, you must check it out, make the change, then check it back in to publish the change.
Right-click the Hello World Form and select Check In. If you see a warning about checking in associated views, CHECK the box to check in associated views, then click OK.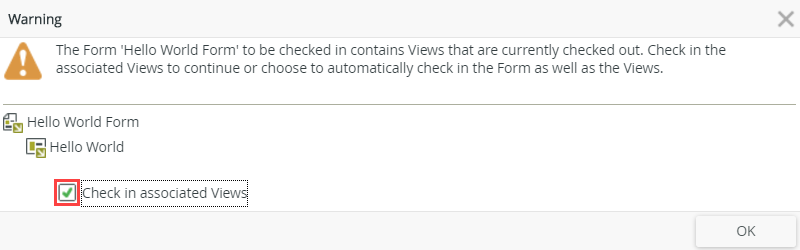
- SmartForms are browser-based forms. If you open this form in a browser, it will expand the entire width of the screen. Since this is a very small form, you can adjust the form's width so that it is easier to use. You can also give the view in the form a title, so that you know what the view does. In this particular application, you only have one view. In other applications, you may have several views, so changing the titles would easily separate one view from another, which helps to organize your form and its flow.
Review
In this step, you generated a form from the Hello World view. You formatted the form by changing the default title bar of the view and by setting the form width, and then you checked the form in so that other users can access it. Your form is now ready for testing!