8. Add a Decision Step
In this step you will add a Decision step to the workflow. A Decision step is often used in conjunction with a user Task step. The Decision step generates lines based on the actions configured in the preceding user task, and moves the workflow along the appropriate line, depending on the decision the task recipient made. In this case, there are two possible outcomes: Approved or Denied.
-
Add a Decision step to the design
canvas, then connect the Manager Approval step to the Decision step.
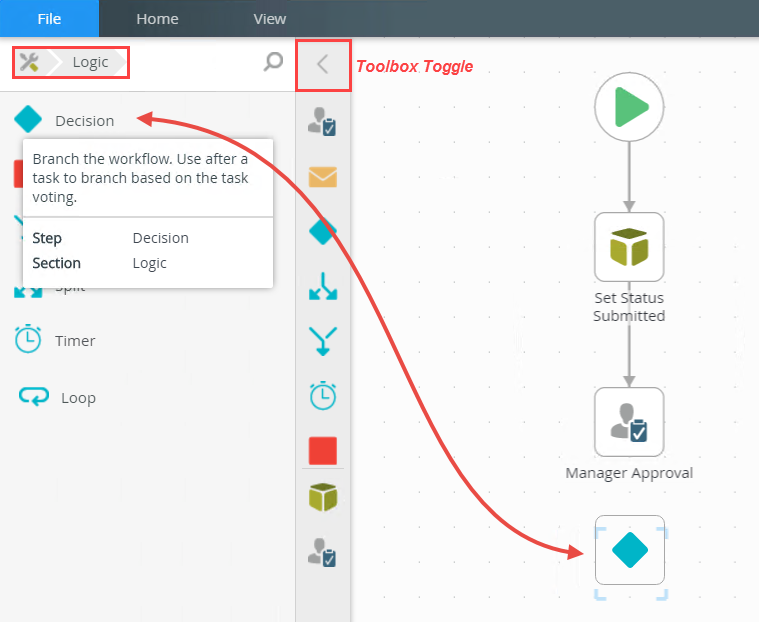
- Expand the Toolbox > Logic node. Drag a Decision step onto the design canvas, below the Manager Approval step. Collapse the Toolbox.Click the Toolbox icon in the breadcrumb bar to return to the main menu. This is useful if you want to change categories (such as Basic or Logic).

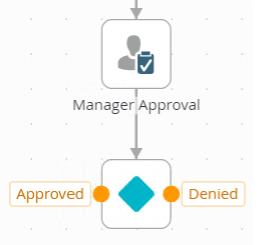
- Connect the Manager Approval step to the Decision step. The Decision step generates the outcome lines for the two actions.
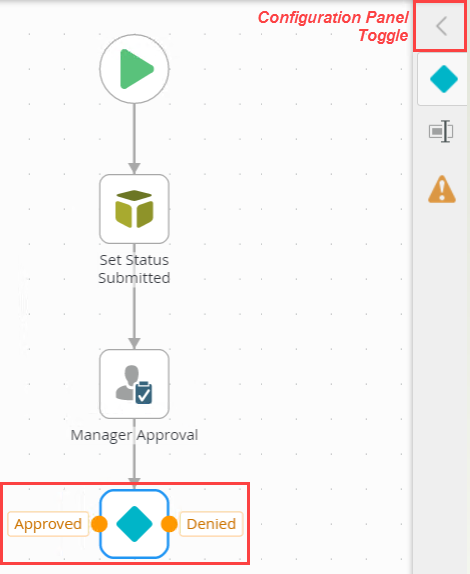
- Click to highlight the Decision step. Expand the Configuration Panel.
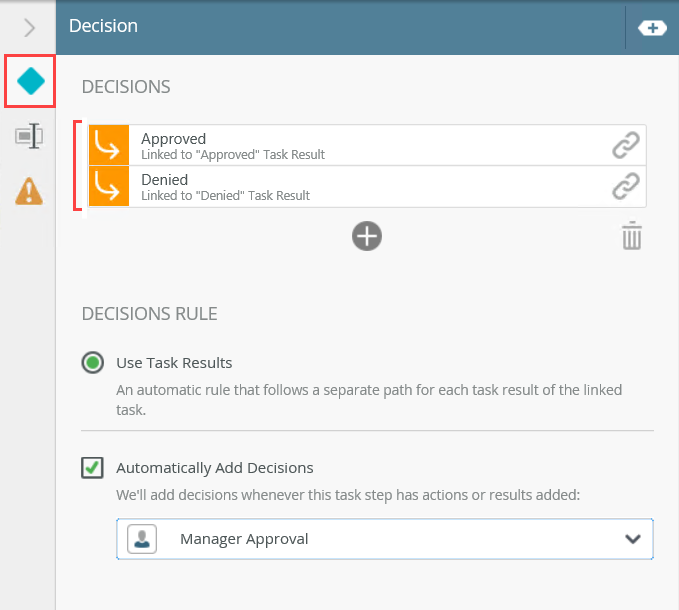
- Click the Decision Details tab. The DECISIONS section displays the Approved and Denied actions. You configured the actions in the Manager Approval step. The DECISIONS RULE displays the Use Task Outcomes by default. You also have the option to create your own rules for handling workflow paths.
- Expand the Toolbox > Logic node. Drag a Decision step onto the design canvas, below the Manager Approval step. Collapse the Toolbox.
-
Rename the step to Manager Approval Decision.
- Expand the General Properties tab. Change the Name to
Manager Approval Decision
so that it is clear what this step does. Confirm the Show Label option is UNCHECKED. In this case, since the Decision step connects to the Manager Approver step, it is obvious the two steps work together, so a visual label is not needed. However, the step will show up in reports, so K2 recommends naming the step for clarity. Collapse the Configuration Panel.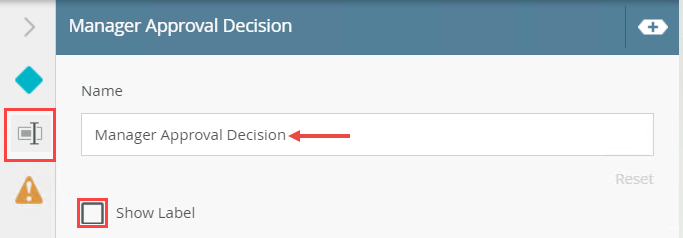
- Expand the General Properties tab. Change the Name to
Review
In this step, you added a Decision step and connected it to the Manager Approval step. The Decision step generates the outcome (lines) based on the actions configured. The workflow will determine if any rules or conditions are valid for the outcomes, then proceed along the appropriate outcome.
In the next step, you will add SmartObject Method steps to each outcome and update the status property based on the manager's decision. Then you will add an End step, which provides a visual indicator that the workflow is complete.