SmartObject Get List Custom filter
In K2 Workflow Designer you use the SmartObject Get List method to retrieve one or more items. You can then use this returned data as inputs for functions and configuration values in other workflow steps.
Use the SmartObject Get List Custom filter to configure filters on the query to return only the data that you need. To add a custom filter, drag a SmartObject Get List method property into a SmartField. In the Smartfield Composer select the Custom option and open the List Method Configuration panel. Here you use the Filter and Properties panels to add criteria and build your filter. Type or drag Fields, Functions, SmartObjects, or Workflow-related properties from the Context Browser.
Example Scenario
An example of using the Custom Filter is that you want to send an email to your customers in a specific industry, in this case Real Estate. The SmartObject that you use contains details for all customers, including a field called Industry Type. To only reach the Real Estate customers, you configure a custom filter to return email addresses for only those in the Real Estate industry. You then use this property in the To field of the Send Email step.
Example of a Custom Filter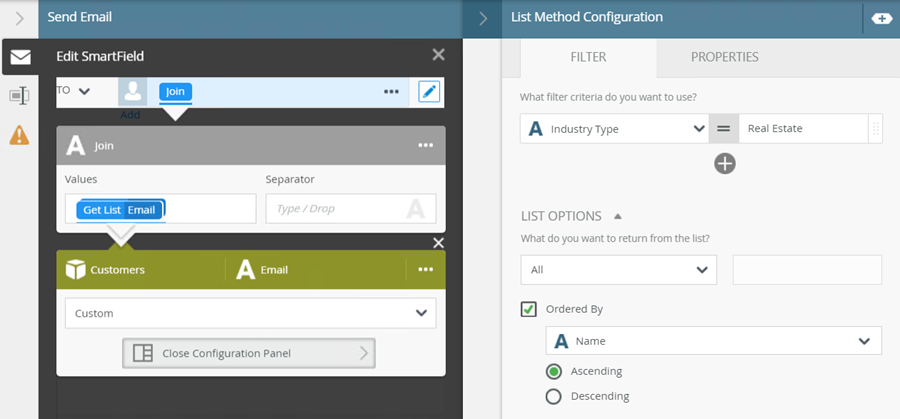
In this example, you use the To field on the Send Email step to add and configure the SmartObject Get List custom filter. Note that you can use a custom filter in any step where you can drag in a SmartObject Get List method.
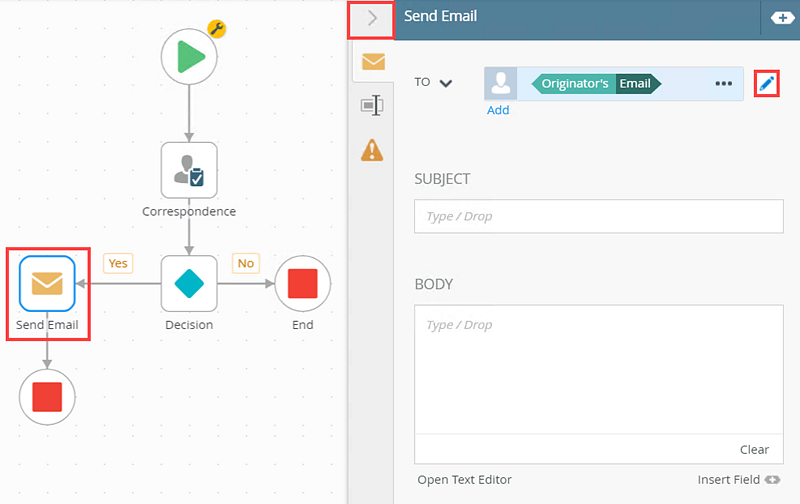
- Select the Send Email step and click the expand / collapse toggle to expand the Configuration Panel. You can also double click the step to expand the panel. Click the Edit button to enable editing in the To field.
- Delete the Originator's Email and expand the Context Browser. Select Functions tab and drag the Join function, from the Text section, into the To field.
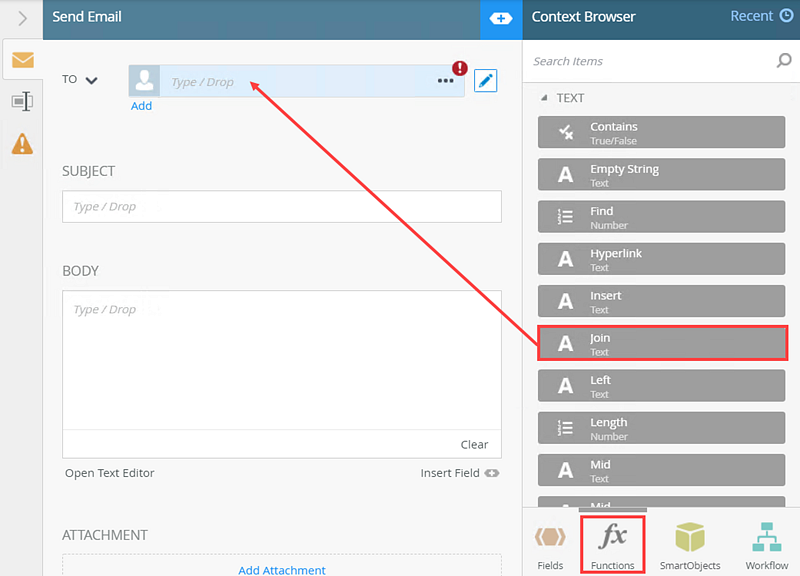
For more information on Join function and how to configure it with the All items as a collection option, see the How to: Use the All items as a collection option. - The Smartfield Composer opens. Select SmartObjects tab and browse to the Customer SmartObject Get List method. Drag the Email property into the Values field.
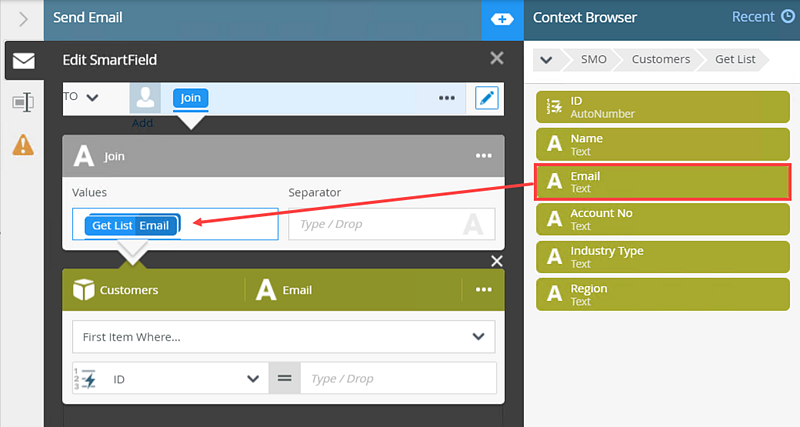
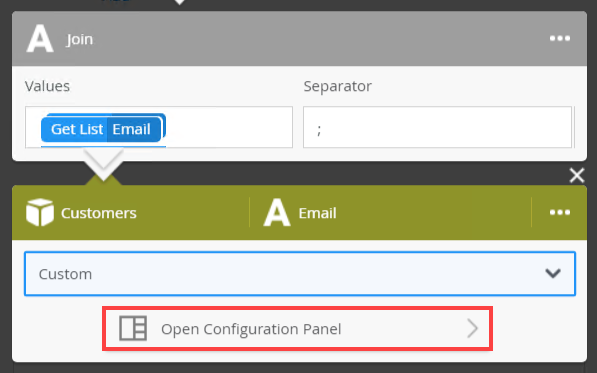
- In the Customer SmartObject properties section menu, select Custom. This is how you add a custom filter.
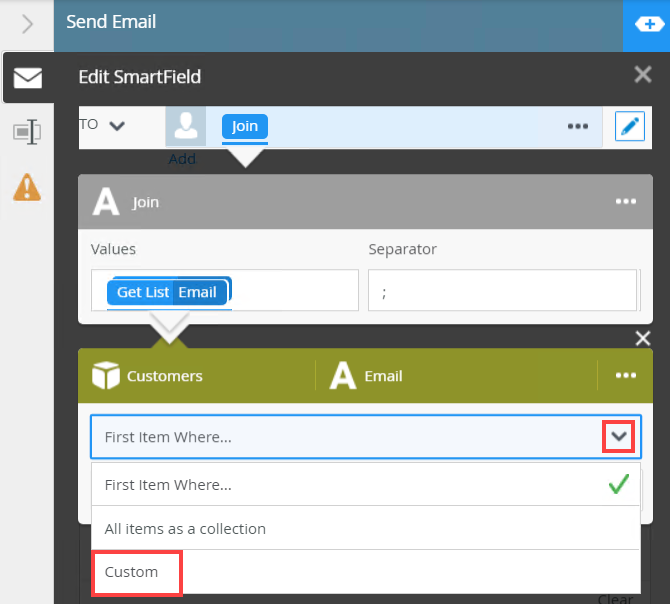
- Click Open Configuration Panel to configure the custom filter.
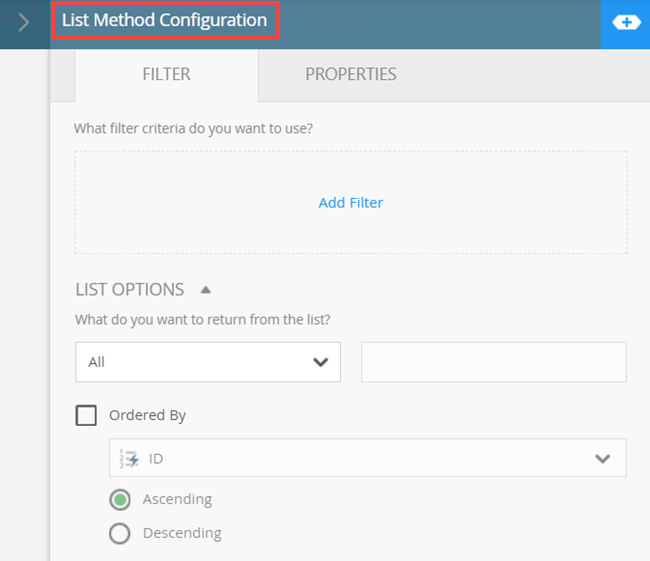
- The List Method Configuration panel shows two tabs.
On the Filter tab you see output properties, which means that all results returned and filtered on the K2 server after the query runs. You use the Properties tab for input properties, which means the query is updated to only return matching records. Using properties is generally better than using a filter, especially with larger data sets. In some cases, you might notice the same properties on both the Filter and Properties tabs. Smartbox SmartObjects, by default, can use any property as an input property. This means that, in most cases, the same properties show on both the Filter and Properties tab. When you use Advance SmartObjects, the input and output properties may differ.
The following table explains the available options:
Option Explanation How to Use Filter Add Filter Use this tab to specify output or return properties. Here you can specify parameters and filters to return data.
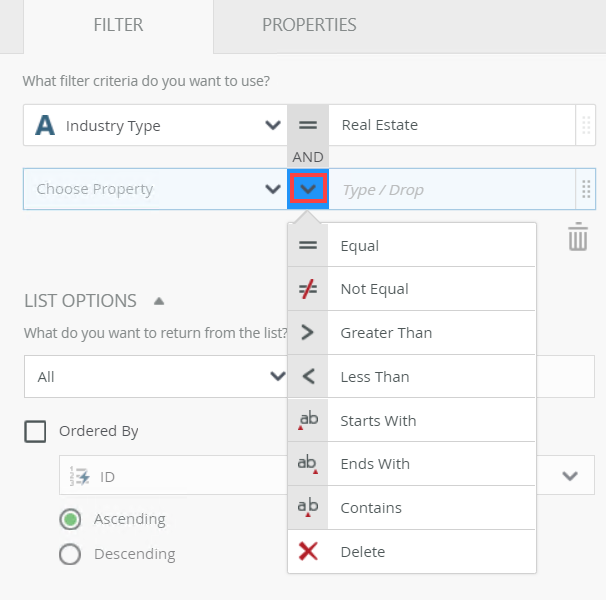
Use operators such as Equal, Not Equal, Starts With, Ends With, and Contains.
Click the Add Filter link to add filters.
Select filter values from the drop-down menu.
Click the operator button to select the operator.
Click Add to add additional filter properties
Type values or create dynamic values by dragging Functions, Fields, SmartObjects and Workflow-related items from the Context Browser into the fields.
To delete properties, select them and click the Trash bin.
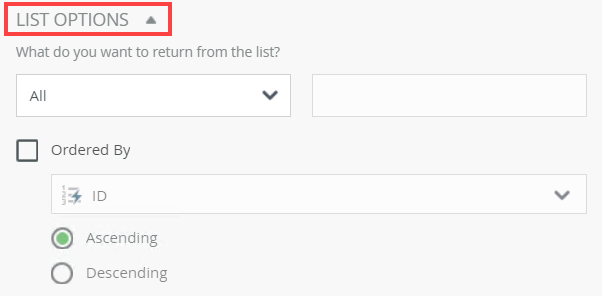
List Options Use this to specify what you want to return from the method and if you want it sorted.
You can select one of the following:
- All - Returns all records
- First - Returns the first record
- Last - returns the last record
- Index - Returns a specific record by its index
You can order the returned data by a property within the SmartObject, and sort it either ascending or descending
Click the down arrow to expand this section.
Ordered By Use this to specify a field on which the returned data is sorted. You can select the display order as ascending or descending. Check the Ordered By check box and select the field from the menu.
Select either Ascending or Descending.
Properties Use this tab to specify input properties.
Click the Add button to display a list of available fields / parameters to add and configure.
In the added property field, type a value, use inline functions, or dynamic fields, by clicking Add to expand the Context Browser. Within the Context Browser, select inline functions and fields from the Functions, Fields, SmartObjects and Workflow categories. Click and drag the function into the property field.
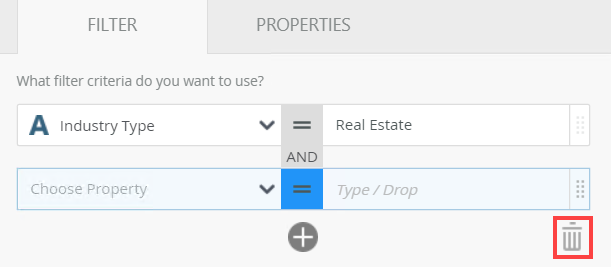
- To add a custom filter, select the Filter tab click the Add Filter link.
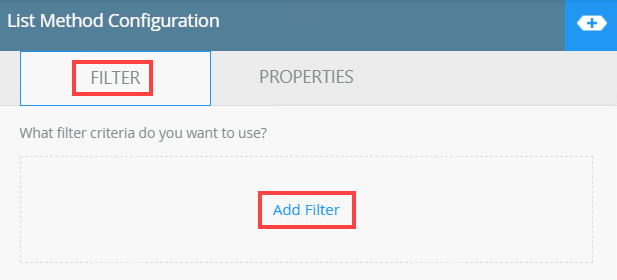
- Here you specify the filter criteria. Select a property from the Choose Property menu. This menu contains all available properties in the SmartObject. In this example, you see all properties from the Customer SmartObject.
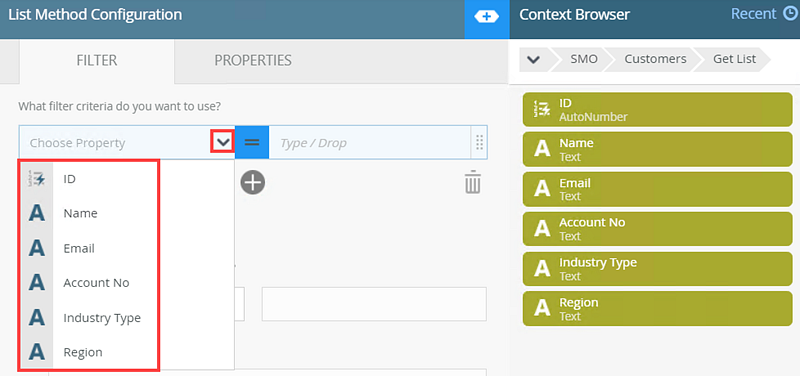
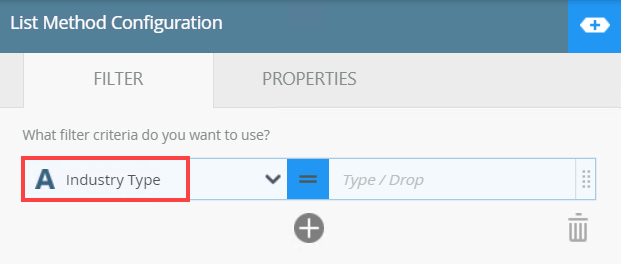
- Select the property from the menu. In this example, select Industry Type.
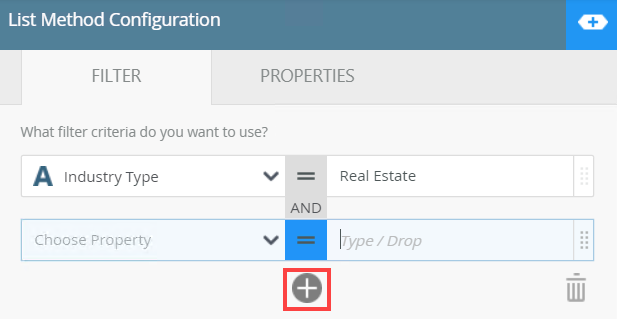
- Expand the Context Browser. Type or drag Fields, Functions, SmartObjects, or Workflow-related properties to customize the filter. In this example, type Real Estate as the value. You only want to send an email to customers in the that industry.

- To add additional filters, click Add.
- To change the operators, click the = sign and select one from the menu.
- To remove a filter, select it and click the Trash Bin.
- In the List Options section, configure what data you want returned and if you need it sorted.
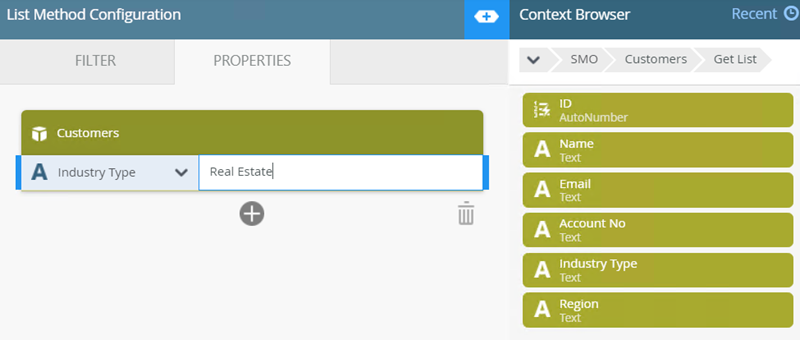
- You can instead use the Properties tab to specify a filter. To add a custom filter, select the Properties tab click Add. You use the Properties tab for input properties, which means the query is updated to only return matching records. Using properties is generally better than using a filter, especially with larger data sets. In some cases, you might notice the same properties on both the Filter and Properties tabs. Smartbox SmartObjects, by default, can use any property as an input property. This means that, in most cases, the same properties show on both the Filter and Properties tab. When you use Advance SmartObjects, the input and output properties may differ.

- Select the property from the menu. Expand the Context Browser. Type or drag Fields, Functions, SmartObjects, or Workflow-related properties to customize the filter.
- To add additional filters, click Add and select a property.
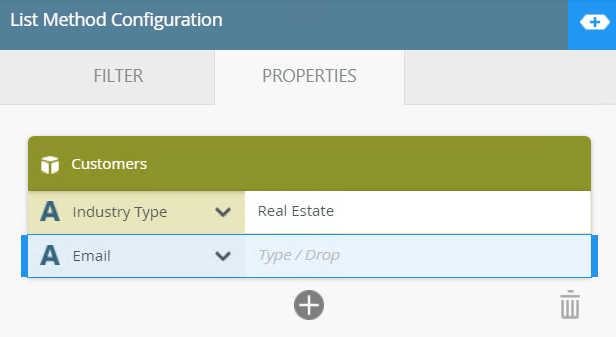
- To remove a filter, select it and click the Trash Bin.
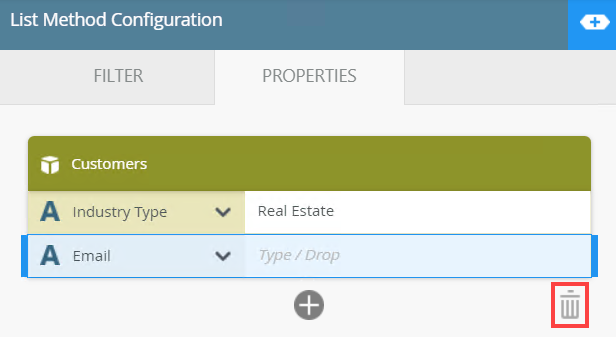
- In this example, the customer list filters on Industry Type and only sends the email to Real Estate customers.
On the Filter tab you see output properties, which means that all results returned and filtered on the K2 server after the query runs. You use the Properties tab for input properties, which means the query is updated to only return matching records. Using properties is generally better than using a filter, especially with larger data sets. In some cases, you might notice the same properties on both the Filter and Properties tabs. Smartbox SmartObjects, by default, can use any property as an input property. This means that, in most cases, the same properties show on both the Filter and Properties tab. When you use Advance SmartObjects, the input and output properties may differ.
See the Considerations section of this topic for information on performance difference between filtering and input properties.
When working with the custom SmartObject Get List Filter keep in mind the following considerations:
- The custom filter is only available on SmartObject Get List methods.
- You cannot open multiple custom SmartObject Get List Filter panels. This means nested configuration is not supported.
- Remember that you can choose to either filter records or specify properties as an input to the method. Filtering returns all records and filters on the K2 server, while properties modify the query first before the query executes, reducing the number of records returned.
- Since both filtering and specifying properties occur in server events, the performance between filtering or specifying properties is less of a concern, but using properties is a best practice to limit the amount of work on the K2 server.