1. Add the Application Categories
In this step you will add categories to the K2 Designer explorer. Categories are similar to folders, and are often used to organize your K2 environment, the applications in a K2 environment, and the application elements of an application. Elements include SmartObjects, views, forms and workflows. While it is not required to create Application-specific categories and folders, they are helpful to keep your work organized. This is especially important when working in a shared environment where multiple people are building applications. In this context, we will use categories to separate your tutorials from other applications.
- Launch K2 Designer and add the following categories to the All Items node in the K2 Designer explorer.
- K2 Learning
- Contact Management
- Forms
- SmartObjects
- ViewsIf you are working in a shared environment where there are multiple builds of the same application, consider adding your initials to the application name so that you can easier determine which projects are yours. For example, Contact Management YourInitials (like Contact Management KL).Contact Management Categories
- Contact Management
- Launch K2 DesignerIf you are unsure of how to launch the K2 Designer site, see Accessing K2 Sites.
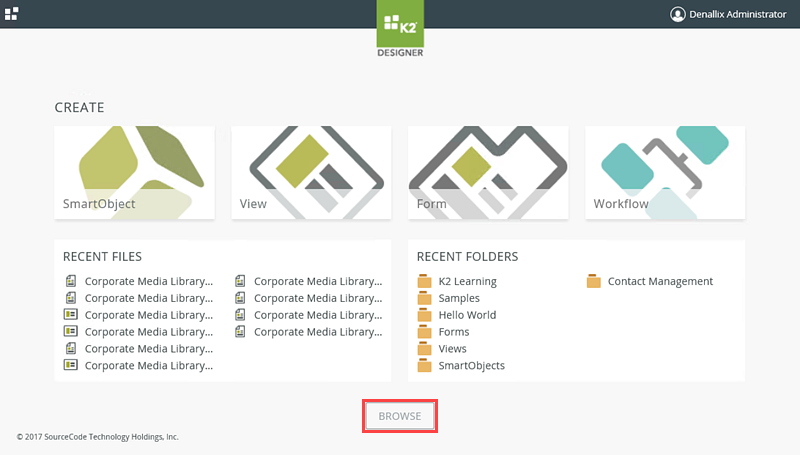
- K2 Designer will open on the home page. You will create new categories in the explorer. To navigate to the explorer page, click the BROWSE button.
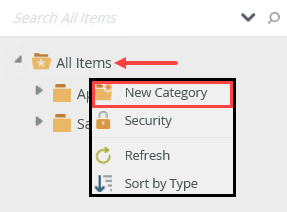
- To create a new category, right-click All Items and select New Category.
- For the category Name, enter
K2 Learning
then click OK. (If the K2 Learning category already exists, continue to the next step) - Now we will create a category for the application itself. Locate the K2 Learning category, then right-click and select New Category. For the category name, enter
Contact Management
then click OK. - Now we will create sub-categories to hold the various elements that will make up our application. Right-click the Contact Management category and select New Category. For the category name, enter
Forms
then click OK. - Repeat the step two more times and add the following additional categories under Contact Management:
SmartObjects
Views
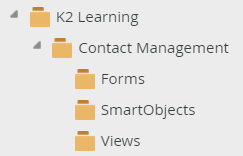
If you are working in a shared environment where there are multiple builds of the same application, consider adding your initials to the application name so that you can easier determine which projects are yours. For example, Contact Management YourInitials (like Contact Management KL).Your explorer should look like the image below.
- K2 Learning
Review
In this step, you created the categories we will use to organize the Contact Management application. While not required, categories help keep your projects organized, especially if you are working within a shared environment. In the next step, you will create the Contact SmartObject.