26. Rework a Claim; Resubmit a Claim
The originator's manager has decided to rework this claim, so the workflow now assigns a new task (from the Originator Rework task step) to the originator, or requester. The new task step) Originator Rework) uses the Originator Rework State rules for the form's configuration and behavior. As the originator, you will open the form, edit some fields, then resubmit the claim.
| TEST ONE
Expense claim submitted that is greater than $100 and less than $500. |
|---|
| Form Check |
|
| Workflow Check |
|
| What this demonstrates |
| This step demonstrates the looping effect that occurs when the originator's manager reworks a claim. The workflow loops between the Claim Approval step and the Originator Rework step. The looping can continue as long as necessary until either the manager or the originator selects a different action (other than Rework - Resubmit Claim). |
- Open OWA (Outlook) for the originator. If you are working on a K2-provided VM, use the OWA link in the Favorites bar or use the following URL: https://mail.denallix.com/owa/. Review the task notification email, then launch the Expense Claim Form from the worklist item link.
- Now, you will open the Expense Claim Form from the task notification email the originator receives. Switch back to the originator's browser, then launch a new tab. Click OWA in the Favorites bar, then log in as Administrator.If you used your own account for the task recipient, you can open your own email client.

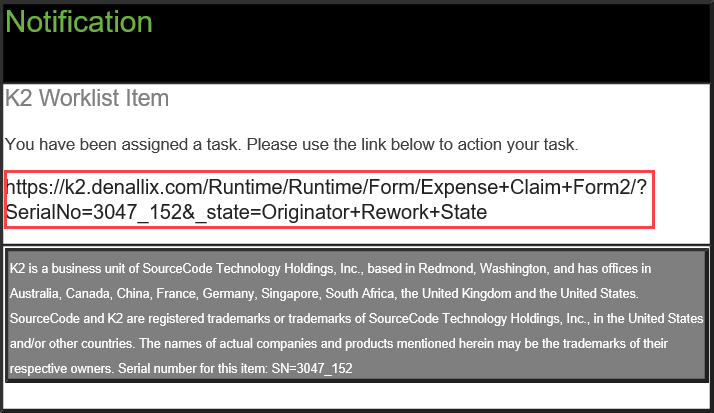
- Click the worklist item link to launch the Expense Claim Form.
 KNOWN ISSUE: In some K2-provided VM environments, the default-format task notification email is not converted to the updated K2 styles. Your email may look similar to the image below. Copy and paste the URL into a new browser tab to launch the Expense Claim Form for the Originator Rework State.
- Now, you will open the Expense Claim Form from the task notification email the originator receives. Switch back to the originator's browser, then launch a new tab. Click OWA in the Favorites bar, then log in as Administrator.
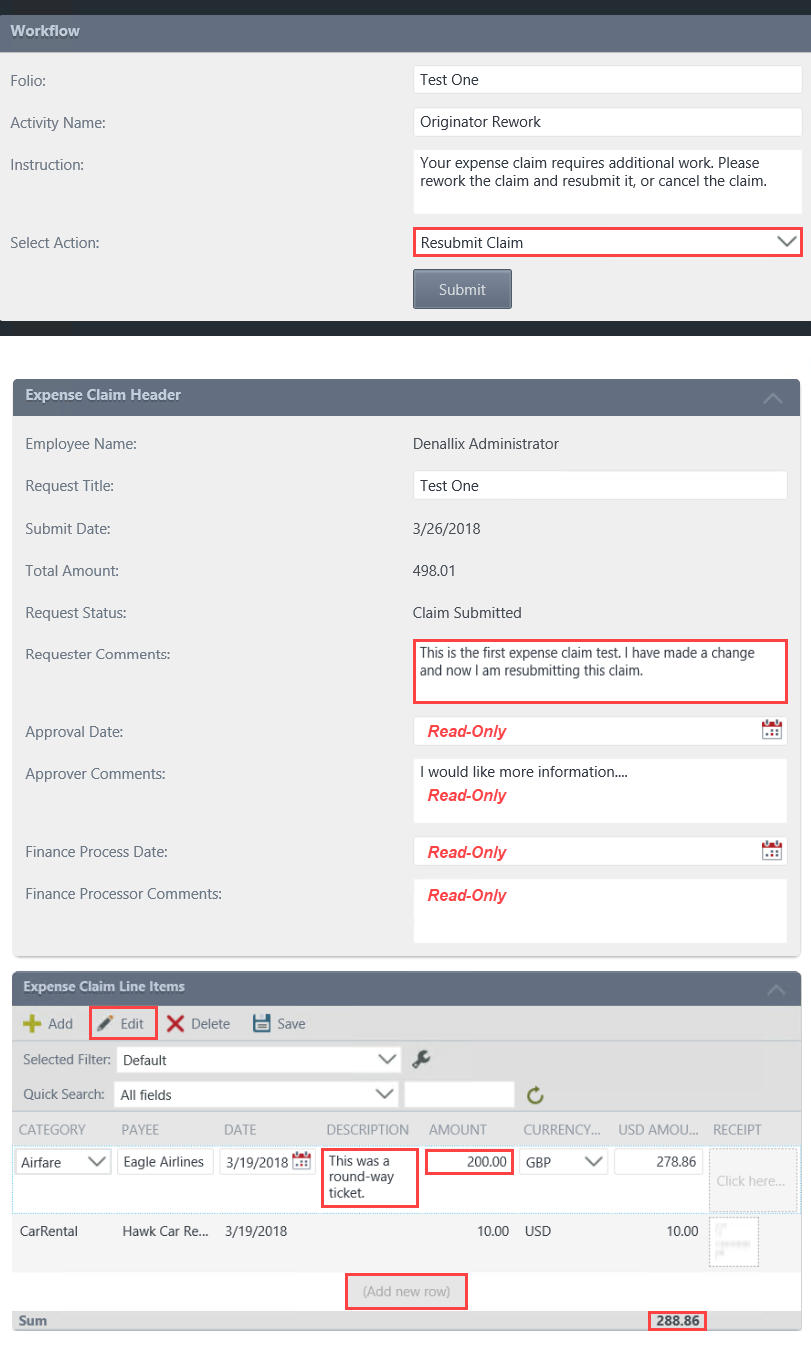
- Review the form, then edit your claim in any manner you like. Select the Resubmit Claim action, then submit the form. The form configuration should contain the following:
- Workflow task view appears at the top of the form with instructions, actions, and a submit button
- Finance Processing View is not visible
- Finance Button Table is not visible
- All controls are editable except Approval Date, Approver Comments, Finance Process Date and Finance Processor Comments.
- Originator's content loads in both the header and line items views
- Next, review the form in its Originator Rework State. Because you must rework the form, most of the fields are now editable. The exceptions to this are the approver and finance processing date and comments.
Edit the form, then resubmit it. You can edit any fields you like. In the image below, we added addition comments in the Requester Comments box. We added a description to the first line item, then changed the amount. Be sure to click the (Add new row) link if you change an amount, so that the Sum USD Amount Data Label updates.
- From the Workflow task view, select Resubmit Claim, then click the Submit button. Click OK when you see the confirmation dialog.
Review
In this step, you edited the Expense Claim Form, then resubmitted the claim. The workflow now routes back to the Set Status Submitted step, where the business analysis of the Total Amount value takes place once again. The form's configuration and behavior reflects the Originator Rework State. By now, you should have an idea of how the form fields change (read-only versus editable) based on the rules configured for the state. In the next step, you will explore the Finance Processing State and how the form looks and behaves differently due to manually configured rules.