13. Add a SmartObject Method Step to Update the Status
In this step, you will add a SmartObject Method step that updates the Request Status property of the Expense Claim Header SmartObject. You will update the status throughout the workflow as it progresses. In this initial SmartObject Method step, you also map the Workflow ID to the SmartObject > Workflow ID property (you will use this ID for building a composite SmartObject later on for your reports).
- From the Toolbox > Basic node, add a SmartObject Method step to the empty placeholder (below the Start step).
- First, you add the SmartObject Method step to the design canvas. Click the Toolbox toggle to expose the menus. Expand the Basic menu, then drag a SmartObject Method step into the empty placeholder just below the Start step.
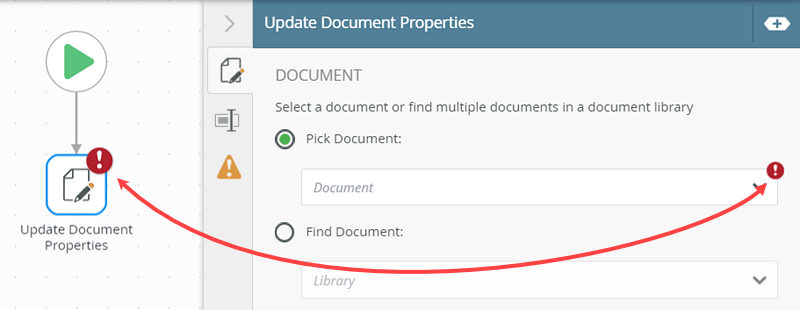
 When adding a step to the workflow design canvas, you may see a red warning badge. This badge simply indicates the step has required configurations. When you expand the Configuration Panel, the required configuration is also flagged. (Note that the steps below may be different from your screen.)
- First, you add the SmartObject Method step to the design canvas. Click the Toolbox toggle to expose the menus. Expand the Basic menu, then drag a SmartObject Method step into the empty placeholder just below the Start step.
-
In the Configuration Panel, configure the SmartObject Method settings using the table below as a guide. If you need help, expand the "Show me how..." section.
Setting Value Notes SMARTOBJECT Expense Claim Header You are updating the header SmartObject with the request status and the ID of the workflow instance. METHOD Save Save is the equivalent of update in K2 terms. You are updating the current record in the data source. INPUT MAPPINGS ID
Request Status
Workflow IDMap the Expense Claim Header reference > ID to the ID input mappings. This tells K2 which record to update.
Manually enter Claim Submitted for the Request Status value.
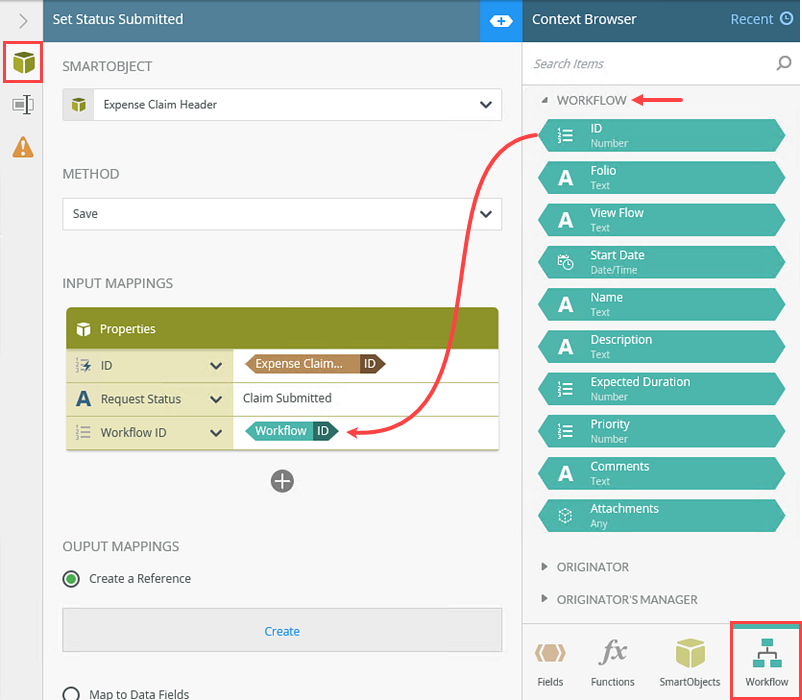
Switch to the Workflow tab. Map the WORKFLOW > ID to the Workflow ID input mappings. You are storing the ID of the current workflow instance back to the header SmartObject. You will use this ID for creating a composite SmartObject later on in the reporting steps.
PROPERTIES Name = Set Status Submitted You rename the step to a more meaningful name. This is helpful both on the design canvas and in reports. - Next, you will configure the settings to update the Request Status property and map the Workflow ID.
Begin by selecting the SmartObject Method step so that it is active. Expand the Configuration Panel. For the SMARTOBJECT, click the Select SmartObject drop-down, then navigate to and select the Expense Claim Header SmartObject. Click OK.
- For the METHOD, select Save. Save is the equivalent of update in K2 terms. You are updating the record in the data source.

- Now, you are ready to define the input values for updating the SmartObject. Recall when you configured the Start step - start event. The first screen displayed the data sources K2 discovered when you associated the workflow with the SmartForm and created references to the SmartObject. This is where those references come into play. You are mapping several SmartObject reference properties to the workflow step, thus creating a relationship between the step configuration and the SmartObject property.
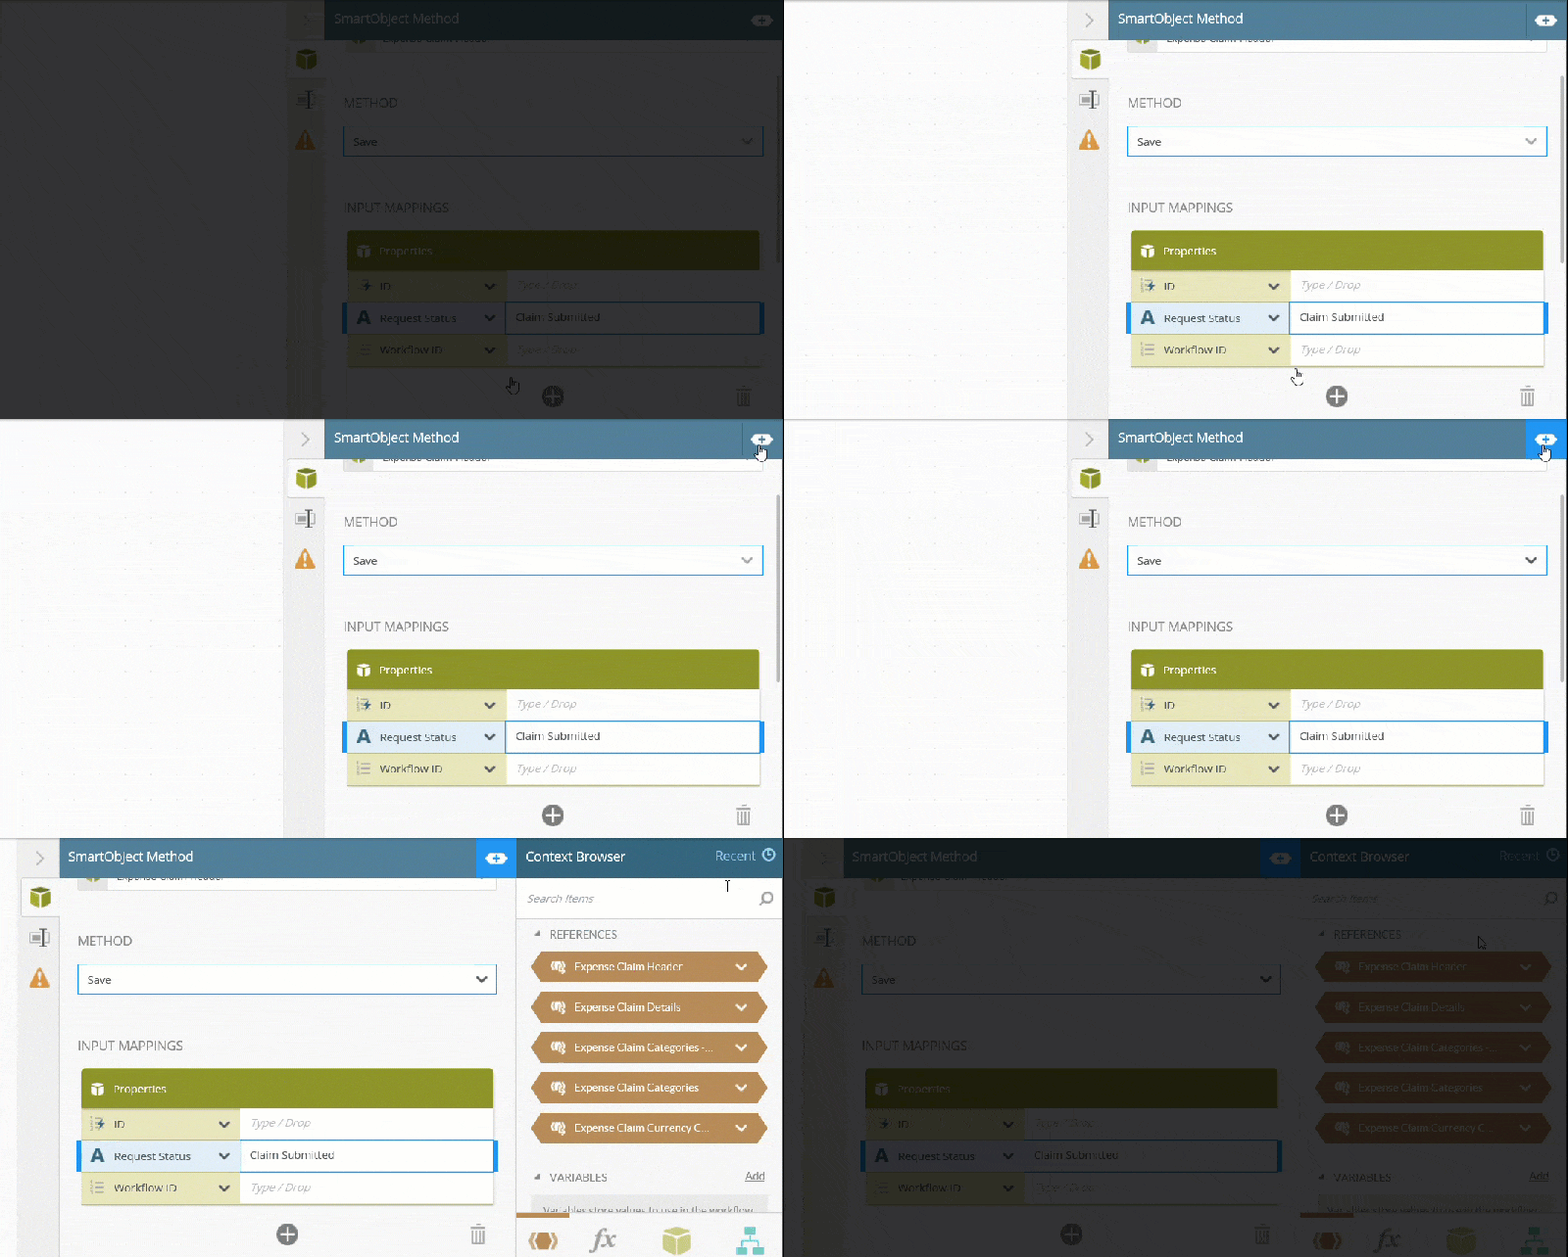
For the INPUT MAPPINGS, click the Add (+) icon. CHECK the boxes for the ID, Request Status, and Workflow ID properties. These are the SmartObject properties you are updating.
- For the Request Status, enter
Claim Submitted
then press <ENTER> to set the value. You want this value to reflect the beginning of the claim submittal process.
- You will map the ID and Workflow ID values from the Expense Claim Header SmartObject reference. Expand the Context Browser.

- Expand the Expense Claim Header REFERENCES. Drag the ID into the INPUT PROPERTIES > ID text box. The ID mapping tells K2 which record to update. The ID of the current record is the ID of the record to update.

- Next, you will map the Workflow ID. Click the Workflow tab at the bottom of this column. Expand the WORKFLOW node, then drag the Workflow ID into the INPUT PROPERTIES > Workflow ID text box. The Workflow ID mapping saves the current workflow instance ID back to the header SmartObject. You will use this value when creating your composite SmartObject for reports.

Your INPUT MAPPINGS should look like the image below.

- Next, you will configure the settings to update the Request Status property and map the Workflow ID.
-
Change the name of the step to Set Status Submitted.
- Next, you will change the name of the step, which updates the step label on the design canvas. By giving your steps meaningful names, you can tell at a glance what the step does. This applies to the design canvas, as well as reports.
Switch to the PROPERTIES screen. Change the step Name to
Set Status Submitted
then collapse the Configuration Panel (by clicking the toggle once again).
- Click the Save icon in the top right hand corner of the screen to save your progress.
Your workflow should look like the image below at this point.

- Next, you will change the name of the step, which updates the step label on the design canvas. By giving your steps meaningful names, you can tell at a glance what the step does. This applies to the design canvas, as well as reports.
Review
In this step, you added and configured a SmartObject Method step that updates two properties in the main Expense Claim header SmartObject record: Request Status and Workflow ID. You will update the status property throughout the workflow process as the workflow progresses.
In the next step, you add a Decision step and configure it to analyze the claim total amount, then route the workflow based on the amount.