Object Browser - Process/Activity Data
The Process/Activity Data browser let's you access and create data and XML fields associated with your process. It also gives you the ability to access and create SmartObject associations and references.

| Data Type | Description | How to use it |
|---|---|---|

|
Data fields contain custom information related to an activity or process |
Expand the Data Fields node and select the data field
OR Expand the Data Fields node and create a new data field |

|
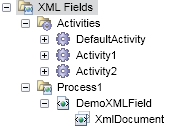
XML fields contain custom XML nodes related to an activity or process |
Expand the XML Fields node and select the required XML field
OR Expand the XML Fields node and create a new XML field |

|
Associations provide mapping between the workflow and SmartObject properties |
Expand the Associations node and select the data field
OR Expand the Associations node and run the SmartObject Association wizard |

|
References provide mapping between SmartObject methods and process data fields |
Expand the References node and select the data field
OR Expand the References node and run the SmartObject Method Reference wizard |
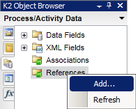
Right clicking on either Associations or References allows you to add a new association or reference.
To refresh information in the context browser right-click on a node and select Refresh
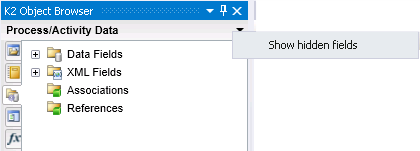
Sometimes data and XML fields are hidden. You can unhide them by clicking the down arrow next to the words Process/Activity Data and selecting Show hidden fields.


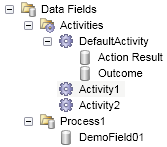
Expanding the Data Fields node shows the following field types:
| Field Type | What it is | How to use it |
|---|---|---|

|
Provides access to Data Fields that have been configured for a process or activity |
Expand the activity to expose the data fields
OR Right-click the activity and click Add See Add a Data Field |

|
Provides access to data fields configured at the level of the process and available across multiple activities |
Select the process data field
OR Right-click on the process and click Add See Add a Data Field |

|
Custom data fields - all objects beneath the activity or process nodes |
Select the data field
OR Right-click on the data field and select Edit See Add a Data Field to see a breakdown of the fields that can be edited |
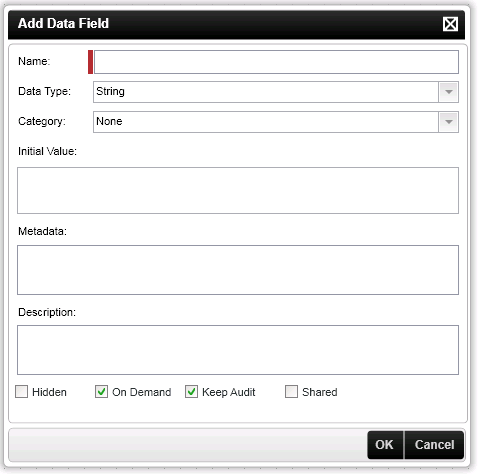
Add Data Field
Right-click on the Process/Activity Data browser and expand the nodes until you see the activity or process node. Right-click on the activity or process and select Add.
| Option | What it is | How to use it | ||||||||||||||||
|---|---|---|---|---|---|---|---|---|---|---|---|---|---|---|---|---|---|---|
| Name | The name of the Data Field that will be displayed within the Object Browser | Enter a name for the data field | ||||||||||||||||
| Data Type |
|
Select the data type from the drop down | ||||||||||||||||
| Category |
The category options allow you to set where the data field value can be accessed.
NOTE: If System is selected it does not appear at runtime and is not visible in reports. |
Select the category from the drop down | ||||||||||||||||
| Initial Value | This value is determined at design time by the developer and exported with the workflow definition. | Enter the initial value | ||||||||||||||||
| Metadata | Metadata describes how and when and by whom a particular set of data was collected, and how the data is formatted. | Enter any required metadata | ||||||||||||||||
| Description | Custom description that describes the data field. | Enter a description | ||||||||||||||||
| Hidden | Prevents the data field from begin shown in the object browser. | Click on the check box | ||||||||||||||||
| On Demand | Selecting this option ensures that K2 Server only loads data fields when and if required either by reading a value or setting a value in a data field. The data on demand option impacts the performance of K2 Server. | Click on the check box | ||||||||||||||||
| Keep Audit | An audit is kept of all the modified values of the data field. This option is only available if the data field is logged. | Click on the check box | ||||||||||||||||
| Shared | A shared data field cannot store separate values. Every time the value is set for that data field, the previous value is overwritten. This option is only available on activity level. | Click on the check box |

The Keep Audit check box can only be checked once the Keep Log check box is selected. If the Keep Log is not selected then the Keep Audit checkbox is disabled.
- A shared data field cannot store separate values. Every time the value is set for that data field, the previous value is overwritten
- A non-shared data field allows it to keep separate values for all the slots in an activity. A non-shared data field is typically used with a succeeding rule where you want to evaluate more than one slot, e.g. continue with the process when at least two approve actions have been selected or when at least one decline action has been selected
| Field Type | What it is | How to use it |
|---|---|---|

|
Provides access to XML fields that have been configured for an activity |
Select the activity XML field
or Right-click on the activity and click Add |

|
Provides access to XML fields that have been configured within a process |
Select process XML field
or Right-click on the process and click Add |
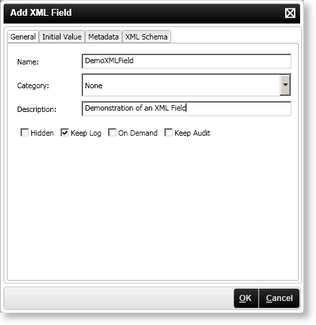
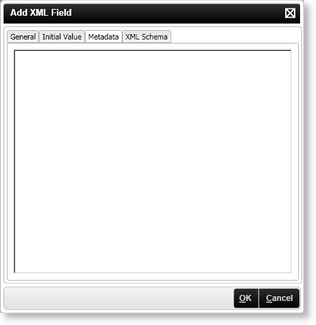
Add XML Field
Right click on the Activity/Process Data Browser and expand the nodes until the XML field node is visible. Right-click on the Activity or Process and select Add.
| Option | What it is | How to use it |
|---|---|---|
| Name | The name of the XML field that will be displayed within the Object Browser | Enter a name for the XML field |
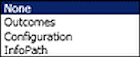
| Category |
The category options allow you to set where the XML field value can be accessed.
|
Select the category from the drop down |
| Description | The custom description of the XML field | Enter a description for the XML field |
| Hidden | Prevents the XML field from begin shown in the object browser | Click on the check box |
| Keep Log | Keeps of log of the XML field | Click on the check box |
| On Demand | Selecting this option ensures that K2 server only loads XML fields when and if required either by reading a value or setting a value in a data field. The On Demand option impacts the performance of K2 server | Click on the check box |
| Keep Audit | This option enables you to keep track of the changes made during the execution of the workflow process and is by default already selected. | Click on the check box |
| Option | What it is | How to use it |
|---|---|---|
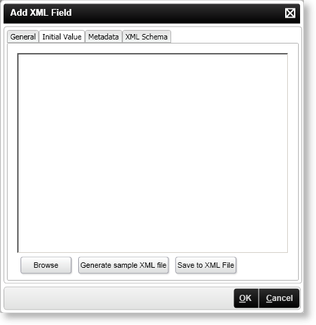
| Initial Value | The value contained within the XML Node at the beginning of the activity or process | Specify the required value |
|
Generates a sample of XML | Click on the Generate sample XML File button |

|
Saves the XML to a file on the local system | Click on the Save to XML File button |
| Option | What it is | How to use it |
|---|---|---|
| Metadata | Metadata describes how and when and by whom a particular set of data was collected, and how the data is formatted. | Specify metadata |
| Option | What it is | How to use it |
|---|---|---|
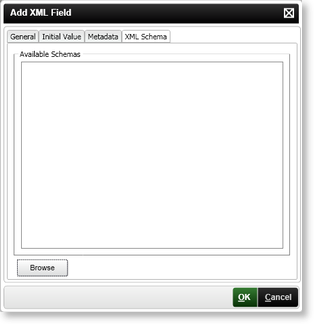
| Available Schemas | Describes the structure and the content constraints of the XML |
Specify an XML Schema
OR Browse the local file system and load an XML schema |
Initial Values
When XML fields are created, make sure that the fields are not created with null values.
<XMLDocument xmlns:xsi =http://www.w3.org/2001/XMLSchema-instance>
<DataField>FieldValue</DataField>
</XMLDocument>
The initial value is a value created during design time and the XML field uses that value for each new instance of the process until some point when the value is updated.
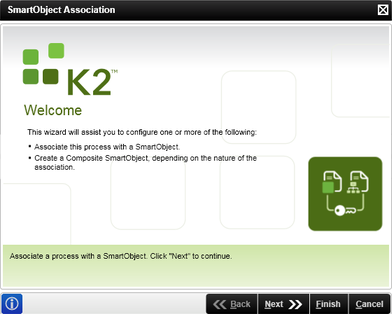
The SmartObject Association wizard creates a mapping between a process SmartObject and a custom SmartObject . When adding a SmartObject association in a workflow, it creates an association between the process SmartObject's properties (process object, activities objects, client event objects) and the other SmartObject (e.g. Order). When running reports and choosing the specific workflow SmartObject, it show the other SmartObject (e.g. Order) as a related object.
The SmartObject Association wizard is accessed in the Object Browser > Process/Activity Data. To open the wizard right-click on the Associations folder and select Add...

The Associations folder is only available when the design canvas is open, and the wizard can only be run if the process has data fields.
It is not necessary to associate all SmartObjects used in a workflow with the process. For example, when using the User SmartObject on the To field of the E-mail event, it does not make sense to create an association to the User SmartObject, for this rather use a reference or drag the SmartObject property in. But if you're using a SmartObject property many times, you can use an association.
The Welcome page is visible once right-clicking on the Associations folder and selecting Add...
The Association Details page allows you to select the SmartObject used in the association process. Before a SmartObject is selected the following page is displayed.
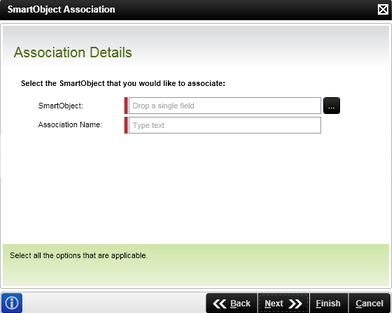
| Feature | What it is | How to use it |
|---|---|---|
| SmartObject: | Select the SmartObject to be associated with the current SmartObject | Select the eclipse icon to display the Context Browser. Browse to Environment > SmartObject Server(s) and select the SmartObject. |
| Association Name: | The association can be given an alias name for future reference | Type a descriptive name in the box for the association |
To select the required SmartObject:
- The SmartObject can be dropped in the SmartObject box on the wizard, or
- Click on the SmartObject in the context browser. When the SmartObject is highlighted, click OK.
The Association Details screen will be populated with default relationships as soon as the SmartObject is selected to which the current SmartObject should be associated with.
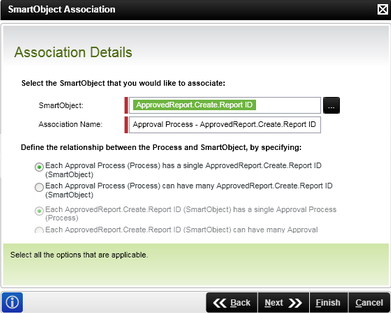
| Feature | What it is | How to use it |
|---|---|---|
| SmartObject | Name of the SmartObject | Select the eclipse icon to display the Context Browser. Browse to Environment > SmartObject Server(s) and select the SmartObject. |
| Association Name | Identity of the Association | Type a descriptive name in the box for the association |
| Each Process has a single SmartObject A | Defines the classification of the database relationship | Select the option |
| Each Process can have many SmartObject A | Defines the classification of the database relationship | Select the option |
| Each SmartObject A has a single Process | Defines the classification of the database relationship | Select the option |
| Each SmartObject A can have many Processes | Defines the classification of the database relationship | Select the option |
To select the required SmartObject:
- The SmartObject can be dragged and dropped in the SmartObject box on the wizard, or
- Click on the required SmartObject in the Context Browser. The SmartObject will be highlighted, click OK.
The Association Details page allows you to select the SmartObject properties to bind to the current process data fields.
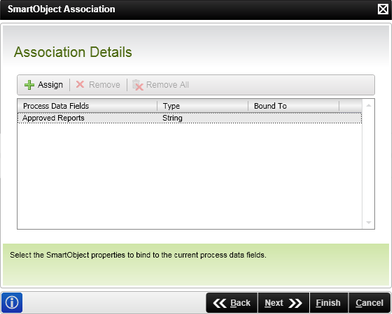
| Feature | What it is | How to use it |
|---|---|---|
| Process Data Fields | Displays the current process data fields | Select the process by clicking on the name |
| Type | Displays the property's type | View the type |
| Bound To | Displays the name of the associated SmartObject property that has been used in the mapping | View the mapped object |
| Assign | Click Assign to open the Map Property To: page | |
| Remove | Click Remove to remove the mapping | |
| Remove All | Click Remove All to remove all the property mappings | |
Assign a mapping
Click the Assign button to open the Map Property To: screen as shown below:
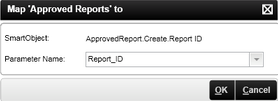
| Feature | What it is | How to use it |
|---|---|---|
| SmartObject Name: | Displays the name of the SmartObject selected to create the association | View the name |
| Property Name: | Lists the SmartObject properties that can be used to the mapping property | Click the down arrow to select a SmartObject property |
This page marks the end of the SmartObject Association wizard.
The SmartObject Method Reference wizard creates a reference between a SmartObject Method and a process data field. Adding a reference to a SmartObject method in a workflow process provides you with easy access to the SmartObject return properties of the method that it's bound to. References are typically used where specific SmartObject properties are used multiple times in the process.
The SmartObject Method Reference wizard is accessed in the Object Browser > Process/Activity Data. To run the wizard right-click on the Reference folder and select Add...
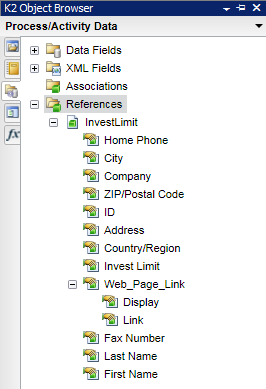
After the reference has been added via the SmartObject Method Reference Wizard, it can be viewed in the K2 blackpearl Object Browser > Process/Activity Data > References. This reference can now be used instead of navigating to the SmartObject itself.
UsageThe same method reference can be consumed again within the same process. The method reference runs once per activity and the dataset generated by that execution may, depending on the nature of the process, become out of sync with the data in the SmartObject. To get the latest data, the method reference must be executed again, but this can only happen in the next activity. Each execution of the method reference creates a cached reflection of the SmartObject data that is not real time.
The Welcome page is visible once right-clicking on the Reference folder and selecting Add...
The SmartObject Details screen allows the user to add a name for the new reference and select the SmartObject method.
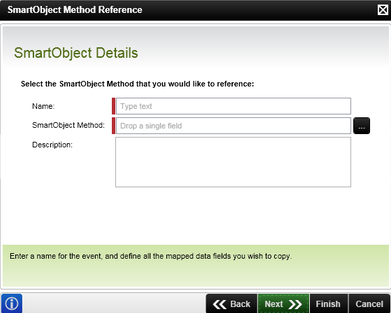
| Field | Desription | How to use it |
|---|---|---|
| Name | Set the name of the new reference | Type the name of the new reference in the Name box |
| SmartObject Method | Set a SmartObject method to be used in the new Reference | Select the ellipsis icon to display the Context Browser. Browse to Environment > SmartObject Server(s) and select the required SmartObject Method |
| Description | Set a description of the reference | Type a description of the association |
To select the required SmartObject:
- The SmartObject can be dragged and dropped in the SmartObject box on the wizard, or
- Click on the SmartObject in the Context Browser. When the SmartObject is highlighted, click OK.
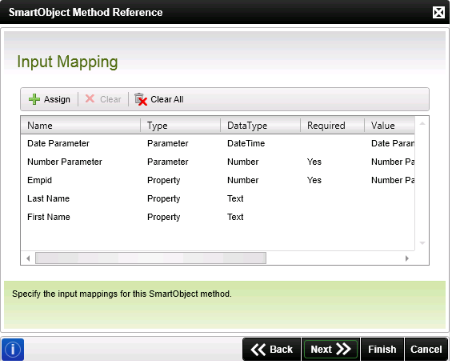
The Input Mapping page enables you to assign and delete references between SmartObject properties/parameters and process data fields. Parameters and input properties can be required or optional. They are grouped together on the Input Mapping page. Parameters are listed first, and then properties.
| Feature | What it is | How to use it |
|---|---|---|
| Name | The name of the Input field | N/A |
| Type | Indicates whether it is a SmartObject Property or a SmartObject Parameter | N/A |
| DataType | The data type of the SmartObject property or parameter | N/A |
| Required | Indicates whether the property or parameter is required for the specific method | N/A |
| Value | The process data field bound to the SmartObject input field | N/A |
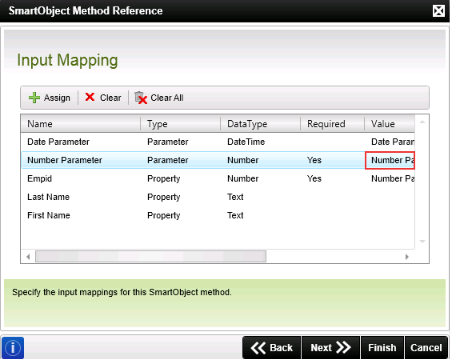
| Assign | Assign a mapping to a property or parameter | Select the SmartObject Property or Parameter in the list of Input fields and click Assign to select the process data field that must be bound to the SmartObject property or parameter |
| Clear | Deletes a mapping on a specific property or parameter | Select the reference to be deleted and click Clear |
| Clear All | Deletes all mappings | To delete all the displayed references click Clear |
Input fields must be bound to a Process Data Field for the reference to be created.
Assign a mapping
On selecting the Assign option the Map 'XX' to window will be displayed. Browse to the process data field that is bound to the selected SmartObject property or parameter and click Add.
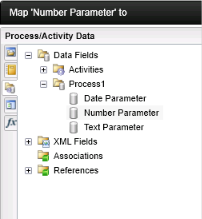
The process data field displays in the Value column next to the referenced SmartObject input field.
It is also possible to filter SmartObject methods.
This page marks the end of the SmartObject Method Reference wizard.