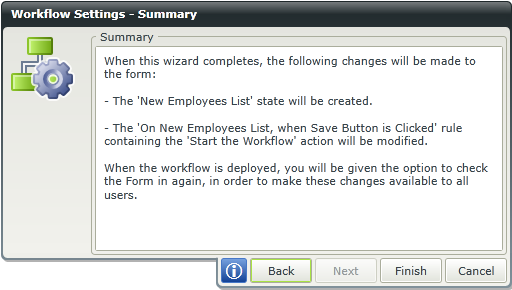
Workflow Settings
To access the Workflow Settings, click on the Start icon from the design canvas.
![]()
The Workflow Settings wizard opens with the Workflow Name page of the wizard. If the start criteria is based on the SharePoint List/Library, the Workflow Name page will display as follows:
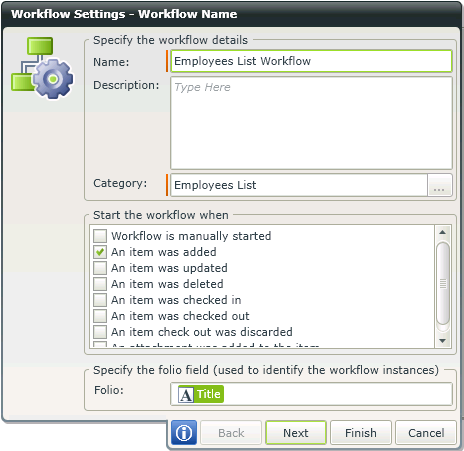
- Name: The name of the Workflow as specified at creation of the workflow using the K2 for SharePoint Application from the SharePoint List/Library.
- Description: Type a description for the workflow if required.
- Category: The Category field is populated with the SharePoint List/Library name if the workflow is being created using the K2 for SharePoint Application.
- Start Criteria: The start criteria selected in the K2 for SharePoint Application is displayed. Change the criteria if required.
- Folio: The Folio field is populated automatically with the SharePoint List/Library Title column when the workflow is being created. Change the value of the Folio field if required. Type a value or drag a pre-configured field from the Context Browser such as a Data Field, Item Reference or SmartObject Load method property. Note that when a SmartObject Load method property is used, an input property is required for the correct information to load.
If the workflow start criteria is based on a K2 smartforms, the Workflow Name page display. For more information see Changes to the wizard-based integration between Workflows and SmartForms
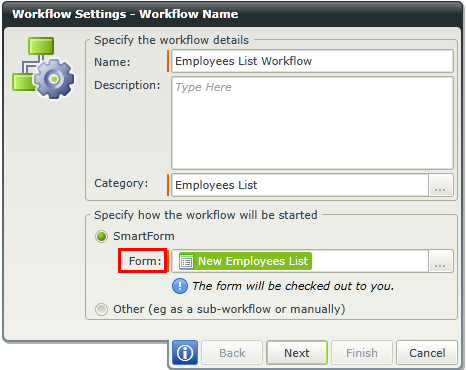
To see more configurable options relating to the Form , click Next and then click the drop-down arrow next to Additional Settings. The page displays the following:
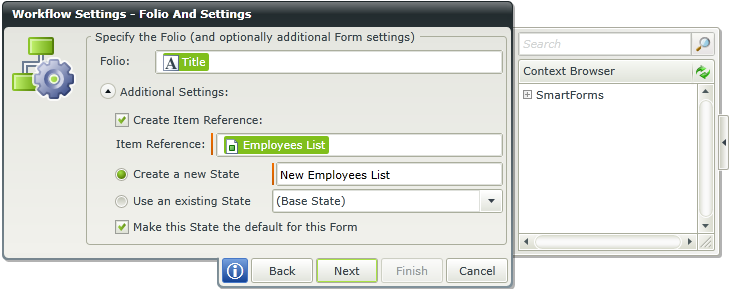
For more information on editing these options, go to K2 smartforms (online).
Click Next to continue with the wizard.
Existing Data Fields will display or new Data Fields can be created. Data Fields are another form of data that can be used in workflows to view, store or update information. Drag data fields from the Context Browser to the form fields and controls list to bind them together. Fields such as pre-configured Data Fields, Item References or SmartObject Load method property. Note that when a SmartObject Load method property is used, an input property is required for the correct information to load. When the form loads, those data fields are used to populate values in the form.
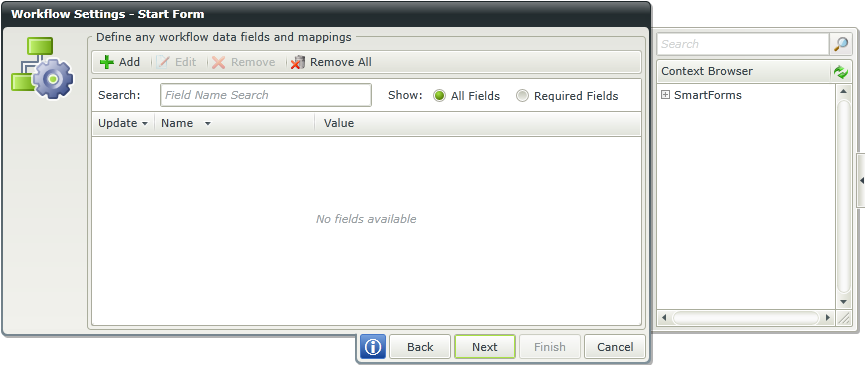
For more information on adding Data Fields go to the Adding a Data Field topic.
Click Next to continue with the wizard.
Select the rule to start the workflow from the drop-down list.
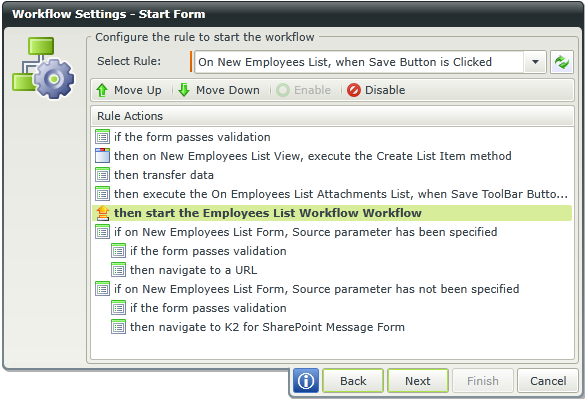
Click Next to continue with the wizard.
The default outcome is displayed which is a single outcome.
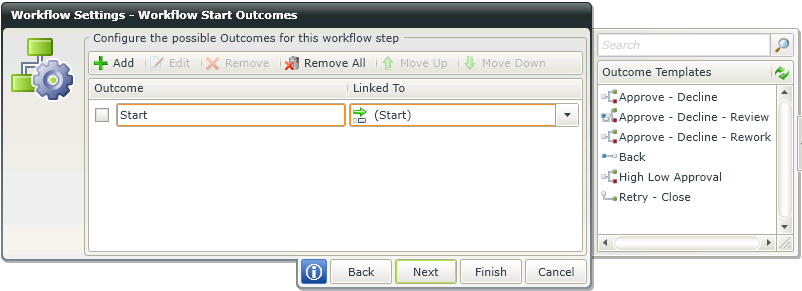
- Click on Add to add a new workflow start outcome or drag a template from Outcome Templates, These outcomes will all be new workflow steps as they are created from the Start Workflow step.
- To add rules to the outcome, select the outcome and click Edit. An action statement can be added by clicking Add Action Statement. Click on the drop-downs to configure the statement.
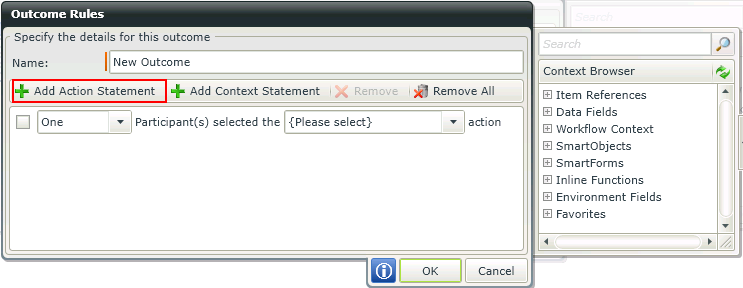
- To add context statements, click on the outcome and click Add Context Statement. Type a value or drag a pre-configured field from the Context Browser such as a Data Field, Item Reference or SmartObject Load method property. Note that when a SmartObject Load method property is used, an input property is required for the correct information to load.
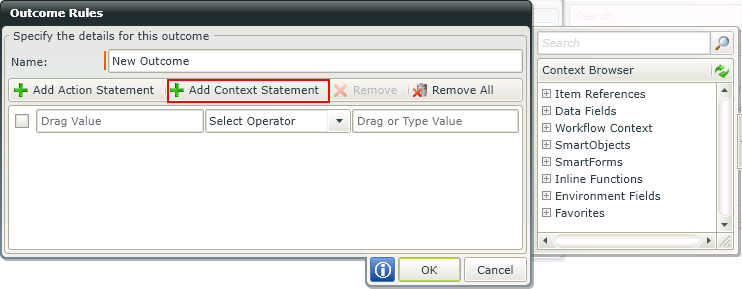
Click OK after adding Action or Context Statements.
Click Next to continue with the wizard or Finish to save changes and close the wizard.
On the last page of the Workflow Settings wizard, Workflow Rights can be assigned. The default assigned rights will display. Use the User/Group Browser to add more users or groups and assign rights.
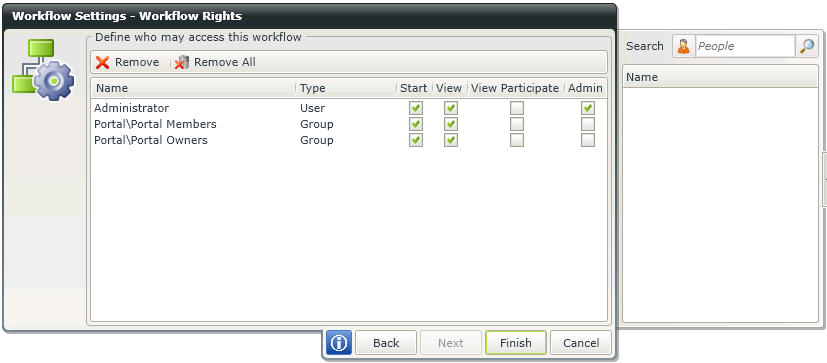
After adding a user or group, assign one or more of the following rights:
- Start: User will be able to start this specific workflow
- View: User will be able to view statistics for all instances of this specific workflow when running reports against the workflow
- View Participate: User will be able to view reporting statistics for only the instances of this workflow where they actually participated in the workflow (e.g. starting the workflow or completing a task in the workflow)
- Admin: User will have Administrator rights to this specific workflow and can Start, View or Manage the workflow
- Remove: Select a User or Group and click Remove to remove only that user or group
- Remove All: Removes all the Users and Groups
Click Finish to save all changes and complete the wizard.
When creating a new workflow, the following page is available. This page does not display when editing the Start event.
