Deadline tab
Use the Deadline tab to control what happens to the task when recipients have not actioned it within a set amount of time. You can specify when the task expires and when the workflow moves on to the next step. You can also use the Task Result Rule to evaluate and configure the deadline.
Example of a configured Deadline

- Select the Task step and click the Deadline tab.

- Click the calendar icon to display the date picker. Select a date using the calendar control.
-
Drag and drop inline functions and field properties (from the Context Browser) into the field to create dynamic functions.
- If this task starts on a weekday and is not completed within 30 minutes, the deadline is reached and task expires.
- If this task starts on a Saturday or Sunday it falls outside of the specified work hours. This means the workflow will wait till Monday 8 am (within working hours) and then expire the task.
- The task result rule is evaluated for each task response as it comes in.
- If the deadline is reached, the task is expired, and the task result path you specify is followed.
- You can use linked or unlinked results.
- Select On Date and click the calendar icon to choose a date.

- Choose a date from the calendar control.

- You can drag dynamic values into the On Date field. From the Context Browser, select and drag inline functions from the Context Browser Functions, Context Browser Fields, Context Browser SmartObjects and / or Context Browser Workflow categories to define the specific date field.

- The Smartfield Composerdisplays. Use the Context Browser to drag fields and functions to define your deadline date.
 For more information on how to use SmartFields, see the Smartfield Composer topic.
 - You can change the name of the configured function by double-clicking the label.

- To close the Smartfield Composer click Close. The defined field displays as follows:

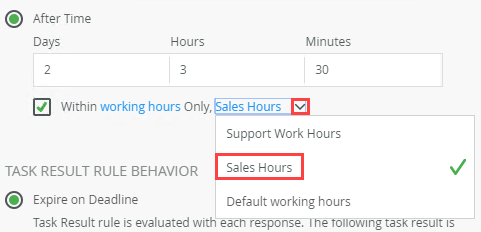
- Select the After Time radio button.

- Enter values in days, hours, minutes, and seconds. You can use a single field or multiple fields, such as two days, or one hour and 30 minutes.

- Check the Within Working Hours Only check box to ensure the task expires after the set time within the specified working hours. Click the working hours link to edit or add working hours.

- Click the Default working hours drop down menu to select a pre-configured set of work hours.

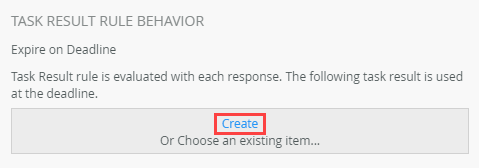
- From the Task Result Rule Behavior section, choose Expire on Deadlineto evaluate theTask Results Rule with each response. Specify or create the task result to use the task deadline is reached. To select an existing result, click the Choose an existing item... link. You can use linked or unlinked results.

- Select a task result and click OK.

- Notice the deadline result is linked to the deadline. To edit the deadline result label, click the Edit link. Click the Change link to select a different deadline result. Changing the label name does not update the linked task result action on the Task Detail tab.

- To create a new deadline result, click theCreate link.

- The Expired result is added. To edit the deadline result label, click the Edit link.

- You can use the Expired result as an unlinked task result action on the Results/Voting tab.

- You can also use this result in the Custom Voting Rule.

Your changes are automatically saved.
The following table explains the available options:
| Option | Explanation | How to Use |
|---|---|---|
| Deadline | ||
| No Deadline | Allows you to have no deadline on the task. This is the default configuration for all tasks. | Click the No Deadline option. |
| On Date | Allows you to add a deadline on a specific or calculated date. |
Click the On Date option. The following applies to this field: |
| After Time | Specify an elapsed time interval for the deadline, for example 7 days after the task has started. This option allows you to set days, hours, minutes, and seconds. You can use a single field or multiple fields, such as two days or one hour and 30 minutes. You cannot use decimal values such as 9.5 hours. Instead use 9 hours and 30 minutes. |
Click the After Time option. Enter values in days, hours, minutes, and seconds. Drag and drop inline functions and field properties (from the Context Browser) into the field to create dynamic functions. |
| Within Working Hours Only |
This function only works when the After Time option is selected. It allows you to set the deadline to happen within specified working hours. If you select this option, the task expires after the set time within the specified working hours. If you don't select this option the deadline does not take these hours into consideration. To define the working hours for your business, click the working hours link. You need access to K2 Management to set the working hours. For more information on how to set your working hours see the Work Hours topic. The Default working hours drop down menu has a list of work hours defined in K2 Management. If you have not defined any working hours, the Default working hours option is selected. Example: You select the After Time options and specify that the task needs to expire after 30 minutes. You also select this to happen within working hours. The working hours option you select is for the Sales team, which means Monday to Friday 8 am - 5 pm. By default, the Within Working Hours Only option is checked. |
Check the Within Working Hours Only box. Click the working hours link to edit or add the working hours parameters. Click the Default working hours drop down menu to select a pre-configured set of work hours. |
| Task Result Rule Behavior | ||
| Expire on Deadline |
Use this to expire the task at the deadline. |
Click the Expire on Deadline option. Click Create to create or select a task result action. Click the Choose an existing item... link to select a task result action. |
For more information on how to use fields, functions, SmartObjects, and workflow context, see the Context Browser topic.
For more information on how to set your working hours see the Work Hours topic.