How To: Attach a PDF File to an Email Step in a Workflow
In the following scenario, you attach a PDF file to an email in a workflow. To do this, you use a form parameter and rules along with the Save As PDF control, and then map the parameter to a data field used to attach the PDF to the email using a Send Email step.
Steps
Follow the steps below to set up the scenario:
- Open K2 Designer and create a SmartObject called Quote with following properties:
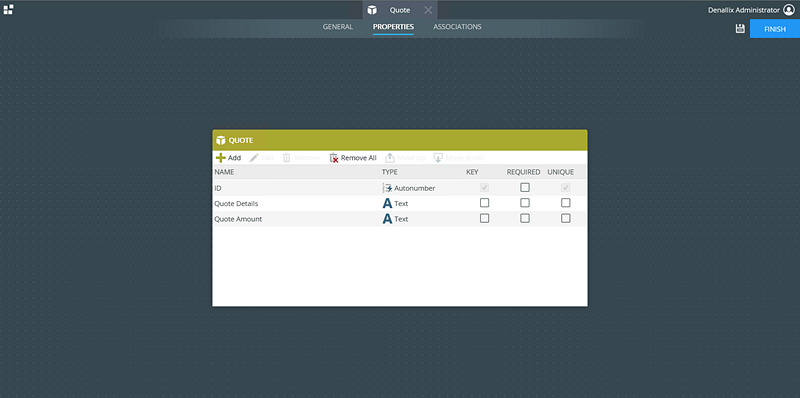
Customer SmartObject Property Type Key Required Unique ID Autonumber Yes No Yes Quote Details Text No No No Quote Amount Number No No No -
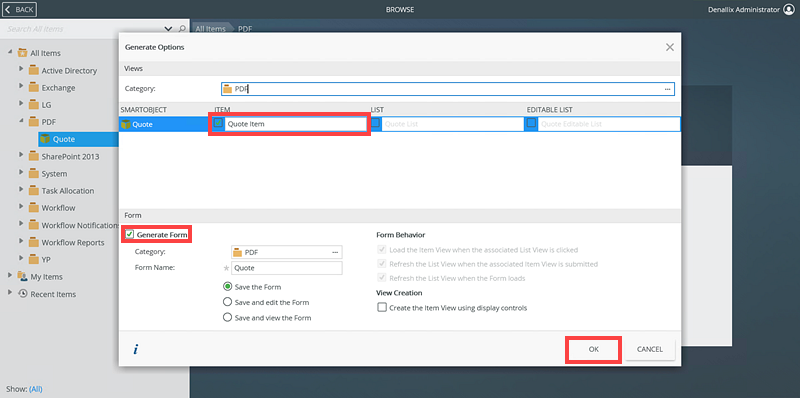
Autogenerate an Item View and a Form using the SmartObject.
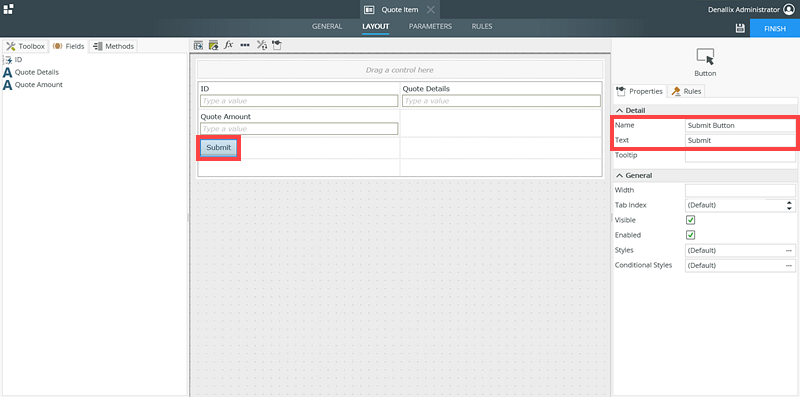
- Edit the view and remove all buttons except Create.

- Rename the Create button to Submit and save the view.
-
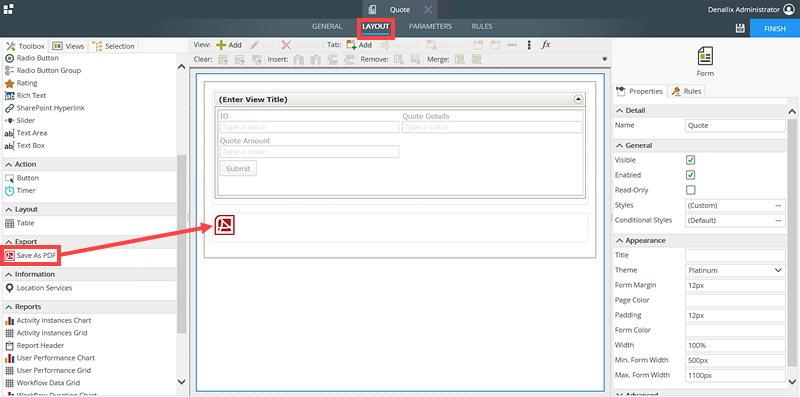
Edit the form, go to the Layout tab, and drag the Save as PDF control onto the canvas.
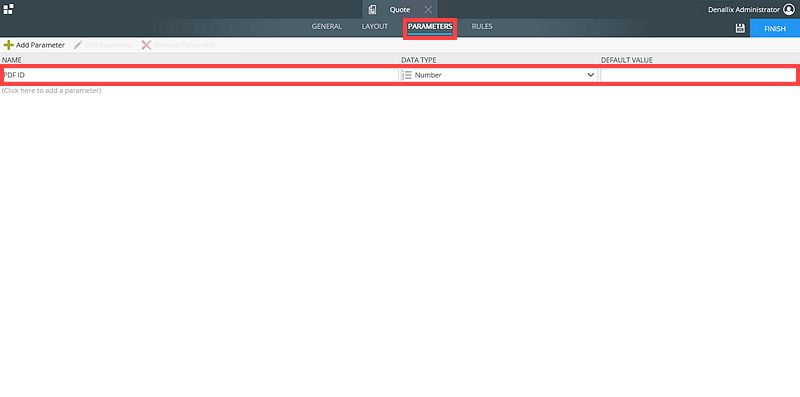
- Click the Parameters tab and add a parameter called PDF ID. Configure the Data Type as Number for this scenario. It is important to match the parameter data type with what the load method of the Save As PDF SmartObject.
-
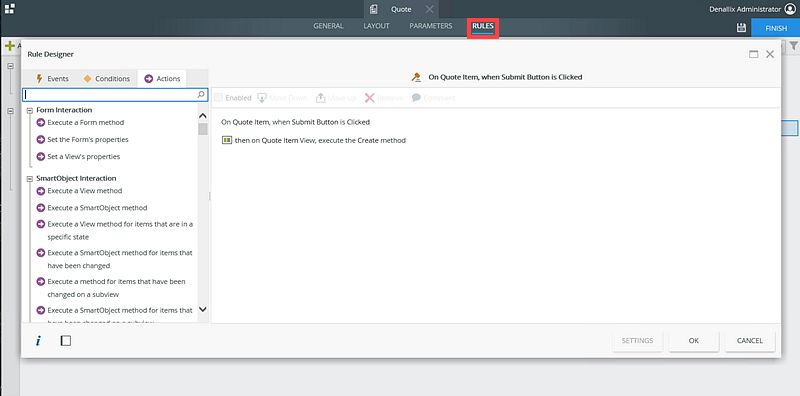
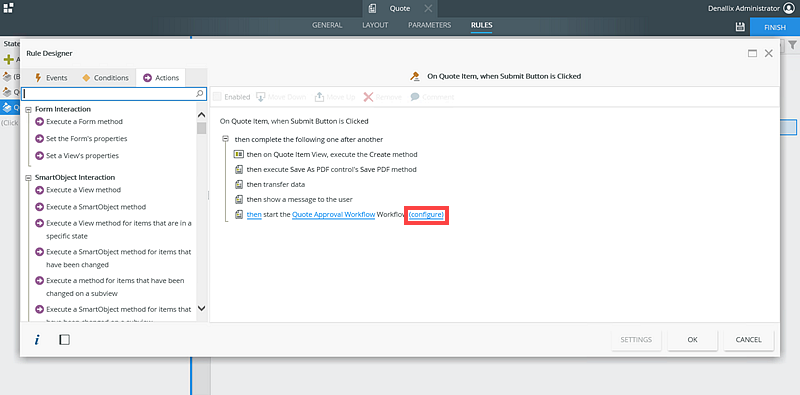
Navigate to the Rules tab and edit the when On Quote Item, when Submit Button is Clicked rule.
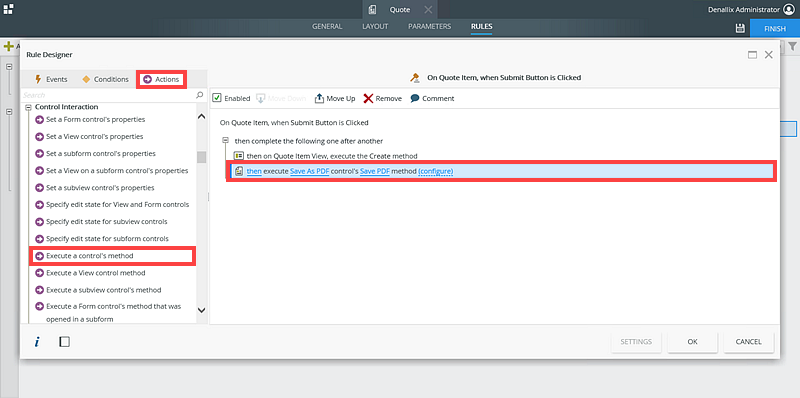
- Navigate to the Actions tab and add the Execute a control's method action. Select the Save PDF method of the Save As PDF control.
- Add a Transfer Data and a Show a Message action to the rule.
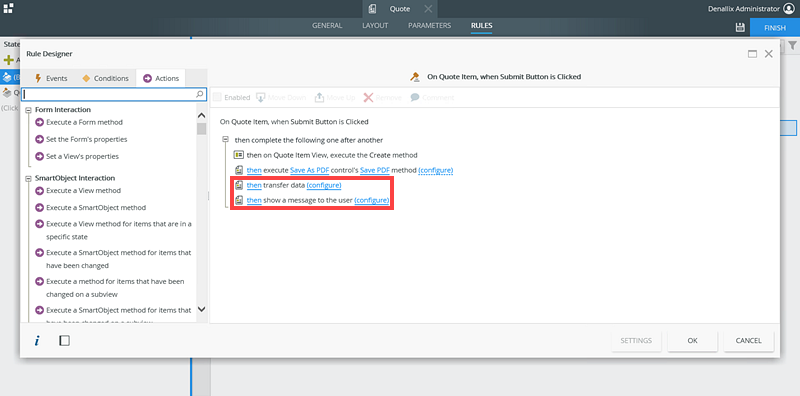
- On the Transfer Data action, click configure and map the Save as PDF control to the PDF ID parameter as shown below, and then click OK.

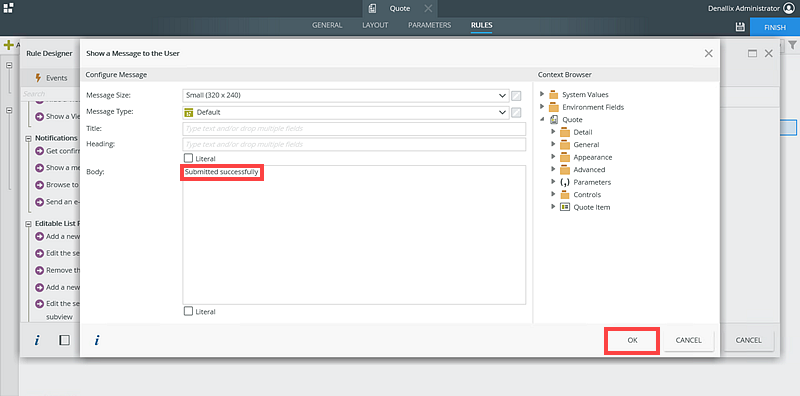
- On the Show a Message action, click configure. Type Submitted successfully in the Body and click OK.
-
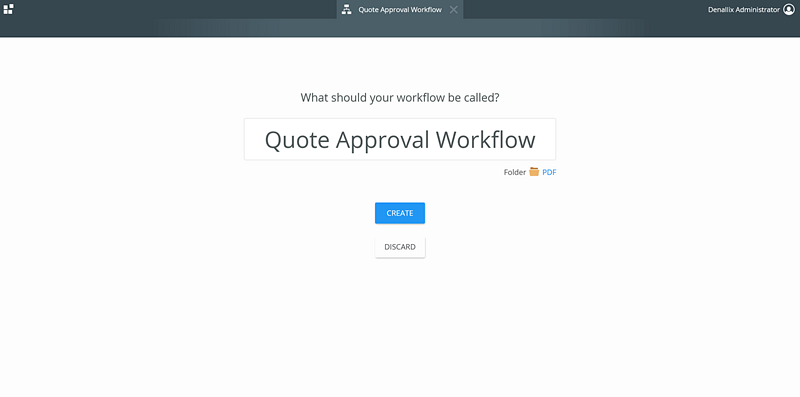
Save the form and create a new workflow called Quote Approval Workflow.
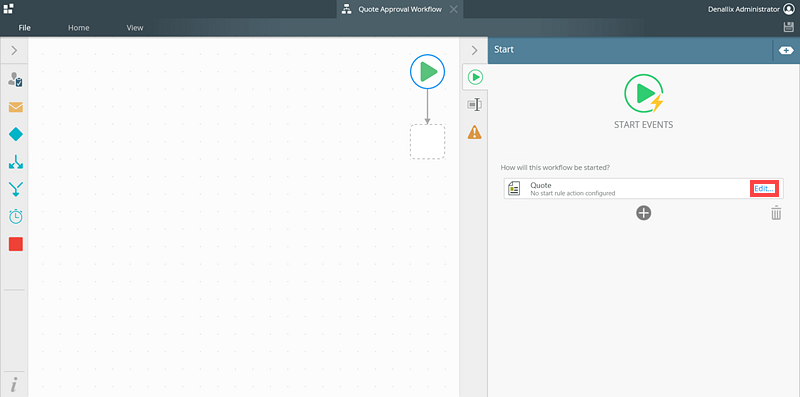
- Click the Start event and then click Edit... under How will this workflow be started?.
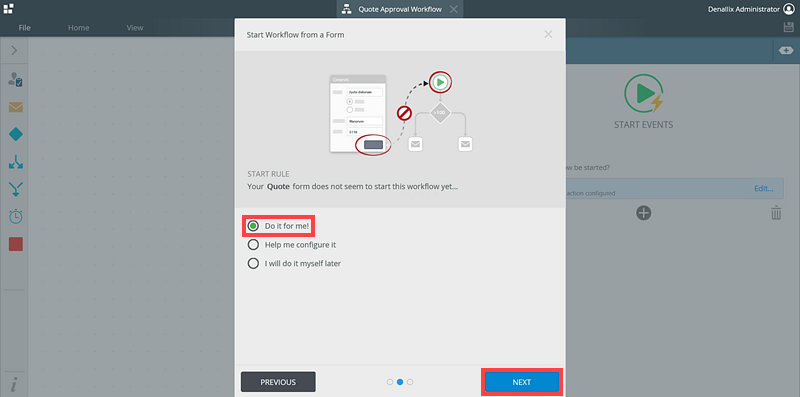
- Click Next on the Start Workflow from a Form page.
- Select the Do it for me! option and then click Next.
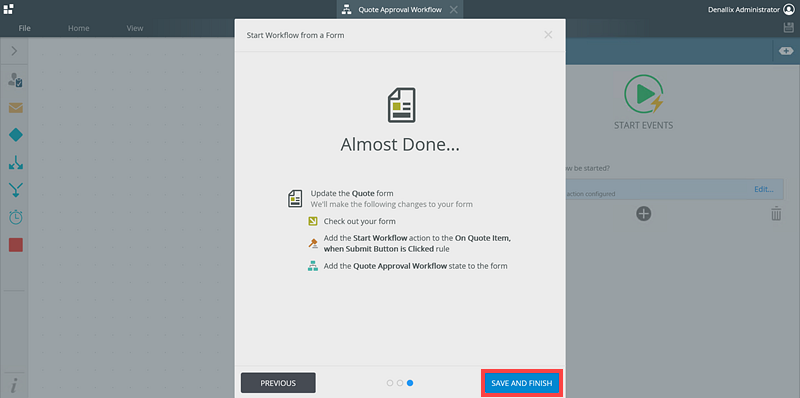
- Click Save and Finish. A new workflow state is created called Quote Approval Workflow.
- Click OK.
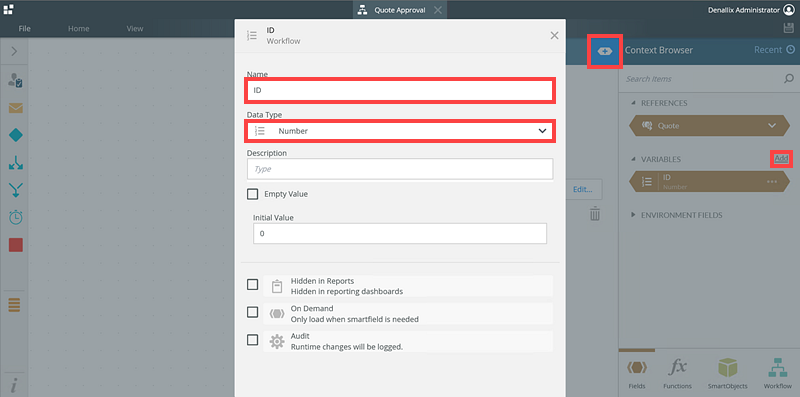
- Select the Start event and create a variable called ID with a Number data type.
- Save and Deploy the workflow.
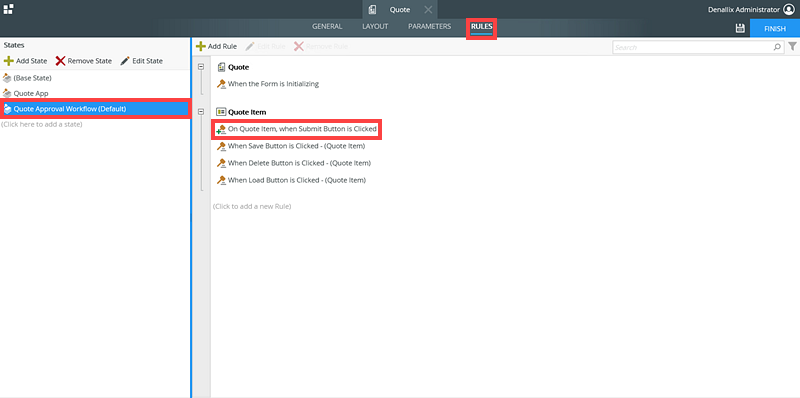
- Edit the Quote form and navigate to the Rules tab. Select the Quote Approval Workflow state from the States section. Double click the On Quote Item, when Submit Button is Clicked rule.
- Click configure on the then start the Quote Approval Workflow Workflow action.
- Drag the PDF ID form parameter from the Context Browser to the ID field in the Workflow Fields section, and then click Finish.

- Click OK and Finish.
- Check in the Quote form.
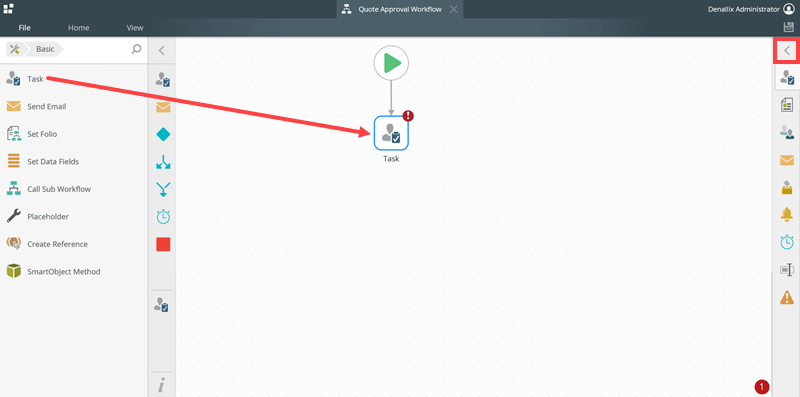
- Edit the Quote Approval Workflow.
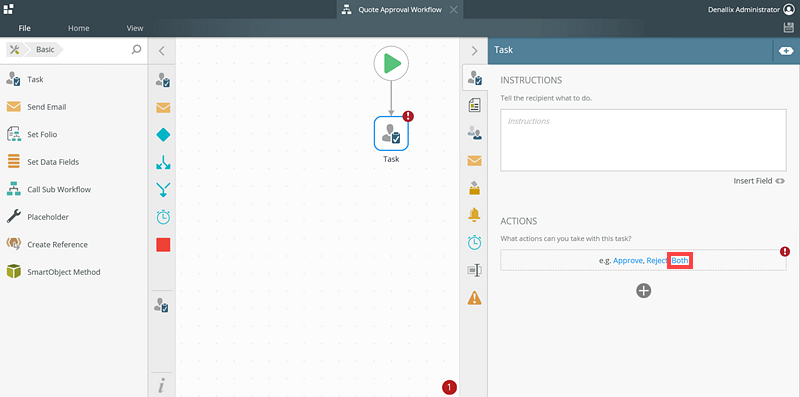
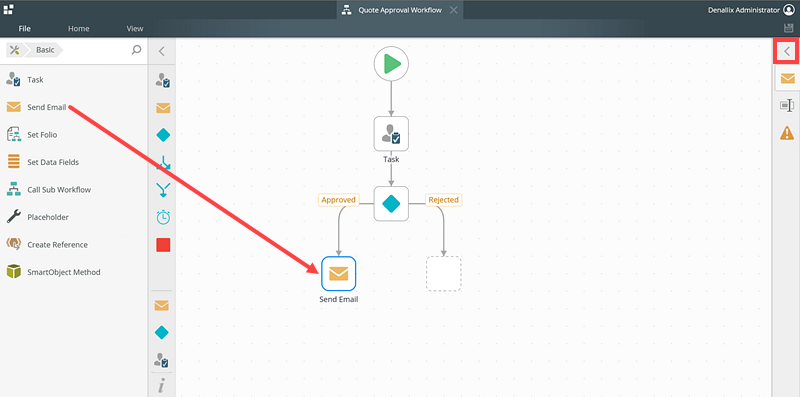
- Drag the Task step from the Basic section on to the canvas. Click the < icon on the left to open the Task tab.
- Click the Both link in the Actions section of the Task tab. This creates two actions called Approve and Reject.
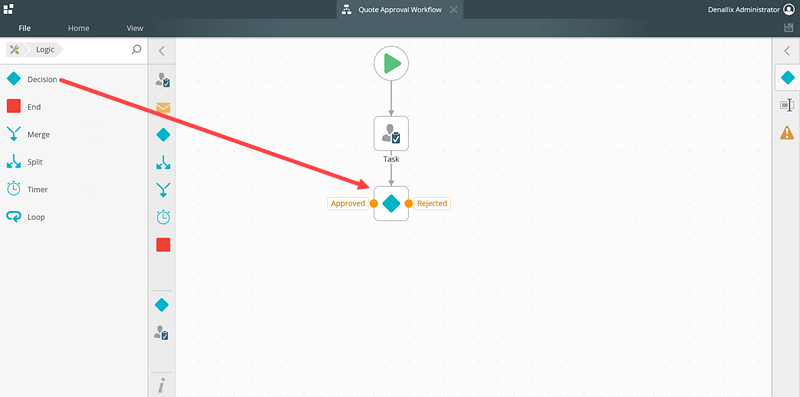
- Drag a Decision step from the Logic section on to the canvas. Connect the Task step to the Decision step.
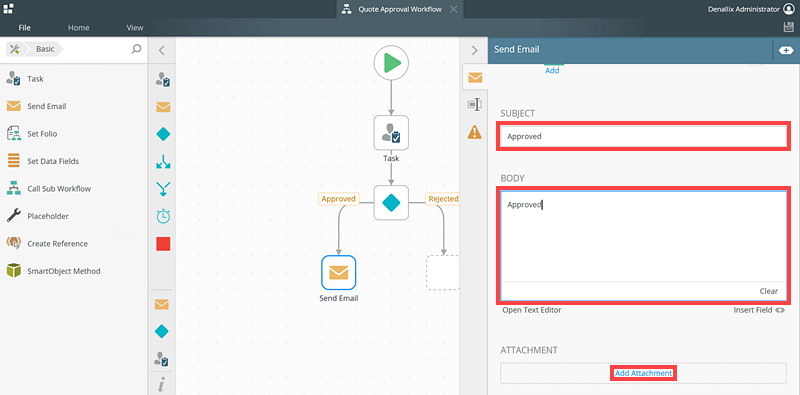
- Drag a Send Email step from the Basic section to the Approved action. Click the < icon to open to the Send Email tab.
- Add a Subject and Body . Click Add Attachment in the Attachment section.
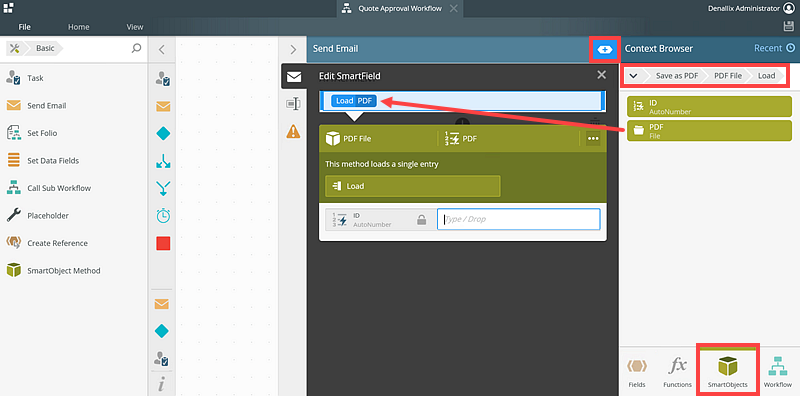
- Click the Context Browser icon to expand the Context Browser and drag the PDF File > Load method from the SmartObjects section.
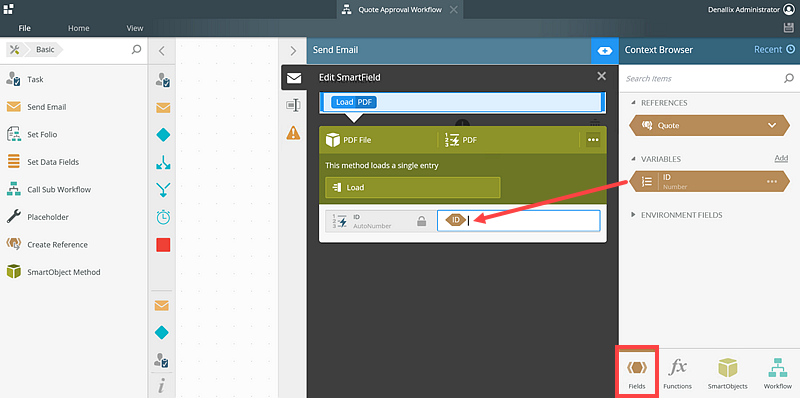
- Drag the ID variable from the Fields section in to the ID field of the Edit SmartField section.
- Drag a Placeholder step from the Basic section in to the Rejected action.
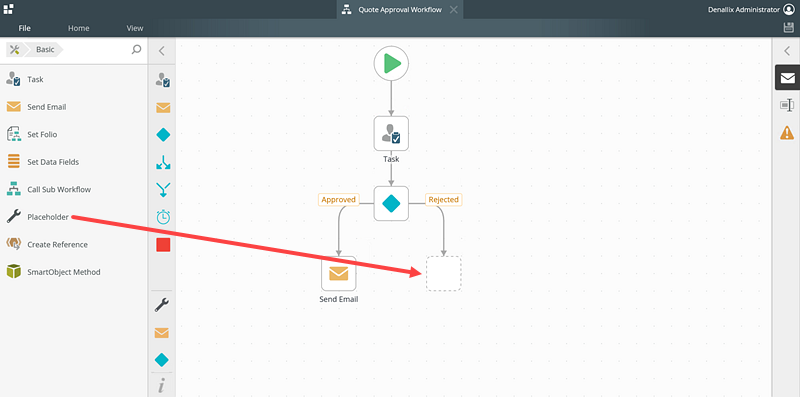
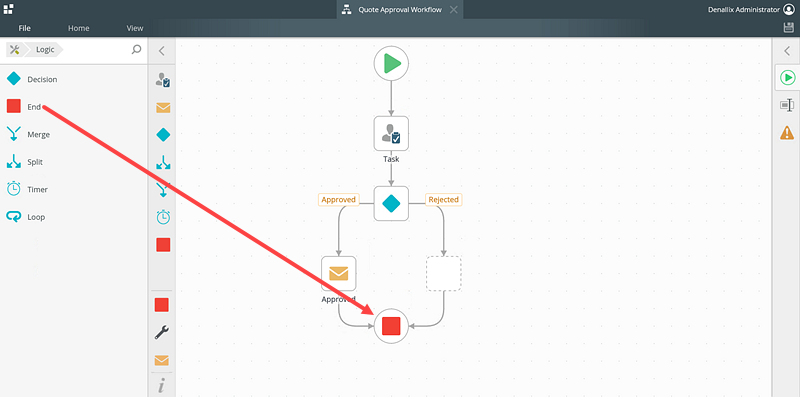
- Drag an End step from the Logic section on to the canvas and connect the Approved and Rejected actions to it.
- Save and Deploy the workflow.
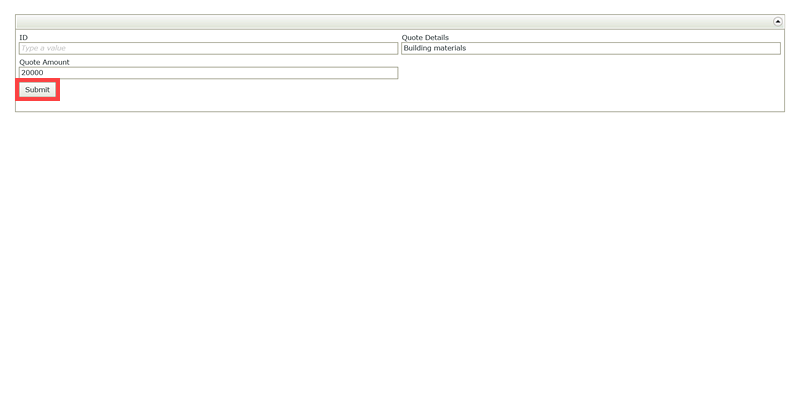
- Run the Quote form, enter values for Quote Details and Quote Amount, and then click Submit.
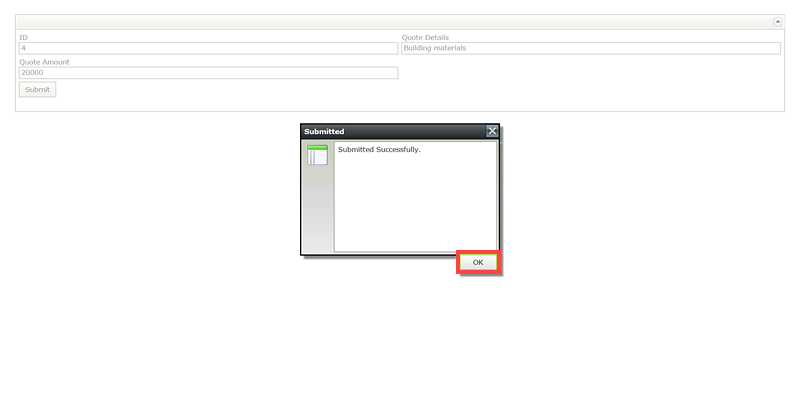
- The Submitted Successfully message is displayed. Click OK.
- Open K2 Workspace, select Approve, and then click Submit.
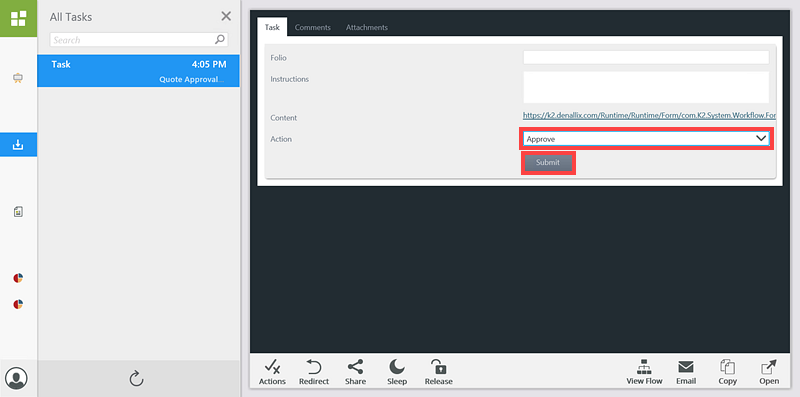
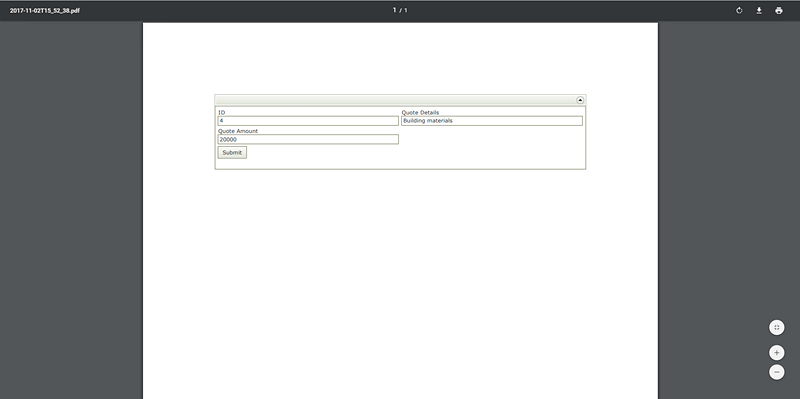
- The email is sent with the attached PDF.

-
Open the PDF to view the quote details.