How To: Create a Custom Workspace Site
Create a Custom Workspace to centralize your business and workflow information. Using a custom workspace allows you to create your own business site that incorporates your business website functions with your K2 apps, tasks, and workflows.
Example Custom Workspace
This example demonstrates how to create the landing page and linked menu pages of a custom workspace. The example web sites and SmartForms are used for demonstration purposes only. Use this example to explore the workspace creation process, and then modify the steps to suit your business needs.
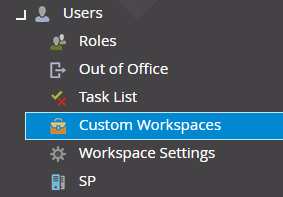
- In K2 Management site, click on Custom Workspaces in the Users menu
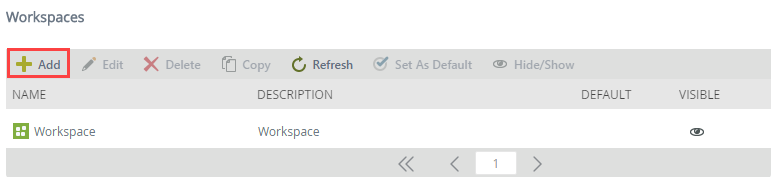
- On the custom Workspaces page, click on Add
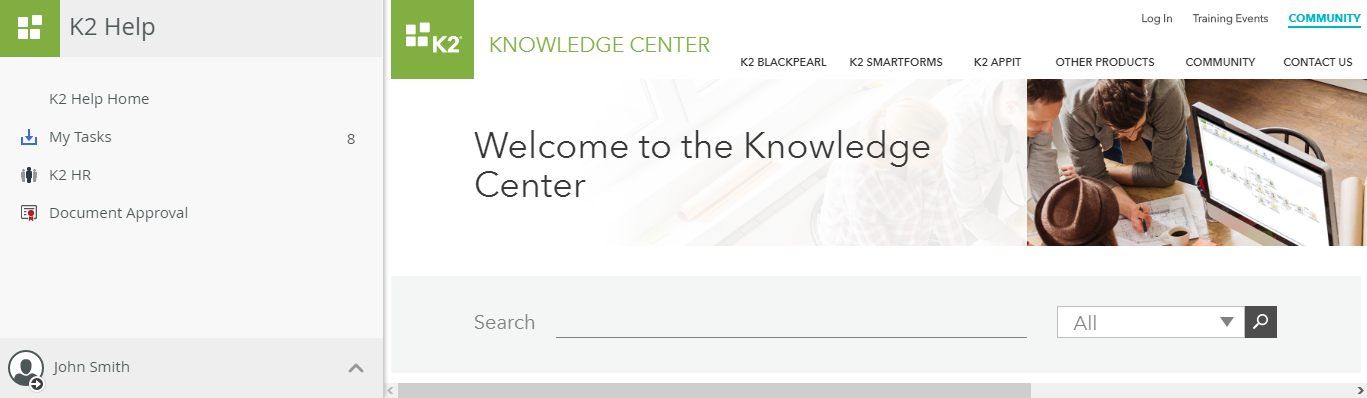
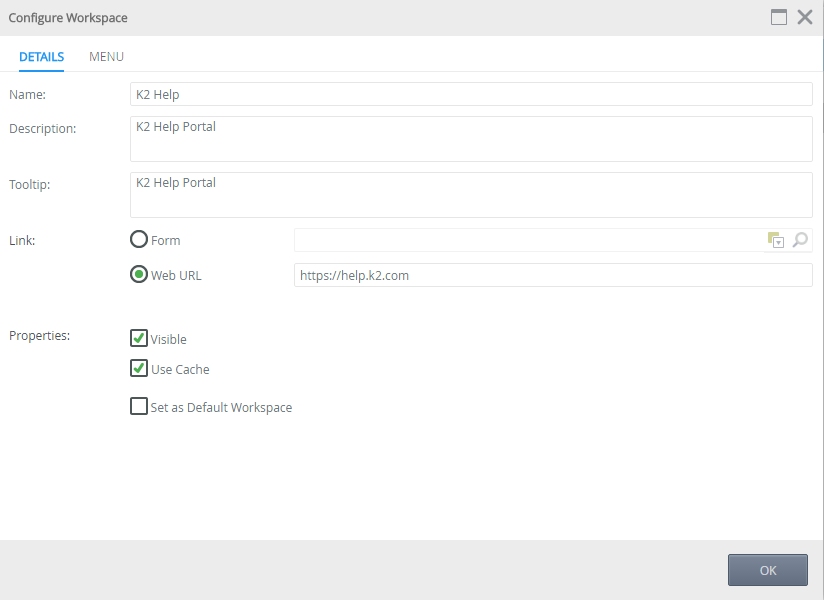
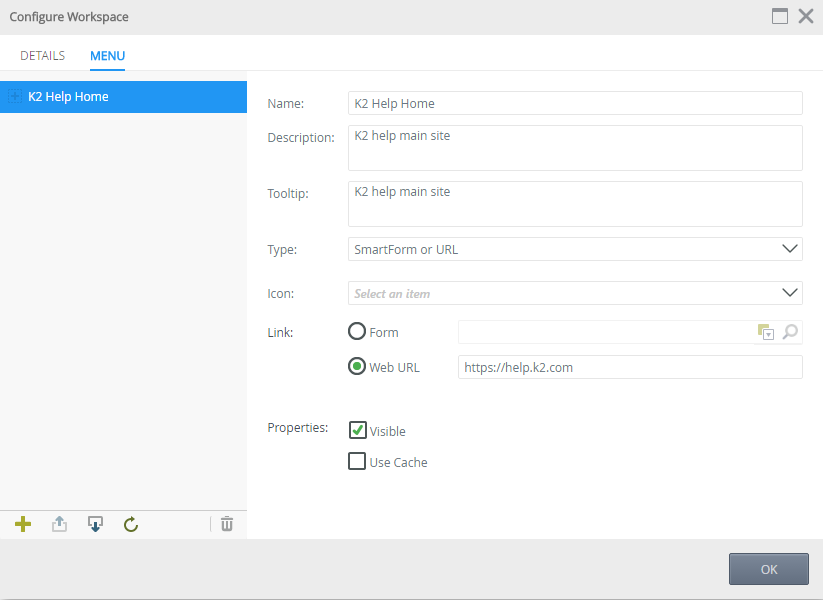
- The Details tab configures the first page that this custom workspace loads. For this example, the home page of the workspace is the online K2 help site. Enter the Name, Description, and Tooltip text as shown in the screen shot below. So select Web URL as the Link type, and enter https://help.k2.com as the URL. Leave the Visible and Use Cache check boxes as enabled. You can create your own SmartForm or use your local business website
- Click on the Menu tab. You can now configure the links to display in the left workspace menu
- Click on the Plus icon to add a Menu link to this workspace. This is usually the same link as you configured in the Details tab, as you need to create a link to bring yourself (or whoever is logged in) back to your home page. For this example, configure this link as shown below
- Click on the Plus icon to add a second link to the workspace menu. This will be a link to the K2 Tasks page, so configure the options as shown below
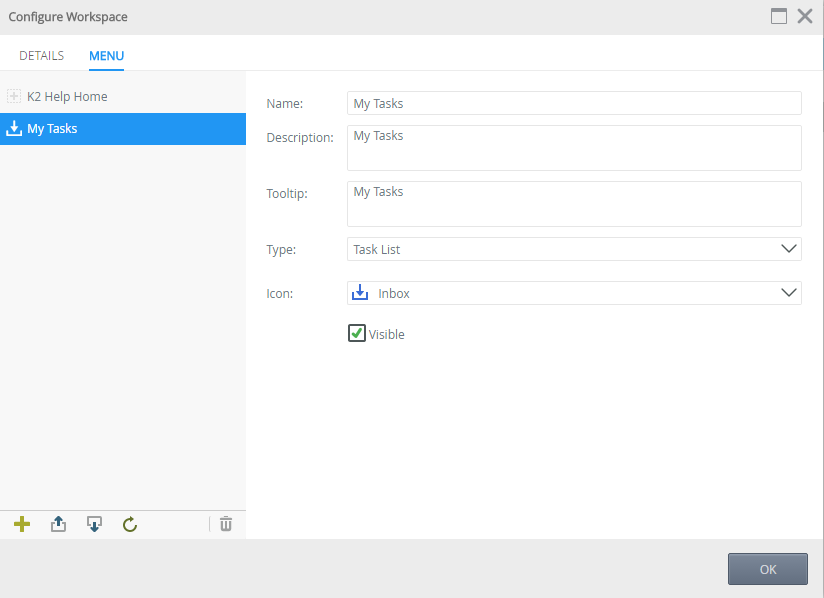
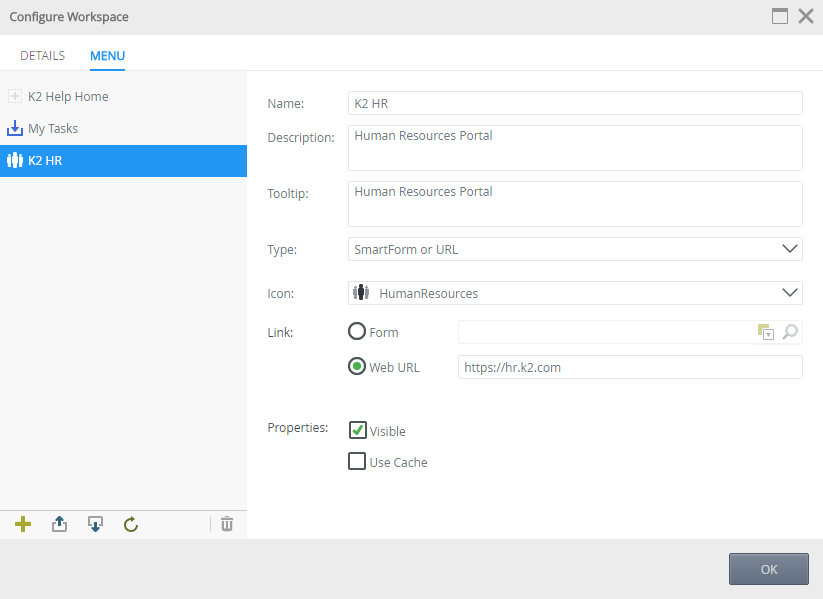
The K2 Task list will only load the tasks assigned to user that is logged in. This page will display as you have seen it in the default K2 Workspace - The next example workspace link will be our Human Resources portal. So click on the Plus icon again and configure this link as shown below (you can swap this information with a site of your own if you want to)
- The final link that we're adding to our example workspace uses a K2 smartform. The SmartForm loads our Document Approval form. Click on the Plus icon and configure the information
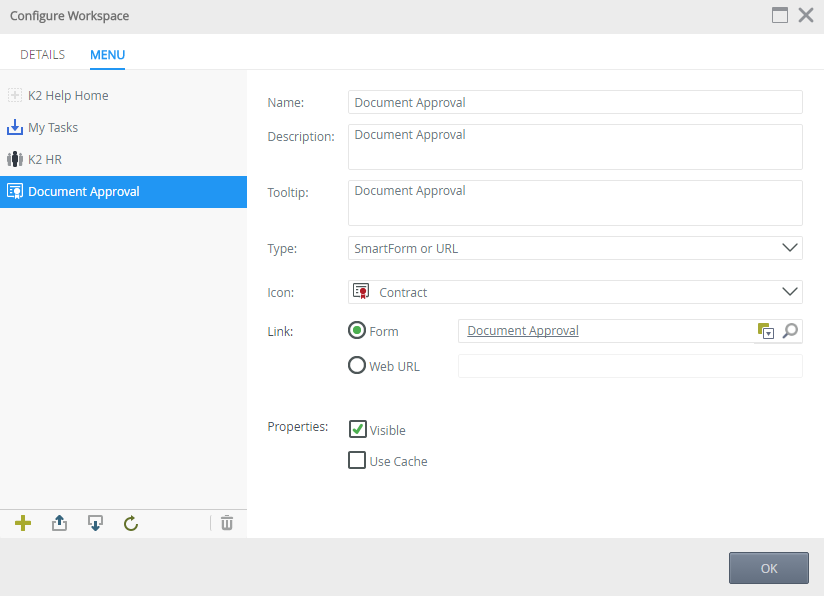
- Use the Search icon in the Link: Form box to find a SmartForm on your system instead of the Document Approval form shown here

- Click on OK to complete your custom workspace
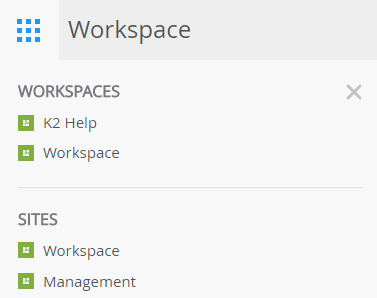
- Once the workspace has been saved and stored on the K2 server, the link to the workspace is found in the Worksapce App link list. For this example, it shows as K2 Help. Click on the link to your custom workspace
- Your custom workspace will now load, displaying the link configured in the Default tab as the workspace page, and the Menu links that you have configured show in the left menu