Use Approval Apps
Using the Approval app begins by submitting a new approval request. After you submit the request, the app workflow starts. The workflow pauses at the approval task step. Here, the approval task recipient decides to approve or reject the request. In a one-step approval workflow, the workflow completes after the task recipient selects an action. For a two-step approval workflow, after the first recipient approves the request, the workflow routes the second approval task to the recipient for their decision. Some workflows have a rework step. In this case, both the first and second task recipients have the option to send the workflow back to the originator for rework. The originator can rework and resubmit the request, or cancel the request. Once the second task recipient approves or rejects the request, the workflow completes.
While the workflow is active, you can track its progress from the app landing page.
Begin by launching an approval app from either the All option in the Build section or My Apps list. After opening the app, you have three options on the landing page:
- Administration: Edit data fields and task recipients. Note that you may not see this option if you are not the app owner.
- Reporting: View reports on process instances or export process instance data to CSV. See the topic Report on Approval Apps for details on reporting.
- Submit New Request: Launch the app request form, which you can use to submit a new request.

To start a new approval request, click the Submit New Request button. 
The approval request form launches. The form layout and fields vary depending on the template selected, or if you chose to build a custom app. Complete the form fields. A red bar indicates a required field. Note that you cannot submit the form without required field values. You have the option of saving the form in draft mode and submitting it later if necessary. Clicking the Save As Draft button saves the form to the My Draft Items list on the app landing page. Clicking the Submit button starts the approval workflow. After you submit the form, you return to the app landing page.
You can track workflow progress from the app landing page. After you submit a request, a reference to your request appears in the My Pending Items list. At first, the list status reflects a new submission. Click the Refresh button. The status now reflects Review Request. (It takes a few seconds for the workflow to update the status property.) The reference remains in this list until the workflow completes. 
Another way to view the progress of your application is to open the View Flow report. The View Flow report displays the workflow with colored lines to show workflow progress. Green lines represent the successful path of the workflow, while blue lines represent the current step. 
Click the reference number to open the request and view the details. Note that you cannot make any changes since this is a live workflow.

Each time you start new apps, they appear in the My Pending Items list.
After a workflow completes, the request appears in the My Completed Items list. The status displays the task recipient's decision.
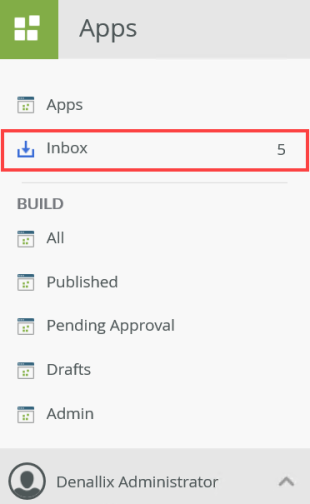
Task notification emails are sent to the recipient's Inbox. If you are the assigned task recipient, you can open the task form and action the task directly from your Inbox. The Inbox link is located in the left column of the workspace.
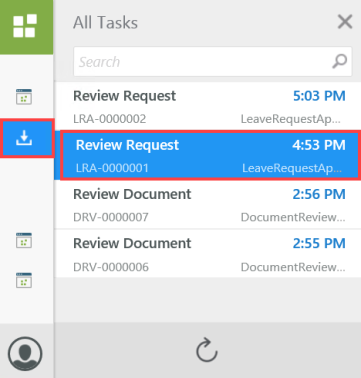
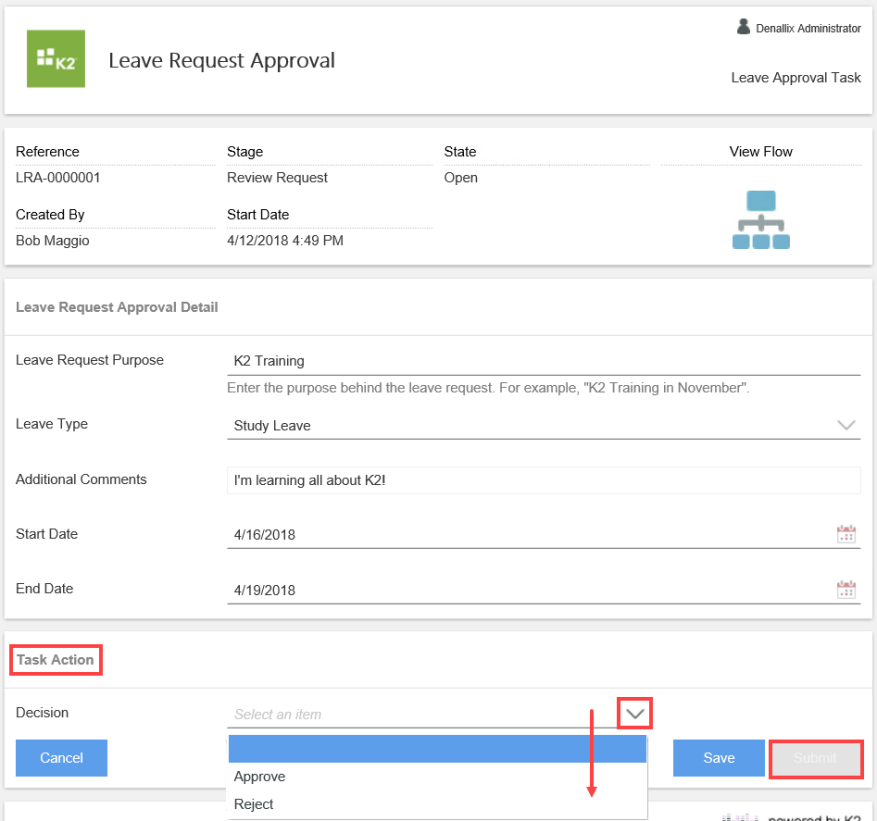
Clicking the Inbox link exposes your active tasks. When you click a task, the request form and actions display in the central pane.
You can review all the request details before you make your decision. The Decision section contains a drop-down list of available actions (such as Approve, Reject or Rework). Select the task action you want, then click the Submit button.
The following is a breakdown of approval decision actions:
- Approve: Approving the request moves the workflow along the approve outcome to the next step. (Outcomes are the lines that connect one step to another.) If the workflow is a two step workflow (and this is the first approval task), the next step is the second approval task.
- Reject: The request is not approved and the workflow continues along the reject outcome. Often, this contains a send email step and an update status step before the workflow completes. Once the workflow completes, you cannot go back and change the action decision.
- Rework (if available): Reworking the request routes the workflow back to the originator, or person who submitted the form. As the originator, you can edit and resubmit the request, or you can cancel the request. If you resubmit the request, the workflow routes back to the approver who sent the request for rework. This could be the first approver or second approver, depending on the workflow type and the step where the rework occurred. Reworking creates a looping effect between the approval step and the rework step. This loop repeats until there is a different action (such as Cancel, Approve or Reject) selected.