Administer Approval Apps
This section covers administration of Approval apps and administrative tasks associated with them. The Approval app has two administrative sections: Lookup Settings and Administrators and Settings. Another administrative task is responding to task assignments. As the K2 App administrator, you approve (or decline) new apps, and as a task recipient, you respond to workflow tasks.

On this page you can add, edit or delete options for lookup controls. Note that you cannot add, edit or delete controls themselves, just the lookup options. You can change the task recipient if the recipient is a static value. In some workflows, the user selects a task recipient when they submit the request form. This type of recipient is not editable from this page.
Lookup Settings
On the Lookup Settings page you see a display of all editable control options. To add a new option, click Add. A new row opens in the list. Enter a name and description for the new option, then enter the sort value (the order in which the new option appears on the form). Save the new option.
To edit a lookup option, click the option title, then click Edit. Make your change, then click Save.
To delete an option, click the option title, then click Delete.
Task Recipients
Task recipients are users that have a task assigned to them. You can change the recipient if it's a static value (configured at the time the app was created). You can add additional recipients, edit existing recipients or delete recipients. Note that you must have at least one recipient. To add an additional recipient, click Add. A new row appears. Enter the user name, then click Resolve. Click Save when you're done.

To edit a recipient, click the name, then click Edit. Change the recipient name, then click Resolve. Click Save.
To delete a recipient, click the name, then click Delete. You cannot delete a recipient if there is only one. You must either change the recipient or add a new recipient, then you can delete the one you don't want.
From this page you can invite users to share your app, save the app to the Favorites menu, and add, edit or delete app administrators.
Invite Users
You can send an email to select users inviting them to use your app. This lets them know the app is live and ready for use. To begin, click Invite Users.
Edit the email subject line and message body. Select the request form link you want to appear in the email message. For the message recipients, enter a user name, then click Resolve. Click Add. Repeat this for each user you want to receive an invitation. When ready, click Send Notification.

Each message recipient receives an email with a link to the request form.

You can also use the Specify An Email Address field to type an address. You can use this feature to send app invites distribution groups in your organization.

If you send an invite to someone outside of your organization (domain) they will not be able to use the app.
Favorites Menu
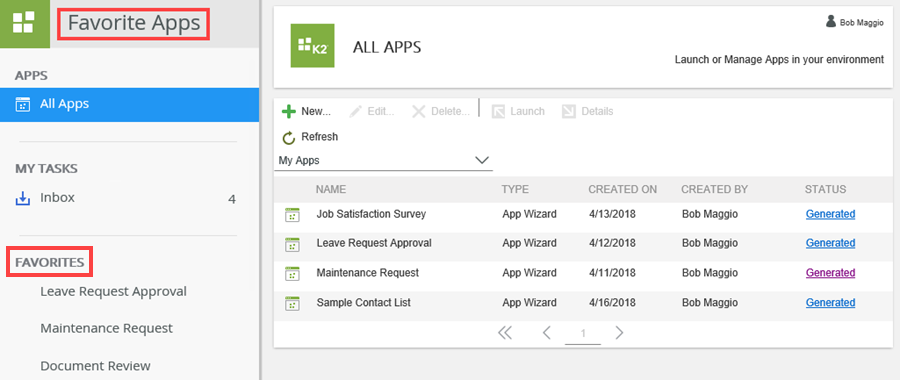
You can add apps to the Favorites section for quick access. The Favorites section appears on the Favorite Apps workspace. By default, the Favorite Apps workspace is hidden which means you have to make it visible to see the apps you've marked as favorites in this workspace. Note that the Favorite Apps workspace is a separate workspace from the Apps workspace, but you can easily toggle between the two by clicking the K2 logo and select the one you want.
-
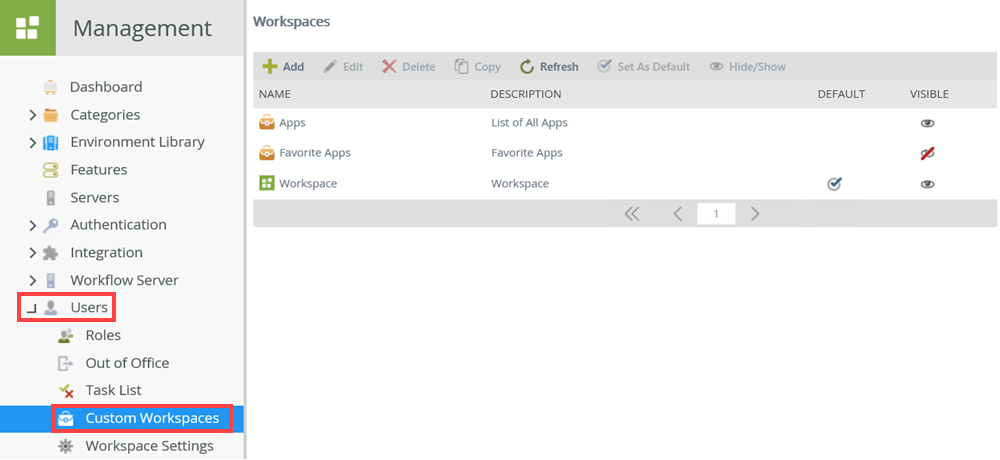
From K2 Management, browse to Users and select Custom Workspaces.
-
Select Favorite Apps and click Hide/Show.

-
The Favorite Apps workspace is now visible.

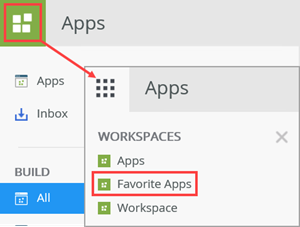
- To see the Favorite Apps workspace, click the K2 logo from App workspace.
Follow these steps to add apps to the Favorite section.
- From the Administrators and Settings page, type the name for the favorite link. Click the Add To Favorites button.

- Click the K2 logo from App workspace and make sure you select the Favorites App workspace.

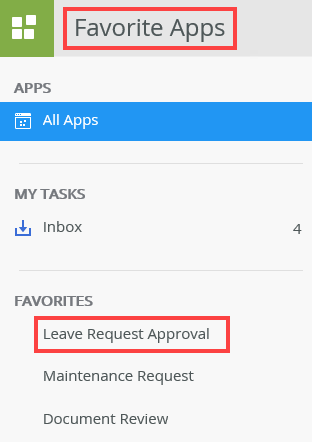
- The added favorites link shows in the Favorites section on the Favorite Apps workspace.
To remove an app from the Favorites section, you need to remove it from the Custom Workspaces section in K2 Management. Follow these steps to remove an app from the Favorite section on the Favorite Apps workspace.
- From K2 Management, browse to Users and select Custom Workspaces.

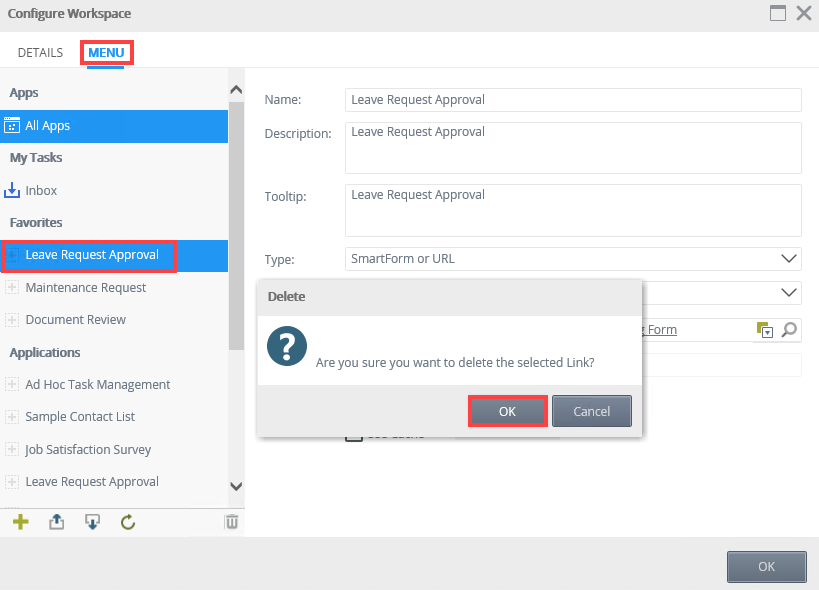
- Select Favorite Apps and click Edit.

- From the Configure Workspace page, click the Menu tab. Select the favorite you want to remove and click the trash bin and click OK to confirm.
Follow these steps to toggle between the App and Favorite App workspaces.
- From the Apps workspace click the K2 logo and select Favorite Apps workspace.
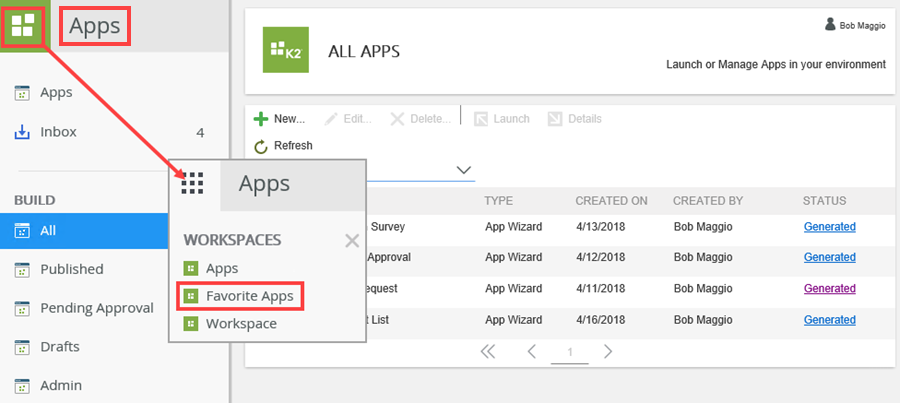
- The Favorite Apps workspace shows.
- To return to the Apps workspace, click the K2 logo and select Favorite Apps workspace.
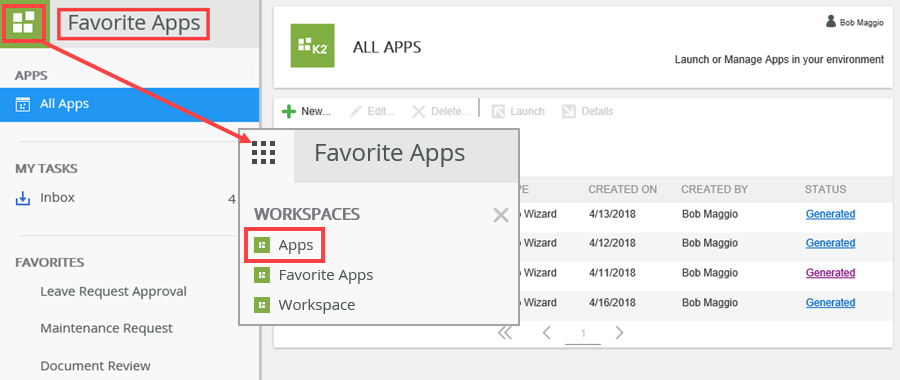
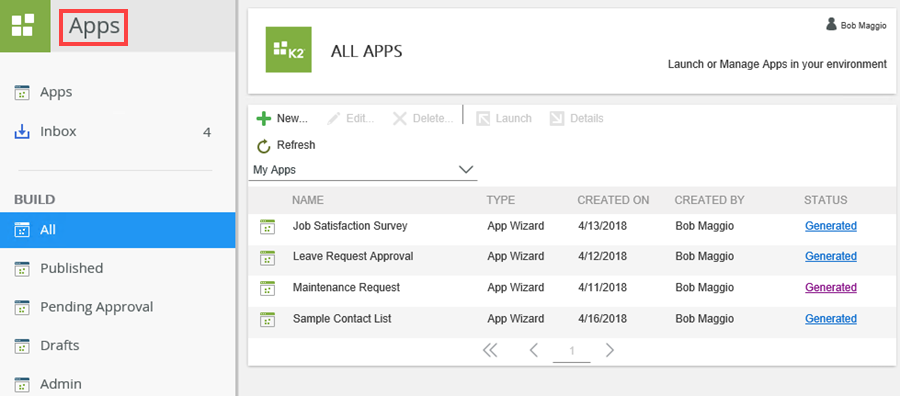
- The Apps workspace shows.
Application Administrators
You can add additional app administrators to give them ownership of the app. In the Administrators section, click Add. Enter the user name, then click Resolve. Click Save.
When someone creates a new app, the app enters an approval queue. However, if they are a member of the Builders group, they bypass the approval process. When members of this group generate a new app, the app is ready for use.All other new apps must get approval from one member of the K2 Apps Administrators group.
Approving New Apps
As the administrator, you receive task notifications when an new app is submitted. You can see your task notifications via the workspace Inbox located in the left column of your workspace.

The email subject line displays Review Request.

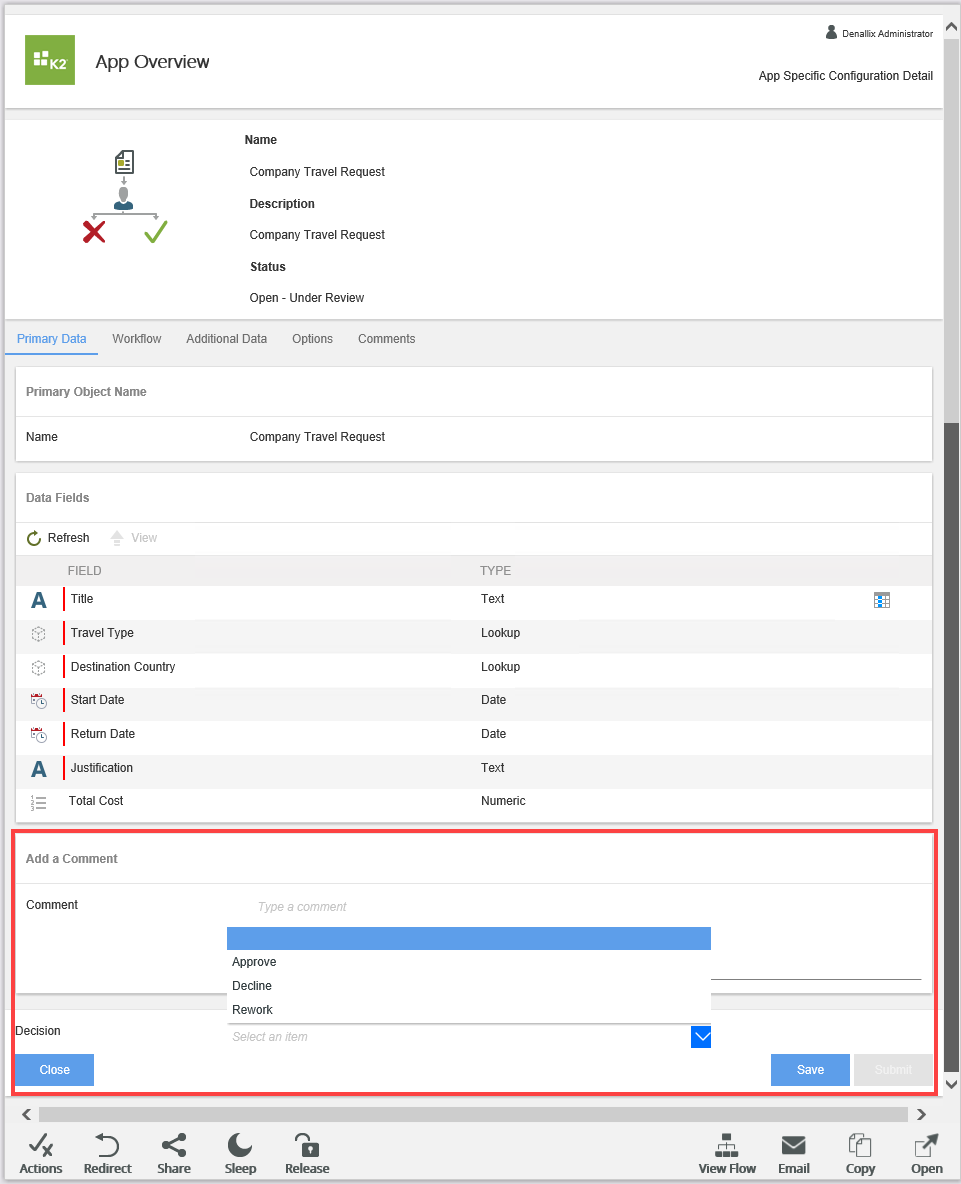
When you click the Review Request title, the app details appear in the central pane. Review the details. After you review the request, add a comment (optional), then select your decision action: Approve, Decline or Rework.
- Approve: Completes the app creation and the app is ready to use
- Decline: You do not approve the app. The process is complete and the app is no longer active
- Rework: Sends the app back to the owner for rework, then resubmit. They can view their rework task email from their workspace Inbox
Task Actions
Recipients receive task notifications in their workspace Inbox. Notice the subtitle displays the type of review requested. In the image below, there is a leave request review and a document review. Click the email title to display the request in the central pane.
Review the request, then select the action from the Decision drop-down. Submit the request to save and send your decision.
The person who created the app can see the status of their request by opening the application, then reviewing the My Completed Items list.