Using Get and Set Values
The example in this topic creates a MyTextBox custom control example and adds Get and Set JavaScript functions.
Four things are needed:
- A control definition file for the MyTextBox Custom Control
- A JavaScript definition that configures the Get and Set functions
- A custom control class that loads the MyTextBox CustomControl
- A K2 smartforms View with the MyTextBox control added and onload rules configured using the RulesWizard
This project on Github contains the sample project described in this topic. You can view the project on Github instead of writing out the code, if you prefer:
K2Documentation.Samples.Extensions.SmartForms.CustomControl
Create the MyTextBox Custom Control
-
In the same way that we created the Custom Hello World control, create a control definition (Definition.xml) in a new folder (named TextBox) of your Visual Studio Custom Control project. In this example we use the Input Category and
define two methods and three datatypes.
Copy
MyTextBox Custom Control definition.xml file
<?xml version="1.0" encoding="utf-8" ?>
<!--Create the MyTextBox Custom Control-->
<ControlType>
<FullName>CustomControls.TextBox.Control, CustomControls</FullName>
<Category>Input</Category>
<Group>Custom</Group>
<Name>MyTextBox</Name>
<GetValueMethod>CustomControls.TextBox.getValue</GetValueMethod>
<SetValueMethod>CustomControls.TextBox.setValue</SetValueMethod>
<DataTypes>
<DataType>Autonumber</DataType>
<DataType>Text</DataType>
<DataType>Memo</DataType>
</DataTypes>
</ControlType> - Remember that the Definition.xml file needs to configured as an embedded resource.
The following list shows the standard SmartObject Datatypes supported:- AudoGuid
- AutoNumber
- DateTime
- Decimal
- File
- Guid
- Hyperlink
- Image
- Memo
- MultiValue
- Number
- Text
- Xml
- YesNo
- A custom control that defines a Datatype can be assigned to a SmartObject property on K2 smartforms. For more information on how to assign a custom control to a SmartObject property please see the bottom section of this topic.
-
Now add a JavaScript file (Script.js) to the TextBox folder, and use jQuery to define the interaction of the K2 smartforms with the Control parameters, as demonstrated in the example below:
Copy
Example using jQuery to define the interaction of the K2 smartforms with the Control parameters
// Create the MyTextBox Custom Control
// Add a JavaScript file (Script.js) to the TextBox folder, and use jQuery to define the
// interaction of the K2 smartforms with the Control parameters, as demonstrated in the example below:
(function ($, undefined) {
if (typeof CustomCOntrols === "undefined" || CustomControls === nul) CustomControls = {};
CustomControls.Textbox = {
getValue: function (ObjInfo) {
return $("#" + ObjInfo.CurrentControlID).val();
},
setValue: function (ObjInfo) {
$("#" + ObjInfo.CurrentControlID).val(ObjInfo.Value);
}
},
}
(jQuery)); - The JavaScript file also needs to be configured as an embedded resource.
-
Finally, create the control definition class file, using the example below as a guide:
Copy
Example of the control definition class file
using System;
using System.Collections.Generic;
using System.Linq;
using System.Text;
using System.Web.UI;
using System.Web.UI.WebControls;
// SourceCode namespaces used in the control
using SourceCode.Forms.Controls.Web.SDK.Attributes;
using SourceCode.Forms.Controls.Web.SDK;
[assembly: WebResource("CustomControls.Textbox.Script.js", "text/javascript", PerformSubstitution = true)]
// Create the MyTextBox Custom Control
namespace CustomControls.TextBox
{
// This custom control takes the input BaseControl and adds two attributes to it that will
// be used to display the results of Getting and Setting values in the K2 SmartForms. K2
// SmartForms Rules are then used to define those values.
[ControlTypeDefinition("CustomControls.Textbox.Definition.xml")]
[ClientScript("CustomControls.Textbox.Script.js")]
public class Control : BaseControl
{
public Control() : base("input")
{
base.Attributes.Add("type", "text");
}
}
} - As demonstrated in the code sample above, this custom control takes the input BaseControl and adds two attributes to it that will be used to display the results of Getting and Setting values in the K2 smartforms. K2 smartforms Rules are then used to define those values.
- Build the project
- Use the controlutil.exe to register the new control definition.
Configure a K2 smartforms View with the MyTextBox Custom Control
- Create a K2 smartforms Item View with multiple cells.
- Add the MyTextBox custom control to one of the cells.
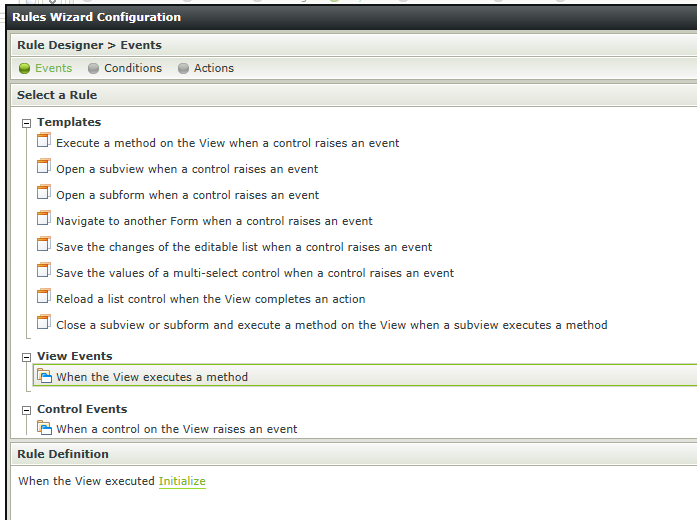
- Click on the cell and select the Rules Wizard from the bottom right-hand property area.
- Select the When the View executes a method rule from the View Events node.
-
Configure the rule to use the Initialize event.
- Click on the Actions Rules view.
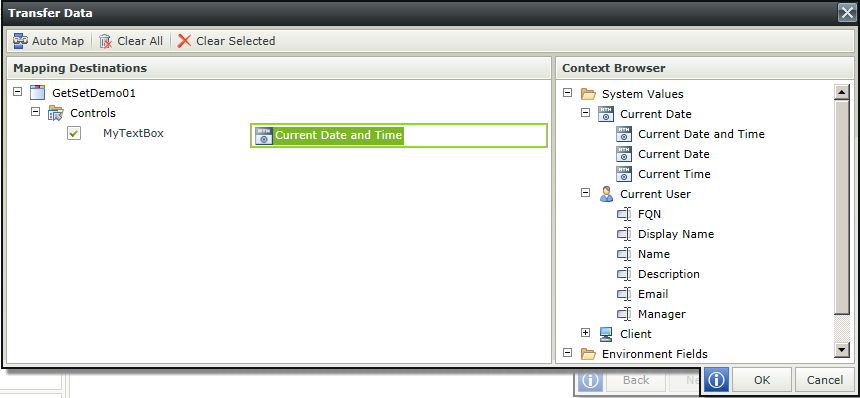
- Select the Transfer Data rule
-
Configure the Transfer Data rule to load the Current Date and Time (drag and drop this field from the System Values>Current Date node in the Context Browser).
- When you run the View you should now see the current date and time value displayed within the text box.
Using the custom control with a SmartObject Property
To use a custom control with a SmartObject property the datatype of the custom control and the SmartObject field must match. We have defined three datatypes in this custom control definition, and so could use this custom control for three different SmartObject field datatypes.
- In the View Designer, drag the SmartObject Field onto the canvas
-
Click on the Change Control icon.

-
Select the custom control from the list of controls presented.

- Click on OK
The display of the SmartObject field will now be controlled by the custom control.