14. (Optional) Report on the Site Request Application
In this step, you view the reports K2 creates as part of the application elements. When you select the Reports option (when creating application elements from a SharePoint list), K2 generates reporting pages that display basic reports on workflow instances.
-
From the Site Requests list, open the Reports page from the K2 menu. Run the Workflow Instances, Activity Instances, and Task Users reports. Review the content and how each report breaks down the previous report into greater detail. Open the View Flow report for a completed workflow and review the successful path the workflow followed for that instance.
-
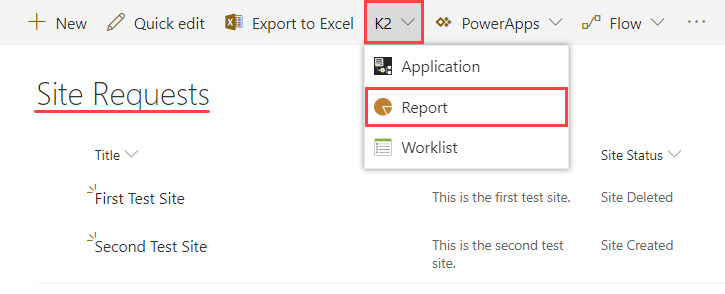
First, access the Reports page. From the Site Requests list, click the Report option in the K2 menu.

-
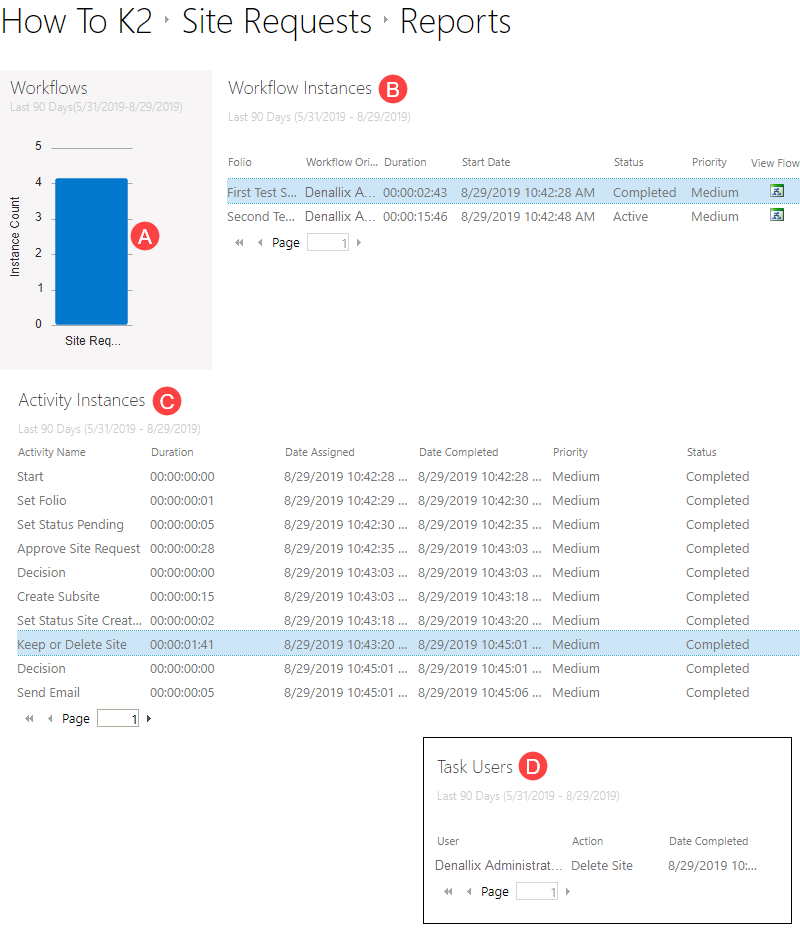
On the Reports page, click the Instance Count bar chart (A). This runs the Workflow Instances report (B). The Workflow Instances report displays each instance of the Site Requests Workflow, both active and completed. You can view the start and end times, along with the duration of the workflow instance. Notice once again, how the Folio comes into play for distinguishing one workflow instance from another.

- Click a row in the Workflow Instances report to run the Activity Instances report (C). (Use the image above for reference, if necessary.) In the Activity Instances report, you see the details for each workflow step, including the duration and status. Click a task step in the Activity Instances report to run the Task Users report (D). Here, you see the task recipient and the action they selected.
-
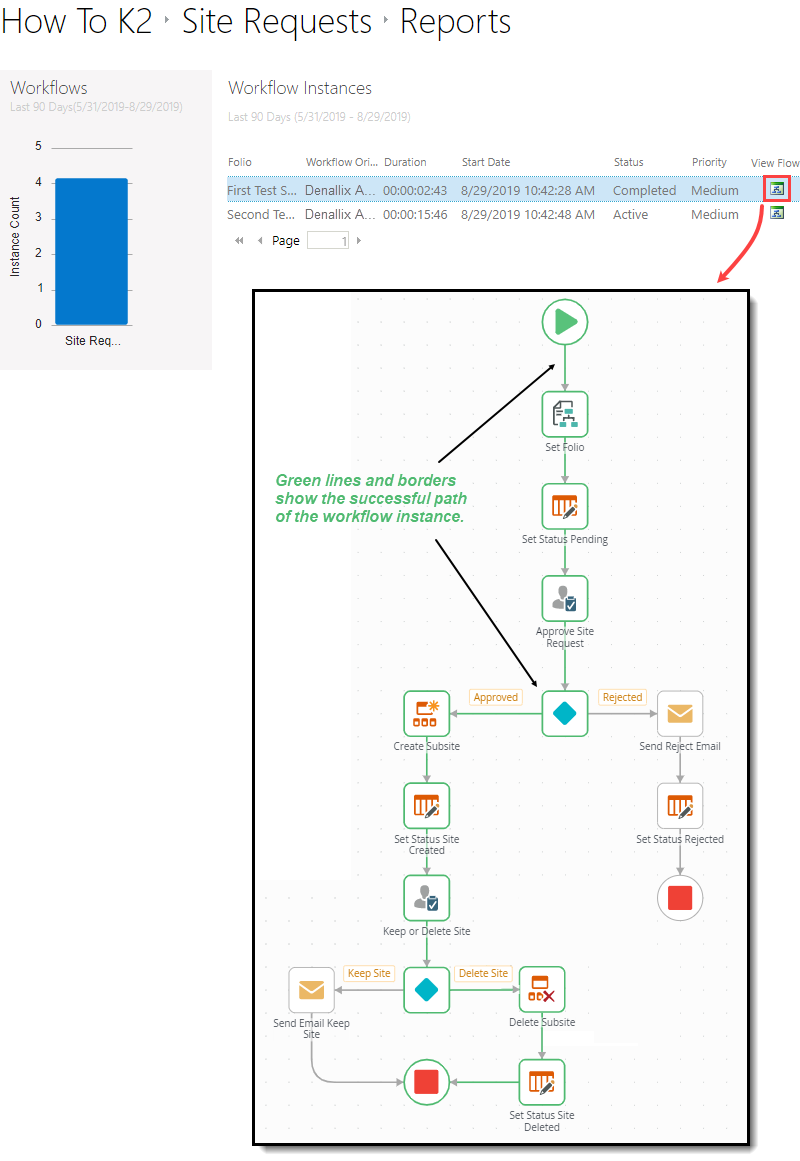
The last report to review is the View Flow report. This report displays the workflow with color coding that shows the paths taken by the workflow, where the workflow is paused, and if there is an error. Click the View Flow icon for the First Test Site workflow. This workflow completed successfully, so you can see the green path from the start step to the final end step. (Green indicates the successful flow of a workflow.) Close the browser window.

-
First, access the Reports page. From the Site Requests list, click the Report option in the K2 menu.
Review
In this step, you explored the standard reports generated by K2. K2 stores this information forever, which allows you to view reporting data on previous workflows at any time. In the next step, you update one of the generated views and remove unused controls. This step gives you an introduction to K2 Designer.