7. Configure the Rejected Outcome
In this step, you complete the workflow steps for the Rejected outcome. You add a Send Email step that informs the originator their site request was not approved. Then, you update the status property in the Site Requests list to reflect the rejected status. In this section, you learn how to reuse steps by copying and pasting existing steps.
-
From the Toolbox > Basic node, add a Send Email step and align it with the Rejected outcome. Connect the outcome to the step. Use references from the Context Browser to personalize the subject line and message body. Name the step Send Reject Email.
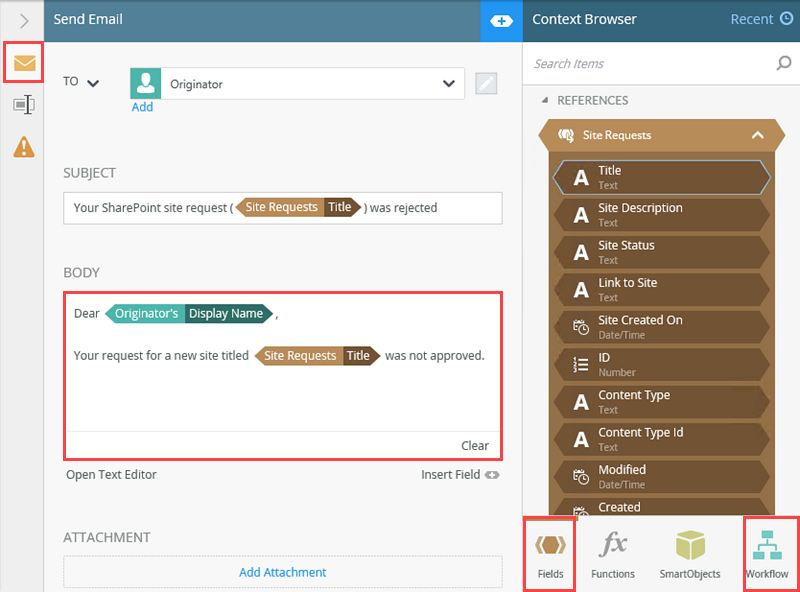
- From the Toolbox > Basic node, add a Send Email step so that it aligns with the Rejected outcome. Connect the outcome line to the step.
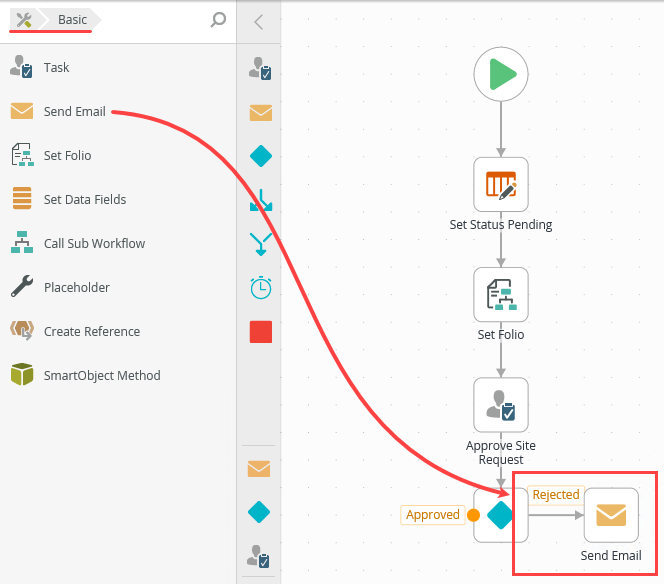
- Select the Send Email step, then expand the Configuration Panel. Click the Send Email tab to make it active, if it is not already. Confirm the TO value is set to Originator. Configure the SUBJECT line so that it says which site request was rejected. Use the Site Requests > Title reference from the Context Browser as part of your subject line. For example:
Your new SharePoint site request [Title] was rejected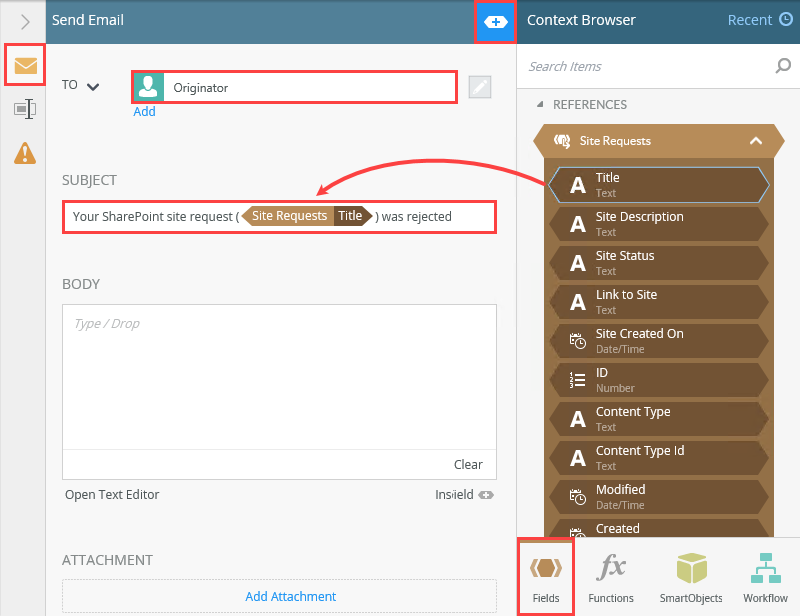
- Complete the message body of the email. Add your own content or use the image below as a guide. Use references from the Context Browser to personalize your message.
Dear [Originator - Display Name]
Your request for a new site titled [Title] was not approved.In the image below, you find the Display Name reference in the Workflow (tab) > ORIGINATOR node. You find the Title reference in the Fields (tab) > REFERENCES > Site Requests node.
- Click the Properties tab. Name the step to
Send Reject Email
then collapse the Configuration Panel.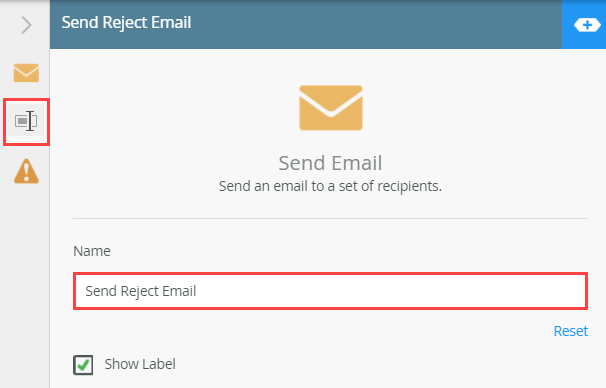
- From the Toolbox > Basic node, add a Send Email step so that it aligns with the Rejected outcome. Connect the outcome line to the step.
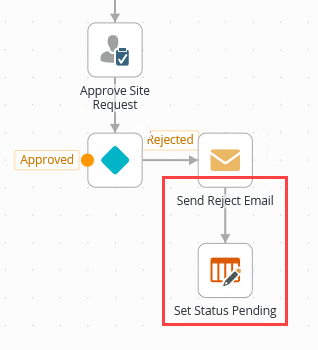
- Copy, then paste, the Set Status Pending step. Align it with the Send Reject Email step, then connect the two steps. Edit the Set Status Pending step so that the Site Status value is now Site Rejected. Change the step name to Set Status Rejected.
- To complete the rejected outcome, you update the Site Status column so that it reflects rejected. You can reuse an existing step to save time. Reusing steps also helps maintain consistency across your workflow configuration.
Select the Set Status Pending step, then select Home > Copy.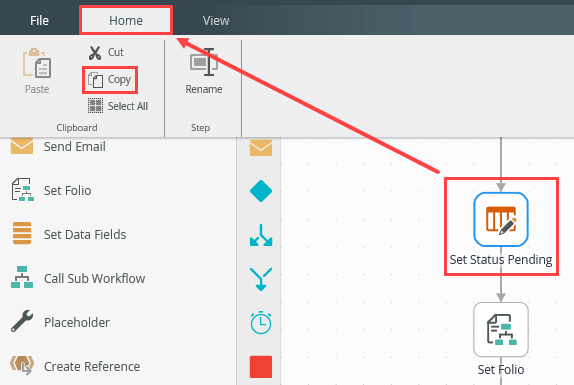
- Select Home > Paste to duplicate the step on the design canvas. Drag the duplicated step so that it aligns with the Send Reject Email step. Connect the two steps.
-
Select the new step, then expand the Configuration Panel. Change the Site Status value to
Site Rejected.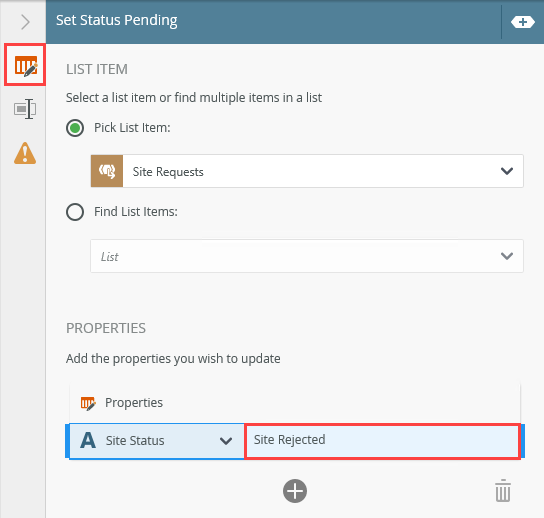
- Click the Properties tab. Name the new step
Set Status Rejected
then collapse the Configuration Panel.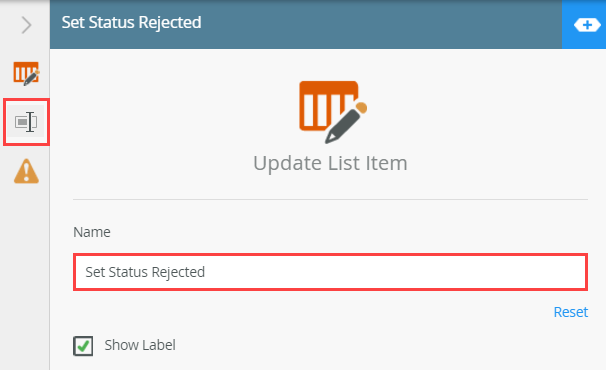
Your workflow should look similar to the image below at this point.
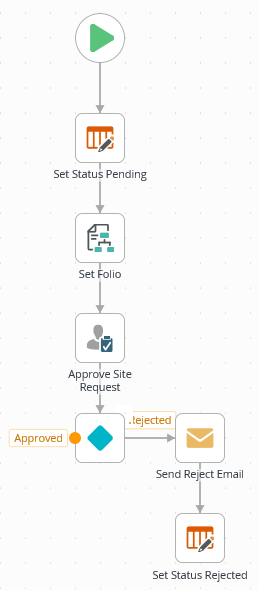
- To complete the rejected outcome, you update the Site Status column so that it reflects rejected. You can reuse an existing step to save time. Reusing steps also helps maintain consistency across your workflow configuration.
Review
In this step, you completed the steps for the Rejected outcome by adding a Send Email step and by updating the site status. You configured the email to notify the originator of the rejected decision. You learned how to reuse an existing step to save time by using the copy and paste tools. In the next step, you begin configuring the steps for the Approved outcome.