5. Set the Folio; Add an Update List Item Step
In this step, you add an Update List Item step, then configure it to update the status column in the Site Requests list. Initially, the status column shows the request is pending. This lets you know there is a new site request and the workflow process is underway. An Update List Item step is a system-related step that the K2 server performs. You also set the Folio. The folio is often a unique value that distinguishes one workflow instance from another and is especially useful when reading reports. Think of it as a title that you give each workflow instance. In this application, you use the Title value from the Site Requests list for the folio.
-
The first step in the workflow updates the status property so that it shows the request is pending. Throughout the workflow build, you update the status so that you can tell at a glance where the request is in the approval process.
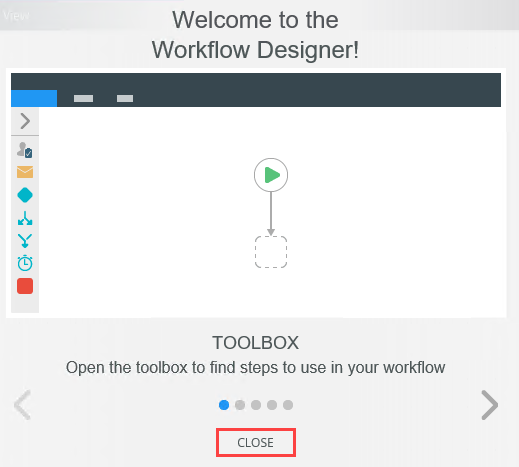
From the Toolbox > SharePoint > List Items node, drag an Update List Item step into the placeholder below the Start step. From the Configuration Panel, set the Site Status value to Pending.-
Workflow steps are found in the Toolbox, located on the left side of your screen. Expand the Toolbox > SharePoint > List Items node. Drag the Update List Item step into the empty placeholder below the Start step. (The Start step has a green triangle.)
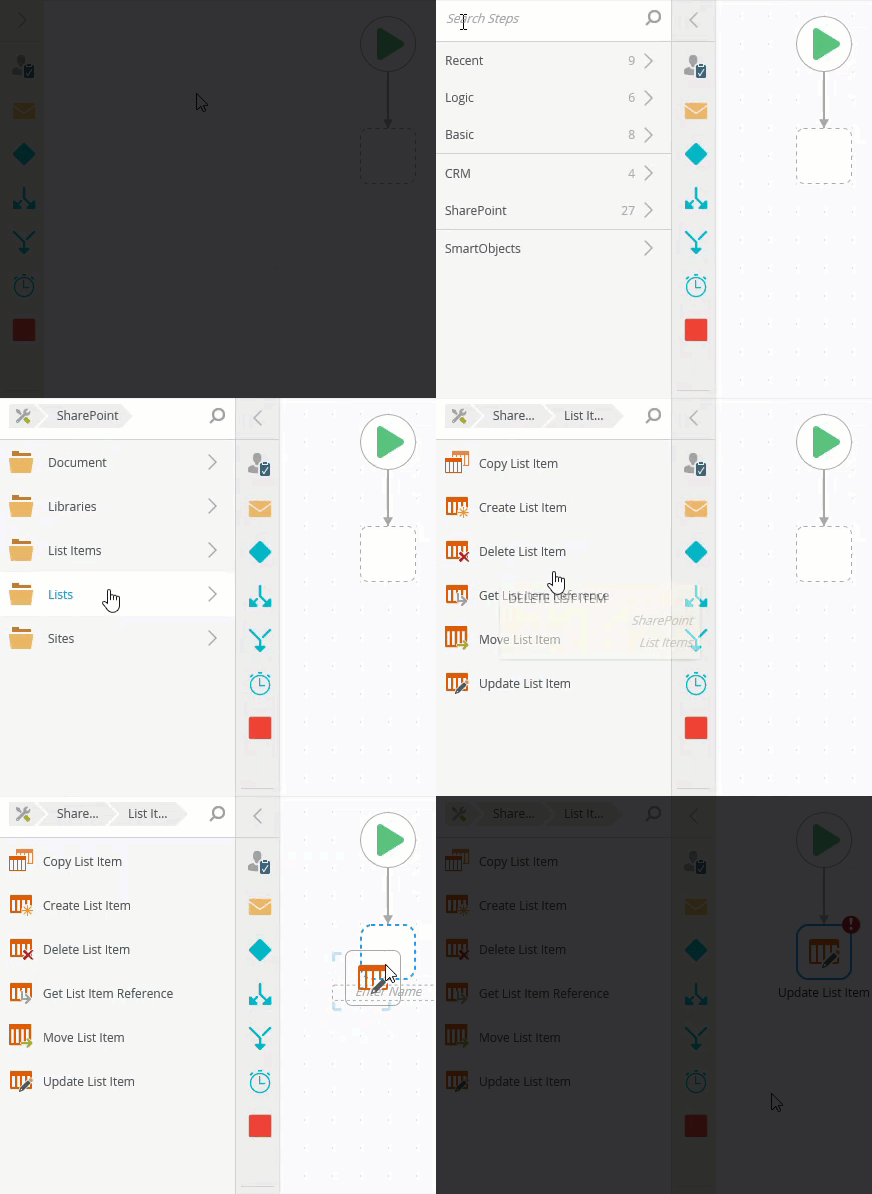
- Select the Update List Item step. (Note that active steps have a blue border.) Expand the Configuration Panel. Click the Update List Item tab to make it active, if it is not already.
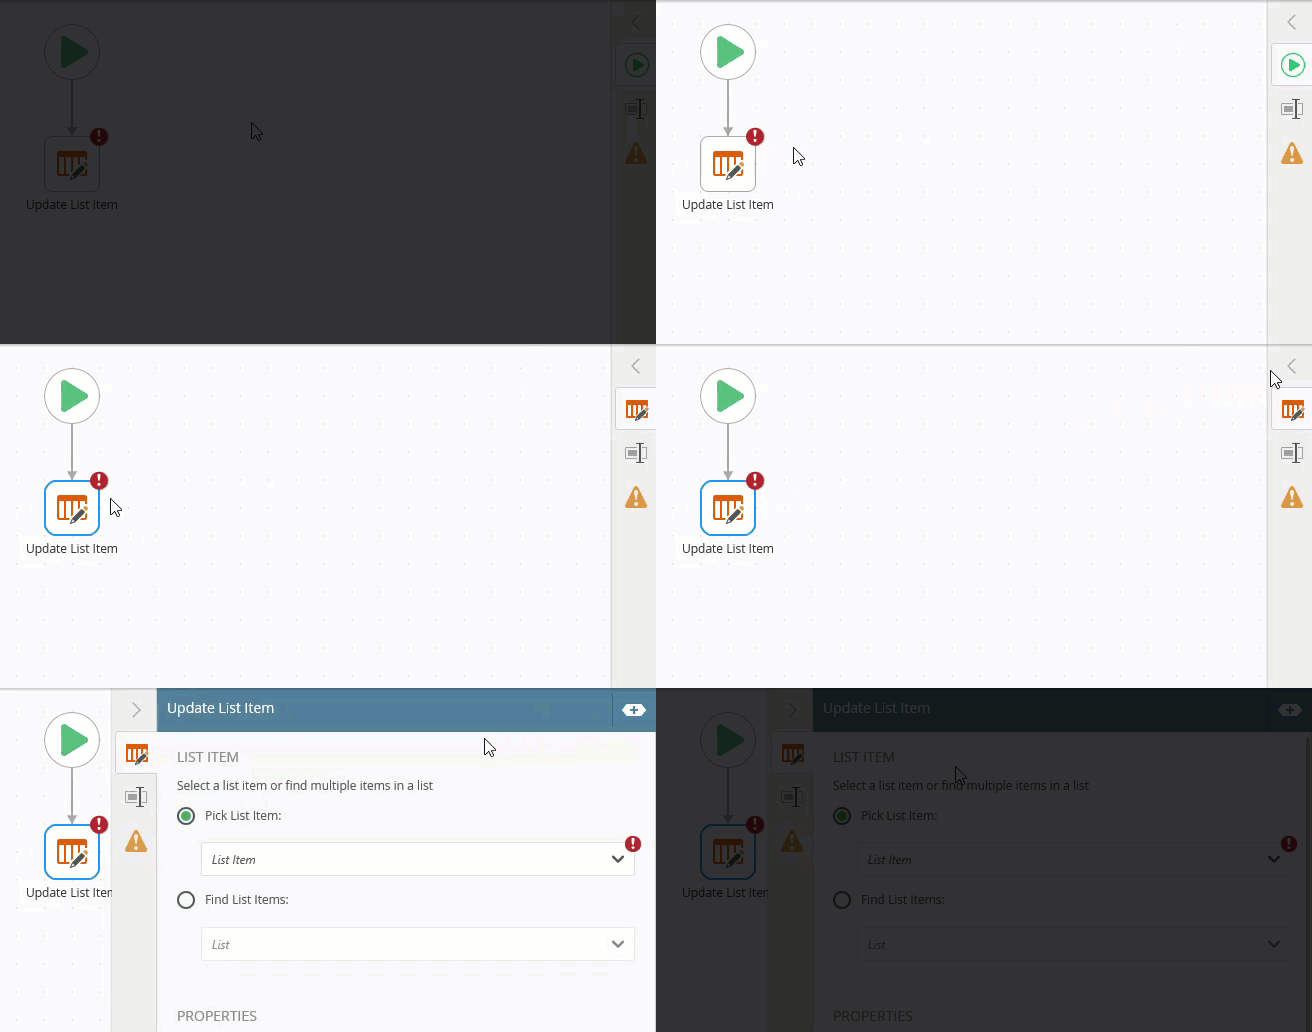
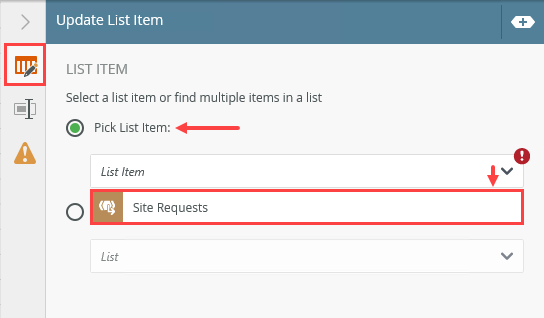
- First, select the SharePoint list you want to update. Under the LIST ITEM heading, expand the options for Pick List Item and select Site Requests.
- Next, set the initial value for the Site Status column. Under the PROPERTIES heading, click Add (+). CHECK the box for Site Status. After the property loads, enter
Pending
for its value.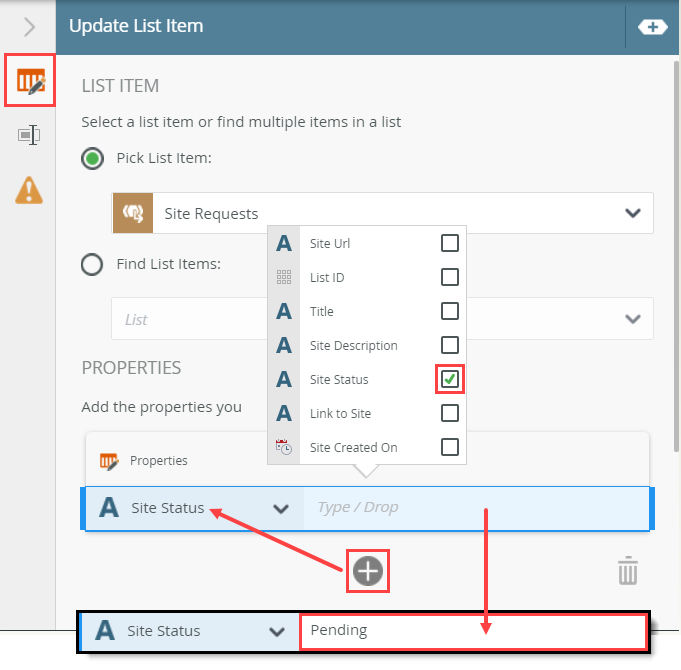
The completed Update List Item configuration.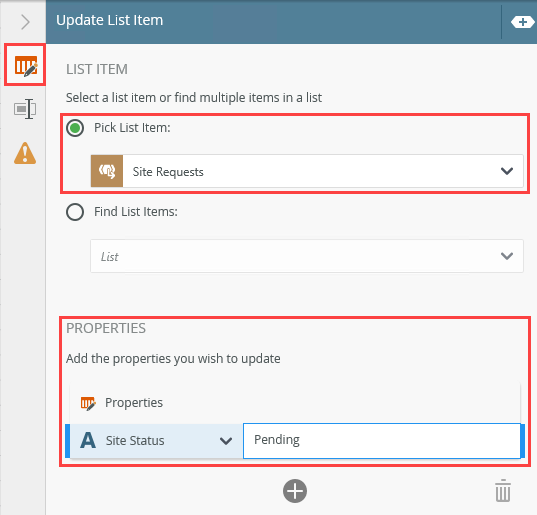
When adding a step to the workflow design canvas, you may see a red warning badge. This badge simply indicates the step has required configurations. When you expand the Configuration Panel, the required configuration is also flagged.The workflow updates the status column throughout the process. This lets you know the current status of the workflow instance. To set the status column, you select the list that contains the column you want to update, then you set the value of the column.
-
Workflow steps are found in the Toolbox, located on the left side of your screen. Expand the Toolbox > SharePoint > List Items node. Drag the Update List Item step into the empty placeholder below the Start step. (The Start step has a green triangle.)
-
Rename the step Set Status Pending. This lets you know in an instance what the step does. When you build complex workflows that have many steps, it is helpful to know exactly what each step does.
-
Click the Properties tab. Name the new step
Set Status Pending
so that you can tell at a glance what function the step performs. Collapse the Configuration Panel.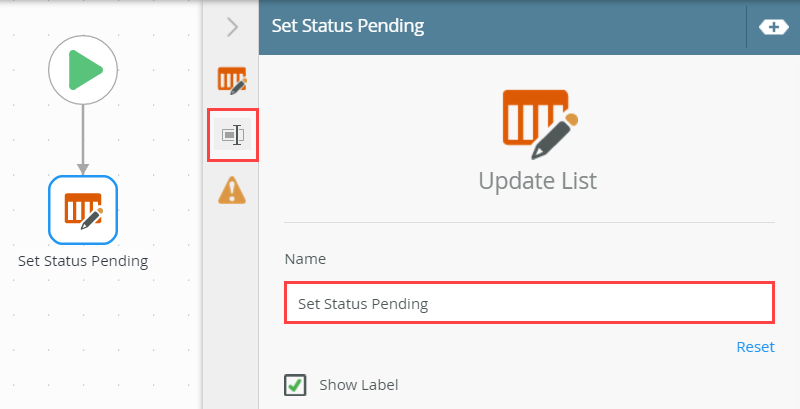
-
Click the Properties tab. Name the new step
- Before continuing, confirm the Start step is configured to start the workflow when you click the Save button on the Site Requests Form. If it is not, configure the workflow to start when the Save button is clicked.
- Click the Start button, then expand the Configuration Panel. If your screen shows No start rule action configured, continue with this step. If there is an action configured (it will show something similar to: On New Site Requests, when Save Button is Clicked), you can move on to the next tutorial.
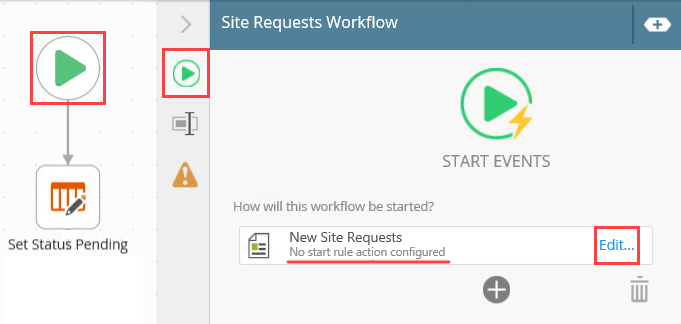
Click the New Site Requests > Edit link. The Start Workflow from a Form wizard launches. - On the REFERENCES screen, there are no changes so click NEXT.
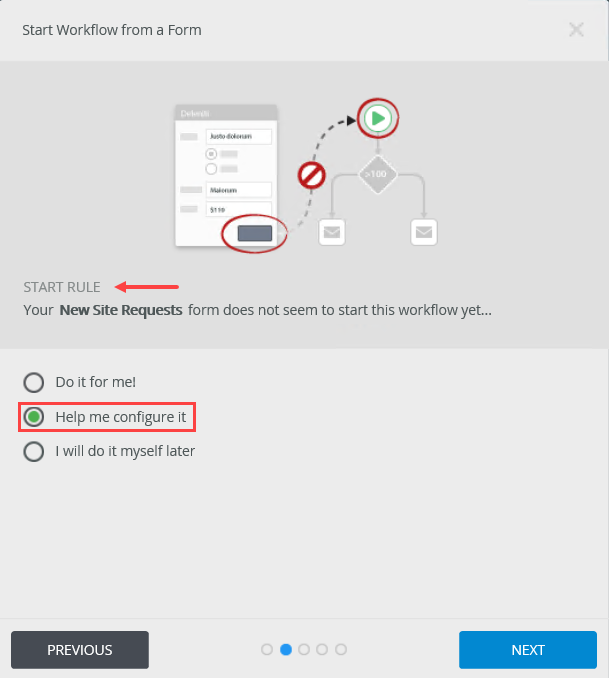
- On the START RULE screen, select Help me configure it. Click NEXT.
- On the FORM STATE, screen, there are no changes so click NEXT.
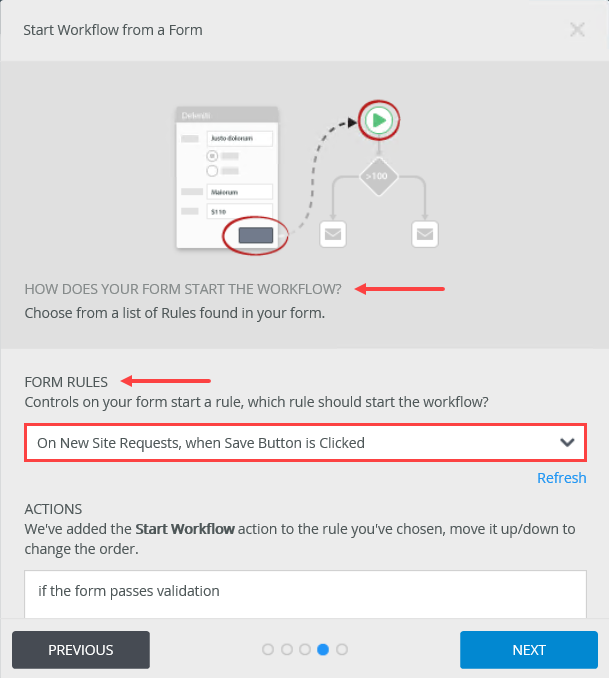
- On the HOW DOES YOUR FORM START THE WORKFLOW? screen, confirm the FORM RULES is On New Site Requests, when Save Button is Clicked. If it is not the default, use the drop-down list to change it. Click NEXT.
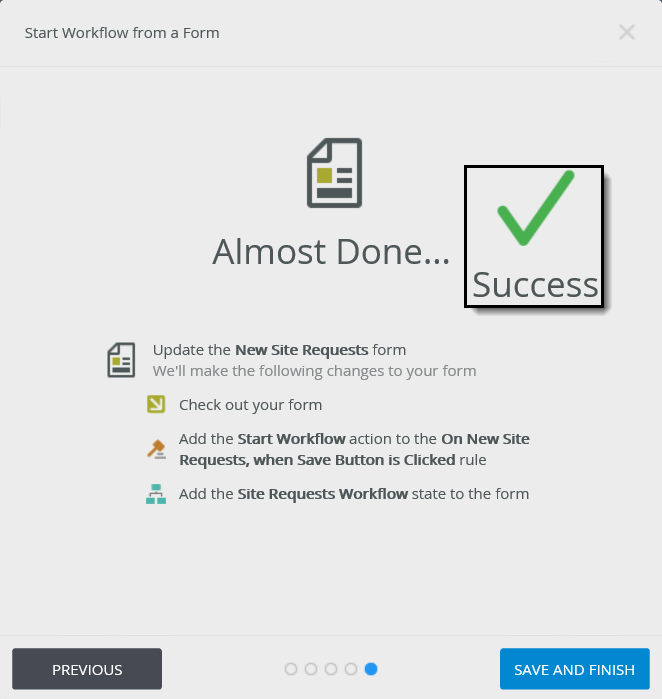
- The last screen is a summary screen. Review the settings, then click SAVE AND FINISH. Click OK when you see the Success check. Collapse the Configuration Panel.
- Click the Start button, then expand the Configuration Panel. If your screen shows No start rule action configured, continue with this step. If there is an action configured (it will show something similar to: On New Site Requests, when Save Button is Clicked), you can move on to the next tutorial.
-
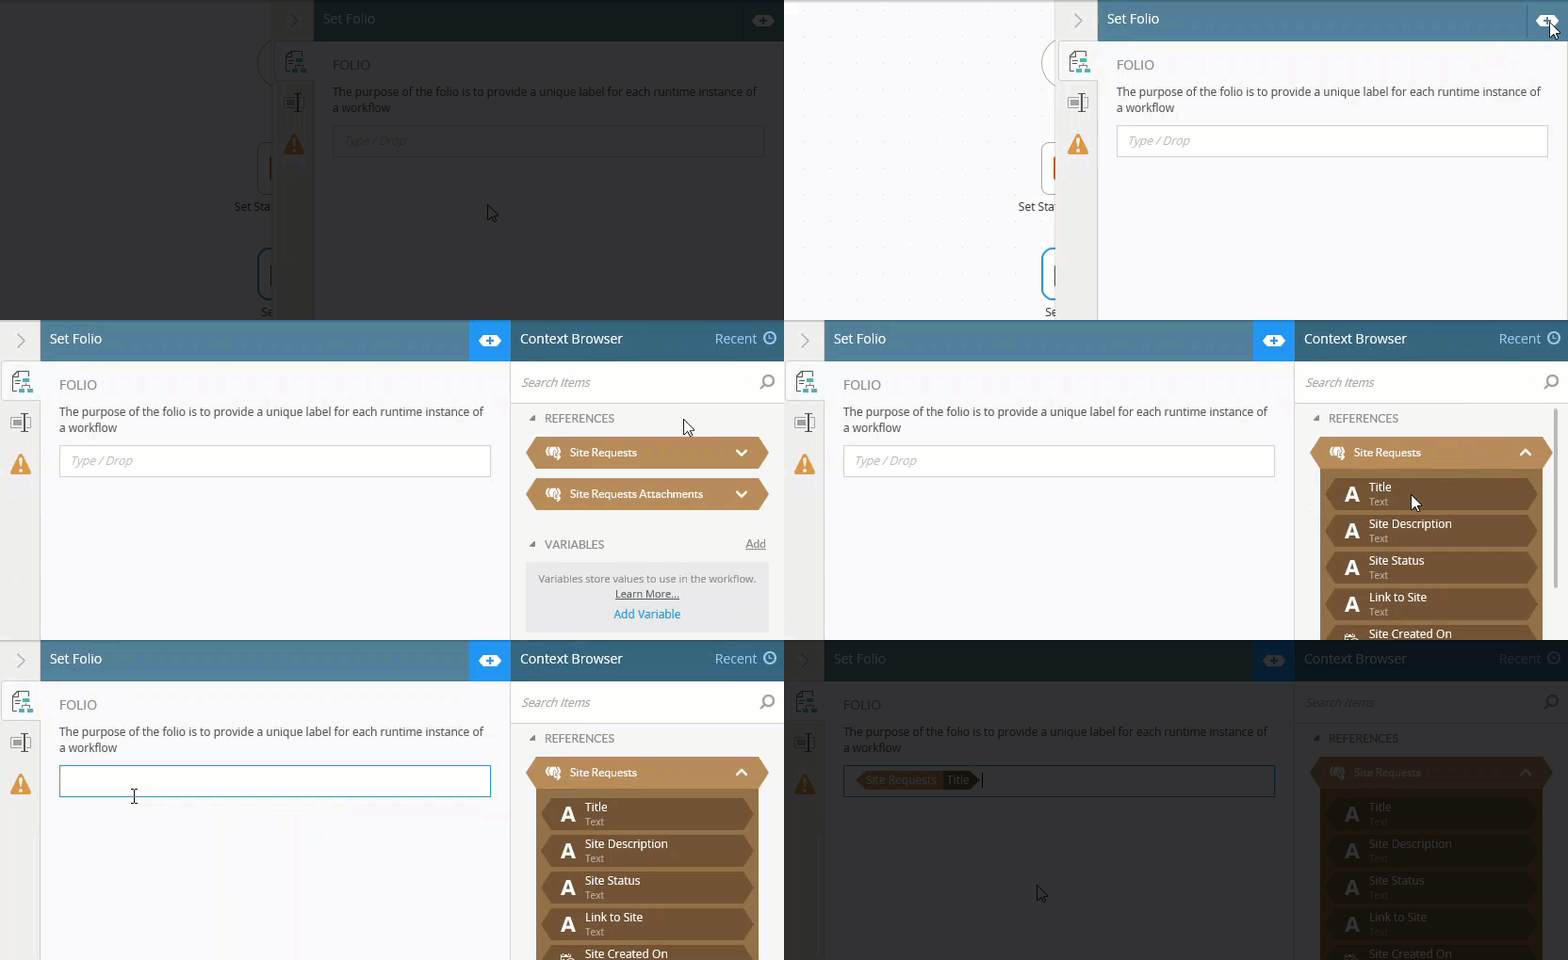
Next, you set the folio so that its value is the title entered by the site requester. From the Toolbox > Basic node, drag a Set Folio step below the Set Status Pending step, then connect the two. Edit the Folio step and map the Context Browser > Site Requests REFERENCES > Title to the Folio text box.
- The last step in this section is to add and configure the Folio. The Folio is often used to distinguish one workflow instance from another and is especially useful when viewing reports on workflow instances.
From the Toolbox > Basic node, drag a Set Folio step onto the design canvas, just below the Set Status Pending step.To return to the Toolbox main menu, click the Toolbox icon in the breadcrumb bar.

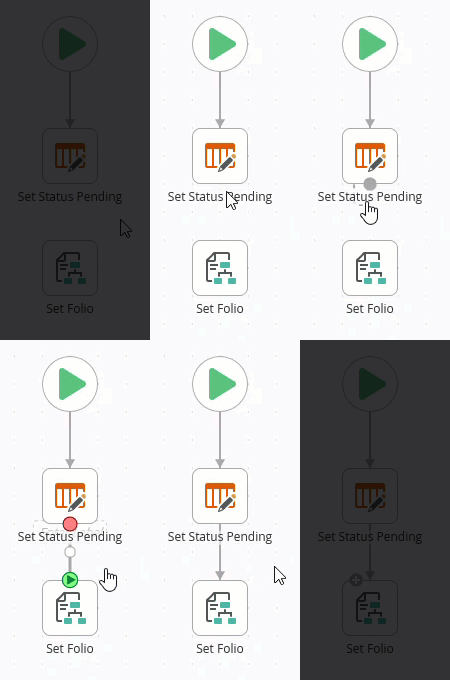
- Connect the Set Status Pending step to the Set Folio step. Hover over the Set Status Pending step bottom border until you see a handle. Click and drag the handle into the Set Folio step. Click anywhere on the design canvas to set the line. (If the handle does not appear when you hover, click anywhere in the design canvas to focus your mouse. Then hover once again.)
- Select the Set Folio step, then expand the Configuration Panel. Expand the Context Browser, then expand the Site Requests SmartObject located under the REFERENCES heading. Drag the Title property into the Folio text box. Collapse the Configuration Panel.
- The last step in this section is to add and configure the Folio. The Folio is often used to distinguish one workflow instance from another and is especially useful when viewing reports on workflow instances.
Review
In this step, you added an Update List Item step to your workflow. You set the Site Status column value to pending. This lets you know the current status of the request. Throughout this tutorial, you update the status value so that it reflects the current location in the workflow process. You also set the Folio. The folio comes into play when viewing reports on workflow instances. It is like a title for each workflow instance and helps distinguish one workflow instance from another. In the next step, you add the approval task step and assign it to a recipient.