29. Create the Expense Claim Report Item View
In this step, you build the first of two views, an item view. This view contains two out-of-the-box reporting controls that display the number of expense claims submitted, along with the average duration of workflow instances. Both controls display the content as a chart.
-
Add a new item view from the Views category and name it Expense Claim Report Item View.
- First, you will add a new item view, then add reporting controls to the view. Right-click the Views category and select New View.
- Name the view
Expense Claim Report Item View
then confirm Item View is the View Type. Click CREATE.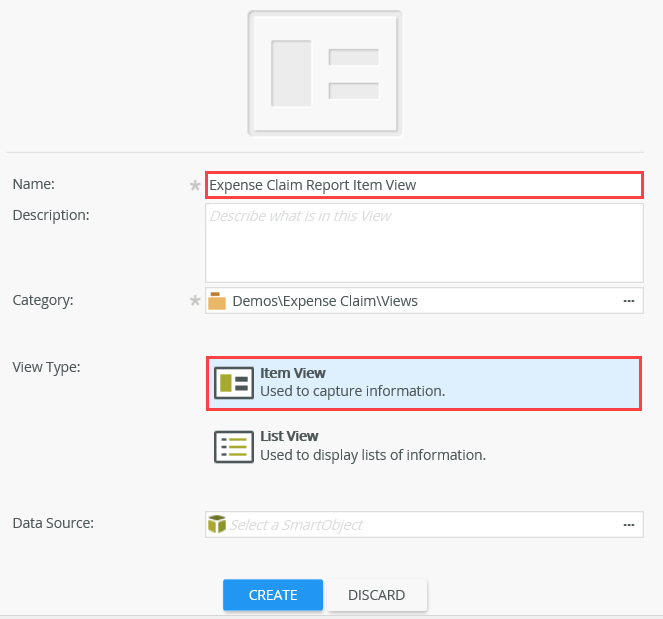
-
Create the layout table with one column and two rows. Add a Workflow Duration Chart to each of the table cells (two charts total). Configure the properties for the two charts as follows:
First Chart Property Value Name Chart Instances Title Number of claims submitted Workflow Names Expense Claim (only one workflow for this chart) Status (All) Range Last 30 Days Group By Weekly Display Value Instance Count Second Chart Property Value Name Chart Duration Title Average duration Workflow Names Expense Claim (only one workflow for this chart) Status (All) Range Last 30 Days Group By Weekly Display Value Duration - Click the Create Layout Table Only link, then configure the table for one column and two rows.
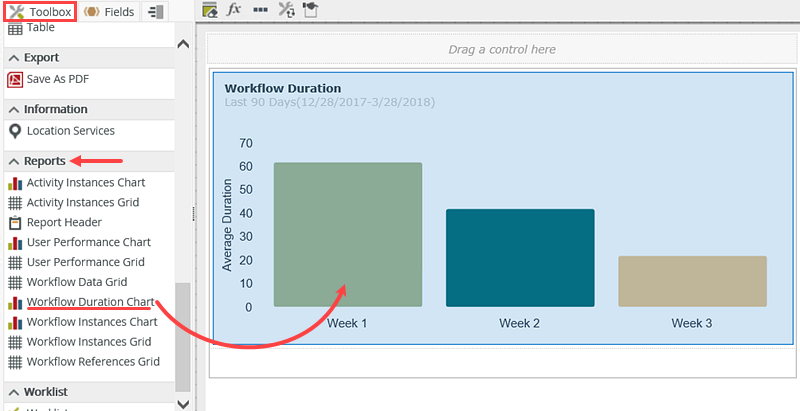
- From the Toolbox on the left side of your screen, drag a Workflow Duration Chart into the first table row. The chart control is found under the Reports heading.
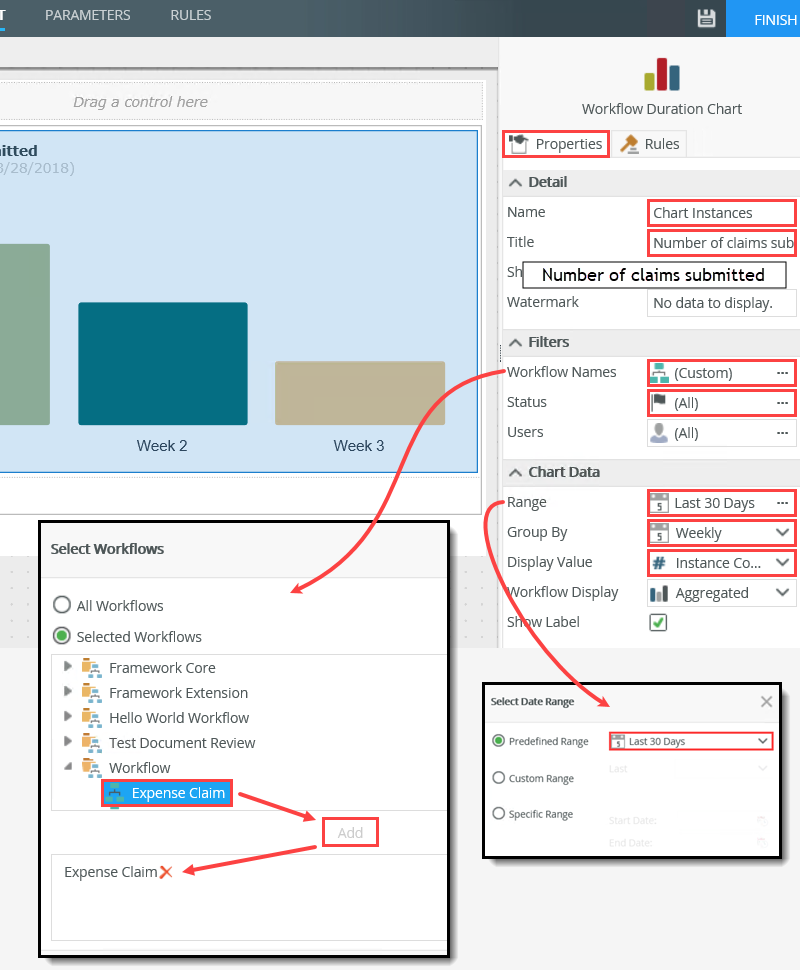
- Select the chart control (if it is not already). In the Properties pane on the right side of your screen, configure the following:
- Name: Chart Instances
- Title: Number of claims submitted
- Workflow Names:
- Click the ellipses to select the workflow
- Change the radio button to Selected Workflows
- Expend the Workflow node, then select Expense Claim
- Click Add, then click OK
- Range:
- Click the ellipses to select the range.
- Select Last 30 Days, then click OK.
- Group by: Weekly
- Display Value: Instance Count
- Add a Workflow Duration Chart to the second row of the layout table.
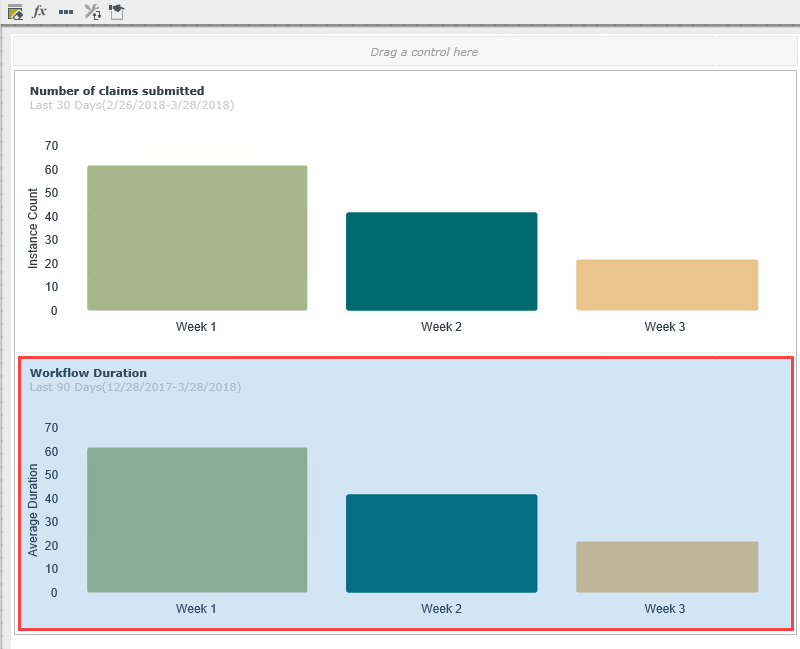
- Select the second chart control (if it is not already). In the Properties pane on the right side of your screen, configure the following:
- Name: Chart Duration
- Title: Average Duration
- Workflow Names: Expense Claim (only one workflow)
- Range: Last 30 Days.
- Group by: Weekly
- Display Value: Duration
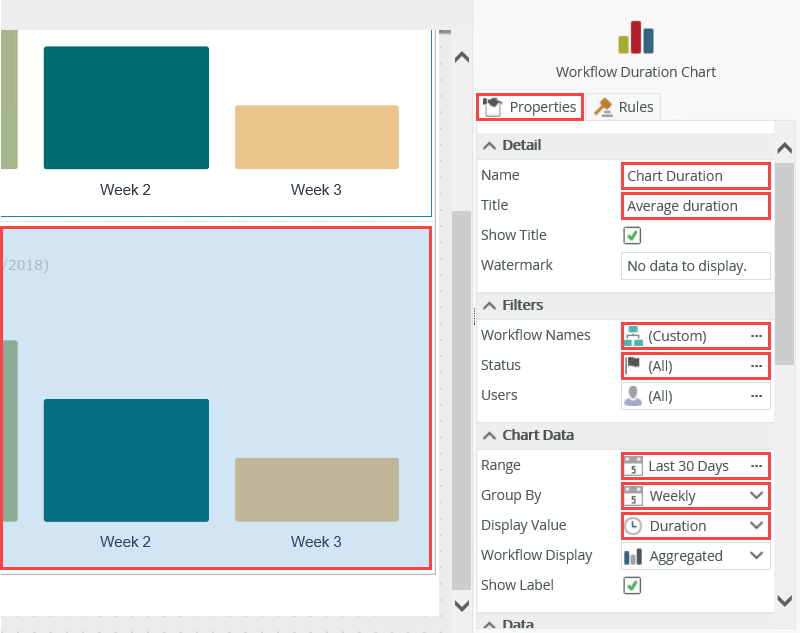
-
To finish the chart control configuration, you will make a slight modification to the rules that load chart data. From the RULES screen, edit the When the View executed Initialize rule. Change the two view control method actions to run as a batch.
- Before finishing the view, you will change the two chart method actions to run as a batch. This ensures the chart data loads as a group before the form moves on to another rule, condition, or action. Click the RULES tab. From the RULES screen, edit the When the View executed Initialize rule.

- For the first chart method action, click then and change it to also. Repeat this for the second chart method action. Click OK.
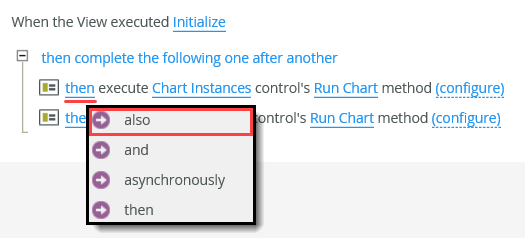

- Click FINISH to save and exit this view.
- Before finishing the view, you will change the two chart method actions to run as a batch. This ensures the chart data loads as a group before the form moves on to another rule, condition, or action. Click the RULES tab. From the RULES screen, edit the When the View executed Initialize rule.
Review
In this step, you created the first view for your reporting form. You added and configured two out-of-the-box chart controls to display the number of expense claim workflow instances, and the average duration of these workflow instances. In the next step, you will build a list view that leverages the data returned by the composite SmartObject created earlier.