Understanding Limited Data Access
This scenario illustrates the use of Limited Data Access in SmartBox Data Access Policies on SmartBox SmartObjects in K2 Management.
In the previous scenario, you added Anthony, the Global Customer Success Team Manager, to a Data Access policy with Full Data Access on the Customers SmartBox SmartObject. He is able to view all the data for the Customers SmartBox SmartObjects at runtime.
You have two options when applying Limited Data Access to your policy:
- This SmartBox object: [SmartObject Name]
- Another SmartBox object [Set]
The SmartObjects
The Region and Customers SmartObjects are designed as follows:

Create the association on the Customers SmartObject by defining the following settings in the Associations page in the K2 Designer.

Finish designing the SmartObjects, generate an Editable List View for each one, and then create a form containing both views called Regions and Customers. Fill in some region data and save it, refresh the form, and then fill in some customer data. This data helps illustrate the scenario.
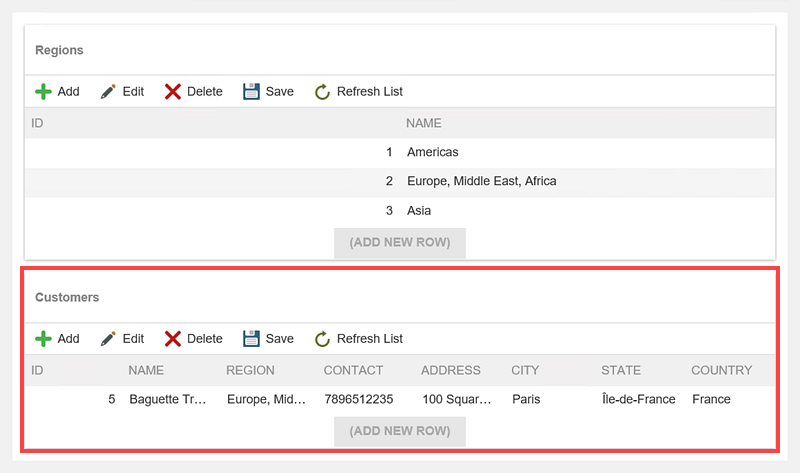
Anthony, who has full access to all data on the Customers SmartObject, sees the following on the Regions and Customers form:

In this scenario, Bob, who is a member of the Customer Success Team - Asia role, only needs access to the data on the Customers SmartBox SmartObject for the Asia region. To achieve this, you must give him Limited Data Access on the Customers SmartBox SmartObject.
Follow the steps below to apply a policy with Limited Access for Bob on the Customers SmartObject via the Another SmartBox Object option.
- Open the Customers SmartBox SmartObject in K2 Management and click the Data Access tab.
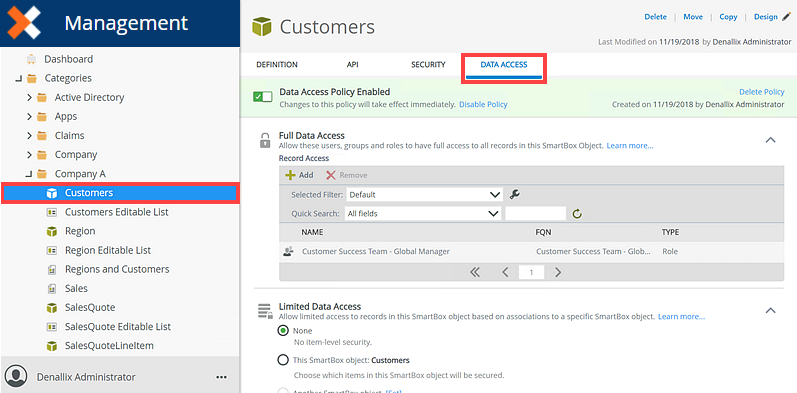
Notice that Full Data Access is enabled for Anthony (a member of the Customer Success Team - Global Manager role), as he is the Global Customer Success Manager. You want to limit the data that Bob is able to access on the Customers SmartBox SmartObject. Data access policies can contain both Full Data Access and Limited Data Access settings.
- On the Limited Data Access section, click Another SmartBox Object [Set] option.
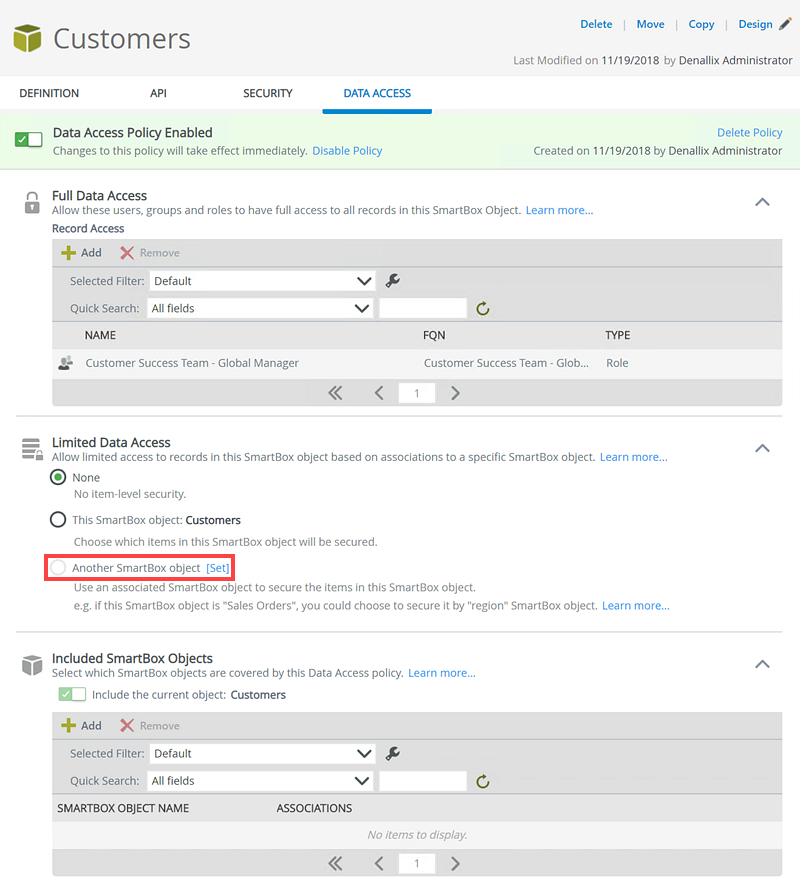
- On the Configure Limited Data Access page, select Region and click Select.

- On the Limited Access section, click Display Properties... and select Name in the Title option. Click OK.

- You can add Bob to SmartBox Object properties in two ways, via the By Item view or the By Role view. For the purpose of this example, you add Bob using the By Item view.
- On the Limited Access section, select Asia and click Add User or the + icon.

- On the Add Users, Groups, And Roles page search and add Customer Success Team - Asia role. Click OK.

- Bob is added to the Asia property via the Customer Success Team - Asia role. This means he only sees data from Asia region in the Customers SmartObject at runtime.

- When Bob runs the Regions and Customers form, which contains data from the Customers SmartObjects, he only sees data for the Asia region.

In this scenario, Jonathan, who is a member of the Sales Team - France role, only needs access to the data on the Customers SmartBox SmartObject for France . To achieve this, you must give him Limited Data Access on the Customers SmartBox SmartObject.
Follow the steps below to apply a policy with Limited Access for Jonathan, on the Customers SmartObject using the This SmartBox Object Option option.
- Open the Customers SmartBox SmartObject in K2 Management and click the Data Access tab.

Notice that Full Data Access is enabled for Anthony ( a member of the Customer Success Team - Global Manager role), as he is the Global Customer Success Manager. You want to limit the data that Jonathan is able to access on the Customers SmartBox SmartObject. Data access policies can contain both Full Data Access and Limited Data Access settings.
- On the Limited Data Access section, click This SmartBox object: Customers.

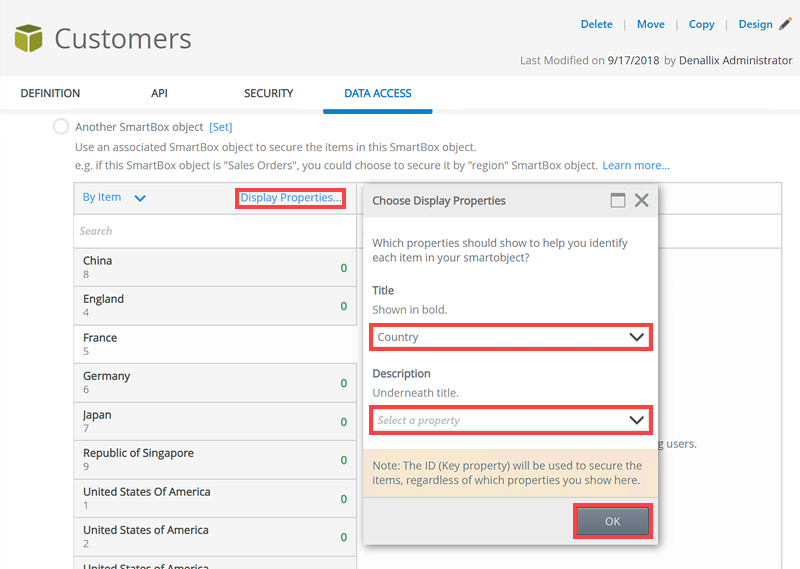
- On the Limited Access section, click Display Properties... and select Country in the Title option and leave the Description option blank. Click OK.
-
You can add Jonathan to SmartBox Object properties in two ways, by using the By Item view or the By Role view. For the purpose of this example, you add Jonathan using the By Role view. Click the By Item option and select By Role.

- On the By Role view, click Add User.
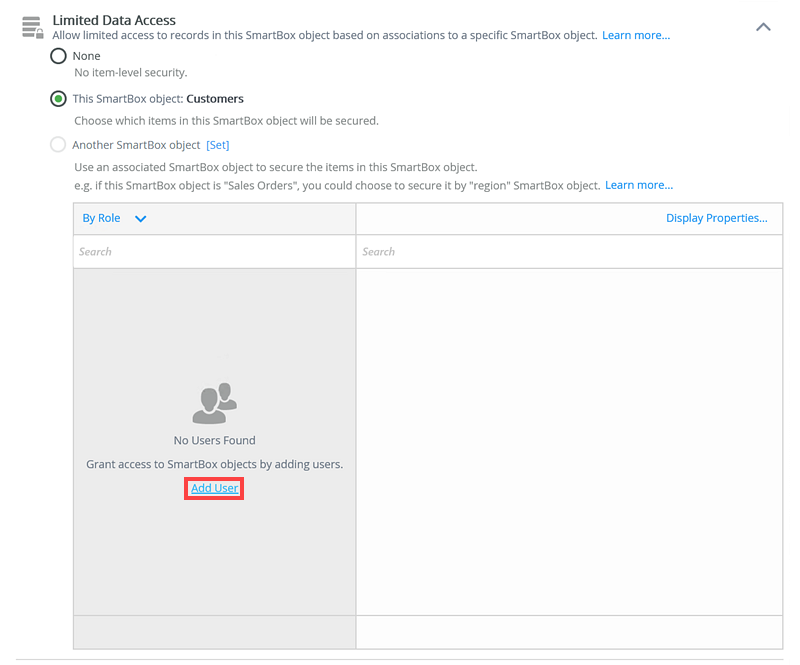
-
On the Add Users, Groups, And Roles page, add the Sales Team - France role. Click OK.

- On the By Role view, give Sales Team - France role access to France. This means the Sales Team - France only sees Customers who's region is France in the Customers SmartObject at runtime.
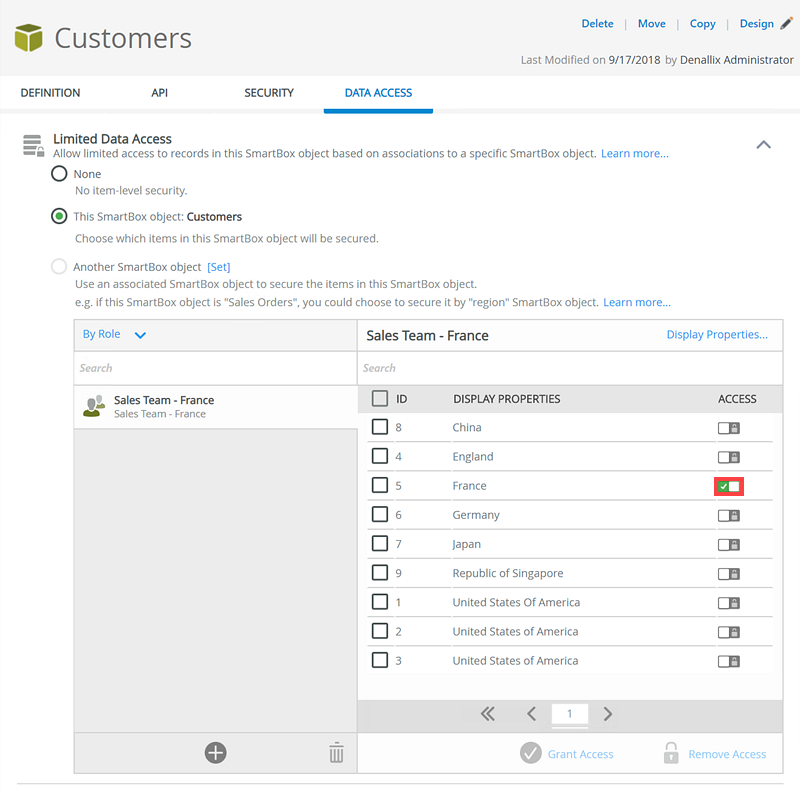
You can use the Grant Access and Remove Access options to give full access or remove access to a selected user on all display properties, on the SmartBox Object, in the By Role view. This allows you to grant and revoke access in bulk. If no display property is selected then the Grant Access and Remove Access options are disabled.
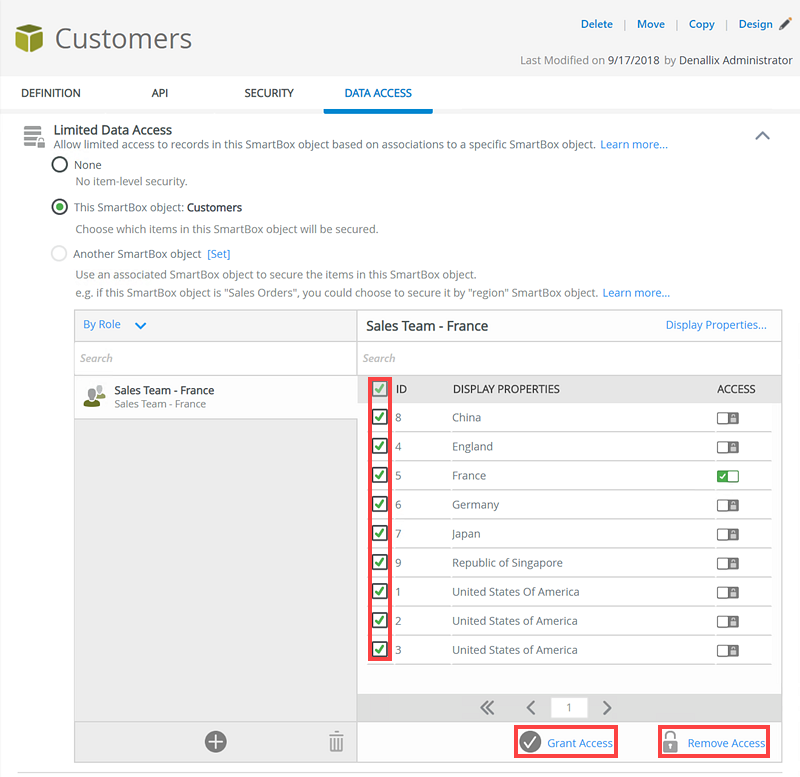
-
Enable the policy by clicking Enable Policy.
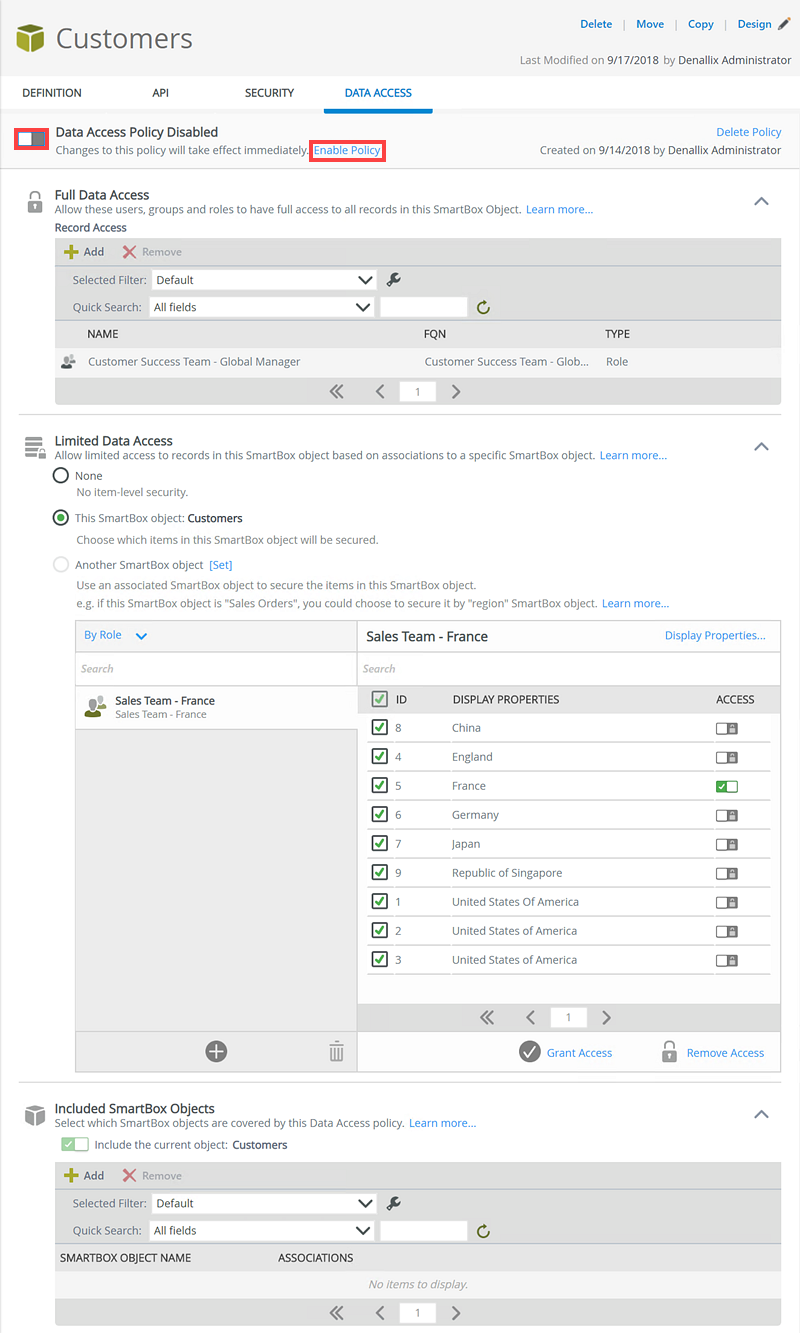
- When Jonathan (a member of the Sales Team - France role) runs the Regions and Customers form, which contains data from the Customers SmartObjects, he only sees data for France at runtime.
