Create List Collaboration Apps
Use the List Collaboration app type to create and manage lists of information, and allow one or more people to contribute to the list. For example, you may want to create a Contacts Management app where you have a shared address book of contacts, and want to allow other users to contribute to that list of contacts as well. This app type supports one-dimensional (flat) lists as well as two-dimensional (parent-child) lists. You can create the app from a template and then modify data fields, or start with a blank app and add data fields yourself. You can manage list security to control the level of access you grant to others who use the lists. Note that this app does not include the option to add a workflow.
You can access Apps from K2 Workspace (Desktop). You can find the apps by clicking the K2 logo, then selecting Apps . You can also click the logo to switch to other sites and workspaces.
Click the All menu in the Build section to open the All Apps page, and then click New. 
In the New App section, select List Collaboration.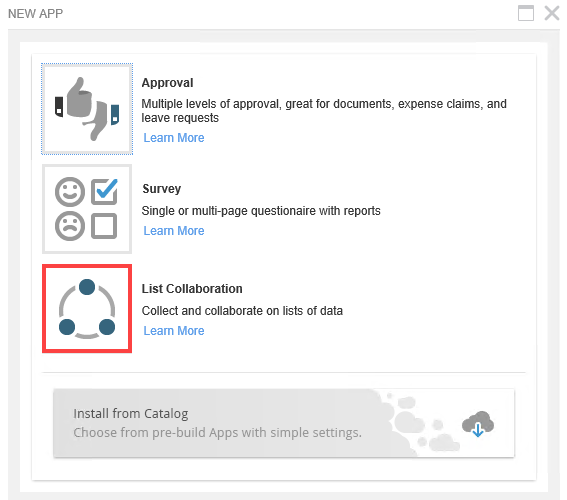
Give your app a name and description.
In the What Template do you wan to start with? section, choose whether to use a template or build a custom app.
- Use a template: Select a template that most closely matches your needs. This option provides sample data fields which you can add, edit or remove.
- Blank/Custom: Define your own data fields. This option allows you to build your data fields from scratch.
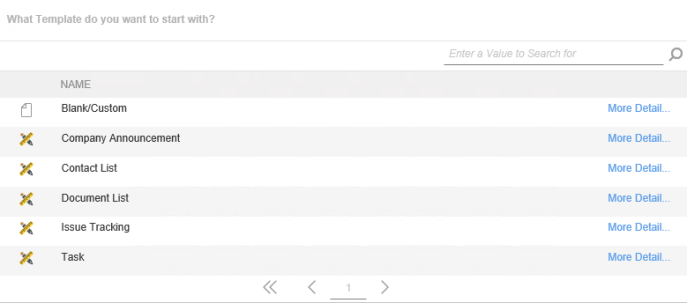
If using a template, choose a template that most closely matches your needs. Click More Detail... to view default data fields and data objects. You can add, edit, and remove data fields later on to fine tune the list for your own requirements. When you decide which template you want to use, click to select it.
Template Details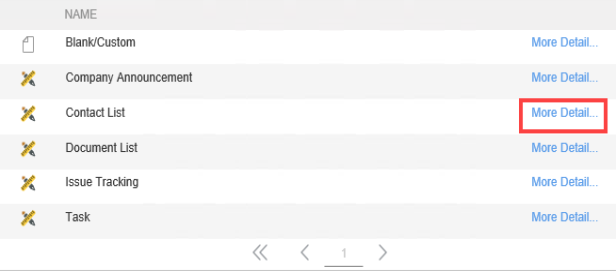
Default data fields for the Contact List template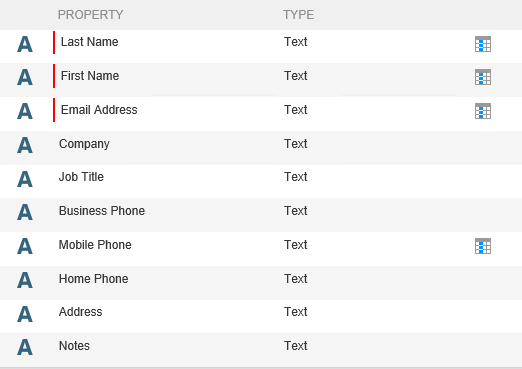
Add a New Data Field
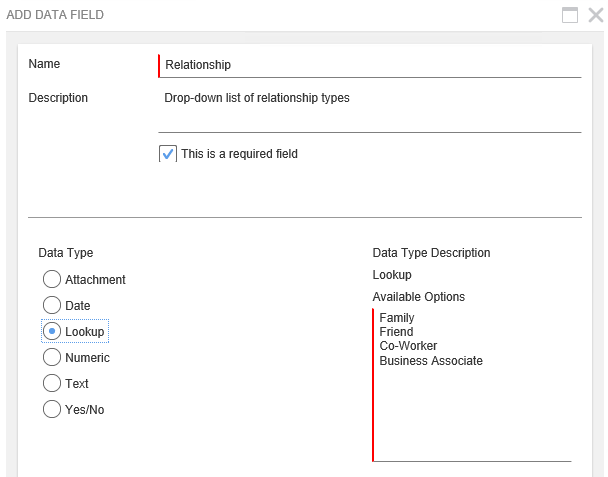
You can add additional data field to customize the app for your own needs. To add a new data field, click Add . Complete the data field properties. An example is shown in the table below.
| Data Field | Example | Notes |
|---|---|---|
| Name | Relationship | Give the data field a meaningful name that reflects its use. |
| Description | Drop-down list of relationship types. | Add a description to describe what the data field does. |
| This is a required field | Checked (Yes) | If checked, you cannot submit the form without selecting or entering a value. |
| Display this field in data lists for this data source. | Checked (Yes) | If checked, this field displays in views that contain the list. You must have at least one field displayed in data lists. |
| Data Type | Select from the list of available data types. | Each wizard has predefined data types. See the Template and Data Type Reference section for more details on each data type. |
| Data Type Description | System value that explains the data type use. | |
| Available Options/Data Type Options | May or may not be required. Further defines the data type. | Most data types have additional options. See the Template and Data Type Reference section for expanded details on each data type. |
Edit a Data Field
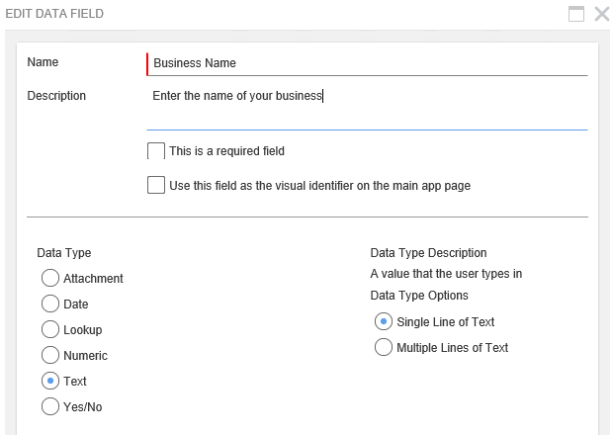
To change an existing data field, select the data field row and click Edit. Change the data field properties as needed. You can change the data type and data type options as well. In the images below, the Company field name is changed to Business Name and a description added.
Delete a Data Field
To remove a data field, select the data field row and click Delete.
Choose Blank/Custom if you want to start with a blank data source and define your own data fields. 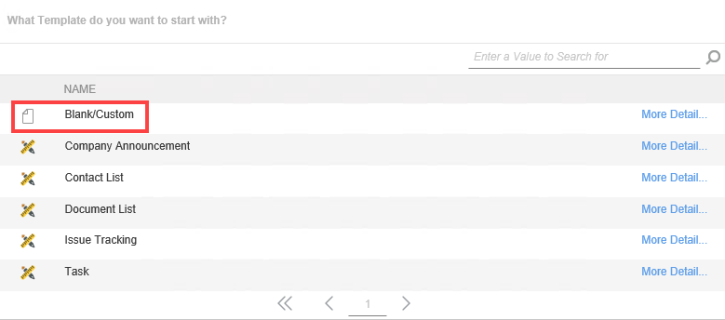
Add Data Fields
To add data fields, click Add. Add the data fields you need for your app. Choose the data type and data options.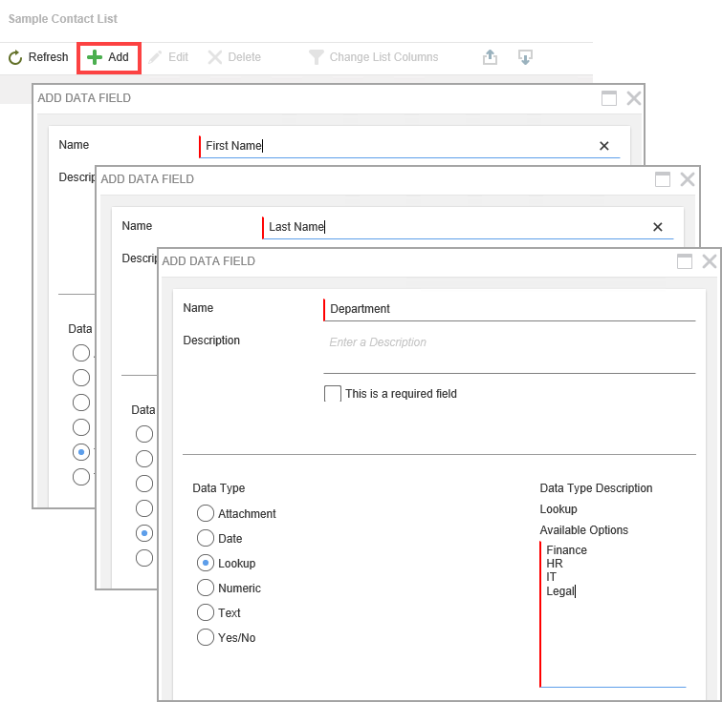
You may want to change the name of your main data object, such as when you have a specific naming convention. Data objects are data sources (stored as SmartBox SmartObjects) that your app uses to store content generated by the app. For example, if you create a leave request application, the main data object stores the data from each request submitted (such as name, leave start date, leave end date).
To change the main data object name, click the Change link. Change the name, then click Update.
Data objects are data sources (stored as SmartBox SmartObjects) that your app uses to store content generated by the app. Each app gets a main data object, or parent data source, when you add a new app. You can add additional data objects to create a standalone object or to create a two dimensional (parent-child) data source relationship. For example, the main data object for a leave request app stores the parent data (such as name, email, department) and an additional data object stores leave request details (such as leave start date, leave end date, reason). A single parent record may have many child records.
To add a data object, click Add. 
Enter a name and description. Decide if the data source requires at least one row.
For example, in a leave request application, the parent data source contains the employee's name, email and department. The child data source contains each leave request the employees submit. It makes sense to require at least one row since, without this information, the approvers won't have any leave details to base their decision on. In another example, you might have a contact list where the parent record contains the contact name and email. The child data source contains additional notes about the contact. In this scenario notes may be optional, so the one row requirement is unnecessary.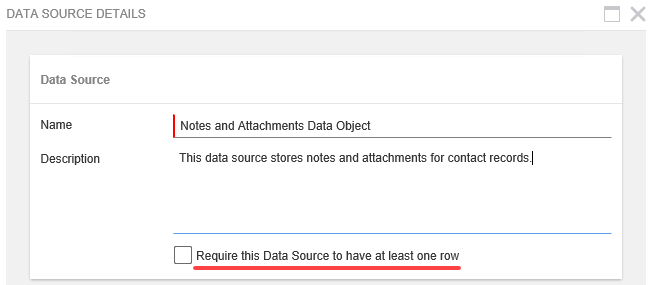
Add Data Fields to the New Data Object
Add data fields to customize the application for your own needs. To add data fields to your new data object, click Add.
Enter a name and description for the new data field. Choose the data type and define the data options. You must include at least one data field in data lists for this data source. Behind the scenes, K2 creates a list view for the new data source and displays it on the app form. The list view must have at least one column. Check the box to Display this field in data lists for this data source to include the current data field as a column. The list view must have at least one data field displayed. See the Template and Data Type Reference section for a complete list of available data types and options.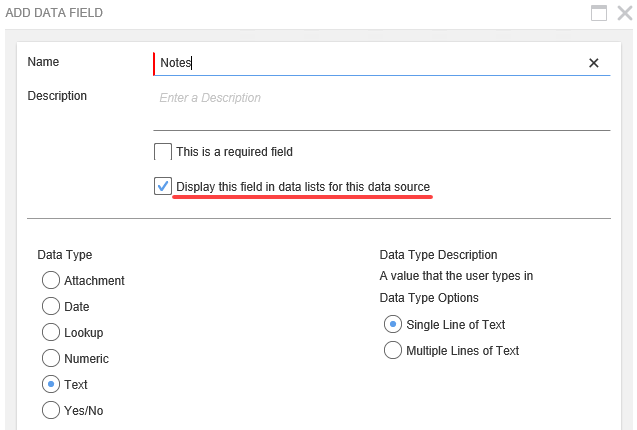
Repeat this step for additional fields.
Edit Data Fields
Select the data field to edit and click Edit.
Delete Data Fields
Select the data field to delete and click Delete.
Manage list security to control access to this list. By default, users have full control to the list, meaning they can create, update and delete list items. When setting list security from the app, the following options are available:
- Full Control: User can view, create, update and delete list items
- Update: Users can view, create and update list items
- Create: Users can view and create new list items
- View: Users can view list items only
- By User (User Specific): Only users with explicitly configured action rights have rights to the list
To change list security, click the Options button. Click the radio button for the list security level you want to assign.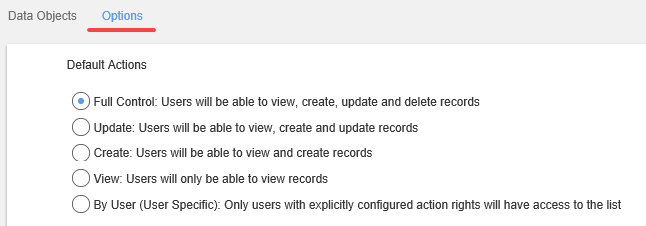
The last step is to generate the app. After clicking the Generate App button, artifacts are created for the app including views, forms and SmartObjects. Depending on the size and complexity of your app, this process may take several minutes.
After you generate a new app, the app
moves to an approval queue. Opening your My Apps
list, the status reflects that your app is Under
Review.
Administrators receive a task notification with your app request. Administrators can approve, decline, or rework (send it back to you) the app. Approving the app completes the process and the app is ready for use. Declining the app ends the process. You cannot edit or resubmit declined applications. Reworking the app sends it back to you for adjustment. You can resubmit the app for approval or cancel the request.
The List Collaboration app has several predefined templates to choose from. Ideally, choose a template that closely matches your needs, then edit it to define the data fields and data objects. If these templates don't work for you, then build a custom app and create the data fields.
Task
| Template Overview | Main Data Object | Data Objects |
|---|---|---|
|
|
Task Item (SmartObject) |
Issue Tracking
| Template Overview | Main Data Object | Data Objects |
|---|---|---|
|
|
Additional Note (SmartObject) |
Contact List
| Template Overview | Main Data Object | Data Objects |
|---|---|---|
|
|
No items |
Company Announcement
| Template Overview | Main Data Object | Data Objects |
|---|---|---|
|
|
No items |
Document List
| Template Overview | Main Data Object | Data Objects |
|---|---|---|
|
|
Task Item (SmartObject) |
Data Types for List Collaboration App
| Data Type | Data Type Description | Data Type Options |
|---|---|---|
| Attachment | An attachment. |
|
| Date | A data type value. |
|
| Lookup | A value that the user selects from a list of options. | Specific to the template. Can be edited, added or removed. |
| Numeric | A numeric value. |
|
| Text | A value that the user types in. |
|
| Yes/No | A yes or no answer. |