Set Folio step
The purpose of a folio is to provide a unique label for each instance of a workflow. Use the Set Folio step to configure the folio value. This value is typically visible on your task list and various reports, and provides a helpful mechanism to identify different instances of the same workflow. See How To: Configure Forms with Draft Functionality for an example of using the Set Folio step with a form configured for mobile use.
Use the Set Folio step in the following scenarios:
- Provide a unique tag for each instance of a workflow
- Use the value to make static text or dynamic values visible throughout the lifetime of a process instance
-
Use the Set Folio step to change the folio value at any point in the workflow. This can be useful to track changing values throughout the workflow lifecycle, such as when a time frame (such as a ship date) needs to be recalculated.
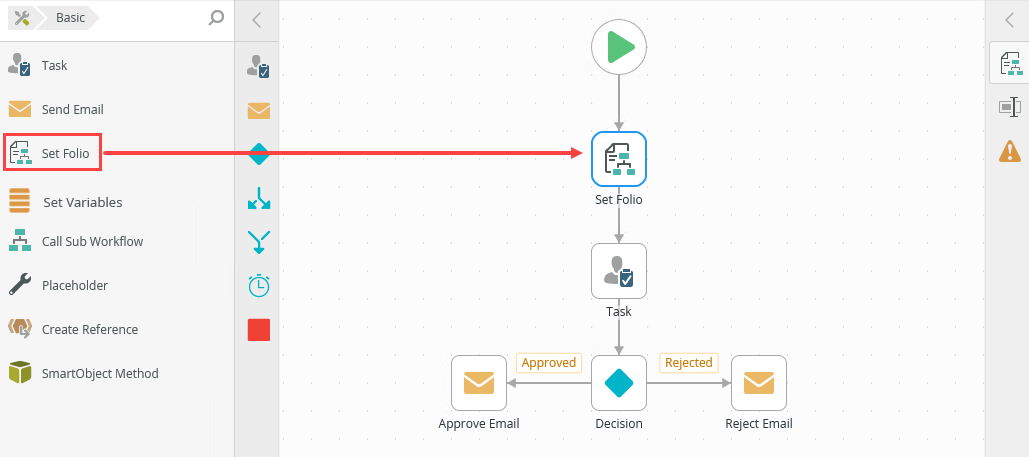
Drag the Set Folio step from the Basic category, Favorites bar, or the Recent category onto the canvas.
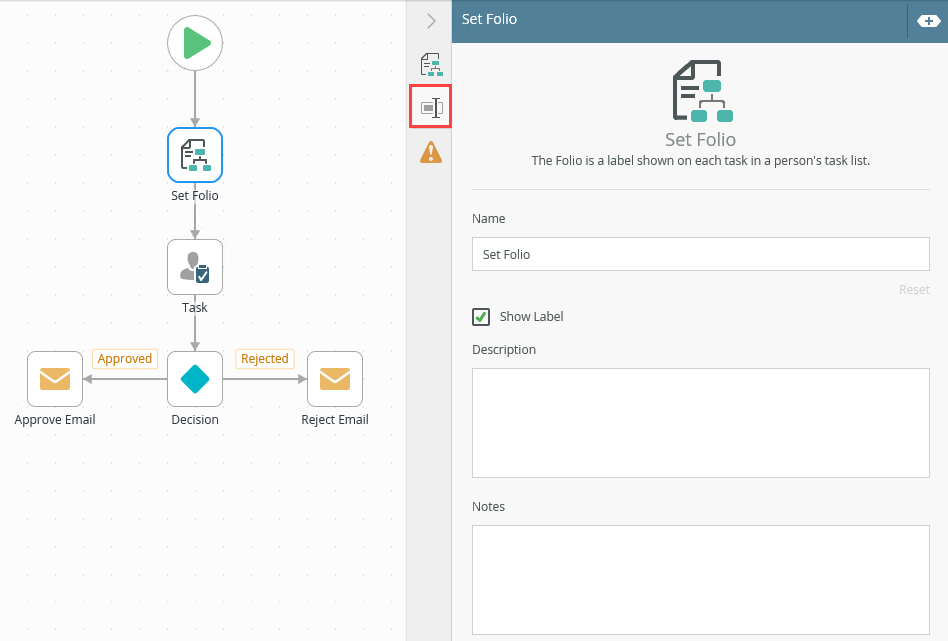
Example of a Set Folio step in a workflow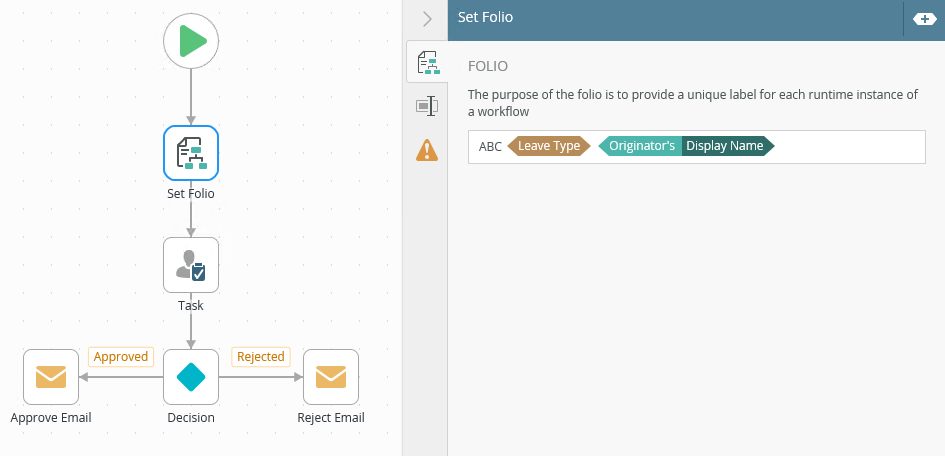
- From the Toolbox click the Basic category, then drag the Set Folio step onto the canvas.
- Select the added step and click the expand / collapse toggle to expand the Configuration Panel. You can also double click the step to expand the panel.
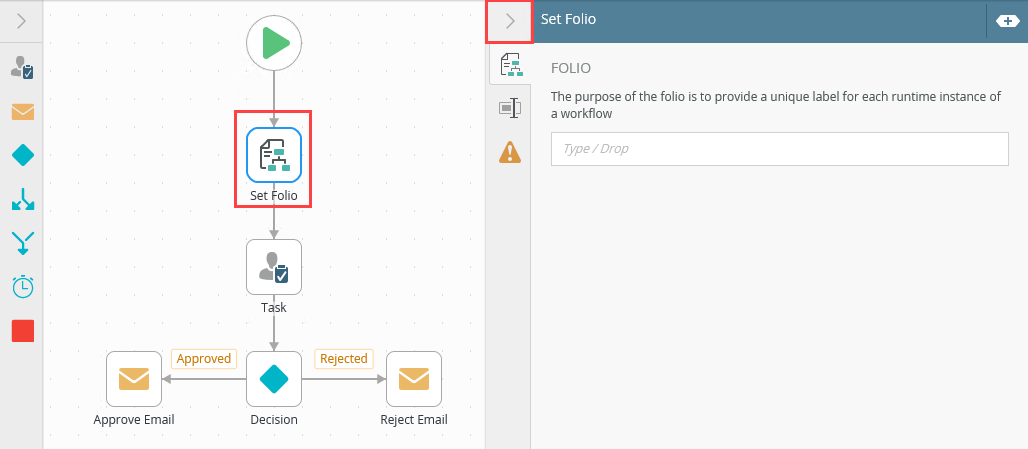
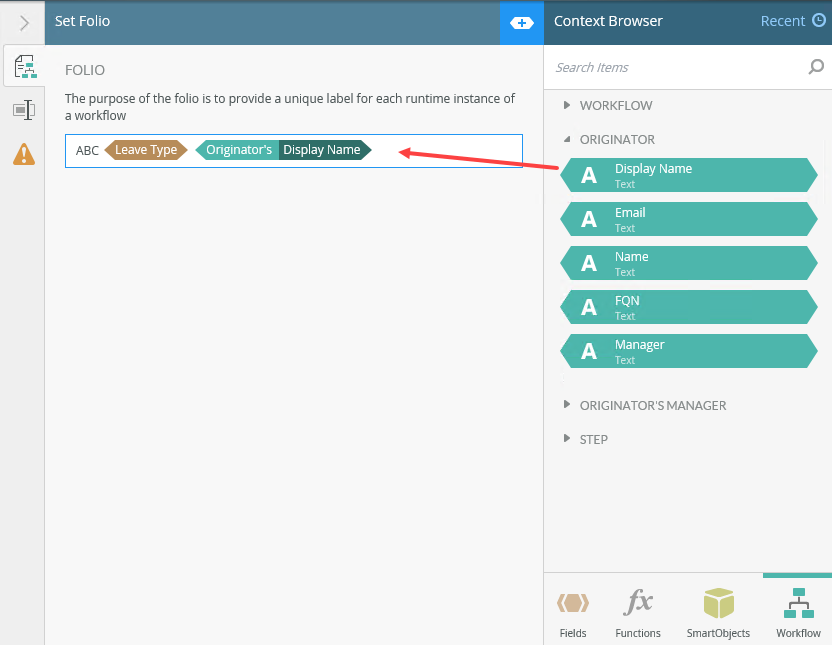
- Select the Set Folio Detail tab. The value entered is used as a unique reference to a running workflow instance.
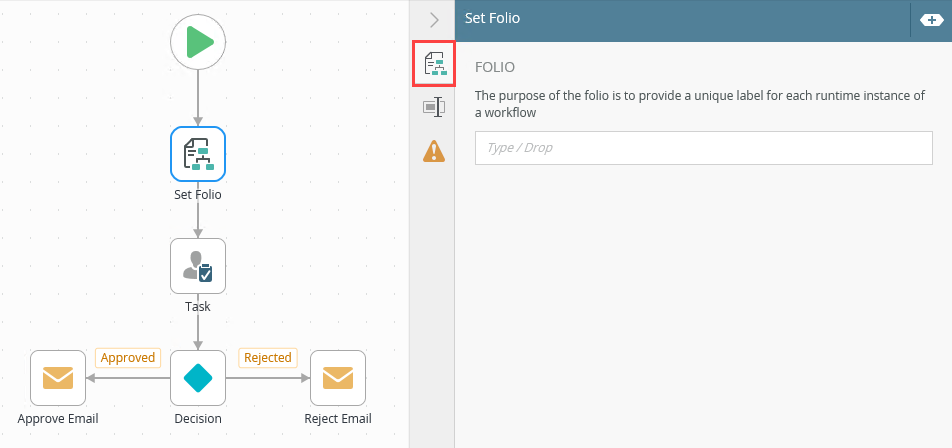
- Customize the folio field with a combination of text and values. You can drag Functions, Fields, SmartObjects and Workflow related items from the Context Browser into this field.
- With the step selected, select the Properties tab.
- Click the Errors tab.
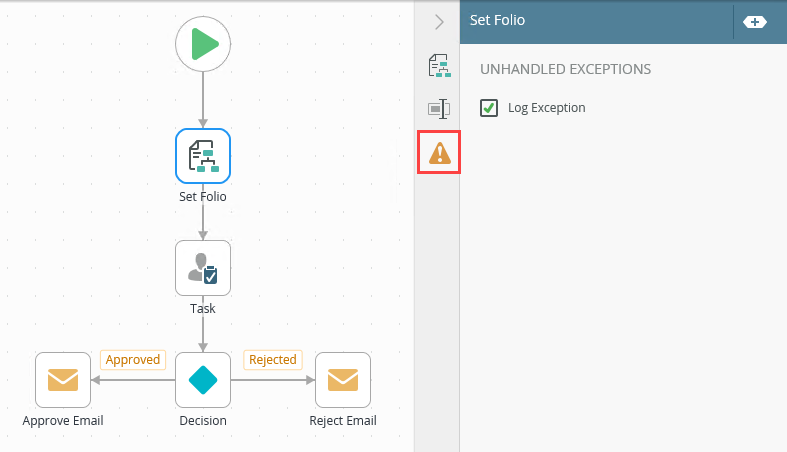
- The exceptions in the table above is an example of those available in Workflow steps. The exceptions available depend on the Workflow step used in the design canvas.
-
When you enable both Continue on Error and Force error when required SmartObject inputs are missing, the workflow continues with execution even if the required inputs are missing. The Continue on Error setting takes precedence.
-
Your changes are automatically saved.
For more information on how to use fields, functions, SmartObjects, and workflow context, see the Context Browser topic.
The following table explains the options available on this tab:
| Option | Explanation | How to Use |
|---|---|---|
| Title / Name | By default, each step on the canvas has a step title. You can change this title to suit your workflow logic and show it on the canvas by checking the Show Label box. | Enter a value into the Title/Name field. |
| Reset link | Use the link to reset any changes to the title. | Click the Reset link to reset the Title/Name field to default value. |
| Show Label | Allows you to see the step label on the canvas. The label shows the value of the title. | Check the check box to display step label on the canvas. |
| Description | Allows you to add a detailed description for the step. | Enter a value into the Create New field. |
| Notes | Allows you to add additional notes for the step. | Enter a value into the Notes field. |
Different types of exceptions can occur on a step, such as:
| Type | Description |
|---|---|
| Known exceptions | Any SmartWizard or standard wizard that has Boolean options for handling known exceptions have these options displayed as check boxes in the Known exceptions section of the Exceptions tab. |
| Unhandled exceptions | Any unknown runtime exceptions. |
The tab contains the following unhandled exceptions:
| Exception | Explanation |
|---|---|
| Log Exception | Logs the exception to the error log. |
| Force error when required SmartObject inputs are missing | Will forcefully throw an error if a SmartObject method has input missing. |
| Continue on error | Will force the workflow to continue running the SmartObject method, even if it runs into an error. |
When working with the Set Folio step keep in mind the following considerations:
- The Set Folio step cannot be added into a multi-step and cannot be made into one
- The Set Folio step can be used anywhere within a workflow
- The Set Folio step must have at least one incoming line