12. Deploy the Site Request Workflow
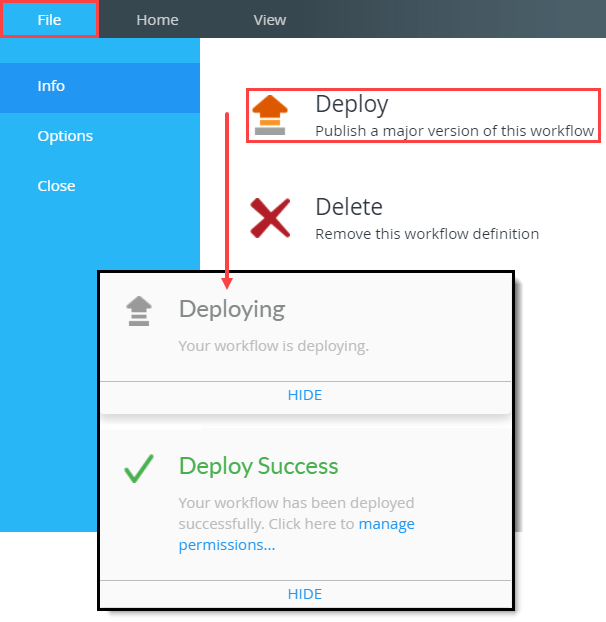
In this step, you deploy the workflow. Deploying a workflow publishes it to the server and makes it available for use. If you make any changes to your workflow, you must deploy it again so that the server has the latest version.
- Deploy the workflow. Return to the K2 Application elements page. (File > Close)
- Click File > Deploy

- When you see the Deploy Success dialog, you can proceed. You are now ready to return to the K2 Application elements page. Click HIDE.
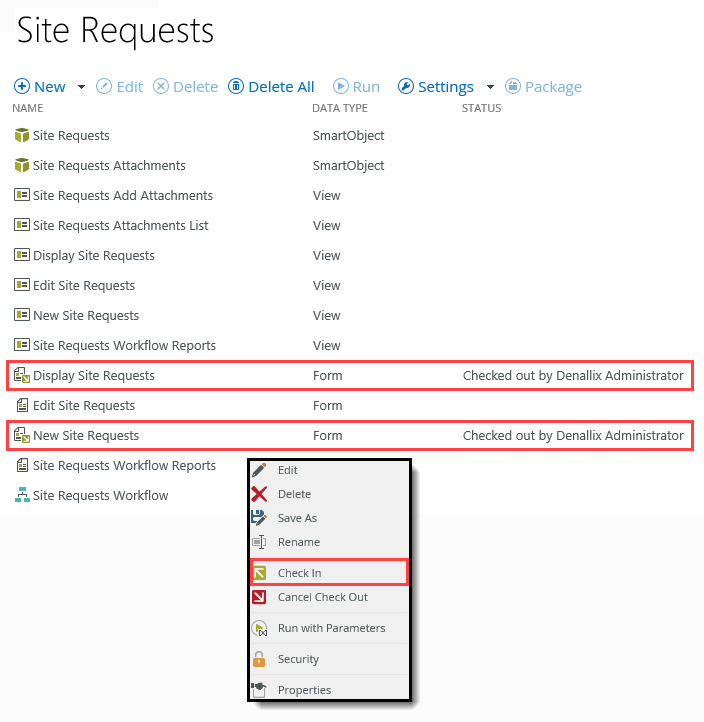
- Return to the K2 Application elements page by clicking File > Close. On this page, you find the artifacts generated by the product when you created the new application. Notice there are views, forms, and the workflow you just configured. The K2 forms replace the standard SharePoint new, edit, and display forms. If you see any views or forms checked out (there are two in the image below), right-click the name, then select Check In.During deployment, the product checks out forms that it needs to update. For example, if you configured task steps that have SmartForms associated with them, the product updates the form and injects rules to create the state. Occasionally, the forms fail to check back in during deployment. In this case, you can check the forms in manually. Checking in forms and views publishes them to the server.

You may have noticed the manage permissions... link on the success dialog. Clicking this link takes you to the Management site where you can set up rights to your workflow. For this application however, you will not set additional permissions. - Click File > Deploy
Review
In this step, you deployed the Site Request Workflow. The application is now ready to use! In the next step, you test your new application by submitting new site requests.