Use Survey Apps
Start a new survey by inviting people to participate in a survey. After you send the survey, participants receive an email notification with a link to the survey. This is only an email notification, and does not show as a task on the participants Worklist. The participant can open the survey, complete, and submit it. This app provides a reporting function that allows you to review responses from completed surveys. This app differs from other apps in that using the survey is inviting people to it and viewing their responses. As such, the View Flow report isn't as useful as in the Approval app.
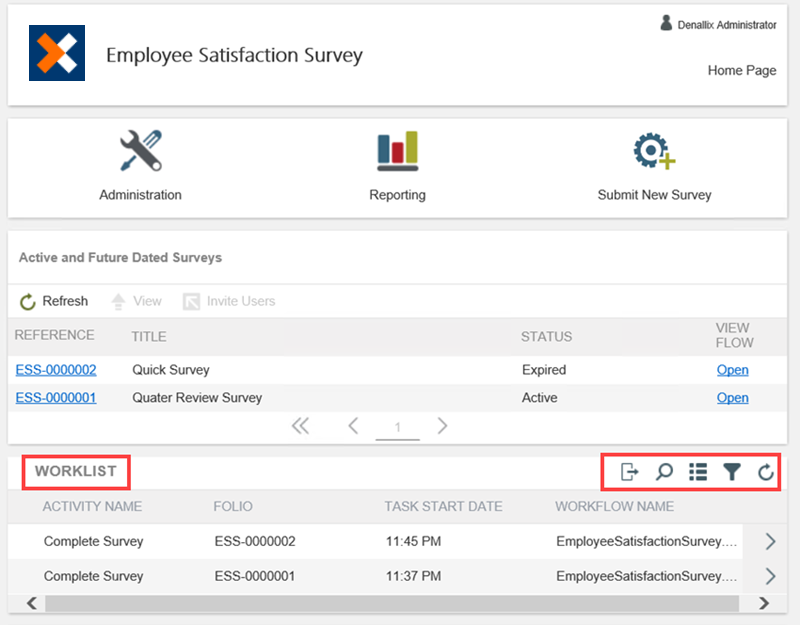
Begin by launching a survey from either the All option in the Build section or from the My Apps list. You have three options after opening the app:
- Administration: Edit questions and question options. You cannot add or delete questions after generating the app. Note that you may not see this option if you are not the app owner.
- Reporting: Review survey answers and participants. You can also view reports on process instances or export process instance data to a CSV file. See the topic Report on Survey Apps for details on process instance reports and exporting survey data.
- Submit New Survey: Launches the new survey form. From this page, you can name the survey instance, select the active dates, and invite users.

To send a new survey, click Submit New Survey. 
The Submit New Survey form launches. Use this form to name your survey and optionally select the active dates. Give the survey a meaningful name so that you can distinguish it from other surveys in reports. Add a description if desired.
If you want the survey to be active for a limited period of time, select the start (Active From) and end (Close On) dates. You can specify the time of day for the start and end dates as well. People you invite cannot submit the survey after the close date.
By default no Close On date and time is specified. This means the survey stays active until all participants have completed it.
Fields with red bars indicate required fields. You cannot send the survey without required field values. To remind yourself of the survey questions, click the Click to View Questionnaire link.
Inviting Users and Editing the Survey Notification Email
The next step is to edit the survey notification email (if desired) and select people to receive the survey. Click the Invite Users button to get started (see image above).
The survey notification email
Each participant receives a notification email which contains a link to the survey. You can edit the subject line and the message to further customize it. Take caution when editing the email so that you do not delete the survey link.
Invited survey users only receive an email that contains a link to take part and complete the survey. It does not show in their workspace inbox. Notifications in the workspace inbox are survey related tasks such as Complete Survey, or an App Generate Error and these are sent to the person who submitted the survey. For more information on the App Worklist, see the App Worklist section below.
Inviting Users
You can send your survey to people in your company and to external users. To send the survey to users within your company, type the user name into the Select A User From Your Domain box, then click Resolve . The user's full name and user account displays.
Click Add to add the user to the list of survey participants. Continue adding users until you have everyone you want for your survey.
To add a group of users, enter the complete email address into the Specify An Email Address box, then click Add.
When you send an invite to someone outside of your organization they will not be able to use the survey form.
After adding your survey participants, click the Send Notification button. Each user receives a survey notification email with a link to the survey.
On the app landing page, the active survey appears in the Active and Future Dated Survey section. To view the details of the your survey, click the Reference number. Here, you will find the instance details (such as the survey name, description and active dates). You can also view the survey questions.

To view a display of the survey workflow, click the View Flow link. This application differs from other apps in that using the survey is inviting people to it and viewing their responses. As such, the View Flow report isn't as useful as in the Approval app.
Inviting Additional Users
You can invite additional survey participants at a later time if needed. Highlight the survey, then click Invite Users. Add domain users or external users using the same steps described above.
The Worklist section shows a list of open surveys. This includes Active and Expired surveys. Use the filter and search features to filter and find specific surveys.

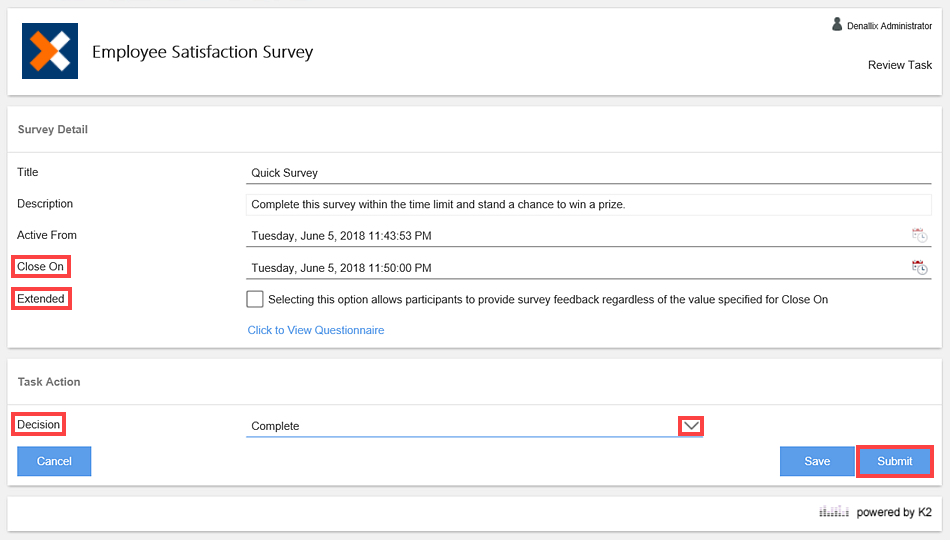
From the Worklist you can change the survey details (Close On, Extend survey and View Questionnaire) and task action Decision for a selected survey. In this example the survey has expired and you want to complete the Quick Survey. Submit the survey as Complete.


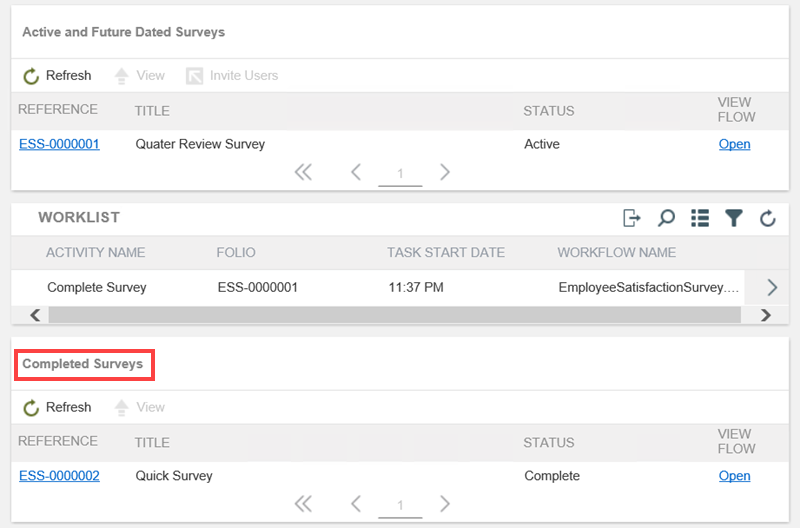
Completed surveys move from the Worklist to the Completed Surveys section.

As a survey participant, you receive an email containing a link to the survey. Click the Survey Response link.
The survey opens in a browser window. Complete the survey questions, then click Submit. To save the survey and complete it later, click Save as Draft. When ready, open the survey from the landing page, then answer the questions and submit the survey.
If you specify a close date for your survey and open it after that date is passed, the following message is shown:
As the survey owner, you can review survey results at any time from the survey landing page. After opening the survey from the application landing page, click Reporting.
There are three options in the Report Dashboard: Process Overview Report, Survey Data & Participants, and Export to CSV.
The Process Overview Report allows you to view data on survey instances such as total and active instances. Export to CSV allows you to export the data from a single survey instance to CSV format (viewable in Excel). For more details on either of these report options, visit Report on Survey Apps.
To access survey responses and participants, click Survey Data & Participants. Because there may be several instances of the same survey, you must first specify which survey instance you want to view. If you know the name of instance you want, enter the name or keyword into the Select Survey Instance box, then click the Resolve button. You should see the survey instance displayed along with the reference number.
Alternatively, you can return a list of all instances for the survey by clicking the spyglass (without entering a value in the search box). 
On the Search page, click the spyglass once again. You see a list of all instances of the open survey. Click the instance you want to report on, then click OK.
When you open a survey you see a list of the survey questions. To view responses to a particular question, click the question. The responses and participants appear in the section just below. The response date is also shown.
Questions that require participants to choose an answer display as a chart with a data table below it. This allows you to view a percentage of answers selected.
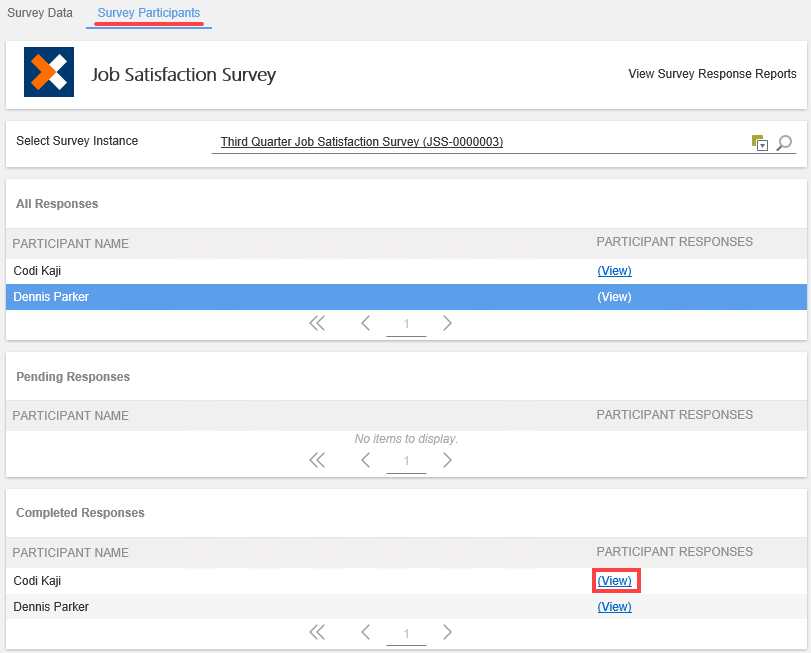
To view participant details, select the Survey Participants option. Here you can see more information on who responded and completed to the survey and who still needs to complete it. Click the (View) link to see the selected participant survey responses. 