How To: Create Embedded Signatures with DocuSign
DocuSign integration allows you to create a K2 workflow with DocuSign functionality. Using the DocuSign wizards and incorporating this into your workflows allows for the management of the DocuSign envelopes and their collective artifact for a given DocuSign Instance. By incorporating embedded signatures, the DocuSign process now lives within your K2 environment / workflow. This means you now longer have to dig around for information or log in and out of DocuSign, as all the information will be available in your K2 process.
By using K2 and DocuSign together you create an end to end solution incorporating the DocuSign process, to capture digital signatures, inside of your K2 environment. The process can be displayed in your SmartForms along with other related information, which enables visibility into the process as well as view a full audit trail of the signing steps.
- Editing, uploading and management of documents
- Creation management of DocuSign envelopes
- Create templates containing definitions of signature placeholder tabs and signing recipient details
- Manage the process from within your K2 environment
Embedded Signatures Scenario
A company provides a service where customers can visit their website and apply for a membership. This process start with completing a document with required details, and submitting it for approval. After the submitted document has been approved, a contract is sent to the customer for signature. The company uses DocuSign to take care of their digital signing.
Process summary:
- Customer clicks a link on website which opens a document or form.
- Customer completes and submit the form to a specified location. In this example, the document is added to a SharePoint document library. The document library contains columns that reflect the required DocuSign input properties which enables you to create and send an envelope.
- The document library is integrated with K2 for SharePoint and K2 artifacts are enabled such as SmartObjects, SmartForms and the K2 Workflow.
- The K2 Workflow is an events based workflow and configured to start as soon as a new item (in this case a document) is added to the document library.
- The company employee receives a notification in their task list to review the document and submits it to start the workflow process.
- During the workflow an envelope is created, document containing the template and signatures tab is added and sent to the specified recipient (customer).
- Customer receives an email containing a link to view and sign the document. This link contains the document and enables the customer to sign the document digitally using the DocuSign embedded signing function.
- The company employee receives a notification that the sent document has been signed by the customer.
Before You Begin
- Ensure that the DocuSign service type has been registered in your environment. This ensures that the DocuSign SmartObjects are exposed in order to setup the embedded signature functionality as part of a workflow. A workflow containing DocuSign embedded signing can be created by using K2 Studio and / or K2 Designer.
- The example in this document is set up in a K2 for SharePoint appified SharePoint Document Library to demonstrate a DocuSign process, which includes embedded signing where the workflow starts when adding a document to the appified SharePoint Document Library.
- The Workflow Designer in K2 for SharePoint allows you to build, modify, save, deploy, and share workflows. You can create a workflow from any SharePoint list or library where the K2 App has been installed. Deploying your workflow associates it with the SharePoint list or library and displays it on the K2 Application page. In order for the DocuSign embedded signatures to display correctly follow the step below to create the workflow.
- During this process you will also create a view from a SmartObject, add rules to this view as well as create a form. These elements are all required.
Runtime Example
Steps
The following fields / columns needs to be added to your document library. These fields are used to map data between K2 and DocuSign in order to send and receive relevant envelope information. All of these added fields will be used during mappings within the workflow wizards.
The table below contains a list of fields to be added:
| Column name | Type |
|---|---|
| Email Subject | Single line of text |
| Email Body | Single line of text |
| Envelope ID | Multiple lines of text |
| Envelope Status | Single line of text |
| Document ID | Single line of text |
| Document Order | Single line of text |
| Document Status | Single line of text |
| Recipient Name | Single line of text |
| Recipient ID | Single line of text |
| Recipient Order | Single line of text |
| Client User ID | Single line of text |
| Tab Label | Single line of text |
| Tab Anchor String | Single line of text |
| Recipient Status | Single line of text |
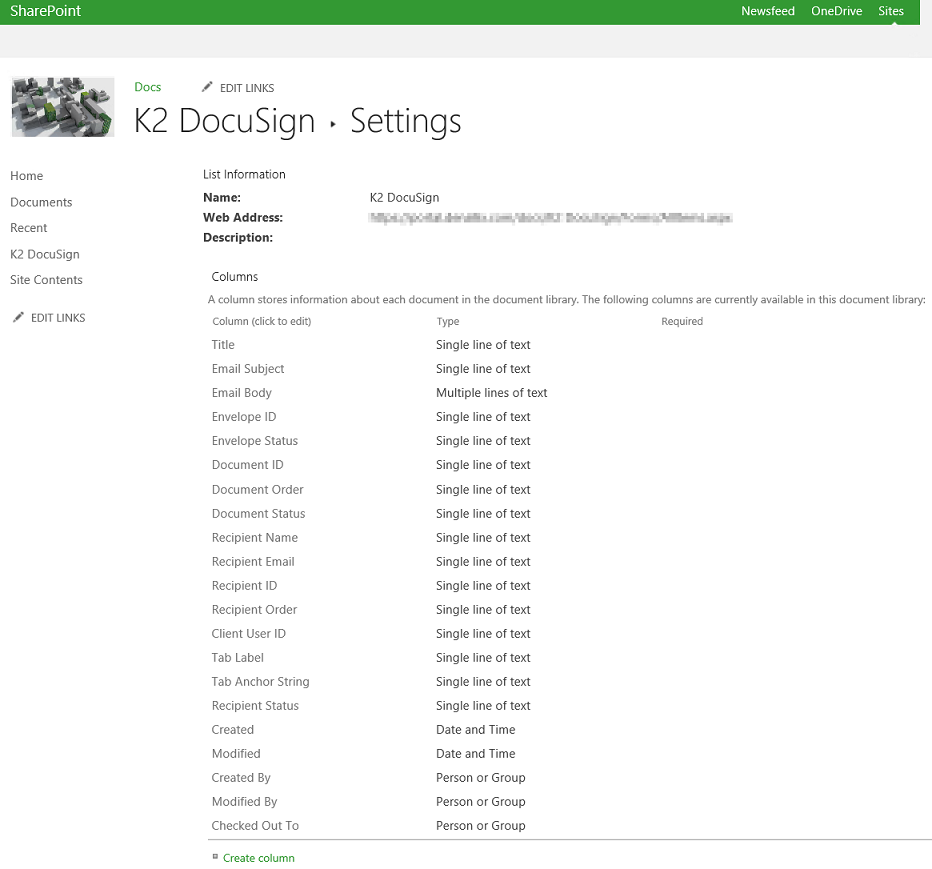
The next step is to integrate the document library with K2 for SharePoint. This allows you to create Applications with Data, Forms, Workflows and Reports from a SharePoint List or Library. For information, link to the Building K2 application in SharePoint topic.
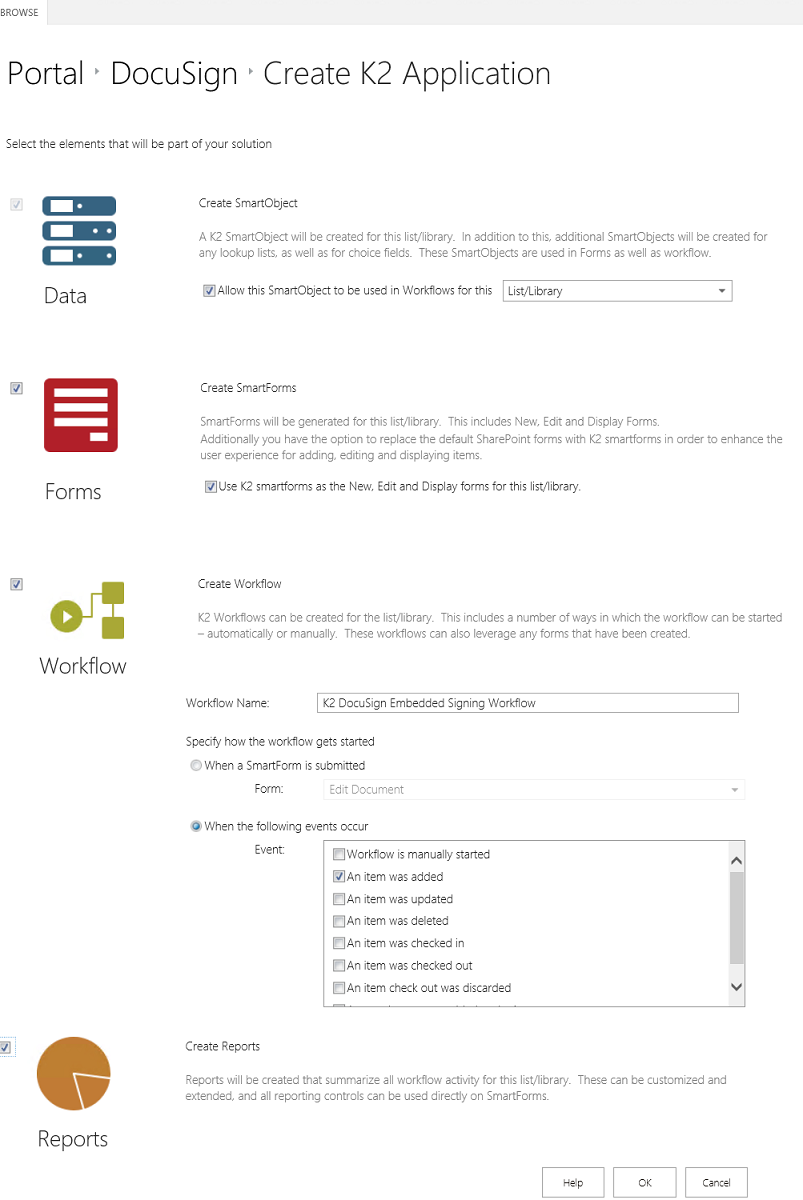
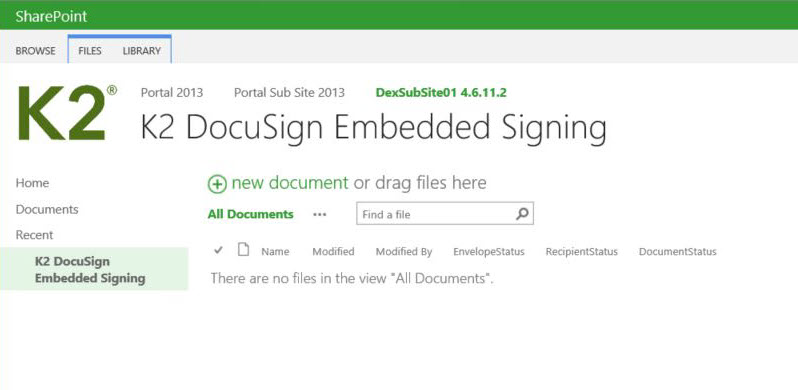
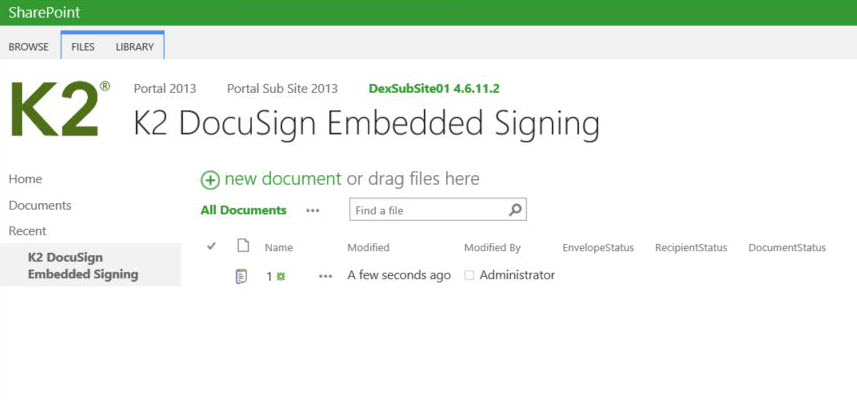
Document library integrated with K2 for SharePoint.
This event is a SmartForms User Task which will expose the document library fields in a K2 integrated (appified) edit view, within a SmartForm. The user task requires the recipient of the task to review the document and manually complete all required fields related to the envelope to be sent to the client user (in this example this would be the customer who uploaded / submitted request and who would need to sign the document / contract. Once this user task has completed (all the input values for the DocuSign events have been provided) and submitted, the DocuSign events executes in runtime.
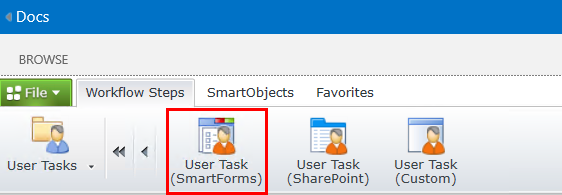
- From the User Tasks category, drag the User Task (SmartForms) wizard on the canvas.
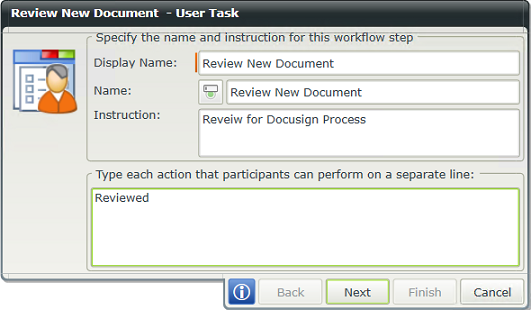
- On the Review New Document - User Task screen ensure it is set as shown below.
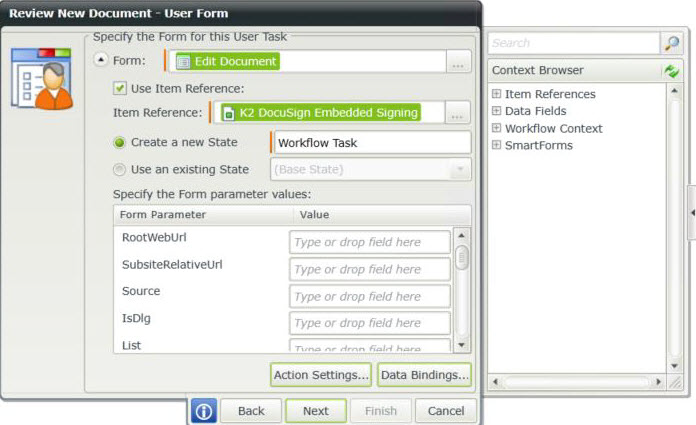
- Click Next. On the Review New Document - User Form click to expand the section. Ensure the screen is set as shown below.
- Click Next. On the Review New Document - Participants screen select and add required groups and / or users by searching and dragging from the context browser.
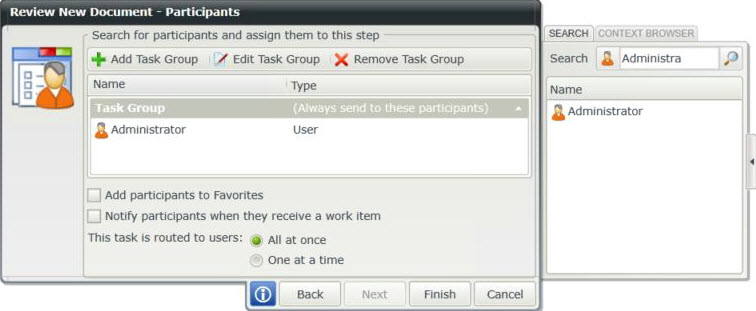
- Click Finish.
- From the File menu select Save to save work done the workflow.
- From the Review New Document step click Workflow Step Outcomes.

- On the Create Envelope - Workflow Step Outcomes screen add Create Envelope as an outcome and click OK. Ensure the screen is set as shown below.

- From the DocuSign category, drag the Create Envelope wizard on the canvas.
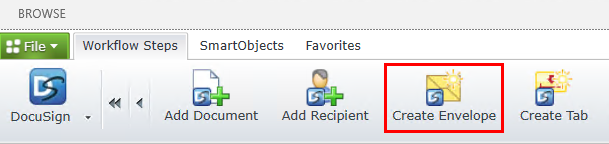
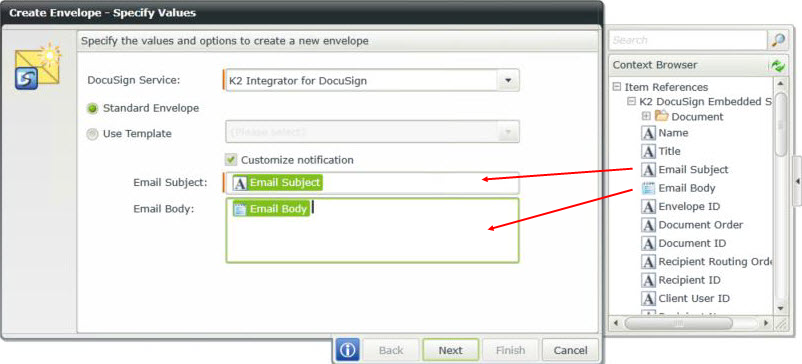
- Click Next. On the Create Envelope - Specify Values screen ensure the following:
- Select the appropriate DocuSign Service Instance from the DocuSign Service drop-down.
- Check the Customize notification check box.
- In the Email Subject and Email Body sections drag the Email Subject and Email Body fields from the Item Reference > K2 DocuSign Embedded Signing in the context browser into the corresponding sections.
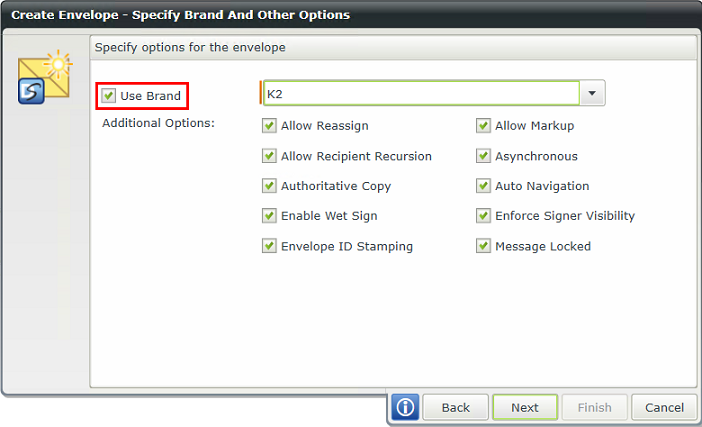
- Click Next. On the Create Envelope - Specify Brand And Other Options screen select K2 from the Use Brand drop-down menu.
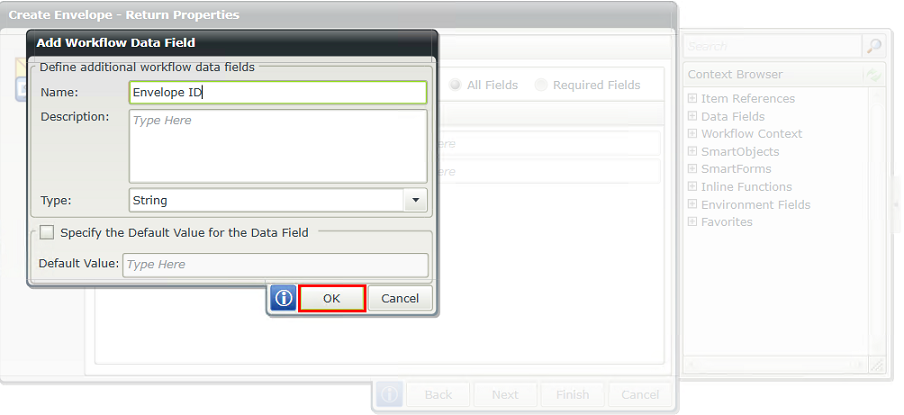
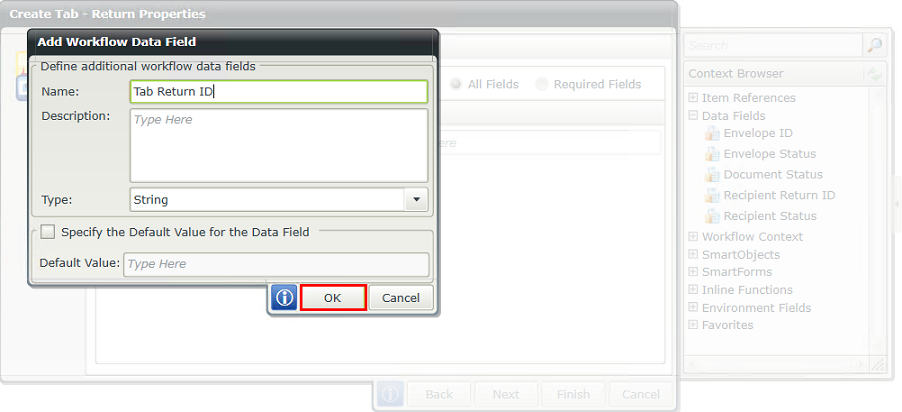
- Click Next. On the Create Envelope - Return Properties screen right click the Data Fields within the Context Browser and select the Add Data Fields option.
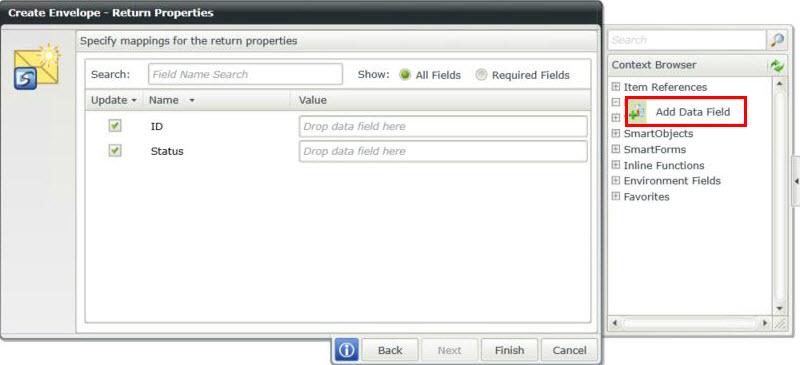
- On the Add Workflow Data Field screen add Envelope ID as a String type data field. Click OK to add the data field.
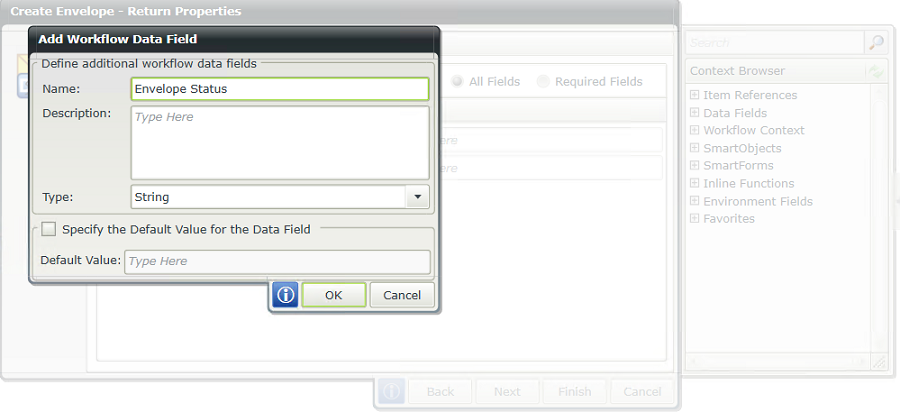
- Add another string type data field and name this one Envelope Status.
- On the Create Envelope - Return Properties screen drag the Envelope ID and Envelope Status fields from the context browser (Data Fields section) to the ID and Status fields.
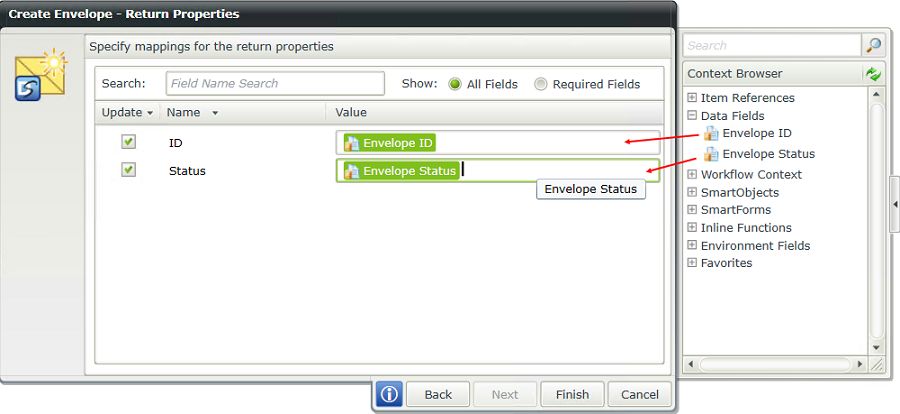
- Click Finish.
- From the File menu select Save to save work done the workflow.
Data fields are added to ensure successful mapping destinations within the workflow wizard configurations. Adding data fields enables the workflow to map return properties back into the process to be used elsewhere in the process. This is also helpful should the user want to update the document properties in the SharePoint document library.
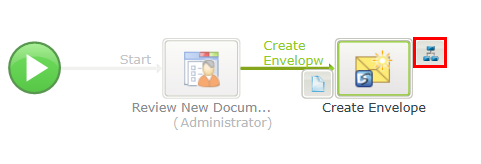
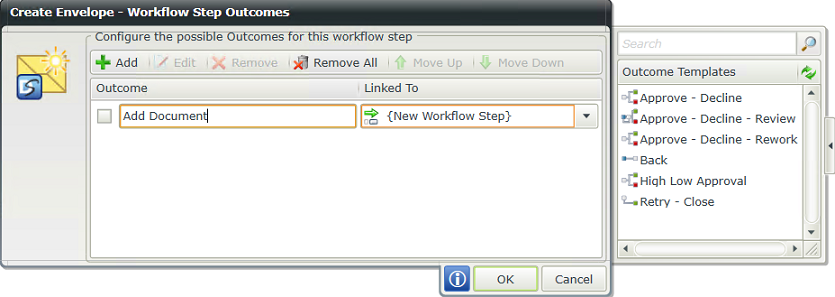
- From the Create Envelope step click Workflow Step Outcomes.
- On the Create Envelope- Workflow Step Outcomes screen add the Add Document outcome and click OK. Ensure the screen is set as shown below.
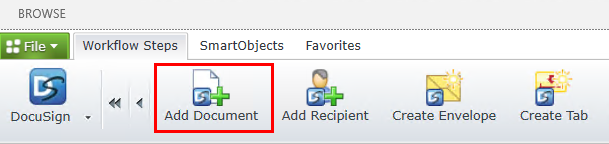
- From the DocuSign category, drag the Add Document wizard on the canvas.
- On the Add Document - Specify Values screen ensure the following:
- Select the appropriate DocuSign service from the DocuSign Service drop-down.
- Drag the Envelope ID field from the context browser (Data Fields section) to the Envelope ID field.
- Drag the Document file from the context browser (Item References > K2 DocuSign section) to the File field.
- Drag the Document ID field from the context browser (Item References > K2 DocuSign section) to the Document ID field.
- Drag the Document Order field from the context browser (Item References > K2 DocuSign section) to the Order field.
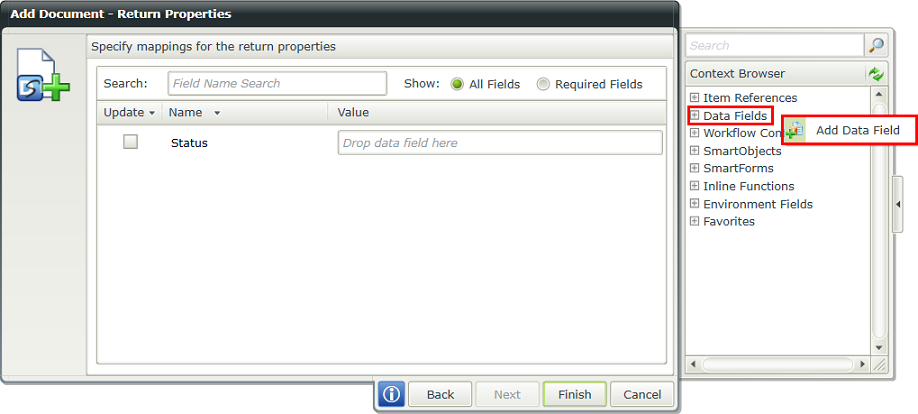
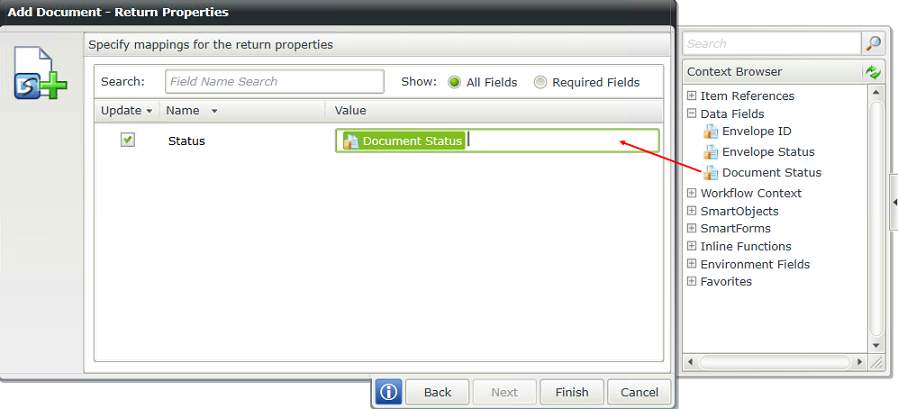
- Click Next. On the Add Document - Return Properties screen right click the Data Fields within the Context Browser and select the Add Data Fields option.
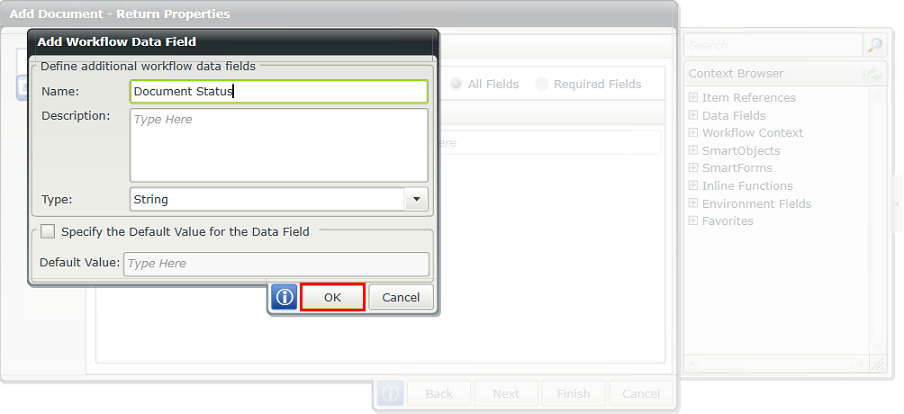
- Add Document Status as a String type data field. Click OK to add the data field.
- On the Add Document - Return Properties screen drag the Document Status field from the context browser (Data Fields section) to the Status field.
- Click Finish.
- From the File menu select Save to save work done the workflow.

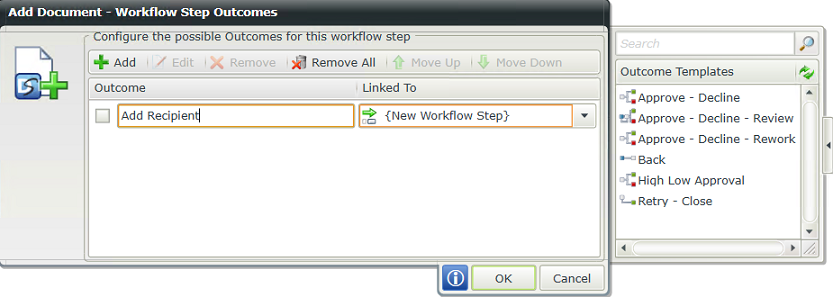
- From the Add Document step click Workflow Step Outcomes.
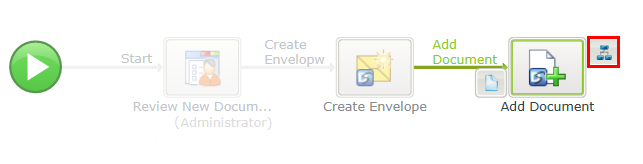
- On Add Document - Workflow Step Outcomes add Add Recipient as an outcome and click OK. Ensure the screen is set as shown below.
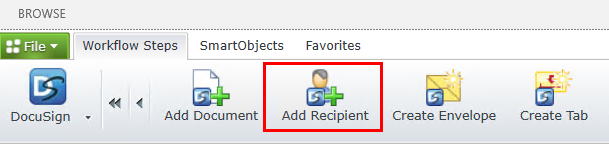
- From the DocuSign category, drag the Add Recipient wizard on the canvas.
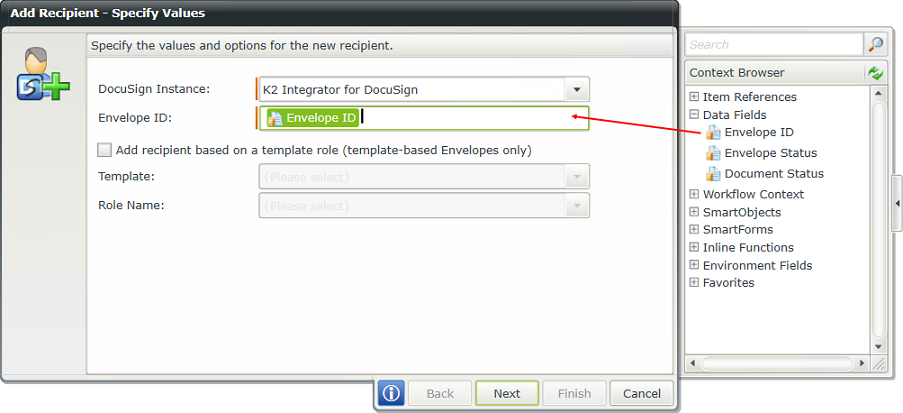
- On the Add Recipient - Specify Values screen ensure the following:
- Select the appropriate DocuSign service from the DocuSign Service drop-down.
- Drag the Envelope ID field from the context browser (Data Fields section) to the Envelope ID field.
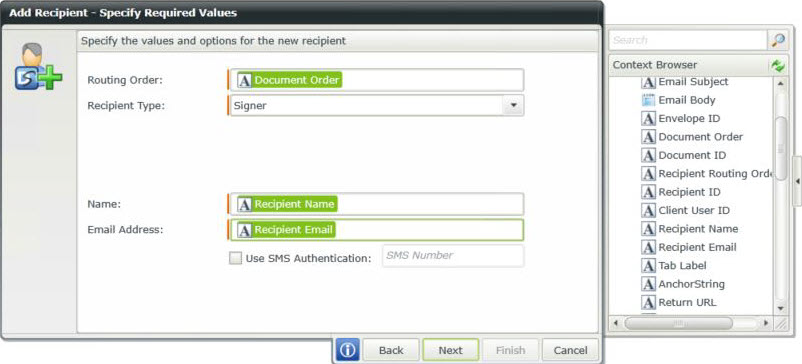
- Click Next. On the Add Recipient - Specify Required Values screen ensure the following:
- Drag the Document Order field from the context browser (Item References > K2 DocuSign section) to the Routing Order field.
- Select Signer from the Recipient Type drop-down menu.
- Drag the Recipient Name field from the context browser (Item References > K2 DocuSign section) to the Name field.
- Drag the Recipient Email field from the context browser (Item References > K2 DocuSign section) to the Email Address field.
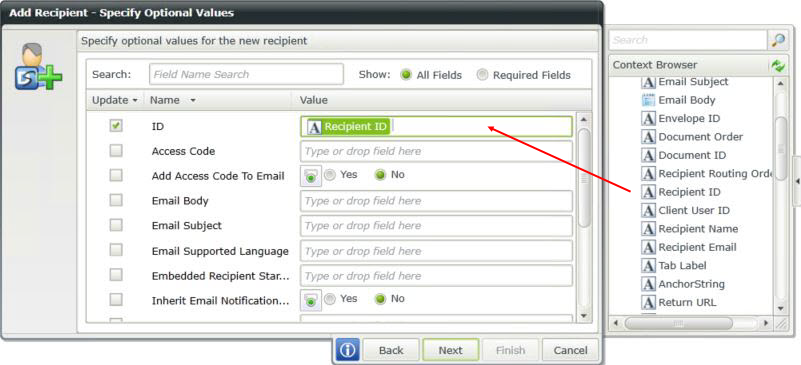
- Click Next. On the Add Recipient - Specify Optional Values screen ensure the following:
- Drag the Recipient ID field from the context browser (Item References > K2 DocuSign section) to the ID field.
- Drag the Client User ID field from the context browser (Item References > K2 DocuSign section) to the Client User ID field.
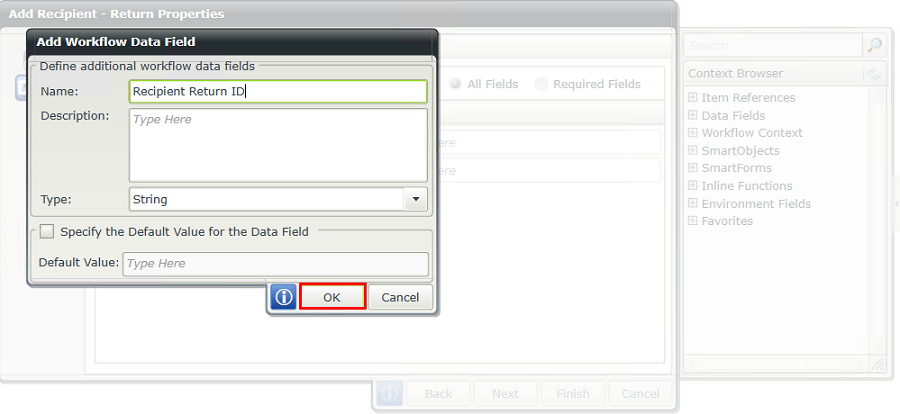
- Click Next. On the Add Recipient - Return Properties screen right click the Data Fields within the Context Browser and select the Add Data Fields option.
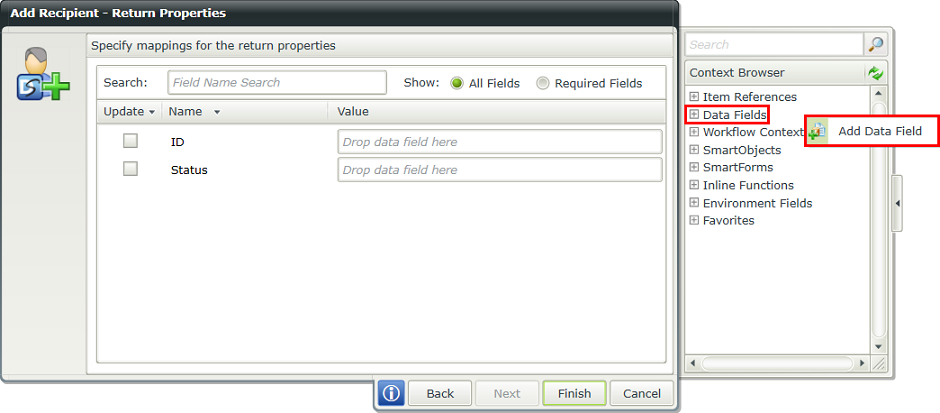
- Add Recipient Return ID as a String type data field. Click OK to add the data field.
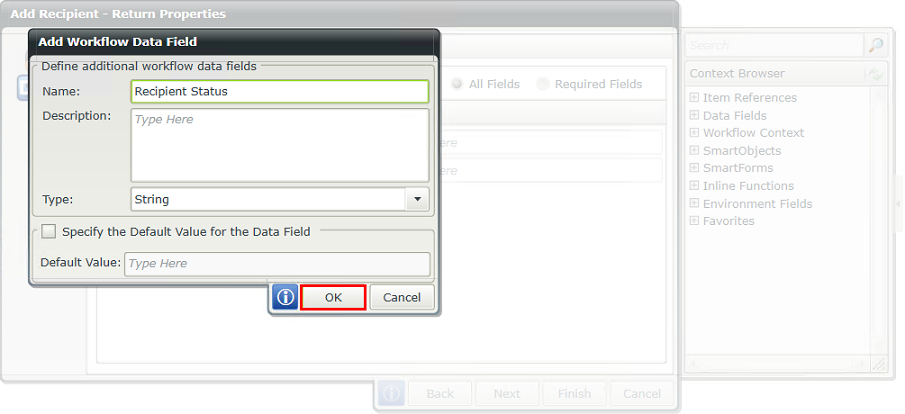
- Right click the Data Fields within the Context Browser and select the Add Data Fields option. Add Recipient Status as a String type data field. Click OK to add the data field.
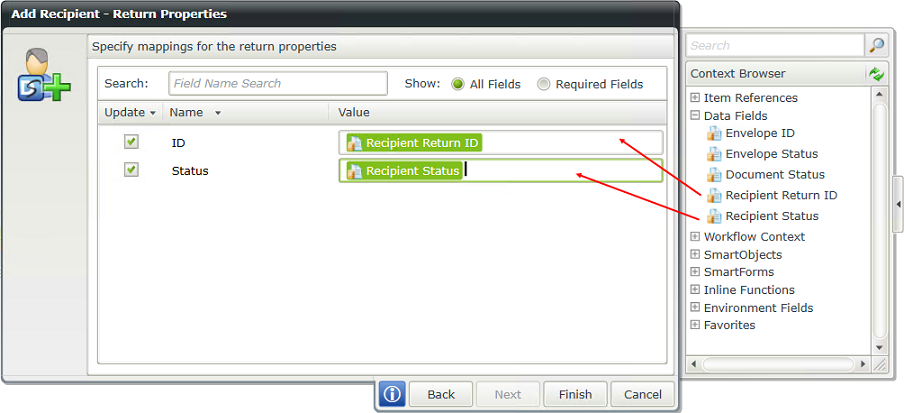
- On the Add Recipient - Return Properties screen ensure the following:
- Drag the Recipient Return ID field from the context browser (Data Fields section) to the ID field.
- Drag the Recipient Status field from the context browser (Data Fields section) to the Status field.
- Click Finish.
- From the File menu select Save to save work done the workflow.
- From the Add Recipient step click Workflow Step Outcomes.

- On the Add Recipient - Workflow Step Outcomes screen add Add Recipient as an outcome and click OK. Ensure the screen is set as shown below.
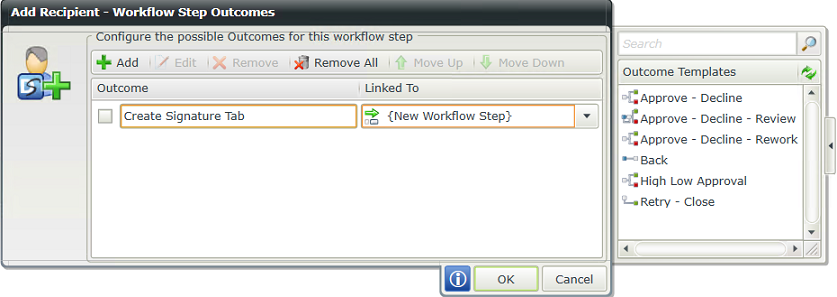
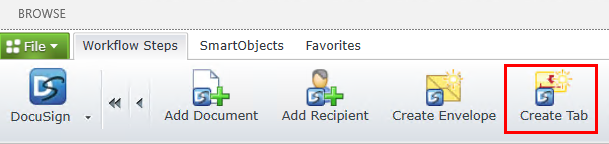
- From the DocuSign category, drag the Create Tab wizard on the canvas.
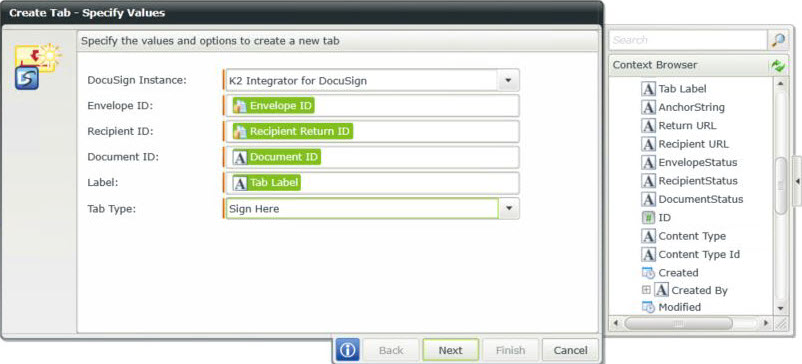
- On the Create Tab - Specify Values screen ensure the following:
- Select the appropriate DocuSign service from the DocuSign Service drop-down.
- Drag the Envelope ID field from the context browser (Data Fields section) to the Envelope ID field.
- Drag the Recipient Return ID field from the context browser (Data Fields section) to the Recipient ID field.
- Drag the Document ID field from the context browser (Item References > K2 DocuSign section) to the Document ID field.
- Drag the Tab Label field from the context browser (Item References > K2 DocuSign section) to the Label field.
- Select Sign Here option from the Tab Type drop-down menu.
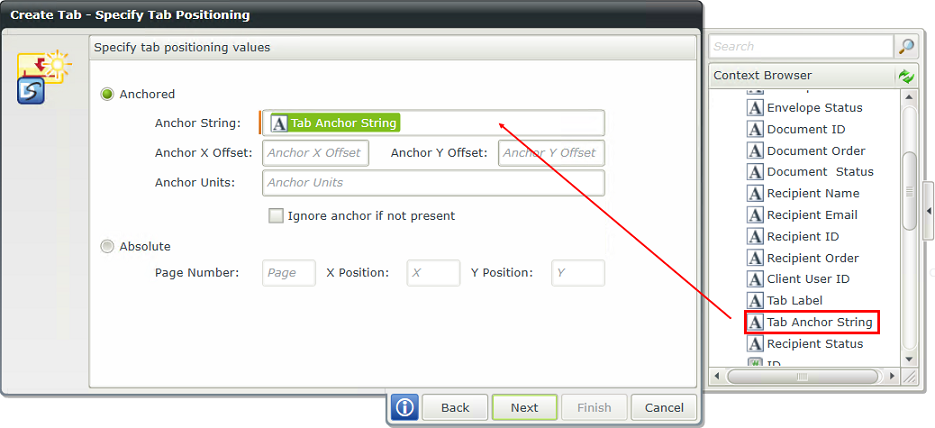
- Click Next. On the Create Tab - Specify Tab Positioning screen drag the Tab Anchor String field from the context browser (Item References > K2 DocuSign section) to the Anchor String field.
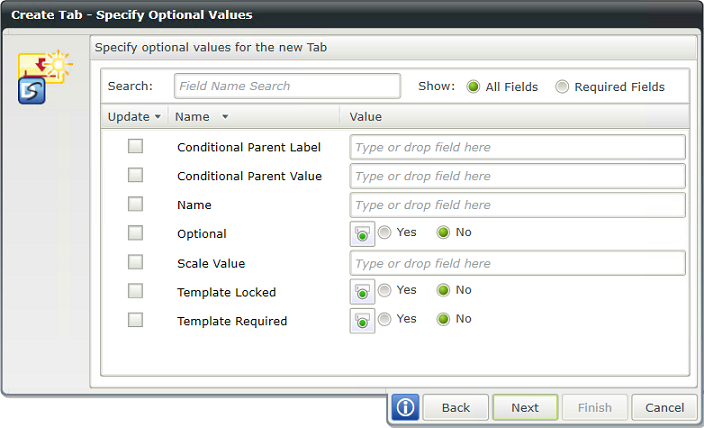
- Click Next. On the Create Tab - Specify Optional Values screen ensure the screen is set as shown below.
- Click Next. On the Create Tab - Return Properties screen right click the Data Fields within the Context Browser and select the Add Data Fields option. Add Tab Return ID as a String type data field. Click OK to add the data field.
- On the Create Tab - Return Properties screen drag the Tab Return ID field from the context browser (Data Fields section) to the ID field.

- Click Finish.
- From the File menu select Save to save work done the workflow.
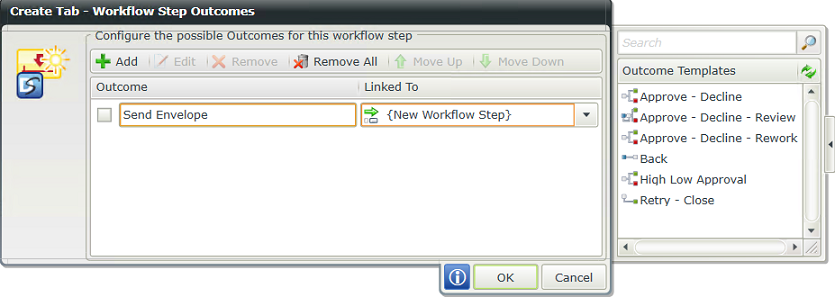
- From the Create Tab step click Workflow Step Outcomes.

- On the Create Tab - Workflow Step Outcomes screen add Send Envelope as an outcome and click OK. Ensure the screen is set as shown below.
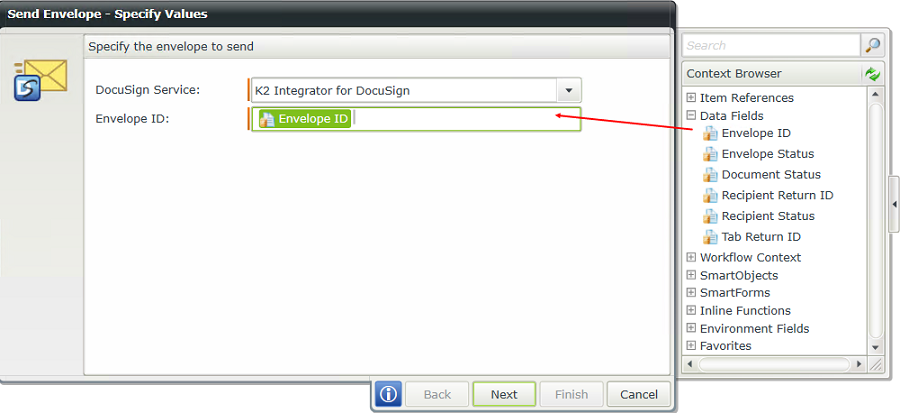
- From the DocuSign category, drag the Send Envelope wizard on the canvas.

- On the Send Envelope - Specify Values screen ensure the following:
- Select the appropriate DocuSign service from the DocuSign Service drop-down
- Drag the Envelope ID field from the context browser (Data Fields section) to the Envelope ID field.
- Click Next. On the Send Envelope - Return Properties screen drag the Envelope Status field from the context browser (Data Fields section) to the Status field.
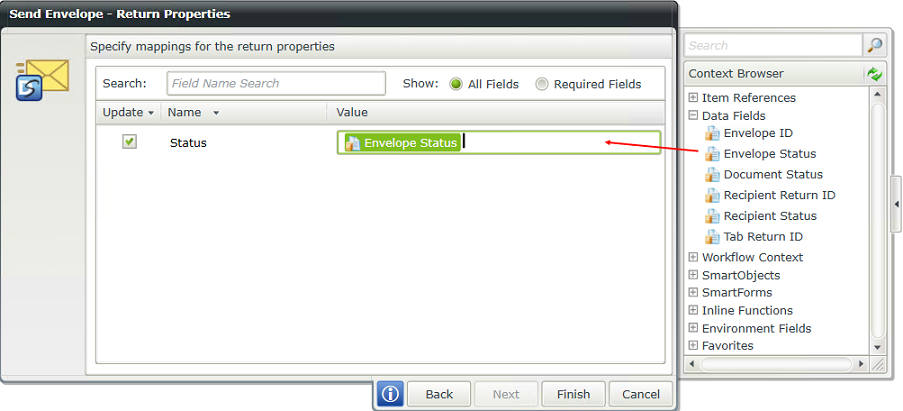
- Click Finish.
- From the File menu select Save to save work done the workflow.
Make use of this step in the workflow to update the document properties, within the SharePoint document library, with values returned from DocuSign after an envelope was created and sent.
- From the Send Envelope step click Workflow Step Outcomes.

- On the Send Envelope - Workflow Step Outcomes screen add Update Document Properties as an outcome and click OK. Ensure the screen is set as shown below.
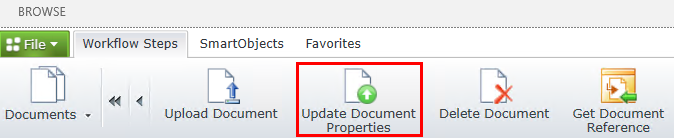
- From the Document category, drag the Update Document Properties wizard on the canvas.
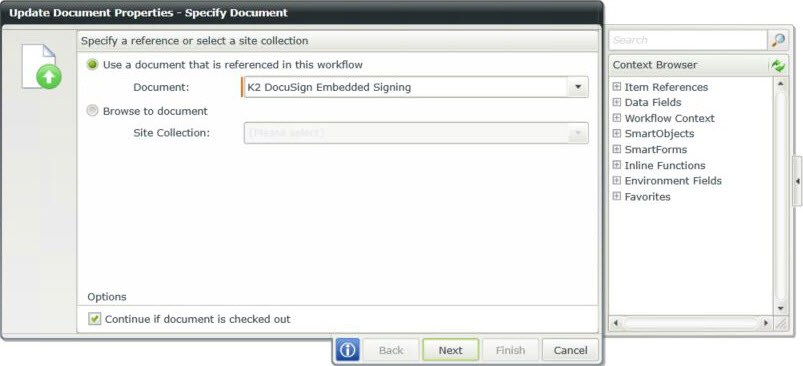
- On the Update Document Properties - Specify Document screen select required document from the Document drop-down menu.
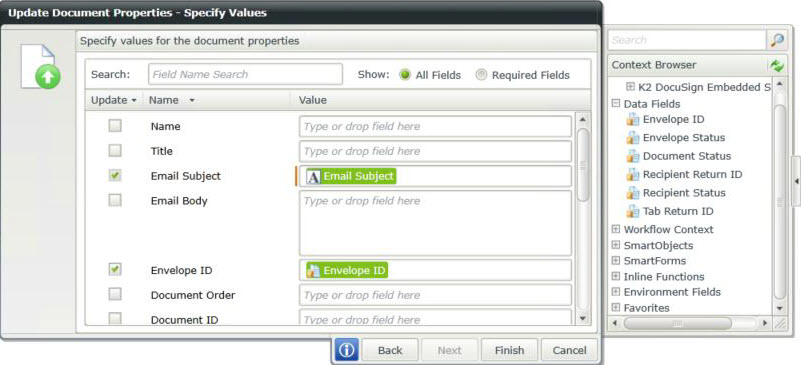
- Click Next. On the Update Document Properties - Specify Values screen ensure the following:
- Drag the Envelope ID field from the context browser (Data Fields section) to the Envelope ID field.
- Drag the Envelope Status field from the context browser (Data Fields section) to the Envelope Status field.
- Drag the Document Status field from the context browser (Data Fields section) to the Document Status field.
- Drag the Recipient Return ID field from the context browser (Data Fields section) to the Recipient ID field.
- Drag the Recipient Status field from the context browser (Data Fields section) to the Recipient Status field.
- Click Finish
- From the File menu select Save and Exit o exit the designer.
In this step you create a new view from the DocuSign SmartObject. This view is designed and configured using the K2 Designer. Use the Rules Designer to create a rule to dynamically populated with DocuSign’s Recipient URL using SmartForms rules to run the DocuSign View | GetRecipientURL method
- From the artifacts page list select the K2 DocuSign Embedded Signing SmartObject, right click and select Design View.
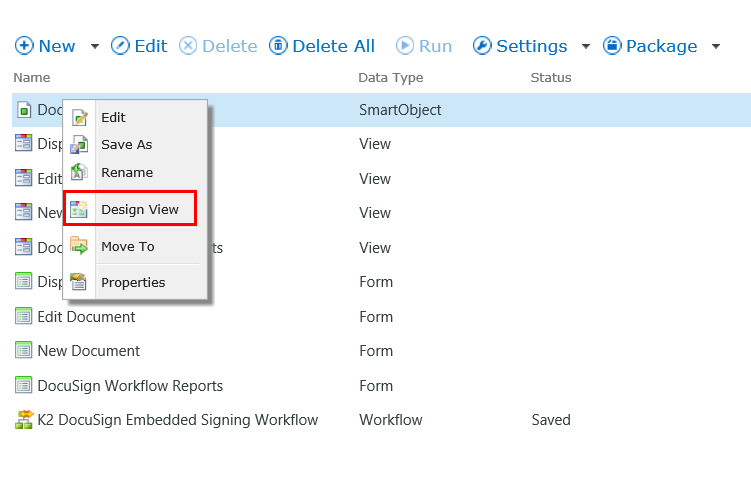
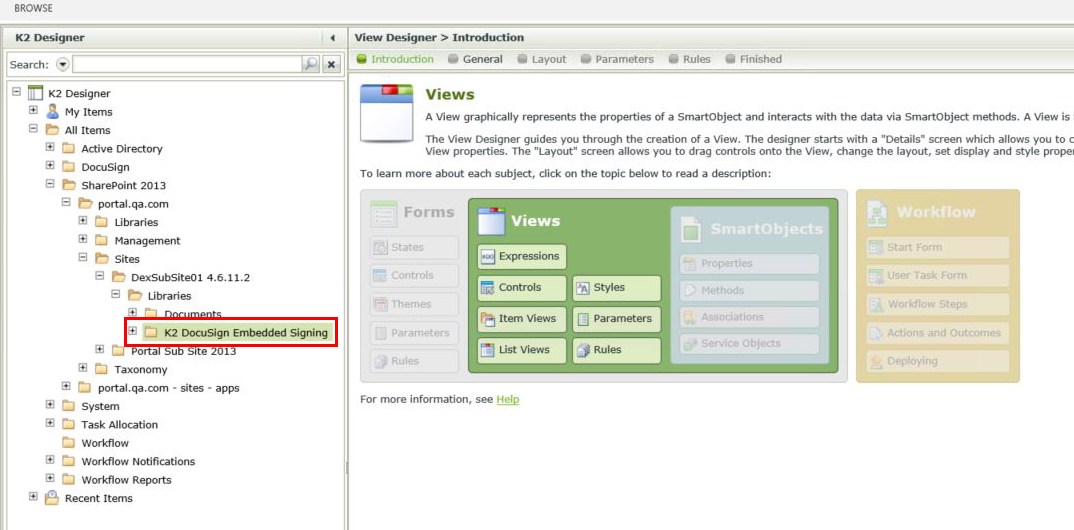
- The View Designer screen displays with the correct category selected.
Click Next.
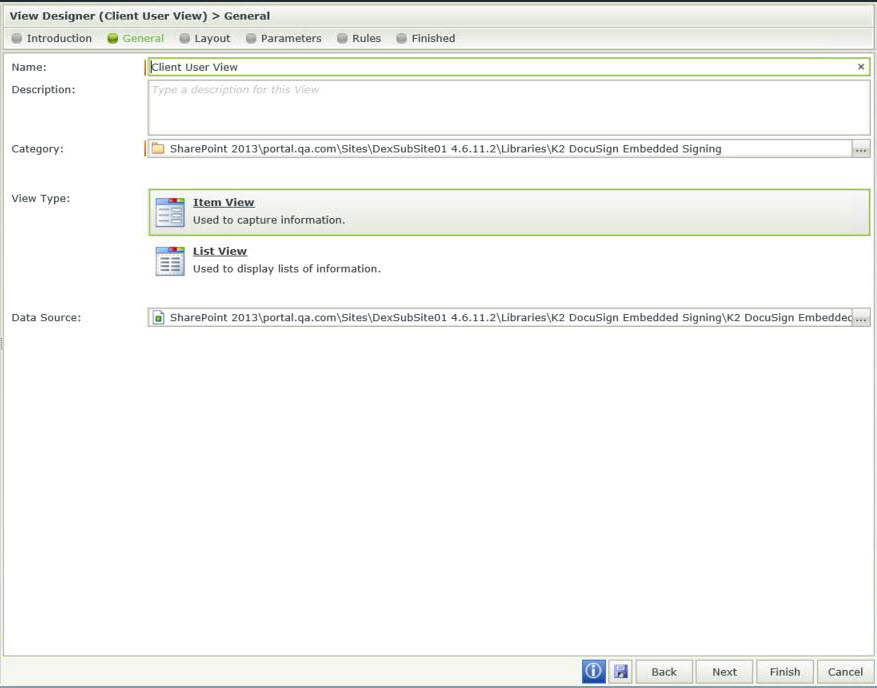
- Enter Client User View as the name. Select Item View as the view type. Click Next.
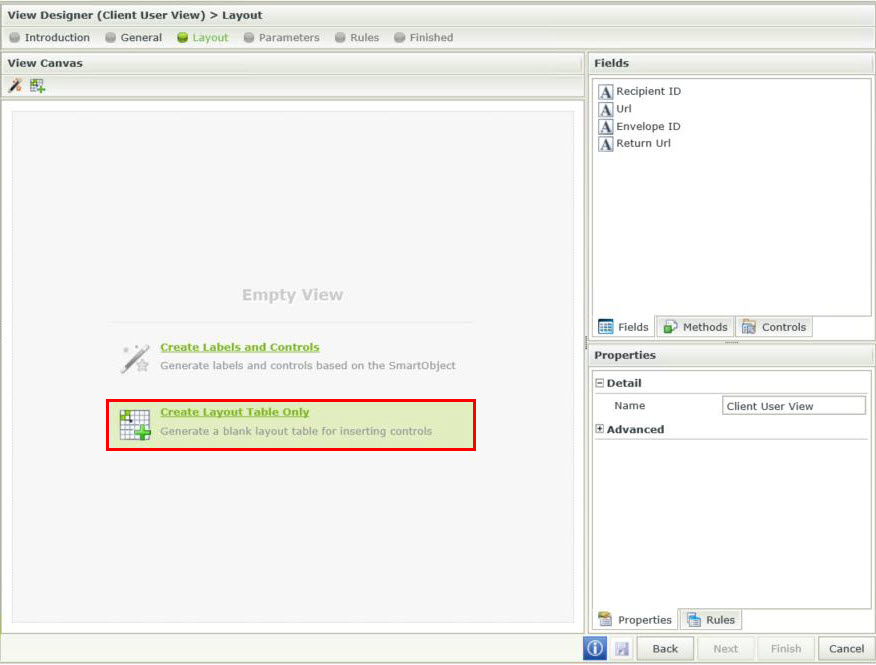
- Click Create Layout Table Only.
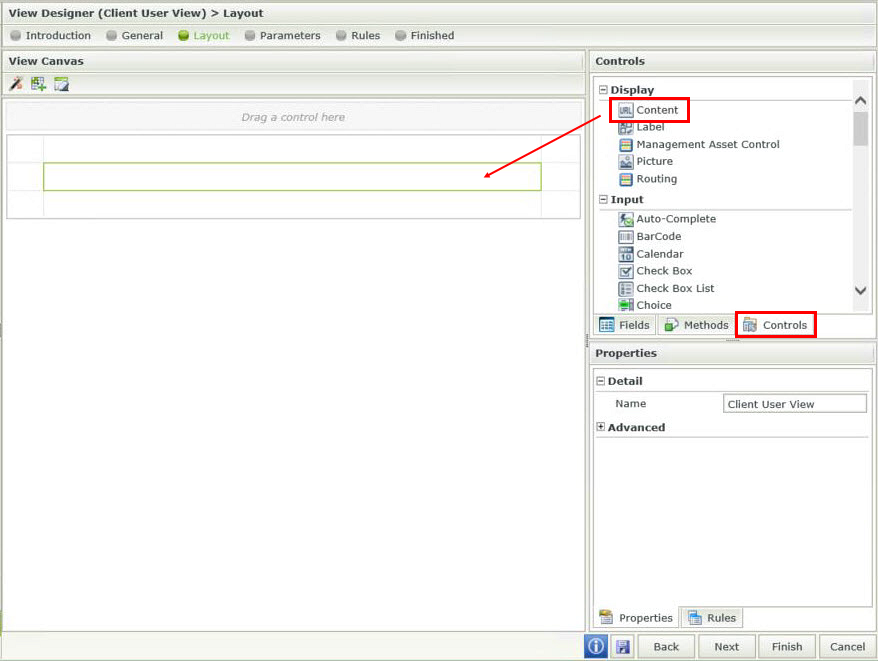
- Select the Controls tab and drag a Content control onto the canvas. Ensure the screen is as shown below.
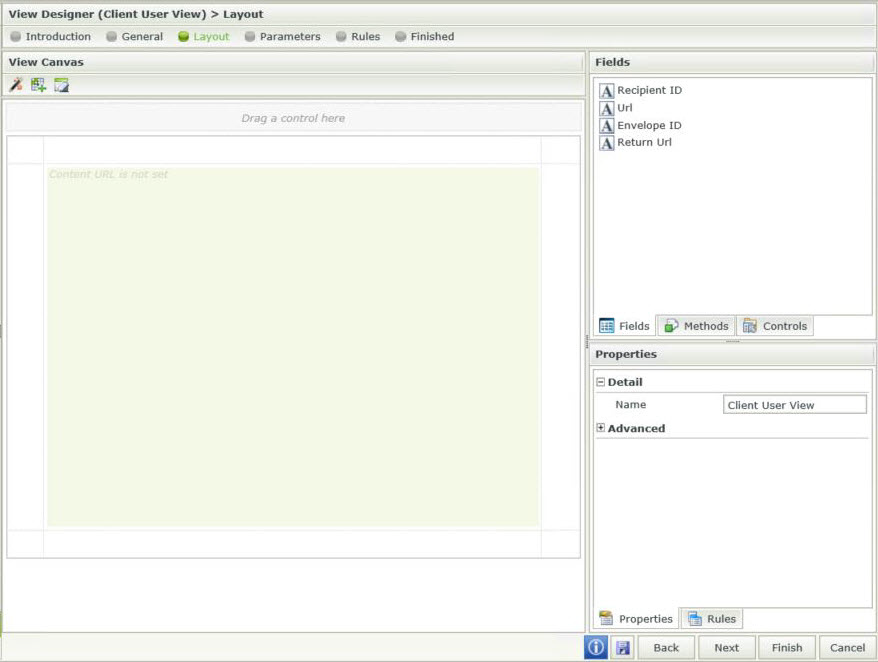
- The canvas displays as follows:
- From the breadcrumb select Rules and click the Add Rule button.

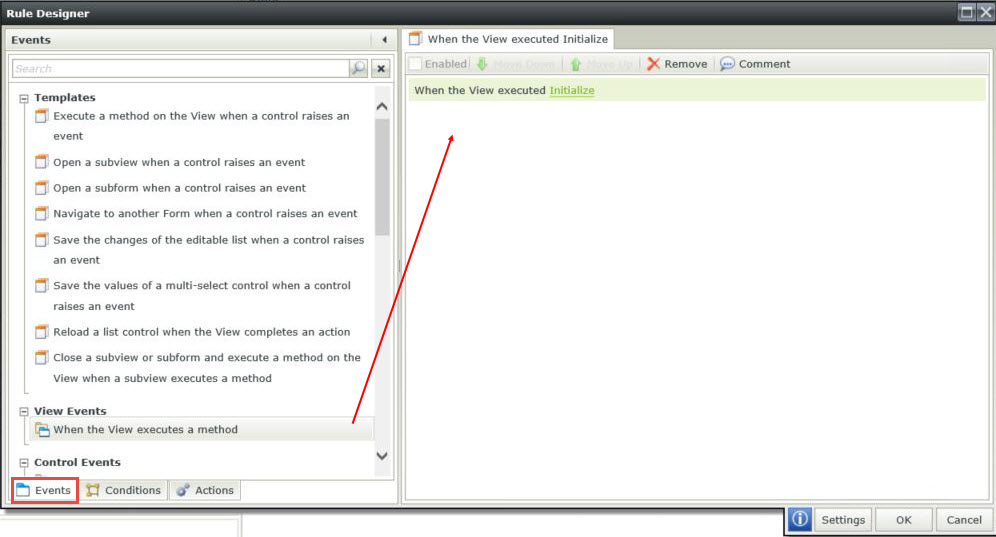
- From the Rules Designer select the Events tab and drag the When the View executes a method rule onto the canvas.
- The completed rules are setup as follows:
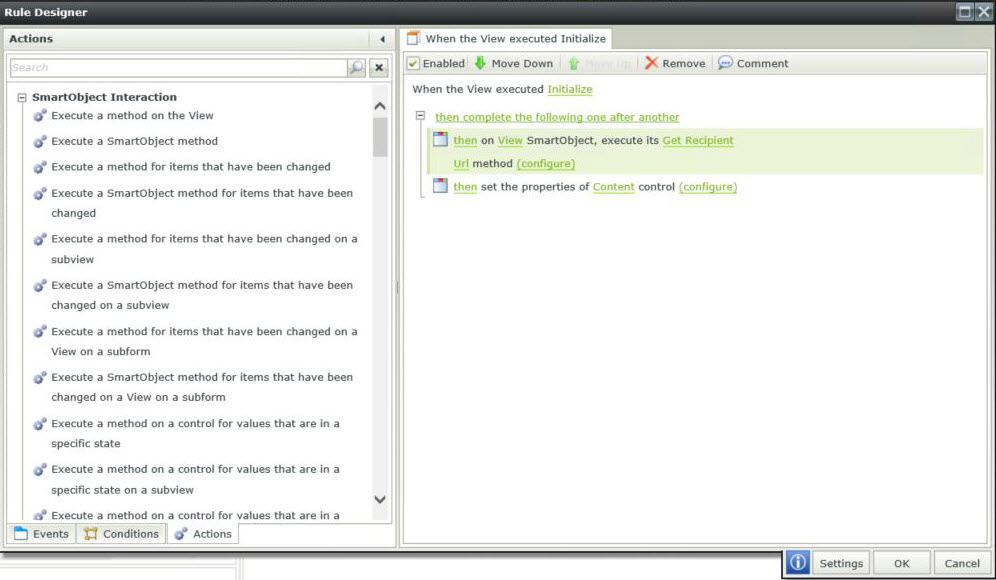
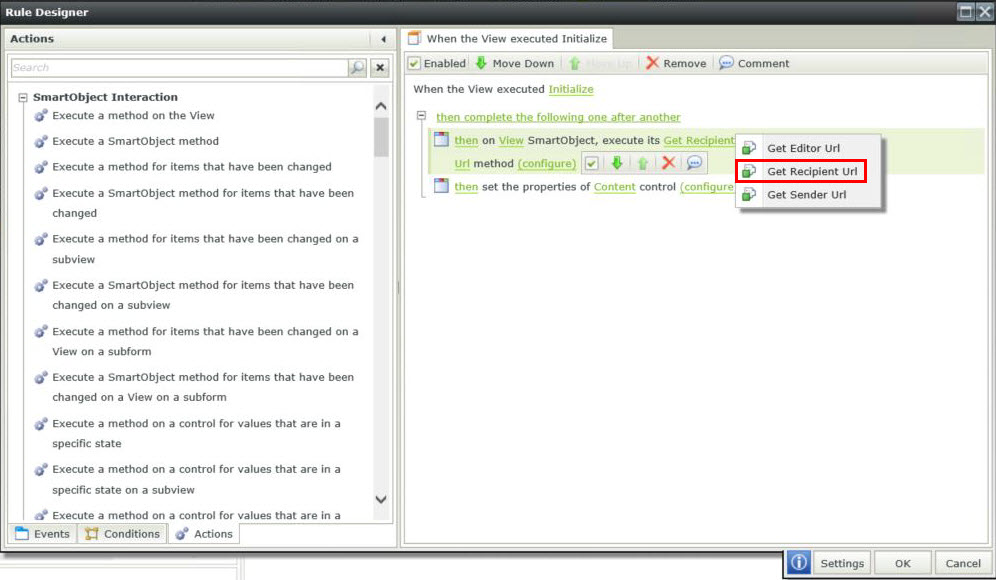
- Click on View and select the View SmartObject.
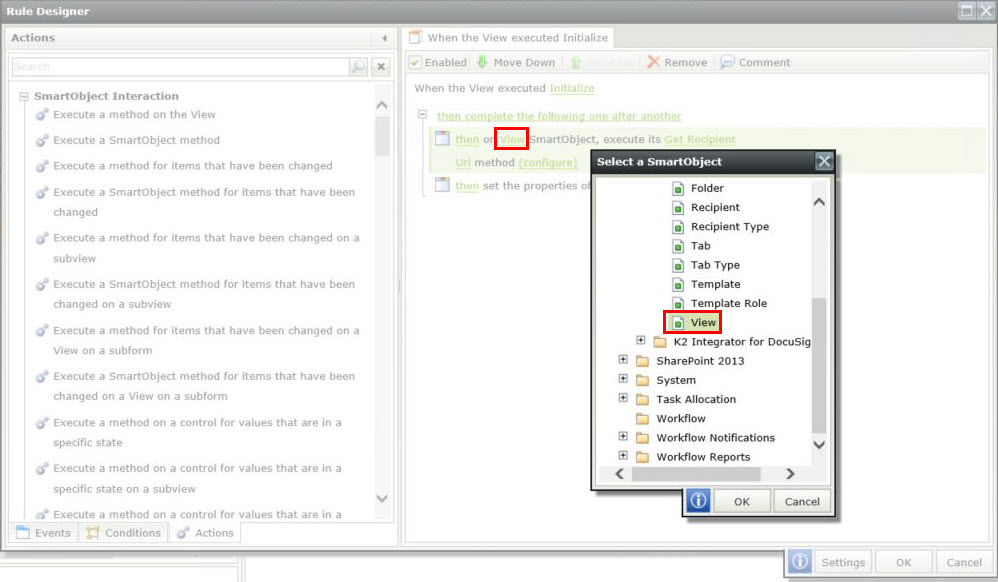
- Select the Get Recipient Url as the execute method.
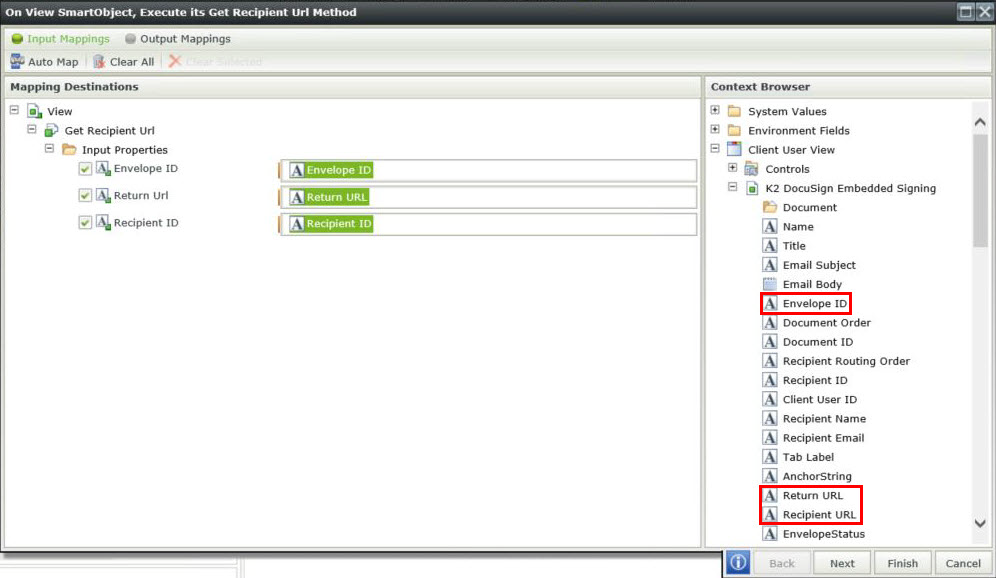
- Click the Configuration link. Ensure the Input Mappings Destinations are as follows:
- Drag the Envelope ID field from the context browser (Client User View > K2 DocuSign Embedded Signing section) to the Envelope ID field.
- Drag the Return URL field from the context browser (Client User View > K2 DocuSign Embedded Signing section) to the Return URL field.
- Drag the Recipient URL field from the context browser (Client User View > K2 DocuSign Embedded Signing section) to the Recipient URL field.
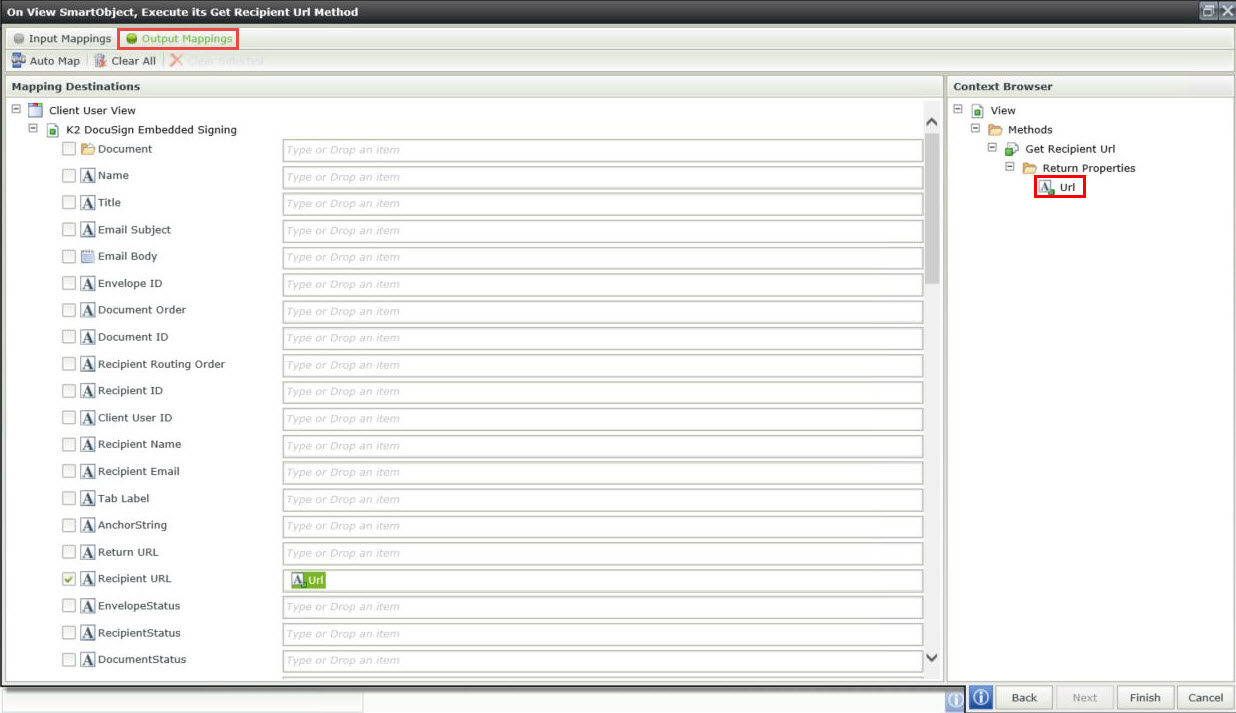
- Click Output Mappings from the breadcrumb. Drag the Url field from the Context Browser (View > Methods > Get Recipient Url section) to the Recipient URL field.
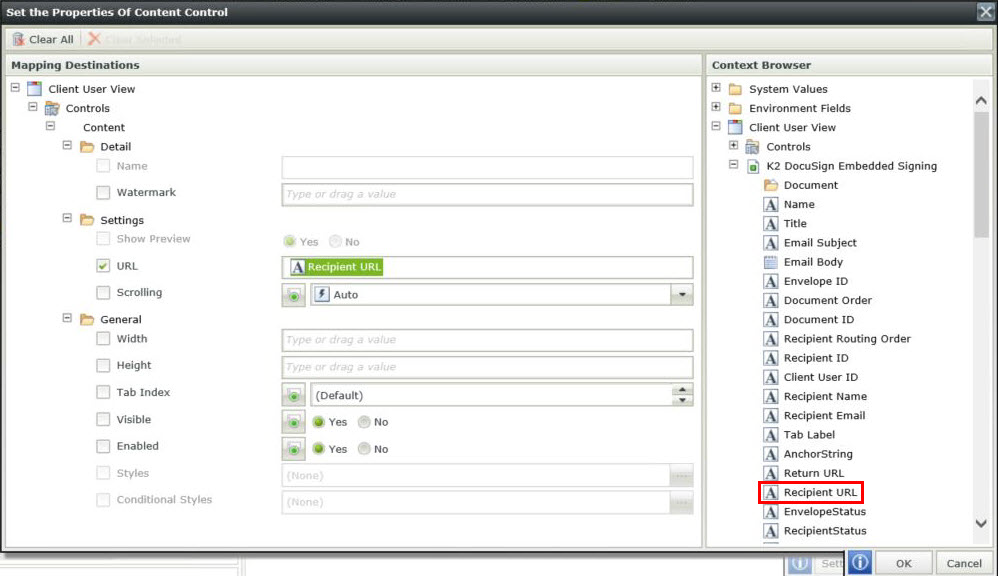
- To set the properties click on the link and select Content.
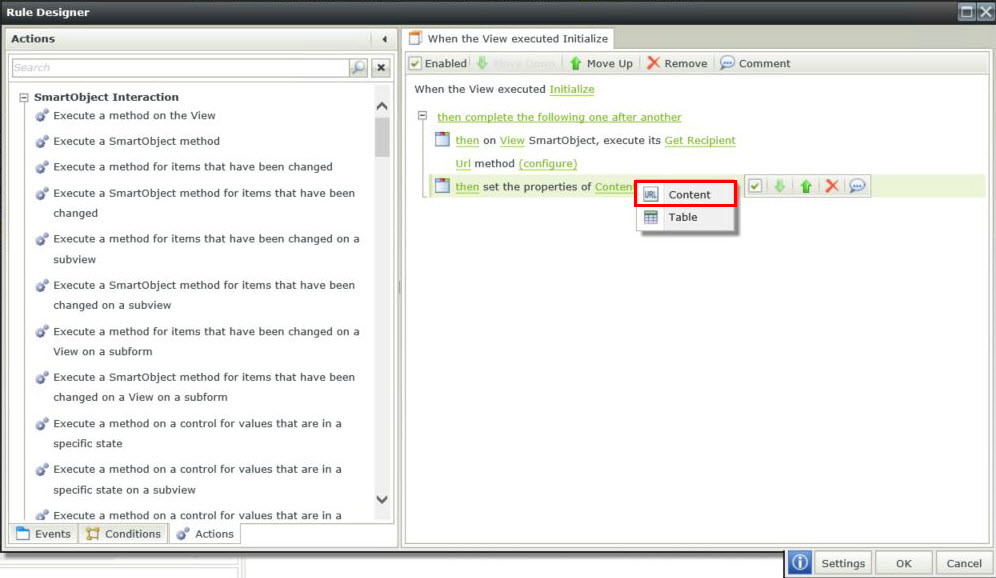
- Configure the Mapping Destination by dragging the Recipient URL field from the context browser (Client User View > K2 DocuSign Embedded Signing section) to the URL field.
Click OK.
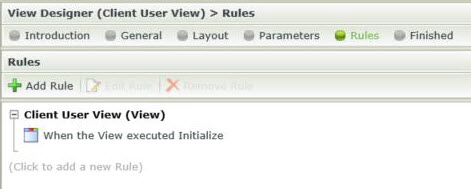
- Close the Rules Designer. The View Designer with the added rule displays as follows:
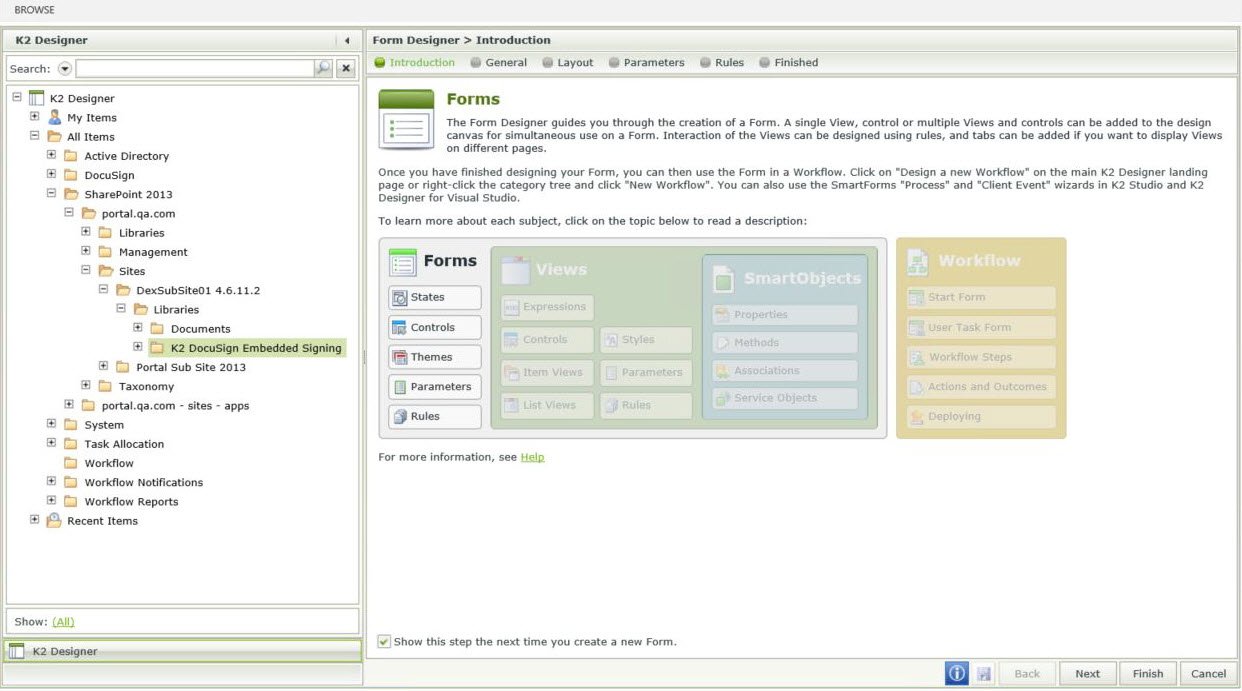
In this step you create a form from the Client User view and is designed and configured using the K2 Designer. This form contains no DocuSign fields apart from the content control that is dynamically populated with the DocuSign Recipient URL using SmartForms rules to run the DocuSign View | GetRecipientURL method. This form is used in the Client Signature step.
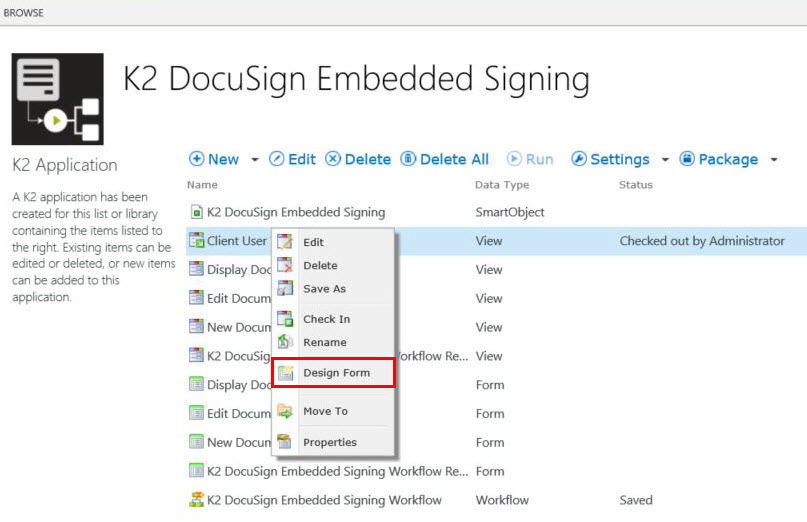
- From the artifacts page list select the Client User View, right click and select Design Form.
- The Form Designer screen displays. Click Next.
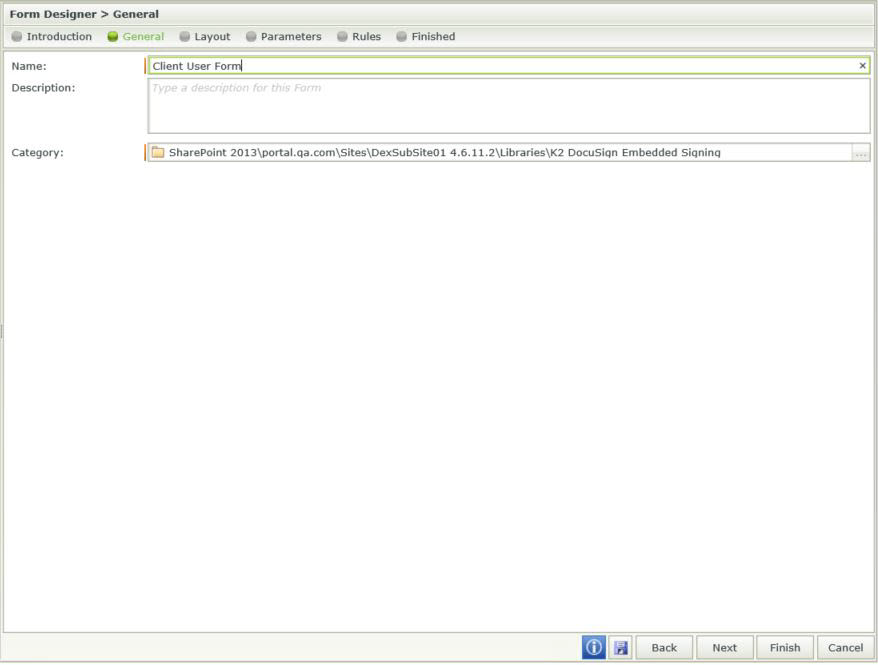
- Enter Client User Form as the name. Click Next.
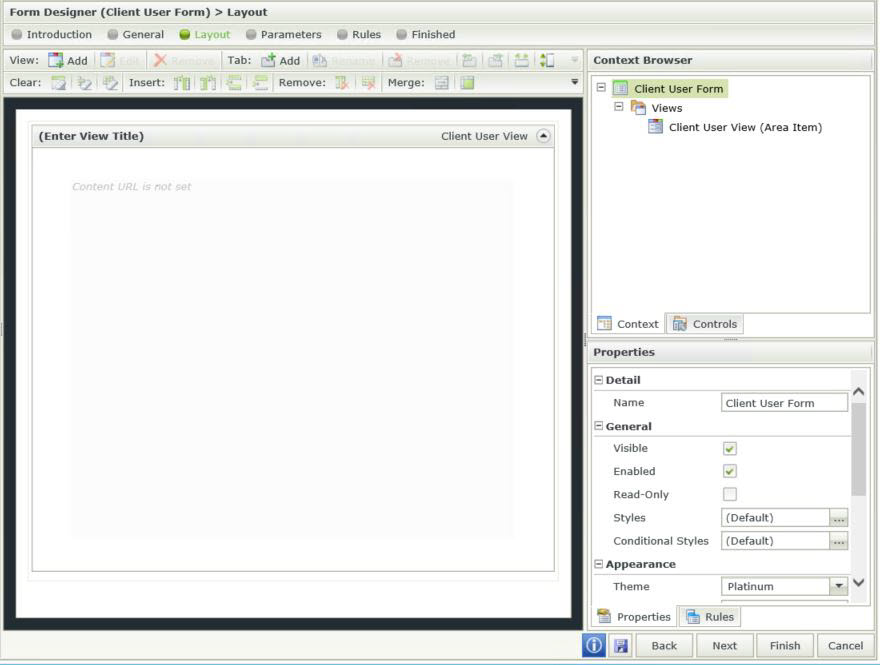
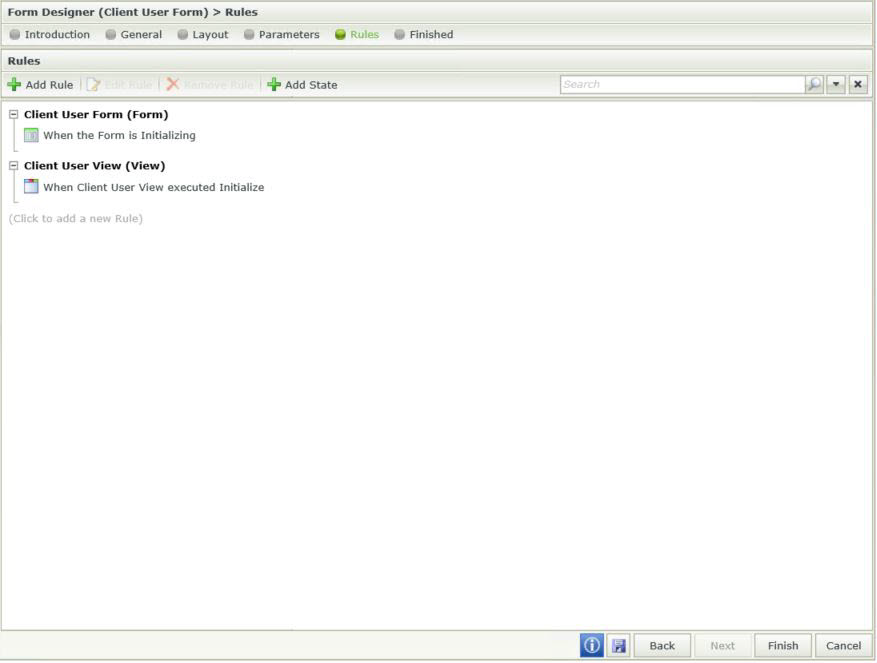
- No changes required on the Layout. Click Next.
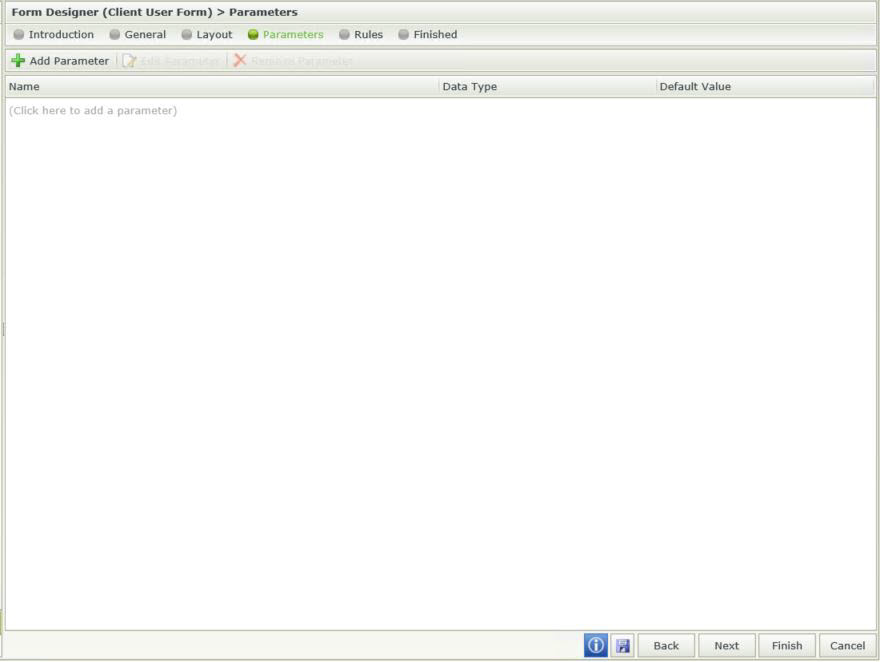
- No changes required on the Parameters. Click Next.
- No changes required on the Rules. Click Finish.
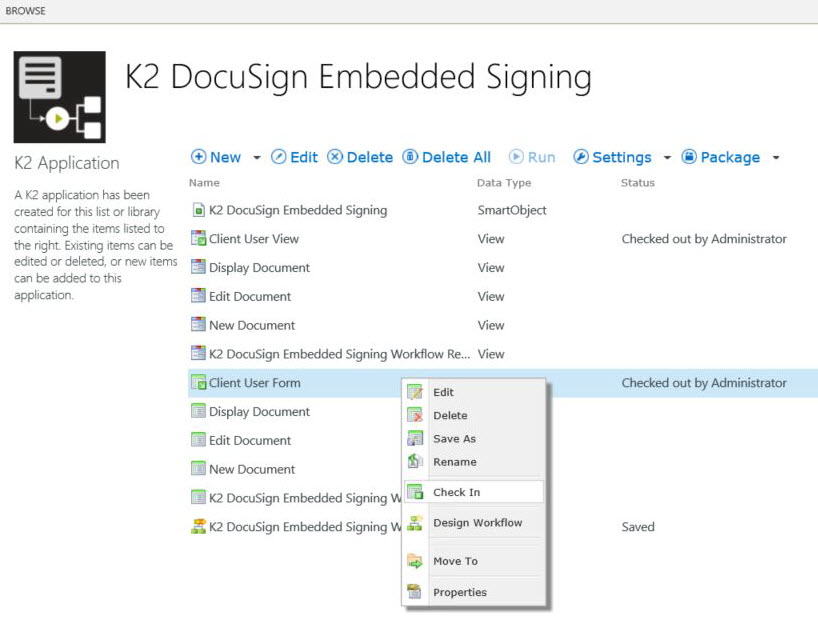
- Right click the Client User Form and select Check In.
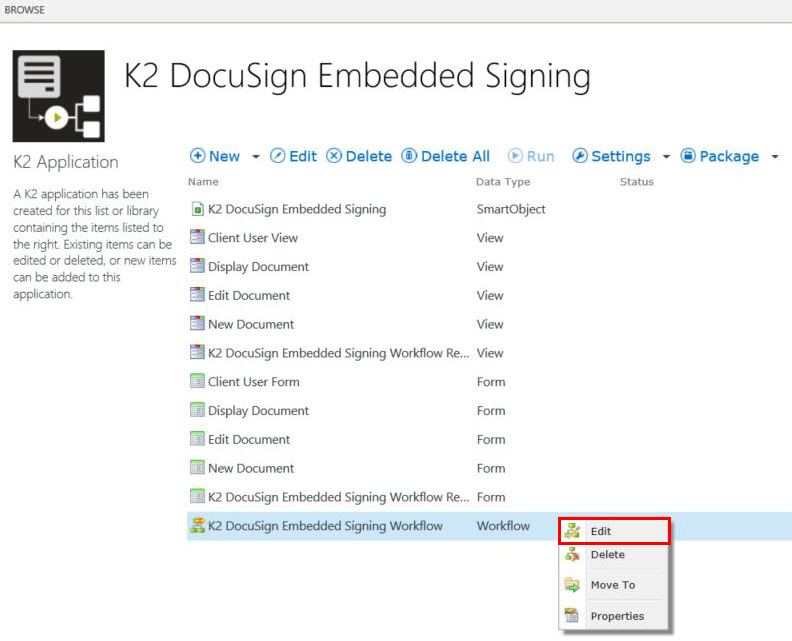
In this step you add a Client User Signing step to the workflow. Right click on the K2 DocuSign Embedded Signing Workflow and select Edit.
- Right click on the K2 DocuSign Embedded Signing Workflow and select Edit.
- From the Update Document Properties step click Workflow Step Outcomes.

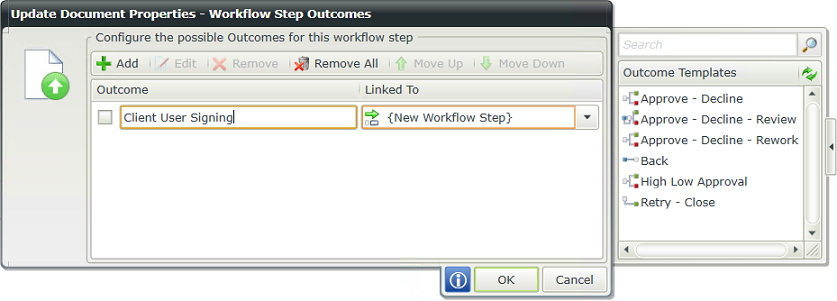
- On the Update Document Properties - Workflow Step Outcomes screen add Client User Signature as an outcome and click OK. Ensure the screen is set as shown below.
- From the General category, drag the User Task (SmartForms) wizard on the canvas.
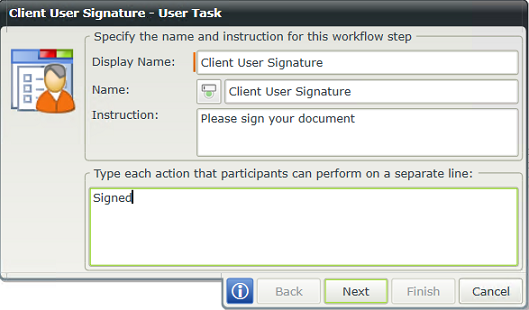
- On the Client User Signature - User Task screen ensure the screen is set as shown below.
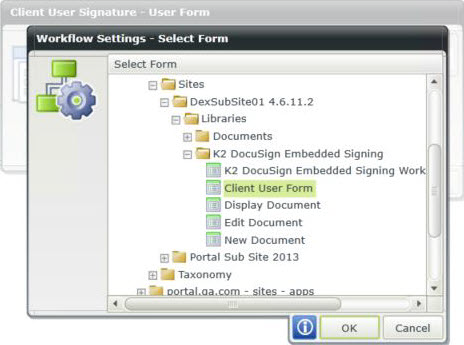
- Click Next. On Client User Signature - User Form click the ellipsis button.
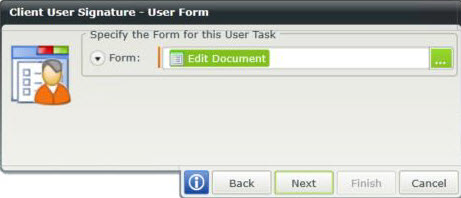
- Select the Client User Form and click OK.
- The Client User Signature - User Form screen displays as follows:
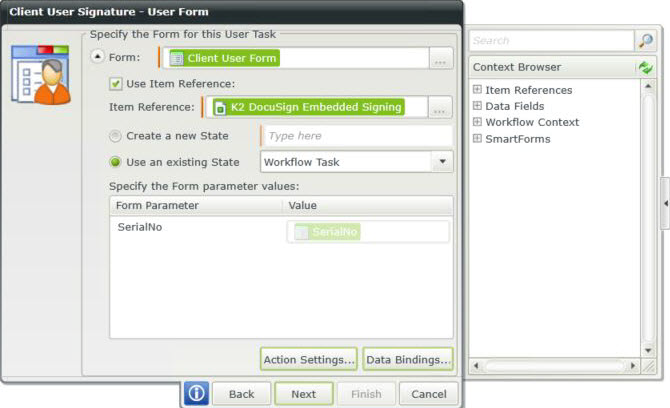
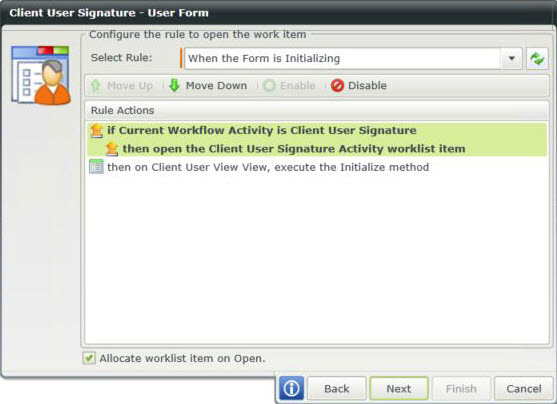
- Click Next. On the Client User Signature - User Form screen ensure screen is set as shown below.
- Click Next. On the Client User Signature - Participants screen select and add required groups and / or users by using the context browser.
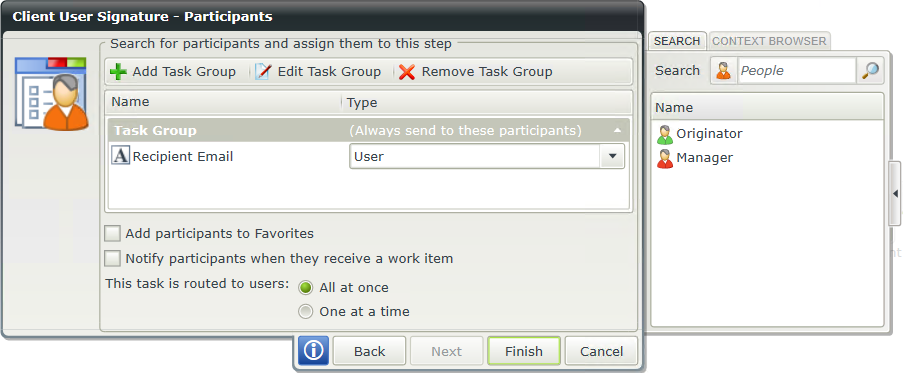
- Click Finish.
For additional information link to the How To: Create a Workflow with DocuSign Events.
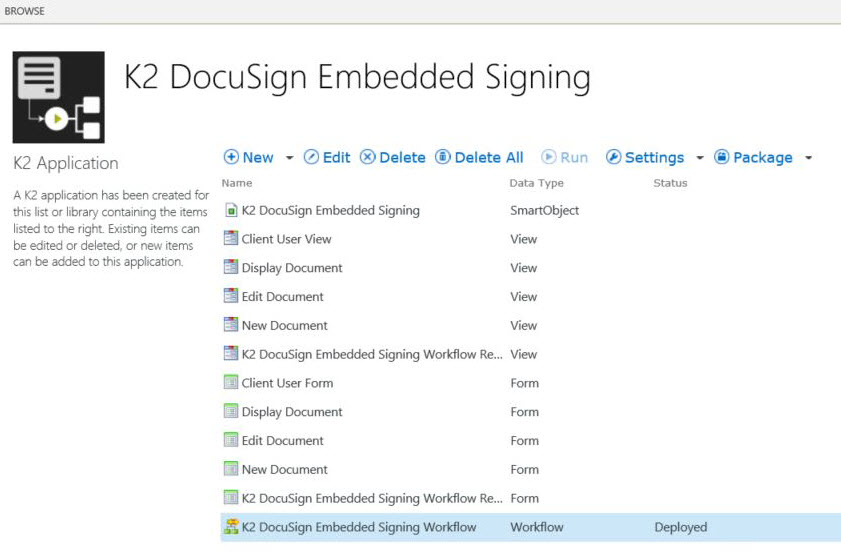
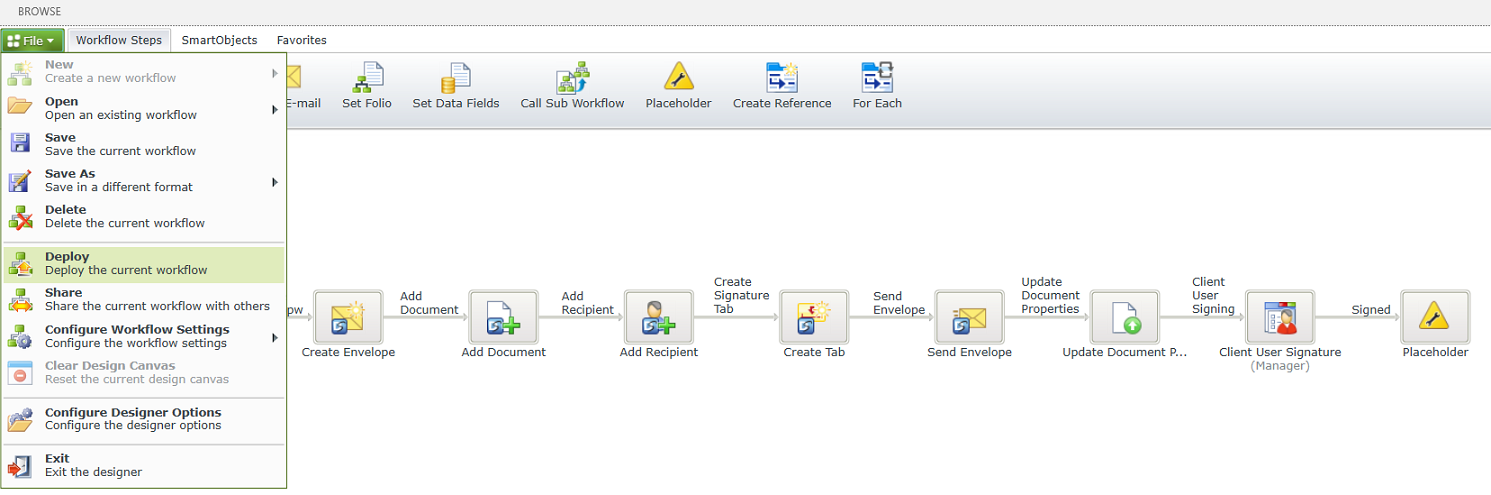
In this step you will save and deploy the workflow you have designed. To save your workflow click File menu and select Save. To deploy your workflow to the server, click File menu and select Deploy.
In runtime this demonstrates the Embedded Signature implementation using SmartForms technology within a K2 for SharePoint workflow in an n integrated K2 SharePoint document library.
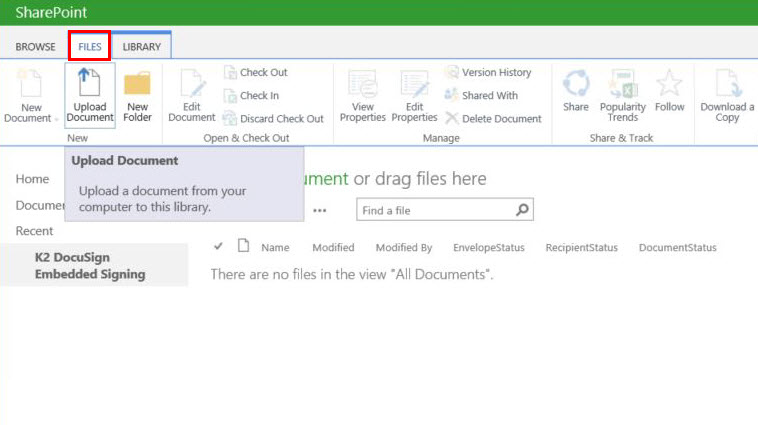
- Go to your SharePoint document library.
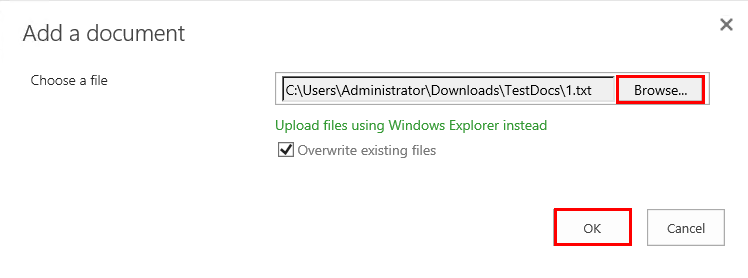
- Click the Files menu and select Upload Document to add a document.
- Click Browse, select required document template. Click OK.
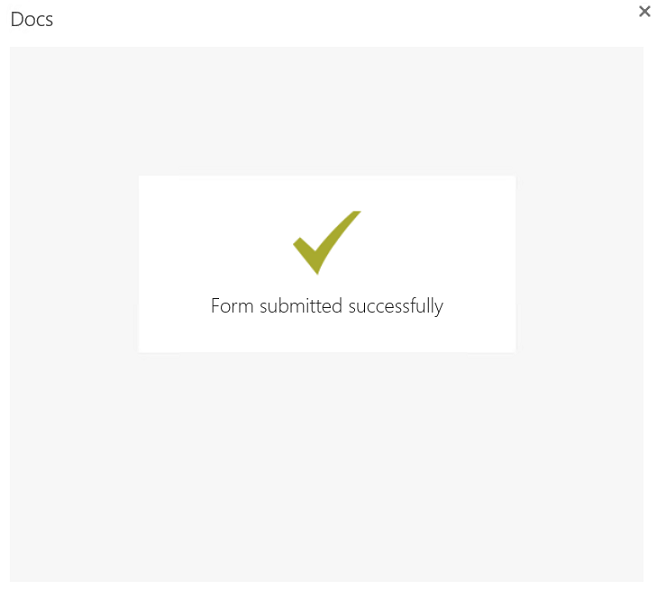
- Form submitted successfully screen displays.
- The document is added and forms part of the workflow.
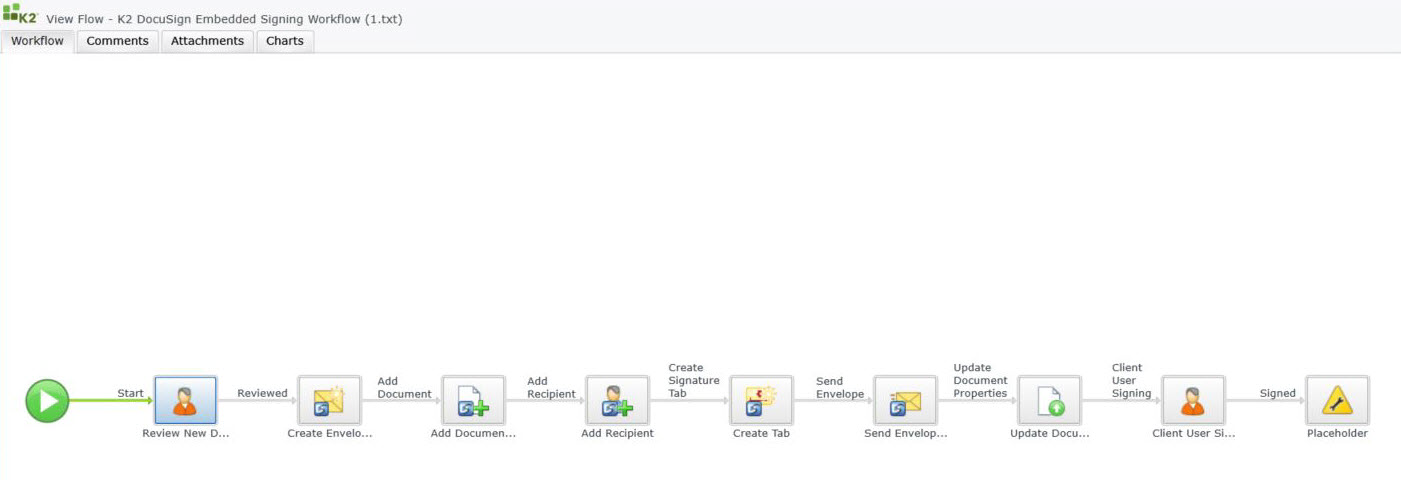
- The workflow view flow displays as follows:
- Navigate to the K2 Worklist. Notice the added document is ready for review. Click the Open action menu and select Open Form.
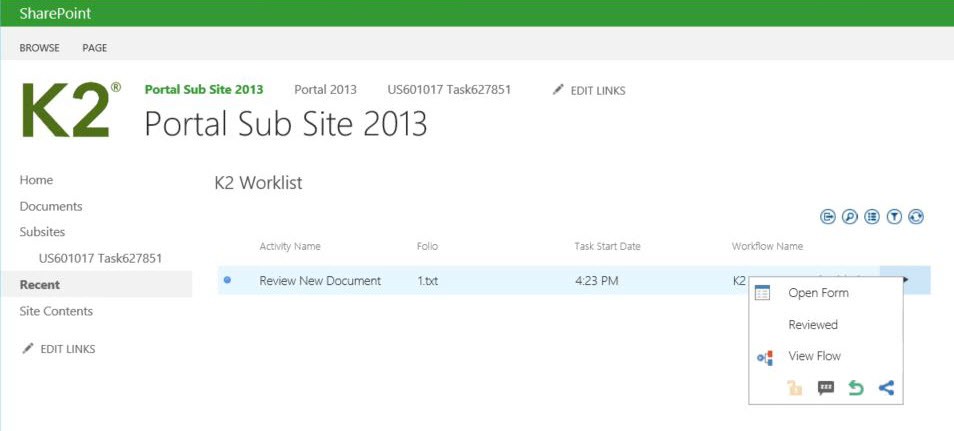
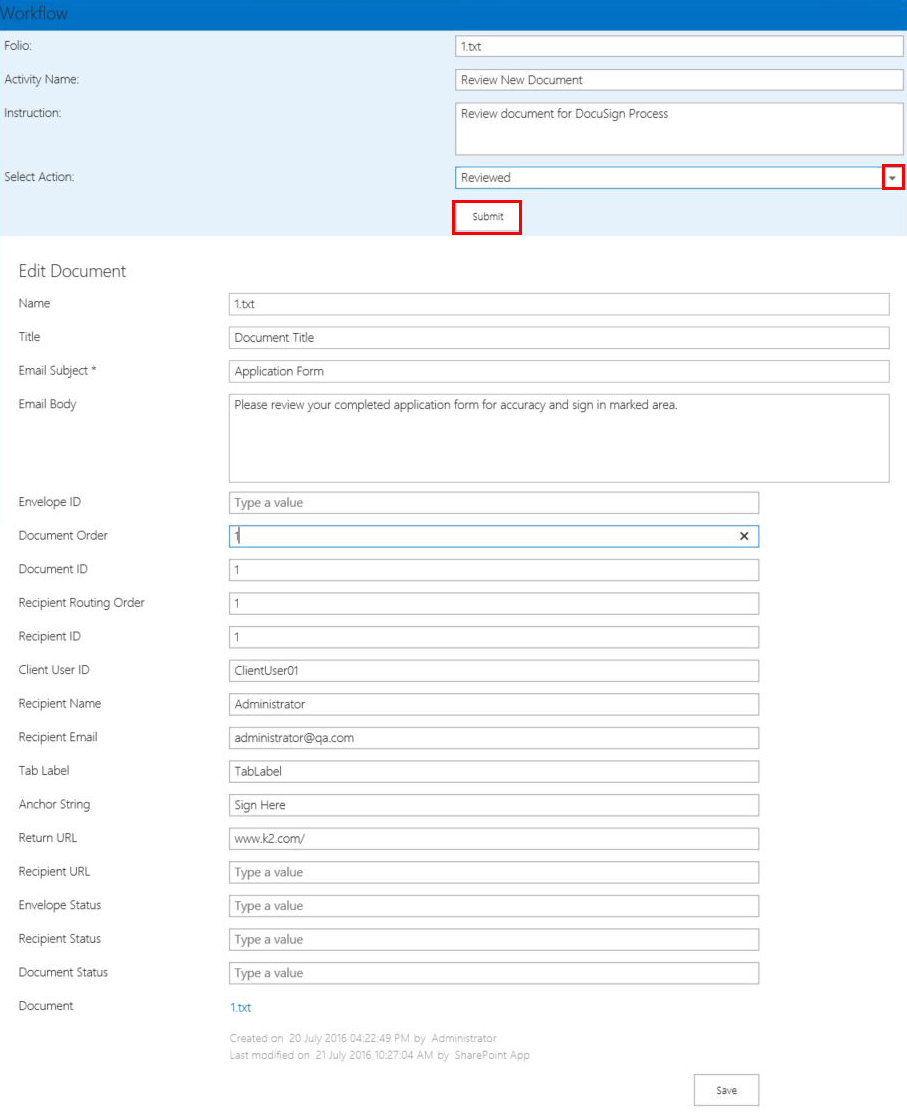
- Review the task, select Reviewed option from the Select Action drop-down menu and click Submit.
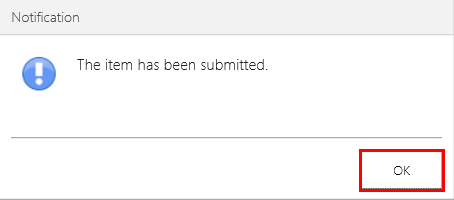
- Click OK on the notification dialog.
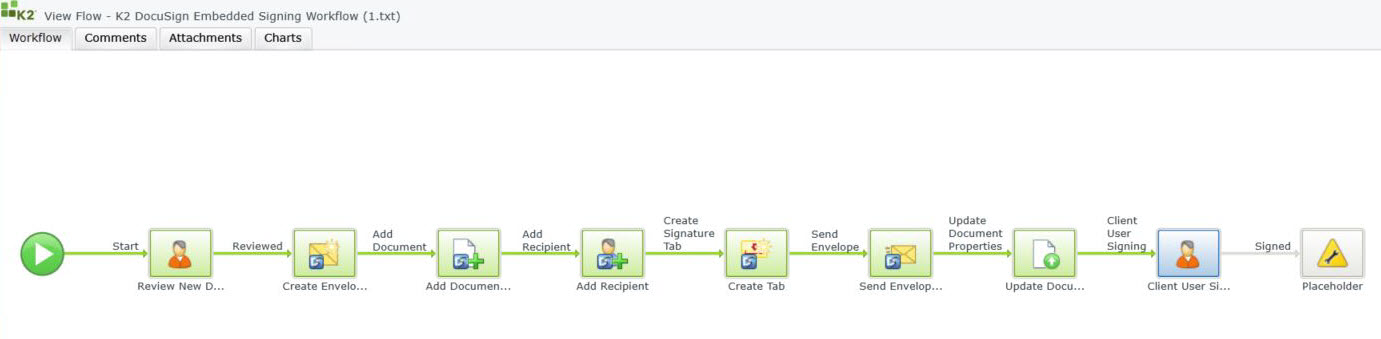
- The document has now been committed as part of the DocuSign process, and the view flow displays as follows:
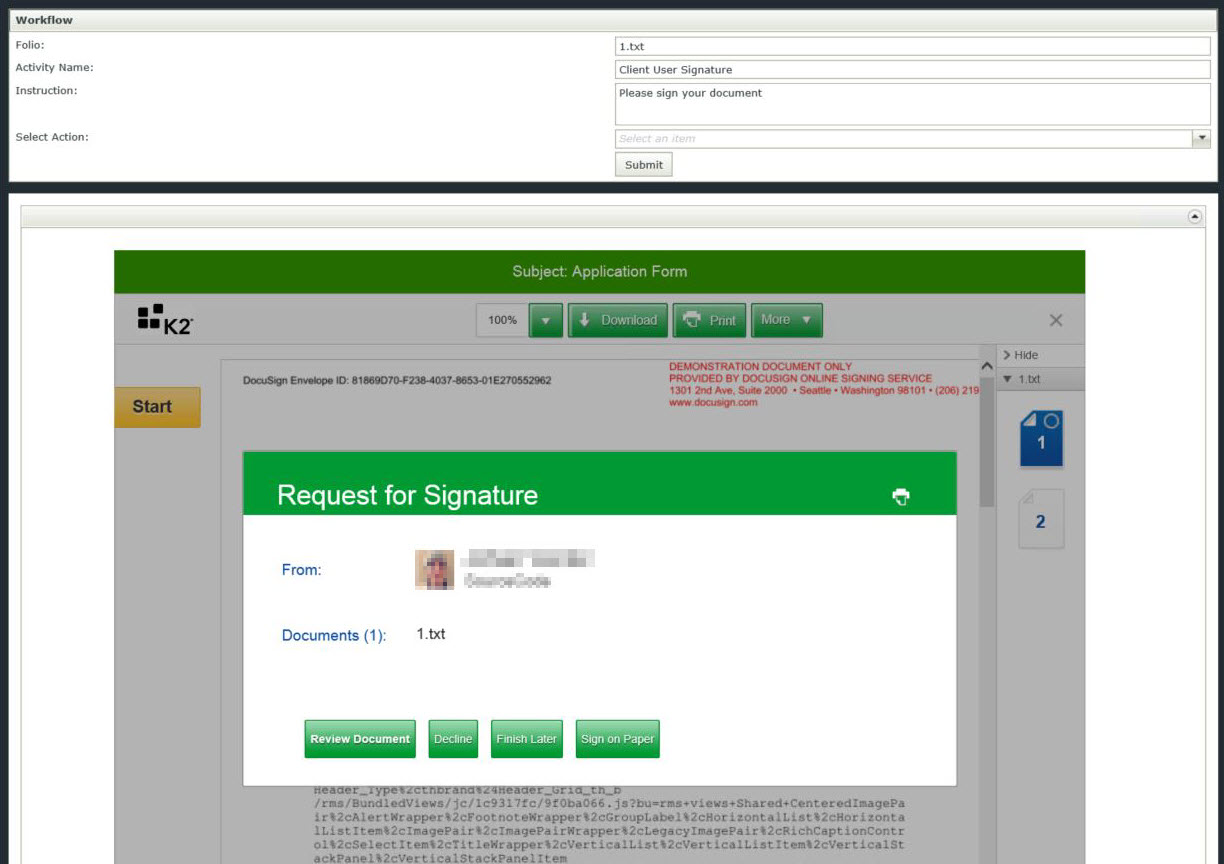
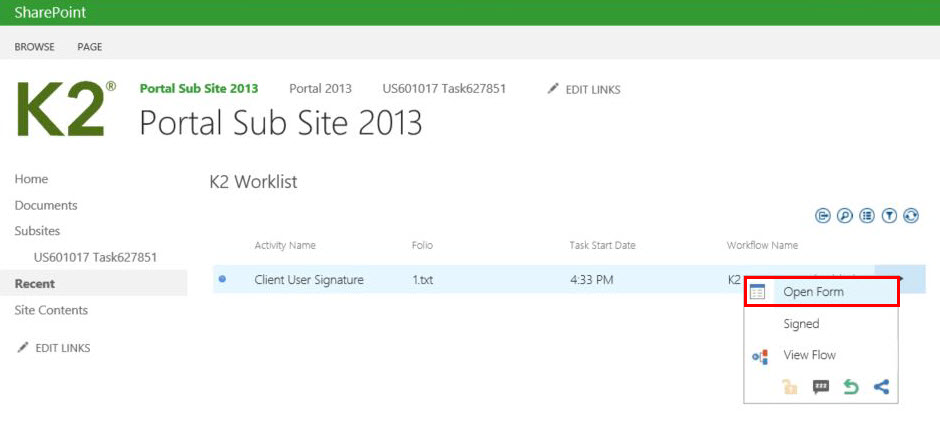
- Navigate to the K2 Worklist. Notice the added document is ready for signing. Click the Open action menu and select Open Form.
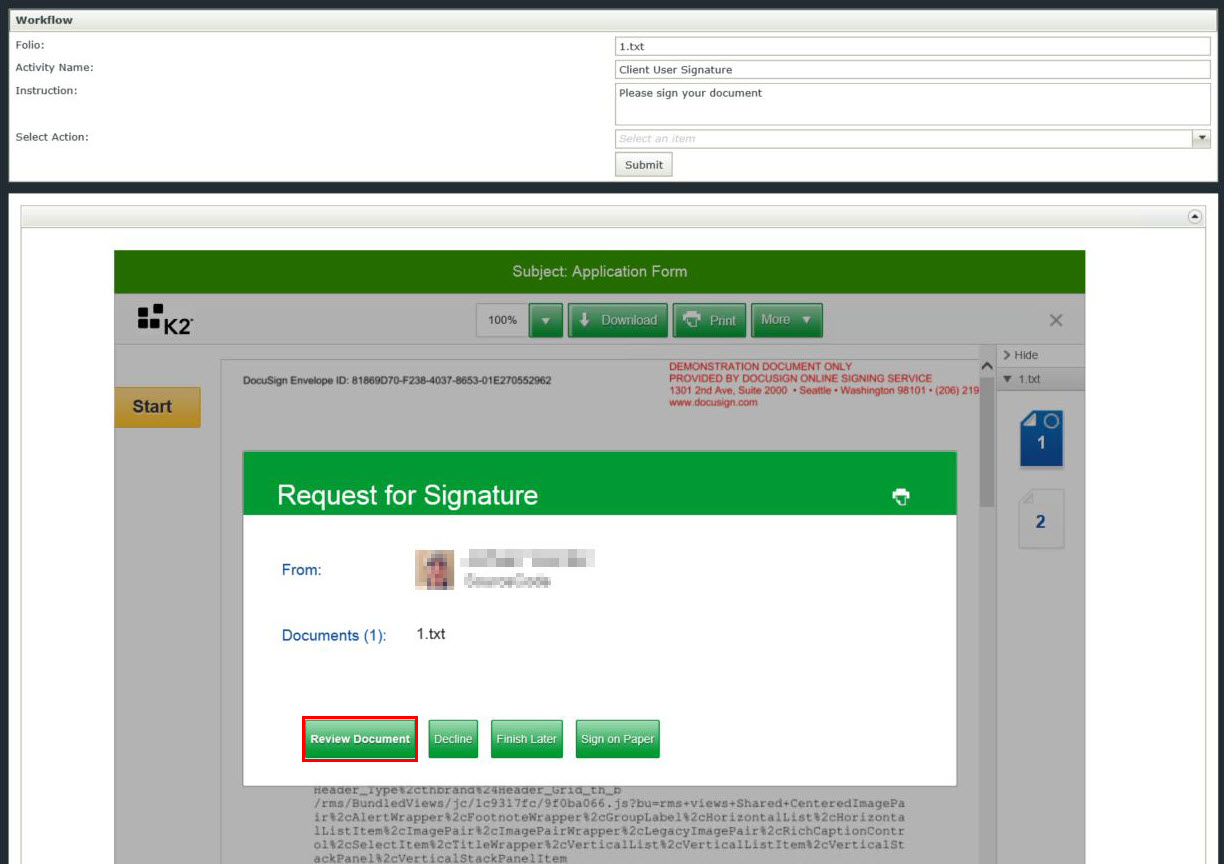
- The document displays. Click Review Document.
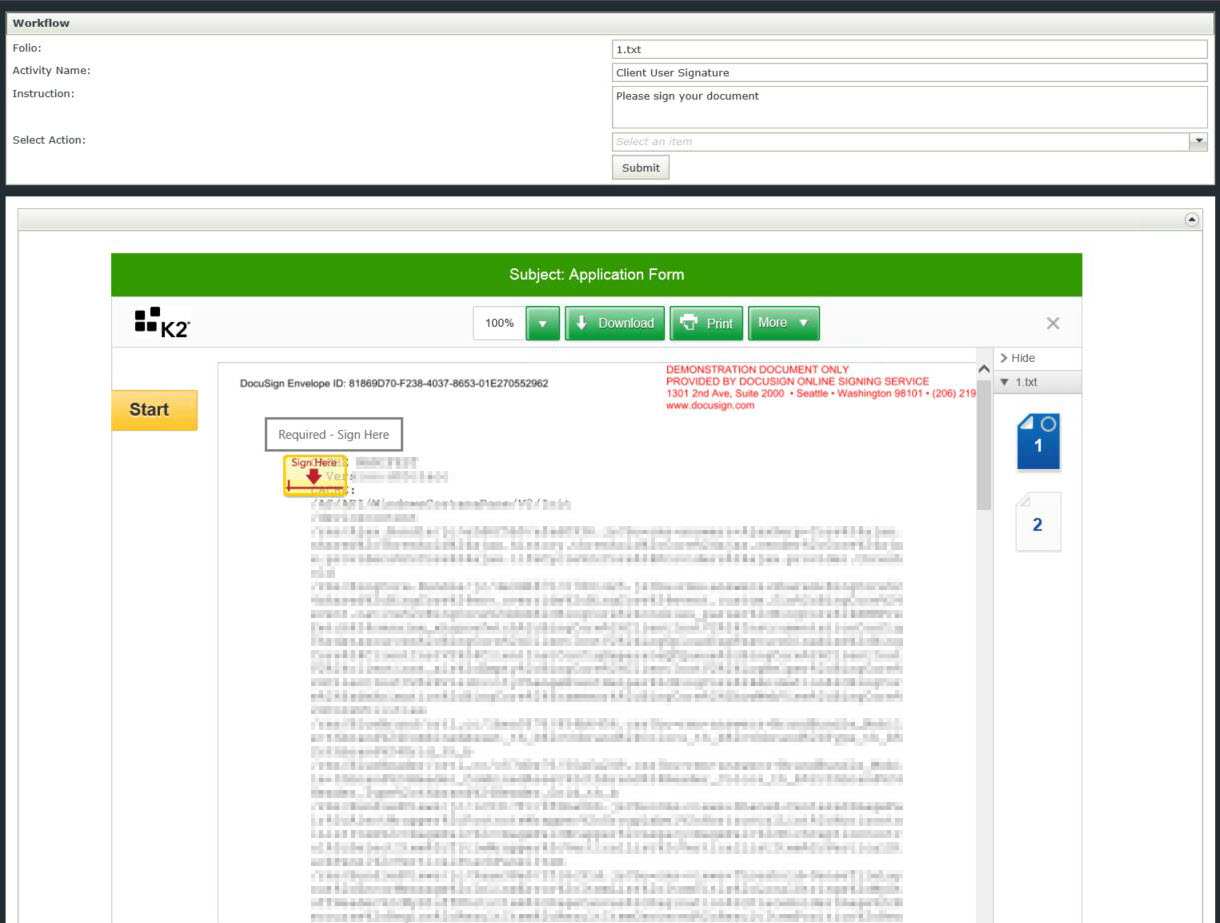
- Click Sign Here.
- Click on Confirm Signing.
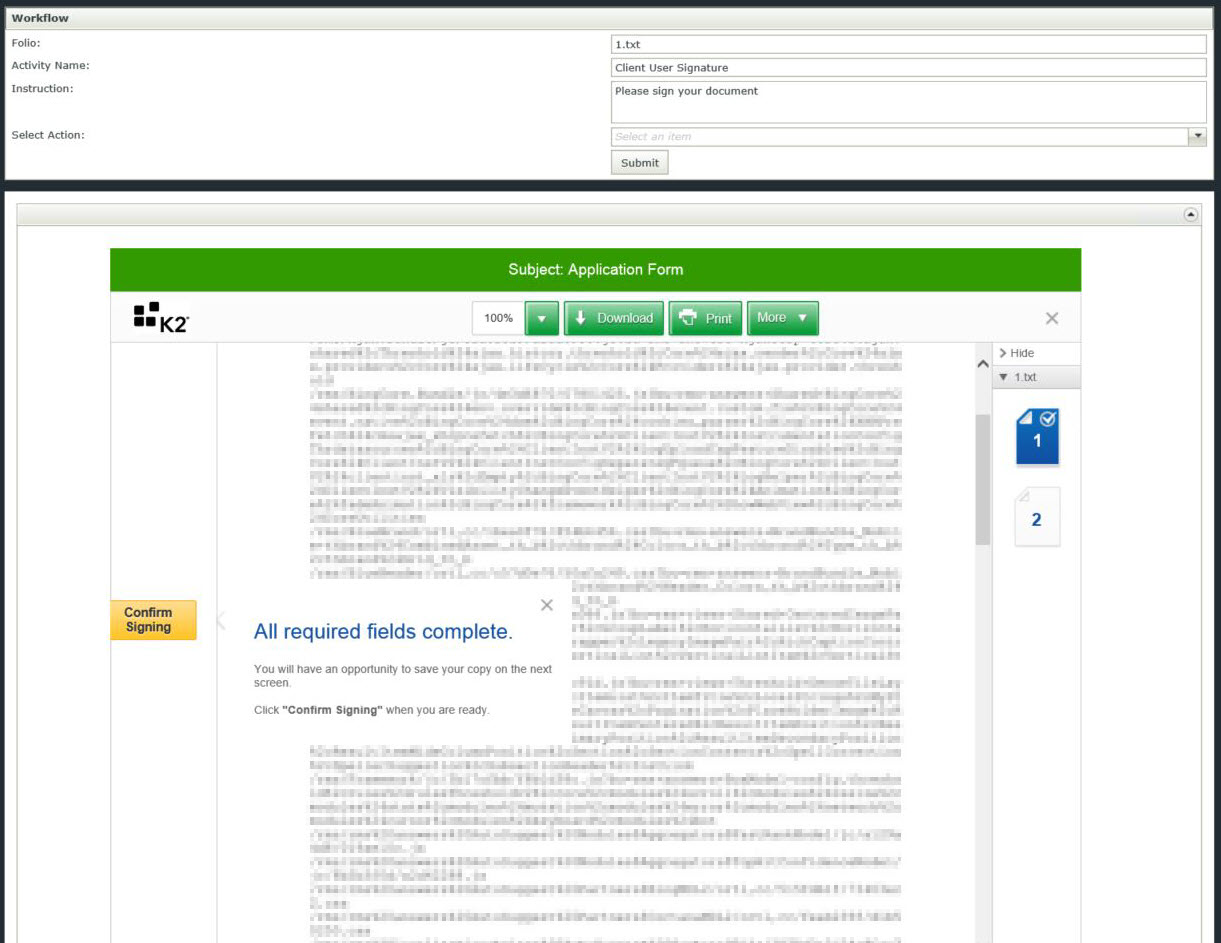
- From the Select Action drop-down menu select Signed and click Submit.

The fields in the form are generated from the document library columns, some of the fields requires values which is then injected into the workflow and DocuSign events. Other fields are only there to capture return values from DocuSign should you wish to update the Document Properties with DocuSign ID's and / Statuses.