
How to add the Adobe Sign Delivery Option to your DocGen Package.
Before you can send an Adobe Sign Agreement from a DocGen Package, you must add the Delivery Option to a DocGen Package. Also, you must relate new recipients to the Adobe Sign Delivery Option. Once this is done, you must move on to tagging your DocGen Package Documents for Adobe Sign, then you can Send, Sign and Complete an Adobe Sign Agreement.
This feature is supported in the DocGen Lightning Component.
Add Adobe Sign Delivery
Note: You must install Adobe Sign before you can send an output document for signature using Nintex Drawloop DocGen® for Salesforce. Adobe Sign does not require any integration with Nintex Drawloop DocGen® for Salesforce after installation.
You can add a Adobe Sign Delivery from the DocGen Package Wizard or the Delivery Options related list on a DocGen Package. The wizard offers access to common options for all deliveries, but you must finish configuration from the related list, where you can set up recipients.
To add a Adobe Sign Delivery from the DocGen Package Wizard
Note: You must install Adobe Sign before you can send an output document for signature using Nintex Drawloop DocGen® for Salesforce. Adobe Sign does not require any integration with Nintex Drawloop DocGen® for Salesforce after installation.
-
From the Force.com app menu, select Nintex DocGen, and then click DocGen Packages.
Tip: You can also select this from Lightning with the
 App Launcher.
 -
Select New.
-
From Basics, enter required information in these fields:
-
DocGen Package Name
-
Type
-
DocGen Package Starting Object.
For more information, see Create new DocGen Packages with the DocGen Package Wizard.
-
-
From Delivery Options, in Type, select Adobe Sign.
-
In Name, type a name (that the user running the DocGen Package will see) and then configure any remaining fields for standard options.
For more information on the standard options, see Delivery Options.
-
On DocGen Package Templates, select or upload a template and click Save.
To add or edit a Adobe Sign Delivery from the Delivery Options related list
Note: You must install Adobe Sign before you can send an output document for signature using Nintex Drawloop DocGen® for Salesforce. Adobe Sign does not require any integration with Nintex Drawloop DocGen® for Salesforce after installation.
-
From the Force.com app menu, select Nintex DocGen, and then click DocGen Packages.
Tip: You can also select this from Lightning with the
App Launcher. -
Select a DocGen Package to add or edit a Adobe Sign Delivery option, and take one of the following actions on the Delivery Option related list.
-
Click New Delivery Option, from Type of new record, select Adobe Sign and then click Continue.
-
From an existing Adobe Sign Delivery, click Edit .
-
-
In Name, type a name (that the user running the DocGen Package will see) and then configure any remaining fields for standard options.
For more information on the standard options, see Delivery Options.
-
Host Signing for the First Signer - Select this option if you want the first signer to complete his/her share of the Adobe Sign Agreement within Salesforce.
-
Agreement Name - The string of text entered here will become the name of your Adobe Sign Agreement. A field tag can be used here to pull data from your objects.
-
Message - Text entered here will become the default message that is placed inside the email of your Adobe Sign Agreement.
-
Language - Select the language of your Agreement here. All agreement text will appear in this language.
-
Signature Type - Specify if you want recipients to use e-Signature or Written Signature for your Agreements.
-
I also need to sign this document - Check this box if you need users to also sign the Adobe Sign Agreements.
-
Signature Order - Choose whether the client signs first or the Salesforce user signs first.
-
Email a Copy To - Enter in an email address to send a copy of the signed Agreement to another recipient.
-
Password required to Sign - Select this checkbox if you want to force recipients to enter in a password to sign.
-
Password - If Password required to Sign is selected, enter in a password here. You must provide this password to your recipients.
-
Remind Recipient to Sign - Choose whether or not you want to remind your recipients to sign the Adobe Sign Agreements here.
-
Password Required to View PDF - Choosing this option will require a password for recipients who wish to view the PDF within the Adobe Sign Agreement. The Password field will be sued if this option is checked.
-
Days Till Signing Expires - Enter a number of days it will take before the Adobe Sign Agreement Expires Here.
-
Signing Preview and Edit - Check this box if you wish to view an Adobe Sign interface that will allow you to make changes to the Adobe Sign Agreement on the fly.
-
Click Save.
Note: The Delivery Option Detail page opens where you select recipients. For more information, see Add or edit a recipients to a Adobe Sign Delivery.
Once you have completed the Delivery Option Edit Page, select Save. This will take you back to the Delivery Option Detail Page, where you can begin adding recipients to your Delivery Option.
Add Adobe Sign recipients
-
From the Force.com app menu, select Nintex DocGen, and then click DocGen Packages.
Tip: You can also select this from Lightning with the
App Launcher. -
From a DocGen Package that has an Adobe Sign Delivery, on the Delivery Options related list, click Name for the delivery option.
-
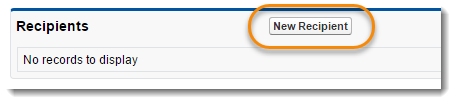
In Recipients, click New Recipient to add a recipient or click Edit to edit an existing recipient.
-
In Signing Order, type a number.
Signing Order - The numbers entered here determine the order of your recipients if you have multiple recipients. For example, a value of three means that the recipient will be the third person to receive the document for signing.
-
In Role Name, type a name.
Role Name - Enter the role name for the recipient here. This will be visible to the Salesforce users on the run DocGen Package page
-
Select Required.
Required - Clear this checkbox to make a signature from this recipient optional for the user generating documents. If you select this checkbox, the user generating documents will have to send the documents to this signer for a signature.
-
Clear or select Display Title.
Display Title - Selecting this option will display the recipient's title on the run DocGen Package page.
-
In Specified Signer, select an option to identify this signer.
For more information, see "Common fields for creating recipients" in Signing apps.
-
Click Save.
When you are ready to preview your Adobe Sign Delivery Option, navigate to a record on your DocGen Package Object, select Generate Documents, satisfy all steps on the generate document page.
Note: At this time, you are not necessarily ready to send an Adobe Sign Agreement. You may need to tag your document for Adobe Sign and create a Data Mapping as well.