Configure Webhooks
A webhook is used to push notifications to Dynamics 365 based on specifically defined events within the lifecycle of a document and/or envelope. These events are defined on the Nintex eSign template that gets trigger by the webhook.
Configure Webhook for Dynamics 365
To configure a webhook, from the Nintex eSign Administration page, in the menu on the left select DocumentTRAK and continue to Notification Administration.
A new window will open and display two tabs at the top of the page. Select the webhook tab and click on the Add Webhook button at the bottom of the page.
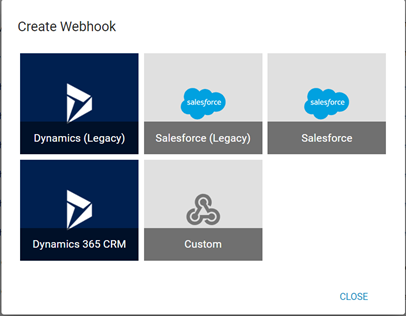
In the create the webhook window, select Dynamics 365 CRM.

The Dynamics (Legacy) solution should not be used for this integration, as this is designed to work with the older Dynamics solution that works with our V2 SOAP web services.
In the Dynamics 365 Configuration window enter in all of the necessary information.
-
Name: Enter any name to best describe the webhook
-
Client ID: Enter the client ID for your dynamics CRM application. Please refer to our article on how to access dynamics app ID.
-
Client Secret: Enter the client secret ID for your dynamics CRM application. Please refer to our article on how to access dynamics app ID.
-
Tenant ID: Enter the tenant ID for your dynamics CRM app. Please refer to our article on how to access dynamics app ID.
-
CRM URL: Enter the dynamics crm instance URL. Example: https://test.crm.dynamics.com/
-
Failure Notification Email Address (optional): Set an email address to receive failure notifications associated with this webhook.
-
Notify On: Select an option for which failure notification will be sent to the email defined in the failure notification field. Options are:
-
First failure: Send notification during the first failure that occurs on the webhook.
-
Final failure: Send notification on the final fail that occurs on the webhook
-
All failure: Send all notifications when they occur.
After the webhook configuration, it is recommended to test the webhook before moving forward. Click the Test button.
The test will display a success message if everything is configured correctly.
Assigning a Webhook to a Simple Setup Template
-
To assign a webhook to your Simple Setup Template, from the main menu, click View Templates(Simple Setup).
-
Click the blue Edit hyperlink under the search bar on the template that you wish to add the webhook to.
-
On the left, under the Nintex eSign logo, click the blue notifications icon that has a clock face
 .
. -
In the top center, click on the DocumentTRAK tab under the Customize Workflow heading.
-
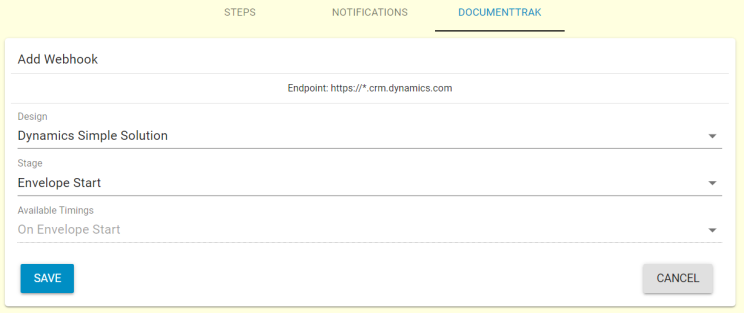
Click the Add Webhook button.
-
Select the webhook design that was previously created from the dropdown list. Set the stage on which you will like the status to be updated back to CRM.

-
Design: Choose the name of the webhook you created earlier in this workflow
-
Stage: Multiple stages are available to choose from. You can choose to receive multiple updated envelope statuses in dynamics CRM. For a list of stages available, please see our article on DocumentTRAK Notifications.
-
Available Timings: Timings are only available for numbered step stages and "On Envelope Pre-Expire". The options available for any given signer numbered step include
-
On Step Start,
-
On Landing Page Visited, and
-
On Step Complete.
-
-
For "On Envelope Pre-Expire" you will need to specify the number of days of advance warning before expiration.
-
Once you have populated the required information, click SAVE.