Out of Office
The out of office feature is available on the Worklist control and enables a user to share specific or all their worklist items with other users. The user (out of office participant) will be able to share all work items with designated colleagues, or alternatively create exception rules for specific work items to be shared with specific users. The column called Original Destination on the worklist will allow users to differentiate between their own, and the absent user's worklist items. This functionality ensures that important and urgent work items receive prompt attention, regardless of someone being absent.
- Allows the sharing of worklists between users according to rules and conditions determined by the out of office user.
- Managers and Administrators can share user worklists depending on availability and workload.
- The out of office user can still access and process the worklist items shared with colleagues.
- Out of office can be configured within a Worklist control .
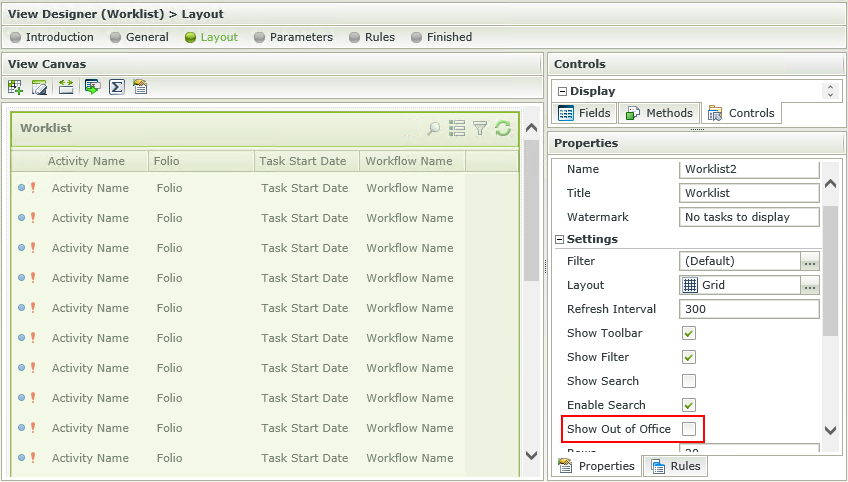
The out of office feature is available on the Worklist control. The feature can be enabled or disabled on the control to be applied at runtime.
To enable or disable the out of office feature, simply select or deselect the Show Out of Office property of the Worklist control. The out of office setting is enabled by default in the Worklist control. Enabling or disabling the feature will do so for all users using the Worklist control.
The column called Original Destination on the worklist allows users to differentiate between their own, and the absent user's worklist items.
- In the designer, edit the View containing the Worklist control.
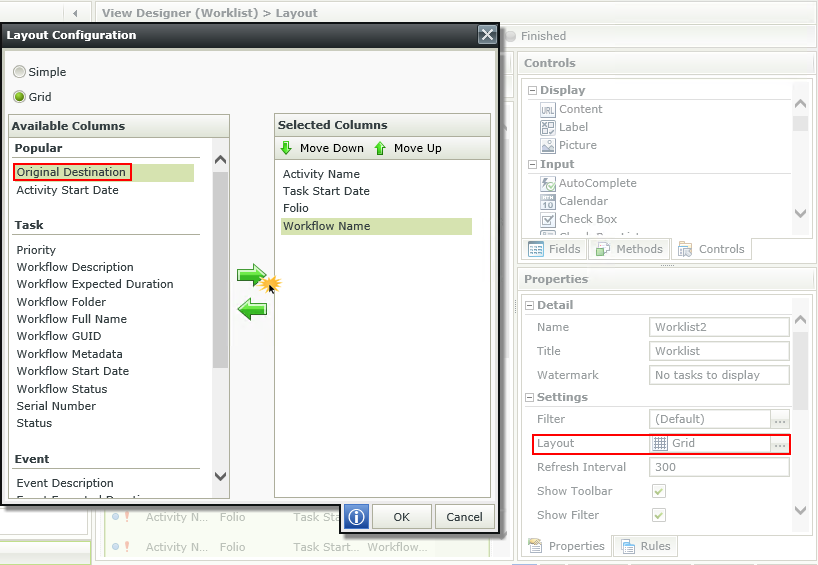
- Edit the Worklist control and click on the Layout property.
Select Grid and the Original Destination column as shown below. Click on the green arrow facing right, and click OK.
- Save the View.
- Run the View.
- The Original Destination column is displayed.

For more information see the section How shared worklist items work.
Existing and new worklist items are shared with a designated alternative as specified by the configured out of office settings.
When configuring Out of Office at runtime, it is necessary to assign destination users who will receive the shared worklist items. The
destination users can be set by the out of office user, administrator or manager. The user's availability can be determined by the out of office
icon
 .
.
To interpret the out of office statuses the following applies:
- The icon of a user who is out of the office, contains a border around the icon,

- The icon of a user who is in the office, has no border,

The configuration screen for out of office is accessed through clicking the Configure Out of Office  icon located at the top right hand corner of the worklist page.

- In the Worklist window, click on the Configure Out of Office icon located at the top right hand side of the worklist page.

- Select the Out of the office option.

- Click on the search icon next to Forward all work items to. Search for and select a user to forward the worklist items to. Multiple users can be added. Click OK.
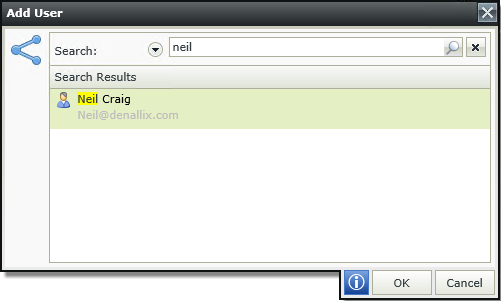
- Click OK on the configuration screen. All items will be forwarded to the selected user(s) unless otherwise specified by an exception rule.
- Optional: To configure exceptions, click Add in the Exception Rules section of the configuration screen.

- Select a specific activity and assign a user who should get this activity's work items instead of the default user.

- Click OK.
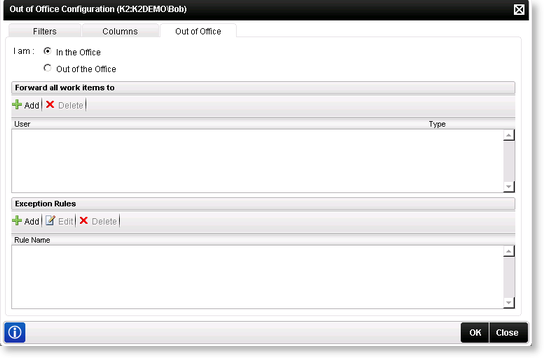
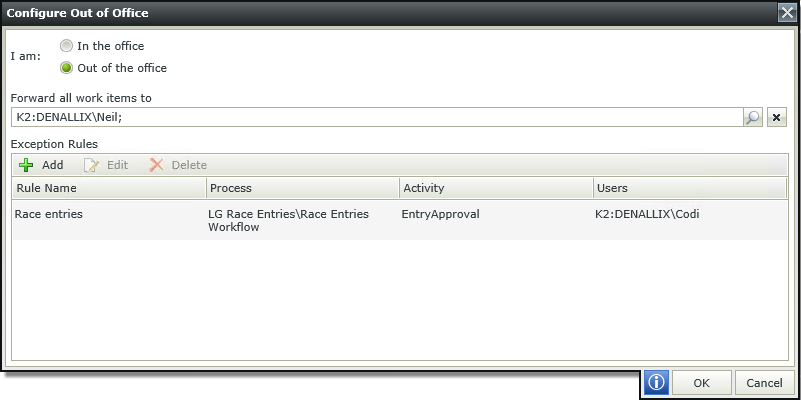
- In the configuration below, all worklist items will be going to Neil while Bob is out of the office except for the Race entries worklist items which will be going to Codi.
| Feature | What it does |
|---|---|
| In the Office | When this radio button is selected the user will be regarded as in the office. The user will be able to configure their out of office settings, but it will not be applied until the user selects the Out of the Office radio button and applies the settings. |
| Out of the Office | When this radio button is selected the user will be regarded as out of the office and worklist item sharing will commence according to the settings that have been created in the out of office configuration tab. |
| Forward all work items to | This list displays the users that will view and process the work on behalf of the out of office user, whilst the user is absent. The user
will be able to add and delete destination users(forwarded users) to and from this list. By adding a user(s) to this list, all K2
worklist items will be shared with the listed destination user(s). Completion of this section is compulsory to enable sharing of worklist
items. |
| Exception Rules |
Enables the user to create exception rules if certain activities' worklist items should be routed to someone else instead of the default user. |
- Open the Out of Office Configuration screen.
- In the Forward all work items to section, click on Add.
- Search for a user, select the check box next to the user's name to assign rights to the user and click OK to save the settings.

| Feature | What it does |
|---|---|
| Search | The search button will take into consideration all criteria specified in the search criteria drop-down, the search text box and the Security Label drop-down and search for destinations that fit those criteria. The destinations will be displayed in the list below. |
| Search Criteria | Use search criteria such as contains, begins with, ends with and equals to filter the results. |
| Security Label | Click on the drop down and select the security label to use in the search. |
- Click on the Add button in the Exception Rules section of the Configure Out of Office screen.

- The Configure Exception Rule screen will be displayed. Give the new rule a name (When the exception rule is saved, this name will be used to identify the rule in the list). Browse and select the work item you wish this exception rule to apply to. Click on the search icon, search for a user and select the user for the specified work type.

- Click OK to save the exception.
- Add more exception rules if required.
- Click OK on the Configure Out of Office screen to save and activate the out of office settings.
- In the Exception Rules section, more than one exception rule can be added.
- Multiple users can receive a specific instance that is specified in the Exception Rules section.
| Feature | What it does |
|---|---|
| Rule Name | This is a required field. When the exception rule is saved, this name will be used to identify the rule in the list. |
| Filter | Type text to apply a filter. |
| Process | All the processes that can be applied will be displayed in this screen. The user can drill-down to activity level. Browse and select the activity you wish this exception rule to apply to. |
| Users | Displays the destination users this rule will apply to. |
A user can identify, view and process the worklist items that have been shared with him. The user accesses and processes the worklist items in the exact same way as their own worklist items.
Shared items can be identified by the column called Original Destination in the worklist. The original destination user of the specific worklist item is displayed in this column. All shared worklist items will be displayed with the out of office user's name. The same rights to the worklist item will apply as were applicable to the original destination user. The shared user can view and action all worklist items that have been shared by the out of office user. Shared worklist items will be actioned on behalf of the out of office user while he/she is absent and remains out of the office. When the out of office user returns and deactivates the out of office feature, all remaining shared worklist items will be removed from the shared user's worklist.
The picture below illustrates user Neil with one worklist item of which he is the original destination user, and one worklist item that has been shared with him by the out of office user Bob.

The out of office service is configured to check periodically if the participant, who is out of the office, has received any new worklist items. Any new items are then shared with the designated stand-in participant.
Out of office is designed to allow the administrator and or the manager to configure a user's out of office settings on their behalf. This is used in the instance where an employee is absent from work and items can be shared with colleagues ensuring that the work is processed in line with the business requirements.
From an administrative perspective, a user with rights to view the worklist items of other participants has access to an out of office node that queries a participant’s availability status (Out of/ In the office). The out of office configuration screen is accessible from the K2 Management Console > K2 Workflow Server > Users > Out of Office. This provides an Administrative view of all the out of office users. The administrator will be able to configure users' out of office settings and also activate/ set users as Out of / In the Office.
A user with Administrative rights on the K2 Workflow Server will be an Out Of Office administrator as well.

| Feature | What it does |
|---|---|
| Add | When the user clicks the Add button the Select a user to add to the Out of Office list search screen will be displayed. The Administrator will be able to search for a user. |
| Configure Settings | To configure a user’s out of office settings, click on a User Name and select the Configure Settings button from the menu. The administrator will be directed to the selected users out of office configuration screen. |
| Out Of Office check box | The out of office check box allows the administrator to activate a users OOF configured settings. |
| Save | When clicking the Save button, all current configuration settings will be saved to the database. |
| Delete | When clicking the Delete button, all current configuration settings will be deleted from the database. |
| Refresh | When clicking the Refresh button, all current configuration settings will be updated from the database. |
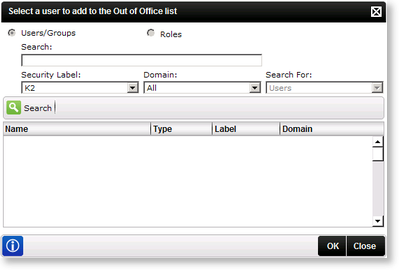
The Add button will open the Select a user to add to the Out of Office list search screen.
| Feature | What it does |
|---|---|
| Users/Groups | Allows the user to only search for the available Users |
| Roles | This is disabled on this screen |
| Search Text Box | Allows the user to enter the search text string |
| Security Label | Click on the drop down and select the security label to use in the search |
| Domain | Click on the drop down and select the domain to use in the search |
| Search | The search button will take into consideration all criteria specified in the Starts With drop-down, the Search For text box and the Security Label drop-down and search for destinations that fit those criteria. The destinations will be displayed in the list below. |
| Select All | The user can select all the destinations in the list by clicking this button. |
| Clear All | The user can clear all selected check boxes in the list by clicking this button. |
| User/Group Name - Type | All destinations (Names and types) will be displayed in this list after the user clicked the Search menu item. |
The administrator will be directed to the selected user's Out of Office Configuration screen where the out of office settings can be configured.
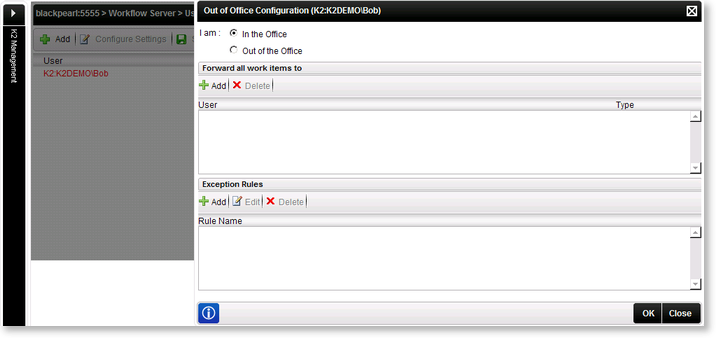
From a manager perspective, a user can view their worklist items and worklist items of all subordinates. The manager will also be able to edit and activate their subordinates' out of office settings. This is possible from the worklist in Workspace. To enable this feature, the Managed Users option has to be activated. This option is accessible from the Management Console by right clicking on the Workflow Server and selecting Edit Settings, then clicking on the Advanced Settings tab. Tick the option Display Worklist of Managed Users and Save to apply the settings
The Managed Users feature can only be activated by a user with Administrative rights on the K2 Workflow Server

The out of office configuration screen is accessible from the User Worklist > Manager view in K2 Workspace. The manager can click on the user in the tree-node in the menu on the left to edit any of their subordinates' out of office settings. The subordinate's worklist will be displayed within the manager's worklist as can be seen from the picture below. Sam is the manager of Bob, and by selecting Bob in the worklist tree on the left, he is able to view Bob's worklist and configure Bob's out of office settings.

- Open the worklist tree in the menu on the left in Workspace.
- From here the manager can select and click on the user in the tree-node.
- The selected user's worklist will open, click on the Out of Office Configuration icon

- This will take the manager to the Out of Office Configuration screen.
| Feature | What it does |
|---|---|
| Worklist tree-node | From here the manager can click on the subordinate to edit any of his out of office settings. This will take the manager to the out of office configuration screen of that subordinate. |
| Subordinates status | Subordinates in out of office status will be visible in the tree. (Green means in the office and red means out of office.) If the manager clicks on a subordinate in the worklist, the manager will be able to see all worklists assigned to that user. |
The Filters and Columns tabs are applicable to the manager's worklist while the Out of Office tab is the selected subordinate's settings.
The Out of Office (OOF) Notification allows all forwarded users to receive an e-mail notification regarding delegated tasks when a specific user is out of office.
Notes
- The notification sent to the forwarded (delegated) users is not customizable.
-
The notification is only sent to forwarded users if the task is sent while the original user's out of office setting is turned on.
Disabling the OOF Notifications
Disabling this notification requires a change to the K2HostServer.exe.config file.
- Open the K2HostServer.exe.config file from the following location: <install drive>\ Program Files(x86)\ K2 blackpearl\ Host Server\ Bin\
-
Locate the following line in the K2HostServer.exe.config file:
<outOfOffice notificationsEnabled="True" /> -
Change the value from true to false as shown below:

The value is set to true by default.
- Save and Close the K2HostServer.exe.config file.
- Restart the K2 Service.
Example
The following example illustrates the Out of Office functionality using a multiple approval step workflow for a Customer Onboarding process. A user’s tasks are delegated to multiple users when they are out of office.
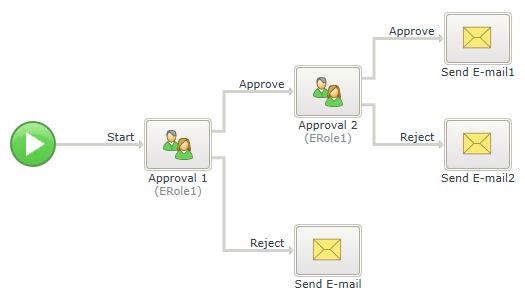
- When a new customer is created via a SmartForm, the workflow starts and the task is sent to the appropriate users in the first approval step. For this example the task is sent to Ashley.

-
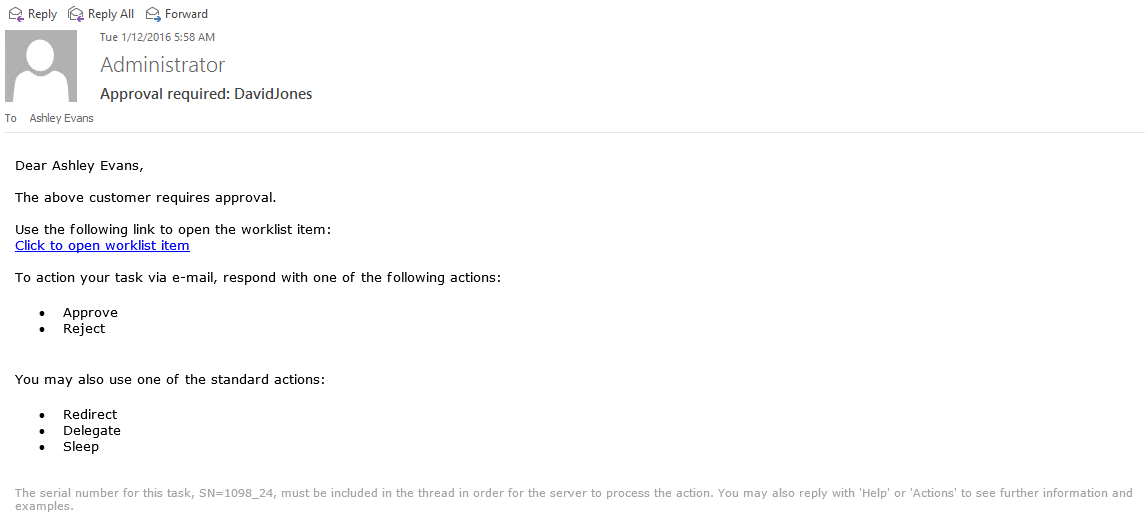
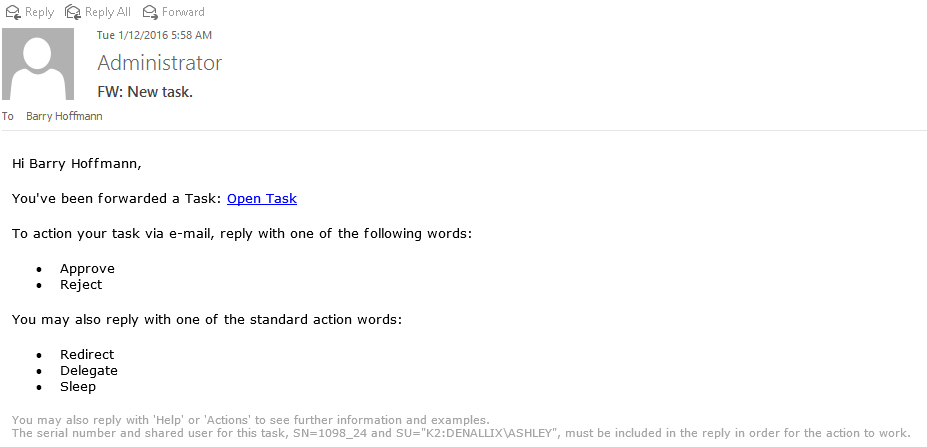
Ashley receives an e-mail notification that he has a new task. Since Ashley is currently out of the office, her tasks are forwarded to two other users, Barry and Codi. The figures below show all three e-mail notifications sent by the K2 server.
Ashley's
Barry's
Codi's
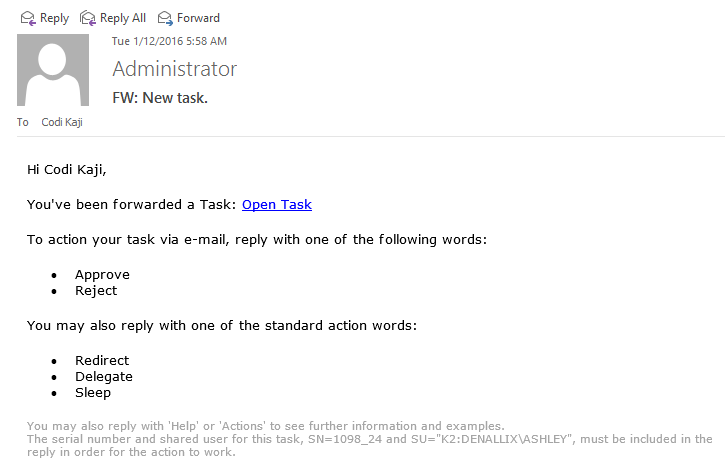
- The task is approved by Codi and she receives an approval e-mail.
-
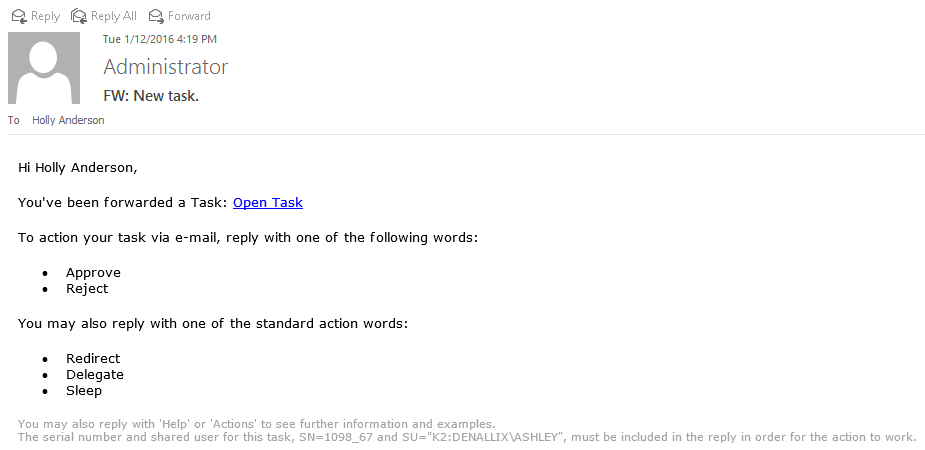
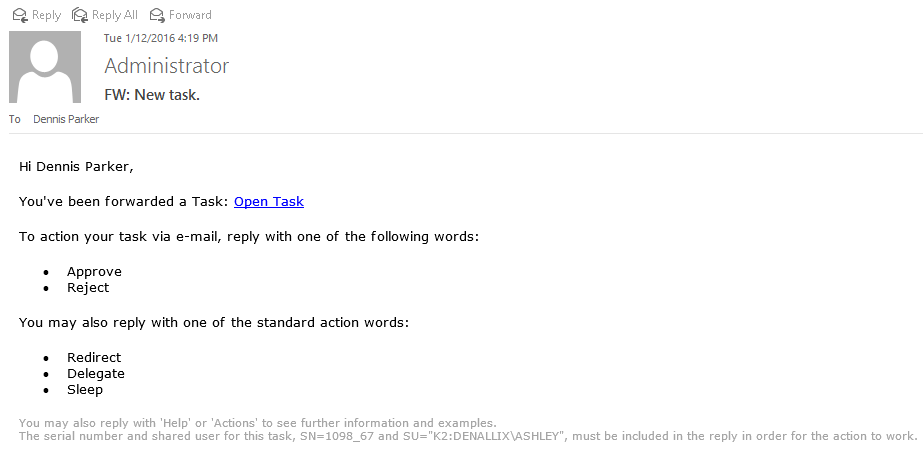
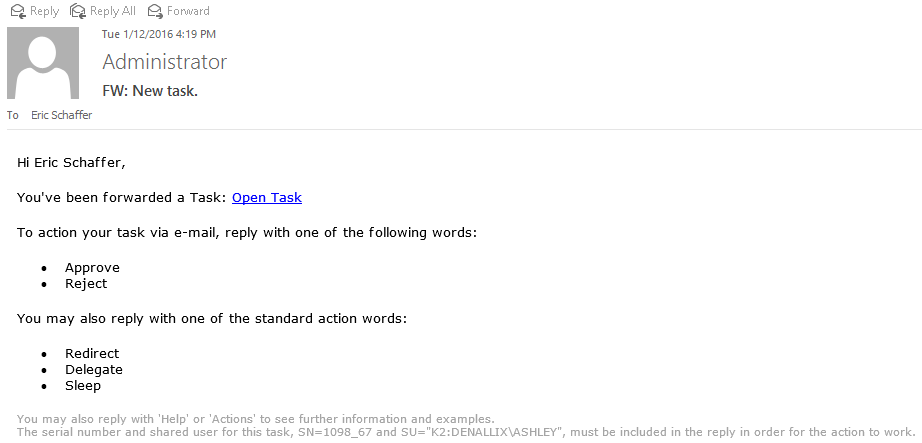
The workflow moves to the second approval step containing an OOF exception rule that forwards the tasks to three other users. For the purpose of this example, the notifications are sent to Dennis, Eric and Holly via the exception rule. Any of the three forwarded users can action the task via responding to the notification or opening the task from their K2 worklist.
Dennis's
Eric's
Holly's
